


转到2021.1.9-2021.1.31的learning record 首页
今日工作:“秒杀”项目的学习
存在的问题:一开始去搭建环境,反正是各种各样的问题吧!比如添加“依赖会报错”,
这个视频偏向于自己去敲代码,所以速度会挺慢的,
还需要连接数据库,这个也不怎么会,只能说去搜索+求助博客了,
还挺慢的下载。可能应该不是网速的原因。
今日总结:
对于之前两个项目的选择,做出最终选择,选1放弃2。
Java秒杀系统方案优化 高性能高并发实战【秒杀】15小时,用的idea,这个有idea版本和 eclipse版本。主要是eclipse版本的
https://coding.imooc.com/class/168.htmlJava双版本(SSM到SpringBoot)校园商铺全栈开发。26小时,不推荐看了。前端的东西多一点。
https://coding.imooc.com/class/144.html
【1-1 java高并发商城秒杀优化导学】这一节的笔记挺乱的,建议看下一节,这节课内容不算重要。
java电商秒杀实战
微服务springboot 开发环境,
数据库mybatis
系统压测(并发带来问题),缓存优化,应用服务器,radis缓存,uilj缓存,互联网缓存技术,数据的不一致,平衡,权衡,mysql数据库,并发,消息队列,千万级的并发,横向扩展,接口安全,验证码,防刷,恶性竞争对手。
分布式会话,商品列表页,商铺详情页,
学习如何应对大并发:利用缓存,异步。优雅的代码,封装,
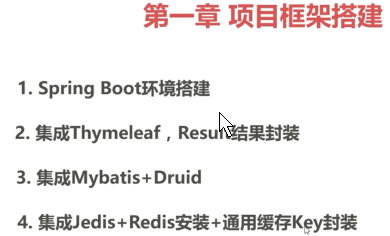
1.spring boot 微服务框架,集成Thymeleaf,result结果封装,集成jedis+redis安装,
2.登录功能,数据库设计,明文密码两次MD5,参数校验,异常处理,session分布式,
3.秒杀,数据库设计,列表,商品详情页,订单详情页
4.jmeter入门,模拟多用户,命令行,打war包,
5.页面优化技术,页面缓存,数据库访问减少,url缓存,对象缓存,页面静态化,
6.redis预➖缓存减少数据库访问,
rabbitmq安装,集成,水平拓展,压测。
7.安全优化,秒杀接口隐藏,数学公式验证码,限流接口限刷,
以秒杀为主,瞬间的并发非常大,缓存用的很多,异步化,业务流程,提高,高并发场景下的秒杀。
【1-2 项目环境搭建(Eclipse)】
【1-2 项目环境搭建(Eclipse)】
1.3Spring Boot环境搭建
快速入门:https://projects.spring.io/spring-boot/
详细文档:https://docs.spring.io/spring-boot/docs/1.5.8.RELEASE/reference/htmlsingle/
Spring mvc需要大量的配置。springboot配置所需少。
快速入门,引入依赖+写上程序=程序运行。
创建项目,文件位置:
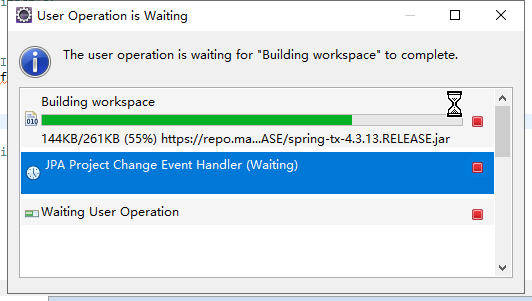
- 点击pom.xml,选择pom.xml,在pom.xml中添加依赖,这一个保存后,会自动下载东西。好像是在下载jar包。
还挺慢的下载。可能应该不是网速的原因。
<parent>
    <groupId>org.springframework.boot</groupId>
    <artifactId>spring-boot-starter-parent</artifactId>
    <version>1.5.9.RELEASE</version>
</parent>
  <dependencies>
    <dependency>
	      <groupId>org.springframework.boot</groupId>
	      <artifactId>spring-boot-starter-web</artifactId>
	</dependency>
  </dependencies>
那现在的pom.xml文件内容是:
<project xmlns="http://maven.apache.org/POM/4.0.0" xmlns:xsi="http://www.w3.org/2001/XMLSchema-instance"
  xsi:schemaLocation="http://maven.apache.org/POM/4.0.0 http://maven.apache.org/xsd/maven-4.0.0.xsd">
  <modelVersion>4.0.0</modelVersion>

  <groupId>com.imooc</groupId>
  <artifactId>miaosha_1</artifactId>
  <version>0.0.1-SNAPSHOT</version>
  <packaging>jar</packaging>

  <name>miaosha_1</name>
  <url>http://maven.apache.org</url>
<parent>
    <groupId>org.springframework.boot</groupId>
    <artifactId>spring-boot-starter-parent</artifactId>
    <version>1.5.9.RELEASE</version>
</parent>

  <properties>
    <project.build.sourceEncoding>UTF-8</project.build.sourceEncoding>
  </properties>


  <dependencies>
    <dependency>
	      <groupId>org.springframework.boot</groupId>
	      <artifactId>spring-boot-starter-web</artifactId>
	</dependency>
  </dependencies>
</project>
-
删掉src/test/java文件夹,然后就不报错了
-
改包名,com.imooc.miaosha_1 变为 com.imooc.miaosha,continue。
-
新建三个子包
com.imooc.miaosha.controller
com.imooc.miaosha.service
com.imooc.miaosha.dao
-
在com.imooc.miaosha.controller中新建DemoController.class文件
package com.imooc.miaosha.controller;

import org.springframework.boot.SpringApplication;
import org.springframework.boot.autoconfigure.EnableAutoConfiguration;
import org.springframework.stereotype.Controller;
import org.springframework.web.bind.annotation.RequestMapping;
import org.springframework.web.bind.annotation.ResponseBody;

@Controller
@EnableAutoConfiguration

public class DemoController {
	@RequestMapping("/")
	@ResponseBody
	String home(){
		return "Hello World!";
	}
	public static void main(String[] args)throws Exception{
		SpringApplication.run(DemoController.class,args);
	}
}
- 运行DemoController文件,出现Tomcat started on port(s): 8080 (http)表示成功运行。再在浏览器打开http://localhost:8080/ ,显示Hello World!。
出现问题:The Tomcat connector configured to listen on port 8080 failed to start. The port may already be in use or the connector may be misconfigured.
解决:
0.win+r cmd
1.直接使用 netstat -ano|findstr 8080 查到8080端口是否使用
2.taskkill /f /t /im 进程号(我的是8512)
taskkill /f /t /im 8512
3.再次运行DemoController文件就OK啦
4.出现Tomcat started on port(s): 8080 (http)表示成功运行。
- 接下来是将项目拆分了,在miaosha包中新建了MainApplication class文件,删掉miaosha包里面的App.java。
MainApplication的代码内容:
package com.imooc.miaosha;

import org.springframework.boot.SpringApplication;
import org.springframework.boot.autoconfigure.EnableAutoConfiguration;
import org.springframework.boot.autoconfigure.SpringBootApplication;

import com.imooc.miaosha.controller.DemoController;

@EnableAutoConfiguration
@SpringBootApplication
public class MainApplication {
	public static void main(String[] args)throws Exception{
		SpringApplication.run(MainApplication.class,args);
	}

}
DemoController的代码内容:
package com.imooc.miaosha.controller;

import org.springframework.stereotype.Controller;
import org.springframework.web.bind.annotation.RequestMapping;
import org.springframework.web.bind.annotation.ResponseBody;

@Controller


public class DemoController {
	@RequestMapping("/")
	@ResponseBody
	String home(){
		return "Hello World!";
	}

}
点击MainApplication去进行重新运行
出现问题:The Tomcat connector configured to listen on port 8080 failed to start. The port may already be in use or the connector may be misconfigured.
解决:
0.win+r cmd
1.直接使用 netstat -ano|findstr 8080 查到8080端口是否使用
2.taskkill /f /t /im 进程号(我的是8512)
taskkill /f /t /im 8512
3.再次运行DemoController文件就OK啦
4.出现Tomcat started on port(s): 8080 (http)表示成功运行。
-
进入http://localhost:8080/,如果返回Hello World!,说明成功。
-
在DemoController中再增加新的代码
先是做下面的内容:
创建com.imooc.miaosha.result的包,在其中新建Result.class文件
package com.imooc.miaosha.result;

public class Result<T> {
	private int code;
	private String msg;
	private T data;
}
然后右键,source,生成set和get方法,全选
package com.imooc.miaosha.result;

public class Result<T> {
	private int code;
	private String msg;
	private T data;
	public int getCode() {
		return code;
	}
	public void setCode(int code) {
		this.code = code;
	}
	public String getMsg() {
		return msg;
	}
	public void setMsg(String msg) {
		this.msg = msg;
	}
	public T getData() {
		return data;
	}
	public void setData(T data) {
		this.data = data;
	}
}
在DemoController.java中生成一个方法。
- 在DemoController中再增加新的代码:
package com.imooc.miaosha.controller;

import org.springframework.stereotype.Controller;
import org.springframework.web.bind.annotation.RequestMapping;
import org.springframework.web.bind.annotation.ResponseBody;

import com.imooc.miaosha.result.Result;

@Controller


public class DemoController {
	@RequestMapping("/")
	@ResponseBody
	String home(){
		return "Hello World!";
	}
	// 1.rest api json输出2.页面
	@RequestMapping("/hello")
	@ResponseBody
	String hello(){
		Result.success(data);
		return new Result(0,"success","hello,imooc");
	}
	@RequestMapping("/helloError")
	@ResponseBody
	String helloError(){
		Result.error(CodeMsg);
		return new Result(500102,"XXX");
		return new Result(500101,"XXX");
		return new Result(500100,"session失效");
	}
}
在Result.java中添加代码
package com.imooc.miaosha.result;

public class Result<T> {
	private int code;
	private String msg;
	private T data;

	/**
	 * 成功时候的调用
	 */
	public static<T>Result<T>success(T data){
		return new Result<T>(data);
	}
	/**
	 * 失败时候的调用
	 */
	public static<T>Result<T>error(CodeMsg cm){

	}
	private Result(T data) {
		this.code=0;
		this.msg="success";
		this.data=data;
	}
	public int getCode() {
		return code;
	}
	public void setCode(int code) {
		this.code = code;
	}
	public String getMsg() {
		return msg;
	}
	public void setMsg(String msg) {
		this.msg = msg;
	}
	public T getData() {
		return data;
	}
	public void setData(T data) {
		this.data = data;
	}

}
在result包中新建CodeMsg.class对象
CodeMsg.java的代码
package com.imooc.miaosha.result;

public class CodeMsg {
	private int code;
	private String msg;

}
生成get和set方法:右键-source-setget-全选
CodeMsg.java的修改后的代码
package com.imooc.miaosha.result;

public class CodeMsg {
	private int code;
	private String msg;
	public int getCode() {
		return code;
	}
	public void setCode(int code) {
		this.code = code;
	}
	public String getMsg() {
		return msg;
	}
	public void setMsg(String msg) {
		this.msg = msg;
	}

}
再去看Result.java的内容,实现封装
	/**
	 * 成功时候的调用
	 */
	public static<T>Result<T>success(T data){
		return new Result<T>(data);
	}
	/**
	 * 失败时候的调用
	 */
	public static<T>Result<T>error(CodeMsg cm){
		return new Result<T>(cm);
	}
	private Result(T data) {
		this.code=0;
		this.msg="success";
		this.data=data;
	}
	private Result(CodeMsg cm) {
		if(cm==null){
			return;
		}
		this.code=cm.getCode();
		this.msg=cm.getMsg();
	}
Result.java的完整内容是:
package com.imooc.miaosha.result;

public class Result<T> {
	private int code;
	private String msg;
	private T data;

	/**
	 * 成功时候的调用
	 */
	public static<T>Result<T>success(T data){
		return new Result<T>(data);
	}
	/**
	 * 失败时候的调用
	 */
	public static<T>Result<T>error(CodeMsg cm){
		return new Result<T>(cm);
	}
	private Result(T data) {
		this.code=0;
		this.msg="success";
		this.data=data;
	}
	private Result(CodeMsg cm) {
		if(cm==null){
			return;
		}
		this.code=cm.getCode();
		this.msg=cm.getMsg();
	}
	public int getCode() {
		return code;
	}
	public void setCode(int code) {
		this.code = code;
	}
	public String getMsg() {
		return msg;
	}
	public void setMsg(String msg) {
		this.msg = msg;
	}
	public T getData() {
		return data;
	}
	public void setData(T data) {
		this.data = data;
	}

}
修改DemoController.java的内容
在这里:
- CodeMsg.java再进行了修改
	public static CodeMsg SUCCESS= new CodeMsg(0,"success");
	public static CodeMsg SERVER_ERROR= new CodeMsg(500100,"服务端异常");

	private CodeMsg(int code, String msg) {
		this.code = code;
		this.msg = msg;
	}
- CodeMsg.java完整内容是:
package com.imooc.miaosha.result;

public class CodeMsg {
	private int code;
	private String msg;

	public static CodeMsg SUCCESS= new CodeMsg(0,"success");
	public static CodeMsg SERVER_ERROR= new CodeMsg(500100,"服务端异常");

	private CodeMsg(int code, String msg) {
		this.code = code;
		this.msg = msg;
	}
	public int getCode() {
		return code;
	}
	public void setCode(int code) {
		this.code = code;
	}
	public String getMsg() {
		return msg;
	}
	public void setMsg(String msg) {
		this.msg = msg;
	}

}
- 修改DemoController.java的内容
package com.imooc.miaosha.controller;

import org.springframework.stereotype.Controller;
import org.springframework.web.bind.annotation.RequestMapping;
import org.springframework.web.bind.annotation.ResponseBody;

import com.imooc.miaosha.result.CodeMsg;
import com.imooc.miaosha.result.Result;

@Controller


public class DemoController {
	@RequestMapping("/")
	@ResponseBody
	String home(){
		return "Hello World!";
	}
	// 1.rest api json输出2.页面
	@RequestMapping("/hello")
	@ResponseBody
	public Result<String> hello(){
		return Result.success("hello,imooc");
		// return new Result(0,"success","hello,imooc");
	}
	@RequestMapping("/helloError")
	@ResponseBody
	public Result<String> helloError(){
		return Result.error(CodeMsg.SERVER_ERROR);
		// return new Result(500102,"XXX");
	}
}
这样,定义错误信息,只需要在CodMsg中进行设置就可以了,代码就不会满天飞了。
// 通用的异常
public static CodeMsg SUCCESS= new CodeMsg(0,"success");
public static CodeMsg SERVER_ERROR= new CodeMsg(500100,"服务端异常");
// 登录模块 5002XX

// 商品模块 5003XX

// 订单模块 5004XX

// 秒杀模块 5005XX
删除掉Result.java和CodeMsg.java的set方法。
Result.java和Code的内容:
package com.imooc.miaosha.result;

public class Result<T> {
	private int code;
	private String msg;
	private T data;

	/**
	 * 成功时候的调用
	 */
	public static<T>Result<T>success(T data){
		return new Result<T>(data);
	}
	/**
	 * 失败时候的调用
	 */
	public static<T>Result<T>error(CodeMsg cm){
		return new Result<T>(cm);
	}
	private Result(T data) {
		this.code=0;
		this.msg="success";
		this.data=data;
	}
	private Result(CodeMsg cm) {
		if(cm==null){
			return;
		}
		this.code=cm.getCode();
		this.msg=cm.getMsg();
	}
	public int getCode() {
		return code;
	}
	public String getMsg() {
		return msg;
	}
	public T getData() {
		return data;
	}
}
CodeMsg.java的内容:
package com.imooc.miaosha.result;

public class CodeMsg {
	private int code;
	private String msg;

	// 通用的异常
	public static CodeMsg SUCCESS= new CodeMsg(0,"success");
	public static CodeMsg SERVER_ERROR= new CodeMsg(500100,"服务端异常");
	// 登录模块 5002XX

	// 商品模块 5003XX

	// 订单模块 5004XX

	// 秒杀模块 5005XX

	private CodeMsg(int code, String msg) {
		this.code = code;
		this.msg = msg;
	}
	public int getCode() {
		return code;
	}
	public String getMsg() {
		return msg;
	}
}
- 运行程序MainApplication.java
出现问题:The Tomcat connector configured to listen on port 8080 failed to start. The port may already be in use or the connector may be misconfigured.
解决:
0.win+r cmd
1.直接使用 netstat -ano|findstr 8080 查到8080端口是否使用
2.taskkill /f /t /im 进程号(我的是8512)每一次的不一定一样。
taskkill /f /t /im 8512
3.再次运行MainApplication文件就OK啦
4.出现Tomcat started on port(s): 8080 (http)表示成功运行。
-
进入http://localhost:8080/,如果返回Hello World!,说明成功。
-
进入http://localhost:8080/demo/hello
-
进入http://localhost:8080/demo/helloError
上面的两句话是说错了,其实没有demo。
-
进入http://localhost:8080/hello
-
进入http://localhost:8080/helloError
-
然后我们进行thymeleaf的页面模板。
在https://docs.spring.io/spring-boot/docs/1.5.6.RELEASE/reference/htmlsingle/里面搜索thymeleaf。引入thymeleaf的依赖,做一些配置。
1.在porm.xml中引入thymeleaf的依赖
<dependency>
    <groupId>org.springframework.boot</groupId>
    <artifactId>spring-boot-starter-thymeleaf</artifactId>
</dependency>
2.在https://docs.spring.io/spring-boot/docs/1.5.6.RELEASE/reference/htmlsingle/中搜索spring.thymeleaf.prefix
3.在src/main/java中新建一个配置文件:source folder。新建src/main/resources文件夹。
4.在src/main/resources文件夹中新建一个other-file文件 application.properties 的file。并添加内容:
spring.thymeleaf.cache=false
spring.thymeleaf.content-type=text/html
spring.thymeleaf.enabled=true
spring.thymeleaf.encoding=UTF-8
spring.thymeleaf.mode=HTML5
spring.thymeleaf.prefix=classpath:/templates/
spring.thymeleaf.suffix=.html
5.在DemoControl.java中新增加内容:
	@RequestMapping("/thymeleaf")
	public String thymeleaf(){
		return "hello";
	}
DemoControl.java的完整内容是:
package com.imooc.miaosha.controller;

import org.springframework.stereotype.Controller;
import org.springframework.web.bind.annotation.RequestMapping;
import org.springframework.web.bind.annotation.ResponseBody;

import com.imooc.miaosha.result.CodeMsg;
import com.imooc.miaosha.result.Result;

@Controller


public class DemoController {
	@RequestMapping("/")
	@ResponseBody
	String home(){
		return "Hello World!";
	}
	// 1.rest api json输出2.页面
	@RequestMapping("/hello")
	@ResponseBody
	public Result<String> hello(){
		return Result.success("hello,imooc");
		// return new Result(0,"success","hello,imooc");
	}
	@RequestMapping("/helloError")
	@ResponseBody
	public Result<String> helloError(){
		return Result.error(CodeMsg.SERVER_ERROR);
		// return new Result(500102,"XXX");
	}
	@RequestMapping("/thymeleaf")
	public String thymeleaf(){
		return "hello";
	}
}
6.在src/main/resources中新增加other-folder文件夹:templates。在这里面新建一个file文件,文件名字是hello.html文件。
<!DOCTYPE html>
<html xmlns:th="http://www.thymeleaf.org">
<head>
    <title>hello</title>
    <meta http-equiv="Content-Type" content="text/html; charset="UTF-8"/>
</head>
<body>
    <p th:text="'hello:' + ${name}"></p>
</body>
</html>
7.输出内容在DemoController.java中,修改内容为:
	@RequestMapping("/thymeleaf")
	public String thymeleaf(Model model){
		model.addAttribute("name", "Joshua");
		return "hello";
	}
DemoController.java的完整内容为:
package com.imooc.miaosha.controller;

import org.springframework.stereotype.Controller;
import org.springframework.ui.Model;
import org.springframework.web.bind.annotation.RequestMapping;
import org.springframework.web.bind.annotation.ResponseBody;

import com.imooc.miaosha.result.CodeMsg;
import com.imooc.miaosha.result.Result;

@Controller


public class DemoController {
	@RequestMapping("/")
	@ResponseBody
	String home(){
		return "Hello World!";
	}
	// 1.rest api json输出2.页面
	@RequestMapping("/hello")
	@ResponseBody
	public Result<String> hello(){
		return Result.success("hello,imooc");
		// return new Result(0,"success","hello,imooc");
	}
	@RequestMapping("/helloError")
	@ResponseBody
	public Result<String> helloError(){
		return Result.error(CodeMsg.SERVER_ERROR);
		// return new Result(500102,"XXX");
	}
	@RequestMapping("/thymeleaf")
	public String thymeleaf(Model model){
		model.addAttribute("name", "Joshua");
		return "hello";
	}
}
8.运行MainApplication.java
出现问题:The Tomcat connector configured to listen on port 8080 failed to start. The port may already be in use or the connector may be misconfigured.
解决:
0.win+r cmd
1.直接使用 netstat -ano|findstr 8080 查到8080端口是否使用
2.taskkill /f /t /im 进程号(我的是8512)每一次的不一定一样。
taskkill /f /t /im 8512
3.再次运行MainApplication文件就OK啦
4.出现Tomcat started on port(s): 8080 (http)表示成功运行。
-
进入http://localhost:8080/,如果返回Hello World!,说明成功。
-
进入http://localhost:8080/hello
-
进入http://localhost:8080/helloError
-
进入http://localhost:8080/thymeleaf
-
问题是:http://localhost:8080/thymeleaf 进不去,找不到。Whitelabel Error Page
2.找到了一份博客:
随笔分类 - 项目四:Java秒杀系统方案优化-高性能高并发实战 https://www.cnblogs.com/yanguobin/category/1577267.html
对于之前两个项目的选择,做出最终选择,选1放弃2。
Java秒杀系统方案优化 高性能高并发实战【秒杀】15小时,用的idea,这个有idea版本和 eclipse版本。主要是eclipse版本的
https://coding.imooc.com/class/168.htmlJava双版本(SSM到SpringBoot)校园商铺全栈开发【同学买的】26小时,不推荐看了。前端的东西多一点。好。
https://coding.imooc.com/class/144.html
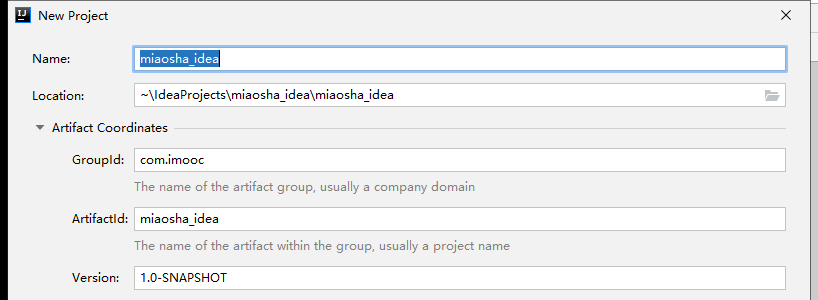
【1-3 项目环境搭建(IDEA)】
基于maven做的开发。
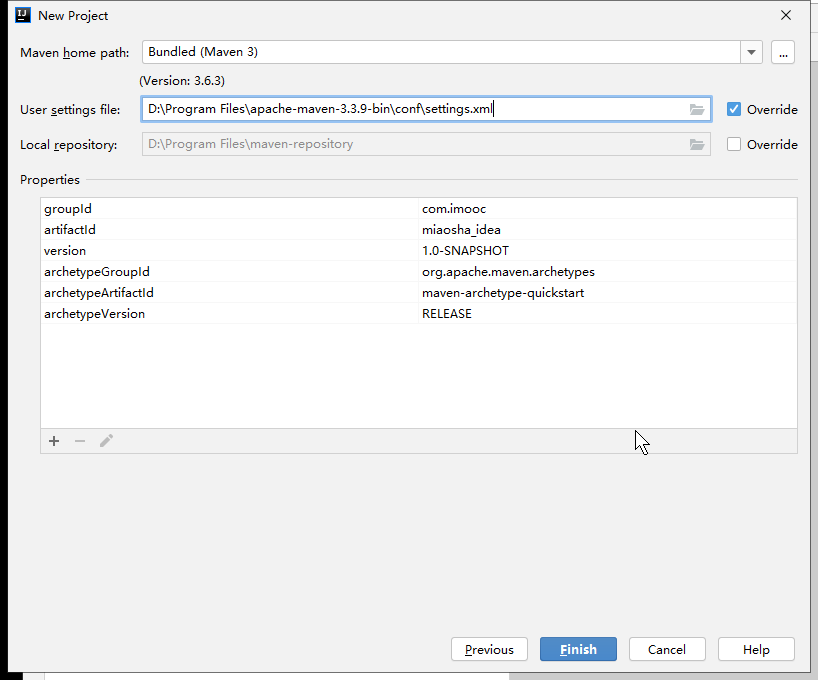
idea,新建项目,maven,create from archetype -archetype-quickstart。

D:\Program Files\apache-maven-3.3.9-bin\conf\settings.xml
[自己的setting的位置](D:\Program Files\apache-maven-3.3.9-bin\conf) : D:\Program Files\apache-maven-3.3.9-bin\conf\settings.xml
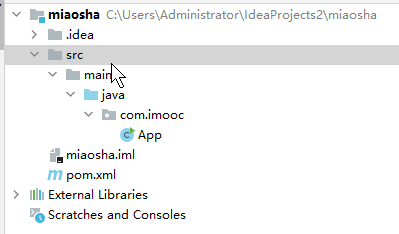
需要等它运行完成,他会自动创建一些东西。
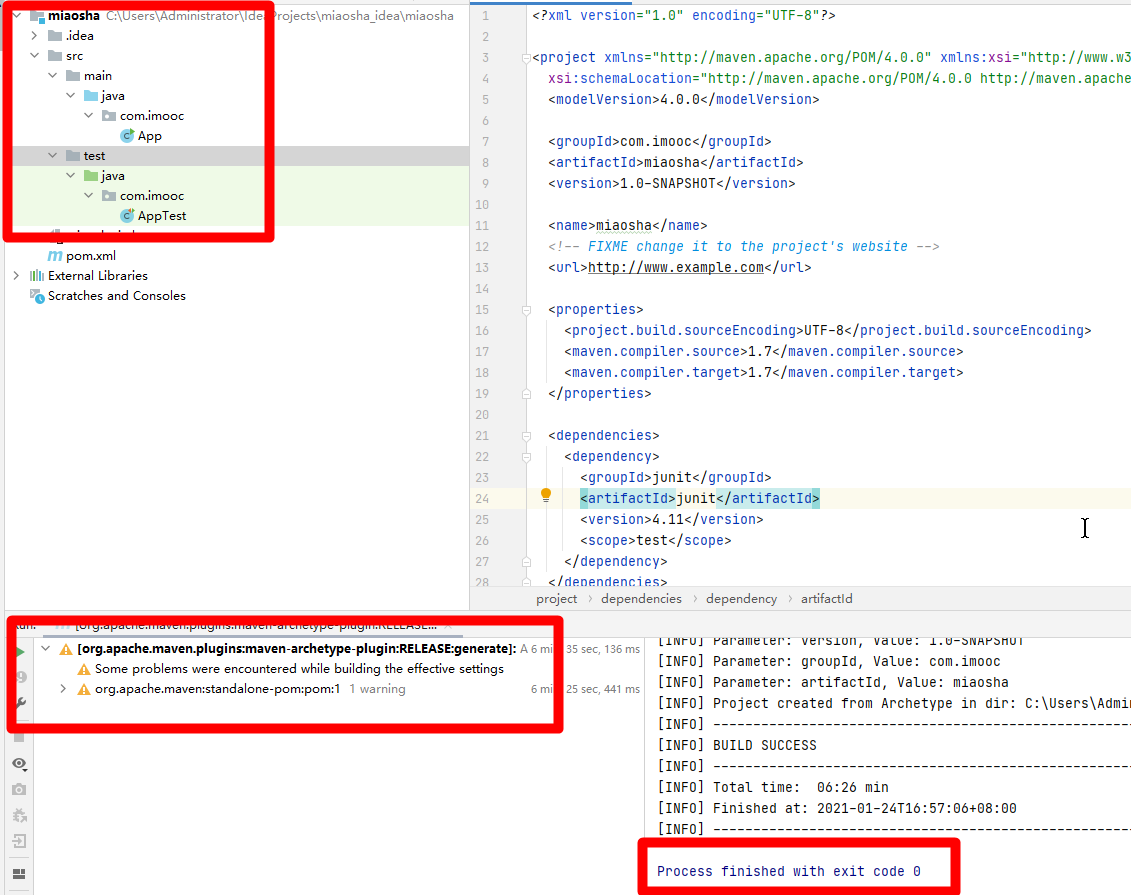
删除test文件。最终的文件是:
1.添加spring环境:添加 parent 依赖
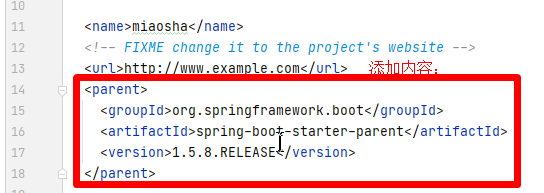
  <parent>
    <groupId>org.springframework.boot</groupId>
    <artifactId>spring-boot-starter-parent</artifactId>
    <version>1.5.8.RELEASE</version>
  </parent>
- 但是这里报红了,错误信息:Project ‘org.springframework.boot:spring-boot-starter-parent:1.5.8.RELEASE’ not found
- 又出现了另外一个问题:Cannot resolve plugin org.apache.maven.plugins:maven-deploy-plugin:2.8.2
[自己的setting的位置](D:\Program Files\apache-maven-3.3.9-bin\conf)
D:\Program Files\apache-maven-3.3.9-bin\conf
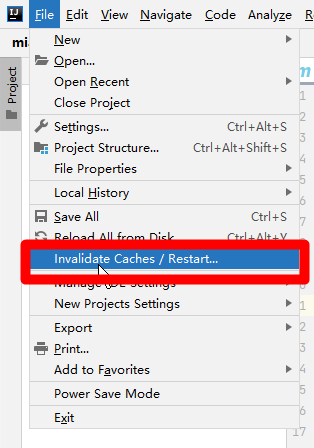
方案:,配置后面两个镜像地址就行。我每一次都得重新删除,好麻烦。
- Could not transfer metadata org.apache.maven.plugins:maven-archetype-plugin/maven-metadata.xml from/to mirrorId (http://repo1.maven.org/maven2/): Transfer failed for http://repo1.maven.org/maven2/org/apache/maven/plugins/maven-archetype-plugin/maven-metadata.xml 501 HTTPS Required
自己项目的位置:C:\Users\Administrator\IdeaProjects
-
另外一个问题:读取pom.xml出现Could not transfer artifact org.springframework.boot:spring-boot-starter-parent 啥的解决方法
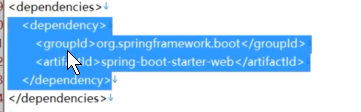
2.添加springframework的依赖
 -将右边的依赖替换为左边的–》
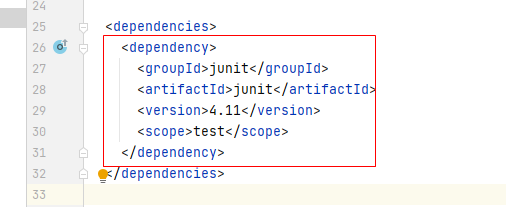
添加的内容如下:
  <dependencies>
    <dependency>
      <groupId>org.springframework.boot</groupId>
      <artifactId>spring-boot-starter-web</artifactId>
    </dependency>
  </dependencies>
- Dependency ‘org.springframework.boot:spring-boot-starter-web:1.5.8.RELEASE’ not found 爆红
springboot maven引入spring-boot-starter-web后报错
真愁人!1.5.8.RELEASE
解决:添加上,
  <dependencies>
    <dependency>
      <groupId>org.springframework.boot</groupId>
      <artifactId>spring-boot-starter-web</artifactId>
      <version>1.5.8.RELEASE</version>
    </dependency>s
3.添加thymeleaf依赖
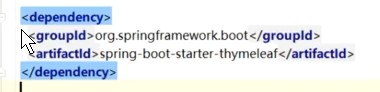
    <dependency>
      <groupId>org.springframework.boot</groupId>
      <artifactId>spring-boot-starter-thymeleaf</artifactId>
    </dependency>
解决方法,在上面的图片中。哈哈。
4.加上一个启动的类[1-3,5:24]MainApplication
package com.imooc.miaosha;

import org.springframework.boot.SpringApplication;
import org.springframework.boot.autoconfigure.SpringBootApplication;

@SpringBootApplication
public class MainApplication {
    public static void main(String[] args) {
        SpringApplication.run(MainApplication.class, args);
    }
}
5.新建 package:controller,service,dao
com.imooc.miaosha.controller
com.imooc.miaosha.service
com.imooc.miaosha.dao
6.在controller 创建 SampleController,和eclipse版本不一样好像。
package com.imooc.miaosha.controller;

import org.springframework.stereotype.Controller;
import org.springframework.ui.Model;
import org.springframework.web.bind.annotation.RequestMapping;

@Controller
@RequestMapping("/demo")
public class SampleController {
    @RequestMapping("/thymeleaf")
    public String thymeleaf(Model model) {
        model.addAttribute("name", "Joshua");
        return "hello";
    }
}
eclipse版本:
package com.imooc.miaosha.controller;

import org.springframework.stereotype.Controller;
import org.springframework.ui.Model;
import org.springframework.web.bind.annotation.RequestMapping;
import org.springframework.web.bind.annotation.ResponseBody;

import com.imooc.miaosha.result.CodeMsg;
import com.imooc.miaosha.result.Result;

@Controller
@RequestMapping("/demo")
public class DemoController {

	 	@RequestMapping("/")
	    @ResponseBody
	    String home() {
	        return "Hello World!";
	    }
	 	//1.rest api json输出 2.页面
	 	@RequestMapping("/hello")
	    @ResponseBody
	    public Result<String> hello() {
	 		return Result.success("hello,imooc");
	       // return new Result(0, "success", "hello,imooc");
	    }

	 	@RequestMapping("/helloError")
	    @ResponseBody
	    public Result<String> helloError() {
	 		return Result.error(CodeMsg.SERVER_ERROR);
	 		//return new Result(500102, "XXX");
	    }

	 	@RequestMapping("/thymeleaf")
	    public String  thymeleaf(Model model) {
	 		model.addAttribute("name", "Joshua");
	 		return "hello";
	    }

}
7.在resources中新建application.properties 文件
在这里面添加上配置项:
spring.thymeleaf.prefix=classpath:/templates/
spring.thymeleaf.suffix=.html
在eclipse版本中,实际添加的是这个。
# thymeleaf
spring.thymeleaf.prefix=classpath:/templates/
spring.thymeleaf.suffix=.html
spring.thymeleaf.cache=false
spring.thymeleaf.content-type=text/html
spring.thymeleaf.enabled=true
spring.thymeleaf.encoding=UTF-8
spring.thymeleaf.mode=HTML5
8.新建一个 templates 文件夹
9.新建一个hello.html的文件
<!DOCTYPE html>
<html lang="en" xmlns:th="http://www.thymeleaf.org">
<head>
    <meta charset="UTF-8"/>
    <title>Title</title>
</head>
<body>
<p th:text="'hello:' + ${name}"></p>
</body>
</html>
10.将resources markas sources root
11.运行MainApplication程序,稍等一下,
控制台输出中有:Tomcat started on port(s): 8080 (http)
浏览器打开:http://localhost:8080/demo/thymeleaf
12.运行成功。
【1-4 集成mybatis】
mybatis的官方文档:http://www.mybatis.org/spring-boot-starter/mybatis-spring-boot-autoconfigure
1.在pom.xml中添加依赖
官方是这个:
<dependency>
    <groupId>org.mybatis.spring.boot</groupId>
    <artifactId>mybatis-spring-boot-starter</artifactId>
    <version>2.1.3</version>
</dependency>
视频中是:依旧报错。
    <dependency>
      <groupId>org.mybatis.spring.boot</groupId>
      <artifactId>mybatis-spring-boot-starter</artifactId>
      <version>2.0.0</version>
    </dependency>
然后视频中又改为了:
    <dependency>
      <groupId>org.mybatis.spring.boot</groupId>
      <artifactId>mybatis-spring-boot-starter</artifactId>
      <version>1.3.1</version>
    </dependency>
一点保存,就会自动去下载东西了。下载的太慢了。
2.添加配置,在application.properties中添加mybatis内容:
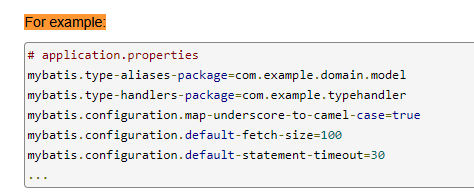
# mybatis
mybatis.type-aliases-package=com.example.domain.model
mybatis.type-handlers-package=com.example.typehandler
mybatis.configuration.map-underscore-to-camel-case=true
mybatis.configuration.default-fetch-size=100
mybatis.configuration.default-statement-timeout=30
3.新建一个包:com.imooc.miaosha.domain
4.再次修改application.properties的mybatis内容,修改后为:
# mybatis
mybatis.type-aliases-package=com.example.domain.model
mybatis.configuration.map-underscore-to-camel-case=true
mybatis.configuration.default-fetch-size=100
mybatis.configuration.default-statement-timeout=3000
mybatis.mapperLocations=classpath:com/imooc/miaosha/dao/*.xml
5.添加数据源。在application.properties中添加druid的内容
druid数据库连接池配置
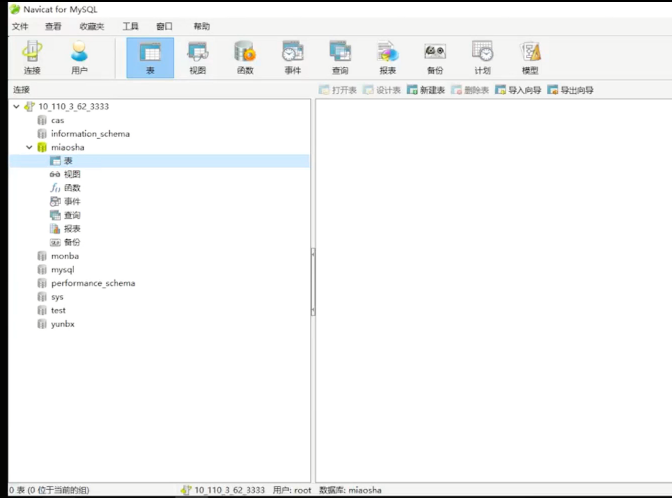
# druid 这个是说是一个已经建好的数据路,名字叫做miaosha
spring.datasource.url=jdbc:mysql://10.110.3.62:3333/miaosha?useUnicode=true&characterEncoding=utf-8
# 上面是一个已经建好的数据库。
spring.datasource.username=root
spring.datasource.password=123456
spring.datasource.driver-class-name=com.mysql.jdbc.Driver
spring.datasource.type=com.alibaba.druid.pool.DruidDataSource
spring.datasource.filters=stat
spring.datasource.maxActive=2
spring.datasource.initialSize=1
spring.datasource.maxWait=60000
spring.datasource.minldle=1
spring.datasource.timeBetweenEvictionRunsMillis=60000
spring.datasource.minEvictableldleTimeMillis=300000
spring.datasource.validationQuery=select'x'
spring.datasource.testWhileldle=true
spring.datasource.testOnBorrow=false
spring.datasource.testOnReturn=false
spring.datasource.poolPreparedStatements=true
spring.datasource.maxOpenPrepareStatements=20
6.在pom.xml中添加 JDBC 的配置
<dependency>
    <groupId>mysql</groupId>
    <artifactId>mysql-connector-java</artifactId>
</dependency>

<dependency>
    <groupId>com.alibaba</groupId>
    <artifactId>druid</artifactId>
    <version>1.0.5</version>
</dependency>
7.打开自己的数据库,建立一个数据库。
8.在SampleController中创建测试用例
在这里,还缺少一个包和文件,
9.创建com.imooc.miaosha.result包,


 677
677

 被折叠的 条评论
为什么被折叠?
被折叠的 条评论
为什么被折叠?
 到【灌水乐园】发言


