


 本文详细描述了在遇到Oracle安装时swap空间不足的情况时,如何在Linux系统中手动创建并配置6GB的swap文件,包括创建文件、初始化、启用及设置开机自动挂载的过程。
1 说明
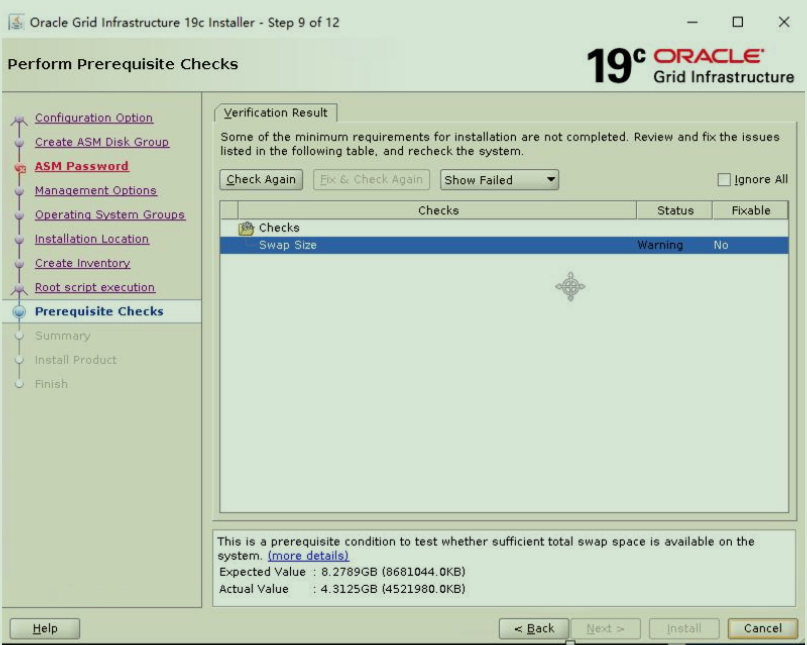
我们在安装oracle软件的时候有时候会遇到swap空间不足的情况,这时候我们就需要另外打开一个服务器窗口,手动添加swap空间。
2 swap添加方法
一、创建一个大小为6GB的swap文件/home/swapfile,将swap加到8gb。
[root@test oracle]# free -h
total used free shared
buff/cache available
Mem: 3.6G 294M 2.1G 8.5M 1.2G 3.1G
Swap: 2.0G 0B 2.0G

[root@test oracle]# dd if=/dev/zero of=/home/swapfile bs=1G count=6
0+1 records in
0+1 records out
2147479552 bytes (2.1 GB) copied, 4.66241 s, 461 MB/s
二、初始化swapfile。
[root@test oracle]# mkswap /home/swapfile
Setting up swapspace version 1, size = 2097144 KiB
no label, UUID=481707f7-f55a-48df-8c5b-85ea9fdd1490

[root@test oracle]# free -h
total used free shared
buff/cache available
Mem: 3.6G 294M 2.1G 8.5M 1.2G 3.1G
Swap: 2.0G 0B 2.0G
Swap还是2gb。
三、启用swapfile。
[root@test oracle]# swapon /home/swapfile
swapon: /home/swapfile: insecure permissions 0644, 0600
suggested.

[root@test oracle]# free -h
total used free shared
buff/cache available
Mem: 3.6G 296M 2.1G 8.5M 1.2G 3.1G
Swap: 8.0G 0B 8.0G
添加成功。
四、防止开机还原,设置系统启动时自动挂载swap文件。
[root@test oracle]# echo "/home/swapfile swap swap default 00" >> /etc/fstab
添加成功后,继续返回oracle软件的安装界面,点击check again即可进行下一步。


 2896
2896


 被折叠的 条评论
为什么被折叠?
被折叠的 条评论
为什么被折叠?
 到【灌水乐园】发言


