转自:http://blog.csdn.net/yegongheng/article/details/38366081
Android动画初步
动画(Animation)在我们日常的Android开发工作当中使用得较为频繁,尤其对于Android游戏这个动画的集合体,掌握动画开发的重要性毋庸置疑。同样的,在Android应用开发中我们也经常使用动画效果来提升APP用户体验,比如应用中的图片的旋转,页面和页面之间的淡入淡出、左右渐入渐出切换效果等等。那从今天开始我们将进入Android 动画的学习阶段,我将带领大家学习并实现一些比较炫的动画效果。
动画的分类
Android FrameWork向开发人员提供了丰富的API用于实现各种各样的动画效果,而若要对动画分类,一般可将Android动画分为以下两类的动画系统:
View Animation
View Animation动画系统又可以分类成Tween Animation 和Frame Animation:
Tween Animation
Tween Animation是Android系统比较老的一种动画系统,它的特点是通过对场景里的对象不断做图像变换(渐变、平移、缩放、旋转)产生动画效果,且这种动画只适用于View对象。
Frame Animation
Frame Animation也是常用到的动画,它的原理比较简单,就是将一系列准备好的图片按照顺序播放,形成动画效果。
Property Animation
Property Animation(属性动画)是在Android3.0(API 11)之后引入的一种动画系统,该动画提供了比View Animation更加丰富、强大和灵活的功能,Android官方推荐开发人员使用该动画系统来实现动画。Property Animation的特点是动态地改变对象的属性从而达到动画效果。该动画实现使用于包括View在内的任何对象。
初步了解了Android各种动画的分类及特点后,下面我们将一一对这些不同的动画系统进行深入地学习和分析。
Tween Animation
上面我们了解到Tween Animation是Android中比较老的一种动画系统,且其只能实现对View对象动画设置,不过其虽然没有Property Aniamtion功能那么强大和灵活,但是使用Tween Animation依然能完成我们日常大部分的开发需求。灵活地掌握Tween Animation的使用方法,十分有必要。那Tween Animation实现View的动画,一般分为以下几种效果:
Alpha:渐变透明动画效果;
Scale:渐变尺寸伸缩动画效果;
Translate:位置位移动画效果;
Rotate:位置旋转动画效果。
接下来我们通过实例来一一学习如何实现以上几种动画效果,实现Tween Animation分为xml实现和代码实现,下面我们都会分别使用这两种方式来实现上面的的几种动画效果。首先我们使用xml方式来实现View的Alpha渐变透明动画效果,在项目目录结构中创建res/anim文件夹,然后在文件夹中创建view_animation_alpha.xml文件,文件中的代码如下:
- <!--
- * android:interpolator:修饰动画效果,定义动画的变化率,可以使存在的动画效果accelerated(加速),
- * decelerated(减速),repeated(重复),bounced(弹跳)等。
- * android:fromAlpha="0.0":设置动画开始时控件的透明度,0.0为透明,控件不显示,1.0为不透明,控件全部显示
- * android:toAlpha="1.0":设置动画结束时的控件的透明度
- * android:duration="2500":设置每一次动画持续的时间值
- * android:repeatCount="5":设置动画重复的次数
- * android:repeatMode="reverse":设置动画重复的模式,reverse为0.0 -> 1.0 -> 0.0,动画反复执行;
- * restart为0.0 -> 1.0, 0.0 -> 1.0,动画每次都重新开始执行
- -->
- <alpha xmlns:android="http://schemas.android.com/apk/res/android"
- android:interpolator="@android:anim/accelerate_decelerate_interpolator"
- android:fromAlpha="0.0"
- android:toAlpha="1.0"
- android:duration="2500"
- android:repeatCount="5"
- android:repeatMode="reverse"
- />
xml文件中的属性在代码中都有详细的解释,这里就不重复说明了。定义完XML文件后,然后在代码中使用AnimationUtils类调用loadAnimation(context, id)方法来加载xml文件,具体代码如下:
-
-
-
- Animation mAnimation = AnimationUtils.loadAnimation(this, R.anim.view_animation_alpha);
上面是使用xml实现Alpha的动画效果,下面我们来看看如何在代码中实现Alpha的动画,很简单,只需要实例化一个AlphaAnimation对象,然后传递相关参数就行,具体代码如下:
-
-
-
-
-
-
-
- Animation mAnimation = new AlphaAnimation(0.0f, 1.0f);
分别使用xml和代码实现Alpha动画后,最后我们为一个ImageView对象设置我们创建好的Alpha动画,ImageView对象只需要调用startAnimation(Animation animation)方法,将刚刚创建好的alpha动画对象作为参数添加传进去搞定,具体代码如下:
- ImageView mImageView = (ImageView)findViewById(R.id.view_animation_imageview);
-
- mImageView.startAnimation(mAnimation);
最后运行程序,操作效果效果图如下:
接着实现Scale渐变尺寸伸缩动画效果,同理,也在res/anim文件夹下创建view_animation_scale.xml,文件中的代码如下:
- <!--
- * android:fromXScale="0.0":设置动画开始时X轴方向的缩放起始值。0.0为X轴方向的控件缩成一点,1.0为X轴方向的控件不缩放
- * android:toXScale="1.0":设置动画结束时X轴方向的缩放结束值。
- * android:fromYScale="0.5":设置动画开始时Y轴方向的缩放起始值。0.0为Y轴方向的控件缩成一点,1.0为Y轴方向的控件不缩放
- * android:toYScale="1.0":设置动画结束时Y轴方向的缩放结束值
- * android:pivotX="100%":动画相对于物件的X坐标的开始位置,当value加了百分号%时(例如80%),则实现相对于控件本身
- * 的位置而定的,当value是数值时(不加%号),则是指相对于父控件的位置而定的,单位是px。
- * android:pivotY="80%":动画相对于物件的Y坐标的开始位置,当value加了百分号%时(例如80%),则实现相对于控件本身
- * 的位置而定的,当value是数值时(不加%号),则是指相对于父控件的位置而定的,单位是px。
- * android:duration="2500":设置每一次动画持续的时间值,单位为毫秒(ms)
- * android:repeatCount="5":设置动画重复的次数
- * android:repeatMode="reverse":设置动画重复的模式:
- * reverse为0.0 -> 1.0 -> 0.0,动画反复执行;
- * restart为0.0 -> 1.0, 0.0 -> 1.0,动画每次都重新开始执行
- -->
- <scale xmlns:android="http://schemas.android.com/apk/res/android"
- android:fromXScale="0.0"
- android:toXScale="1.0"
- android:fromYScale="0.5"
- android:toYScale="1.0"
- android:pivotX="100%"
- android:pivotY="80%"
- android:duration="2500"
- android:repeatCount="5"
- android:repeatMode="reverse"
- />
然后在代码中使用AnimationUtils类调用loadAniamtion(context,id)方法加载xml文件,具体代码如下:
-
-
-
- mAnimation = AnimationUtils.loadAnimation(this, R.anim.view_animation_scale);
上面是使用xml实现Scale的动画效果,下面我们来看看如何在代码中实现Scale的动画,很简单,只需要实例化一个ScaleAnimation对象,然后传递相关参数就行,具体代码如下:
- Animation mAnimation = null;
-
-
-
-
-
-
-
-
-
-
-
-
-
-
-
-
-
-
- mAnimation = new ScaleAnimation(0.0f, 1.0f, 0.5f, 1.0f, Animation.RELATIVE_TO_SELF, 1.0f, Animation.RELATIVE_TO_SELF, 1.0f);
接下来就是为ImageView加载动画并开启动画,实现代码如上面为Imageview加载Alpha动画的代码一样,在这里就不重复列出,具体详细代码可以下载文章末尾的代码进行学习。最后我们运行程序,操作效果图如图下:

接着实现Translate动画效果,同理,在res/anim/文件夹下创建view_animation_translate.xml,文件中的代码如下:
- <!--
- * android:interpolator:修饰动画效果,定义动画的变化率,可以使存在的动画效果accelerated(加速),
- decelerated(减速),repeated(重复),bounced(弹跳)等。
- * android:fromXDelta="0%"动画开始执行时X轴方向控件的起始位置,当value加%时(例如80%),意思是相对于控件的原始位置往右的80%控件宽度的位置
- * 又例如value为-20%时,意思是相对于控件的原始位置往左的20%控件宽度的位置。当Value不加%时(例如80),表示相对于
- * 控件的原始位置往右80个像素(px)的位置,又如当Value为-20时,即往左20个像素。
- * android:toXDelta="100%"动画结束执行时X轴方向控件的结束位置,Value可以加%,也可以不加%,原理同上
- * android:fromYDelta="0%"动画开始执行时Y轴方向控件的起始位置,Value可以加%,也可以不加%,原理同上
- * android:toYDelta="100%"动画结束执行时Y轴方向控件的结束位置,Value可以加%,也可以不加%,原理同上
- * android:duration="2500"设置每一次动画持续的时间值
- * android:repeatMode="reverse"设置动画重复的模式,reverse为0% -> 100% -> 0%,动画反复执行;
- * restart为0% -> 100%, 0% -> 100%,动画每次都重新开始执行
- * android:repeatCount="1"设置动画重复的次数
- * android:startOffset="1000":动画执行前的延迟时间
- * android:fillEnabled="false"当设置为true时,fillAfter和fillBefroe将会都为true,此时会忽略fillBefore和fillAfter两种属性
- * android:fillAfter="true":当Value为true,表示动画执行结束后停留在结束后的状态
- * android:fillBefore="false":当Value为false:表示动画执行结束后回到动画开始时的状态
- -->
- <translate xmlns:android="http://schemas.android.com/apk/res/android"
- android:interpolator="@android:anim/bounce_interpolator"
- android:fromXDelta="0%"
- android:toXDelta="100%"
- android:fromYDelta="0%"
- android:toYDelta="100%"
- android:duration="2500"
- android:repeatMode="reverse"
- android:repeatCount="1"
- android:startOffset="1000"
- android:fillEnabled="false"
- android:fillAfter="true"
- android:fillBefore="true"
- />
然后在代码中使用AnimationUtils类调用loadAniamtion(context,id)方法加载xml文件,具体代码如下:
-
- mAnimation = AnimationUtils.loadAnimation(this, R.anim.view_animation_translate);
上面是使用xml实现Translate的动画效果,下面我们来看看如何在代码中实现Translate的动画,很简单,只需要实例化一个TranslateAnimation对象,然后传递相关参数就行,具体代码如下:
- Animation mAnimation = null;
-
-
-
-
-
-
-
-
-
-
-
-
-
-
-
- mAnimation = new TranslateAnimation(Animation.RELATIVE_TO_SELF, 0.0f, Animation.RELATIVE_TO_SELF, 1.0f,
- Animation.RELATIVE_TO_SELF, 0.0f, Animation.RELATIVE_TO_SELF, 1.0f);
最后我们运行程序,操作效果图如图下:
 接着实现Rotate动画效果,同理,在res/anim/文件夹下创建view_animation_rotate.xml,文件中的代码如下:
- <!--
- * android:fromDegrees="-50":动画开始执行时的控件起始状态的角度;
- * android:toDegrees="360":动画结束执行时的控件结束状态的角度;
- * android:pivotX="50%":旋转动画的中心点的X轴方向的横坐标,Value加%时,意思是相对于控件的原始位置往右方向的50%控件宽度的位置为横坐标,
- * 若Value为负值(例如-50%),则表示往左方向;当Value为数值时,则代表相对于屏幕的(px)像素值;
- * android:pivotY="50%":旋转动画的中心店的Y轴方向的纵坐标,原理同上;
- * android:startOffset="1000":动画执行前的延迟时间;
- * android:fillAfter="true":当Value为true,表示动画执行结束后停留在结束后的状态;
- * android:duration="2500":设置每一次动画持续的时间值,单位为毫秒(ms);
- * android:repeatCount="5":设置动画重复的次数;
- * android:repeatMode="reverse":设置动画重复的模式:
- * reverse为0.0 -> 1.0 -> 0.0,动画反复执行;
- * restart为0.0 -> 1.0, 0.0 -> 1.0,动画每次都重新开始执行
- -->
- <rotate xmlns:android="http://schemas.android.com/apk/res/android"
- android:interpolator="@android:anim/accelerate_decelerate_interpolator"
- android:fromDegrees="520"
- android:toDegrees="3600"
- android:pivotX="50%"
- android:pivotY="50%"
- android:startOffset="1000"
- android:fillAfter="true"
- android:duration="2500"
- android:repeatCount="4"
- android:repeatMode="reverse"
- />
然后在代码中使用AnimationUtils类调用loadAniamtion(context,id)方法加载xml文件,具体代码如下:
-
-
-
- mAnimation = AnimationUtils.loadAnimation(this, R.anim.view_animation_rotate);
上面是使用xml实现Rotate的动画效果,下面我们来看看如何在代码中实现
Rotate
的动画,很简单,只需要实例化一个RotateAnimation对象,然后传递相关参数就行,具体代码如下:
- Animation mAnimation = null;
-
-
-
-
-
-
-
-
-
-
-
-
-
-
-
-
- mAnimation = new RotateAnimation(-50f, 360f, Animation.RELATIVE_TO_SELF, 0.5f, Animation.RELATIVE_TO_SELF, 0.5f);
最后我们运行程序,操作效果图如图下:
 至此我们就实现了Tween Animation中的Alpha、Scale、Translate和Rotate四种动画效果,那我们就可以根据我们APP的具体需求,定义我们自己的动画,不过除了单独使用这些动画效果外,Android还允许我们使用这几种动画里面的若干种组合成一个动画集合,从而实现更加炫更加多样的动画效果。下面我们也分别使用xml和代码来利用动画集合的方式实现一个图片飞进飞出的动画效果,首先也是在res/anim文件夹下创建一个view_animation_set.xml文件,文件中的代码如下:
- <set
- xmlns:android="http://schemas.android.com/apk/res/android"
- android:shareInterpolator="true"
- android:duration="1000"
- android:repeatMode="reverse"
- android:repeatCount="2"
- >
- <alpha
- android:fromAlpha="1.0"
- android:toAlpha="0.0"
- android:fillAfter="true"
- android:duration="1000"
- android:repeatCount="1"
- android:repeatMode="reverse"
- />
- <scale
- android:fromXScale="1.0"
- android:toXScale="0.0"
- android:fromYScale="1.0"
- android:toYScale="0.0"
- android:pivotX="50%"
- android:pivotY="50%"
- android:fillAfter="true"
- android:duration="1000"
- android:repeatCount="1"
- android:repeatMode="reverse"
- />
- <translate
- android:fromXDelta="0%"
- android:toXDelta="100%"
- android:fromYDelta="0%"
- android:toYDelta="100%"
- android:fillAfter="true"
- android:duration="1000"
- android:repeatCount="1"
- android:repeatMode="reverse"
- />
- <rotate
- android:fromDegrees="0"
- android:toDegrees="360"
- android:pivotX="50%"
- android:pivotY="50%"
- android:fillAfter="true"
- android:duration="1000"
- android:repeatCount="1"
- android:repeatMode="reverse"
- />
- </set>
查看上面代码,我们可以使用一个<set/>节点将动画组合成一个集合,需要注意的是<set/>里面也可以嵌套<set/>。接着在代码中加载xml动画,具体代码如下:
-
-
-
- mAnimation = AnimationUtils.loadAnimation(this, R.anim.view_animation_set);
上面是使用xml实现Set集合动画效果,下面我们来看看如何在代码中实现Set集合
动画,具体代码如下:
-
-
-
- AnimationSet mAnimationSet = new AnimationSet(true);
-
- AlphaAnimation mAlphaAnimation = new AlphaAnimation(1.0f, 0.0f);
- mAlphaAnimation.setRepeatCount(1);
- mAlphaAnimation.setRepeatMode(Animation.REVERSE);
- mAlphaAnimation.setFillAfter(true);
- mAlphaAnimation.setDuration(1000);
-
- ScaleAnimation mScaleAnimation = new ScaleAnimation(1.0f, 0.0f, 1.0f, 0.0f,
- Animation.RELATIVE_TO_SELF,0.5f,Animation.RELATIVE_TO_SELF,0.5f);
- mScaleAnimation.setRepeatCount(1);
- mScaleAnimation.setRepeatMode(Animation.REVERSE);
- mScaleAnimation.setFillAfter(true);
- mScaleAnimation.setDuration(1000);
-
- TranslateAnimation mTranslateAnimation = new TranslateAnimation(Animation.RELATIVE_TO_SELF, 0.0f,
- Animation.RELATIVE_TO_SELF, 1.0f, Animation.RELATIVE_TO_SELF, 0.0f, Animation.RELATIVE_TO_SELF, 1.0f);
- mTranslateAnimation.setRepeatCount(1);
- mTranslateAnimation.setRepeatMode(Animation.REVERSE);
- mTranslateAnimation.setFillAfter(true);
- mTranslateAnimation.setDuration(1000);
-
- RotateAnimation mRotateAnimation = new RotateAnimation(0, 360, Animation.RELATIVE_TO_SELF, 0.5f,
- Animation.RELATIVE_TO_SELF, 0.5f);
- mRotateAnimation.setRepeatCount(1);
- mRotateAnimation.setRepeatMode(Animation.REVERSE);
- mRotateAnimation.setFillAfter(true);
- mRotateAnimation.setDuration(1000);
-
- mAnimationSet.addAnimation(mAlphaAnimation);
- mAnimationSet.addAnimation(mScaleAnimation);
- mAnimationSet.addAnimation(mTranslateAnimation);
- mAnimationSet.addAnimation(mRotateAnimation);
最后我们运行程序,操作效果图如图下:

Frame Animation
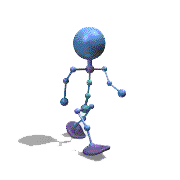
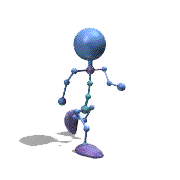
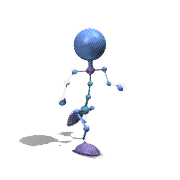
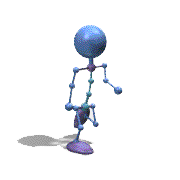
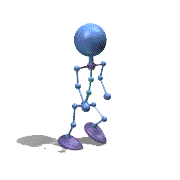
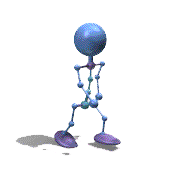
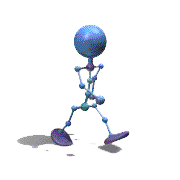
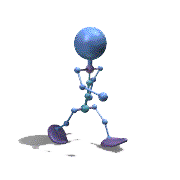
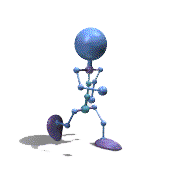
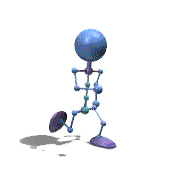
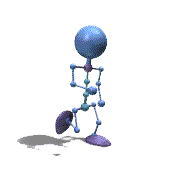
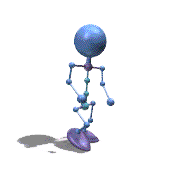
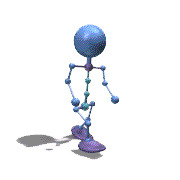
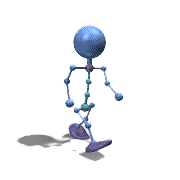
早期的老式电影放映机估计很多人都有所了解,它的播放原理就是在电影胶片上有一幅幅固定的画面,然后在放映的时候通过电机匀速推进切换画面,画面在人们视觉差作用下产生连续的动画效果。这里我们所要学习的Frame Animation的实现原理和老式电影放映机的播放原理是一样的,我们通过将一系列准备好的图片按照顺序播放,形成动画效果,就如同放电影一般。接下来我们就来学习如何在Android中使用Frame Animation,首先我们得准备一系列连续的图片,如图下:
上面是一系列小机器人走路的连续图片,我们将要做的就是将它们一张张匀速连续播放,从而感觉小机器人在走的动画效果。准备好图片后,我们就将它们一一组织起来,具体怎么设置呢?先在项目中的res/drawable/文件夹下创建drawable_animation_robot.xml文件,文件中具体代码如下:
- <animation-list xmlns:android="http://schemas.android.com/apk/res/android"
- android:oneshot="false"
- >
- <item android:drawable="@drawable/drawable_animation01" android:duration="80"/>
- <item android:drawable="@drawable/drawable_animation02" android:duration="80"/>
- <item android:drawable="@drawable/drawable_animation03" android:duration="80"/>
- <item android:drawable="@drawable/drawable_animation04" android:duration="80"/>
- <item android:drawable="@drawable/drawable_animation05" android:duration="80"/>
- <item android:drawable="@drawable/drawable_animation06" android:duration="80"/>
- <item android:drawable="@drawable/drawable_animation07" android:duration="80"/>
- <item android:drawable="@drawable/drawable_animation08" android:duration="80"/>
- <item android:drawable="@drawable/drawable_animation09" android:duration="80"/>
- <item android:drawable="@drawable/drawable_animation10" android:duration="80"/>
- <item android:drawable="@drawable/drawable_animation11" android:duration="80"/>
- <item android:drawable="@drawable/drawable_animation12" android:duration="80"/>
- <item android:drawable="@drawable/drawable_animation13" android:duration="80"/>
- <item android:drawable="@drawable/drawable_animation14" android:duration="80"/>
- <item android:drawable="@drawable/drawable_animation15" android:duration="80"/>
- <item android:drawable="@drawable/drawable_animation16" android:duration="80"/>
- </animation-list>
上面代码中,我们将刚准备好的图片使用<animation-list/>将它们一一组合排列,并使用android:duration属性设置每张图片的显示时间,这里设置为80毫秒(ms),其中android:oneshot属性的作用是设置是否只播放一次,设置false则循环播放动画,true则只播放一次动画。
设置完图片后,我们来播放动画,那需要播放连续动画,则我们需借助AnimationDrawable类来完成,AnimationDrawable是实现逐帧动画的帮助类。下面就是我们执行逐帧动画的具体代码实现,如下:
- public class LoadingRobotProgressView extends ImageView {
-
- private AnimationDrawable mAnimationDrawable;
-
- public LoadingRobotProgressView(Context context) {
- super(context);
-
- init();
- }
- public LoadingRobotProgressView(Context context, AttributeSet attrs) {
- super(context, attrs);
-
- init();
- }
- public LoadingRobotProgressView(Context context, AttributeSet attrs, int defStyle) {
- super(context, attrs, defStyle);
-
- init();
- }
-
- private void init() {
-
- this.setBackgroundResource(R.drawable.drawable_animation_robot);
-
- mAnimationDrawable = (AnimationDrawable) this.getBackground();
- }
-
-
-
-
- @Override
- protected void onAttachedToWindow() {
- super.onAttachedToWindow();
- mAnimationDrawable.start();
- }
-
-
-
- @Override
- protected void onDetachedFromWindow() {
- super.onDetachedFromWindow();
- mAnimationDrawable.stop();
- }
- }
好了,所有的编码工作都做完了,下面我们来运行一下程序,看一下具体的效果,如图下:
观察上面的效果图可知,实验成功。
由于篇幅关系,本片文章就讨论Tween Animation 和Frame Animation,下一篇文章我们将学习功能更加强大、灵活的Property Animation,敬请期待!
源代码下载,请戳下面:


 900
900

 被折叠的 条评论
为什么被折叠?
被折叠的 条评论
为什么被折叠?
 到【灌水乐园】发言


