对于Android开发人员从初级向高级的进阶过程中,动画无疑是必不可少的一块知识点。在合适的场景合理的使用动画效果,可以极大的提高app的系统体验流畅度,是优化交互和提高用户体验的一个重要的方面。
你可能很早就接触过Android动画,甚至能说出动画分为:View Animation、Drawable Animation和Property Animation等类型,但是你未必能详细说出每种动画的适用场景和不同动画之间的差异。本文会尽可能详尽的罗列出不同动画的具体使用方式,适用场景,属性设置,每种动画的特性等知识点。关于Android动画方面的知识将会以多篇博客的形式进行讲解,本篇将针对View Animation进行说明。
OverView
You can use the view animation system to perform tweened animation on Views. Tween animation calculates the animation with information such as the start point, end point, size, rotation, and other common aspects of an animation.
A tween animation can perform a series of simple transformations (position, size, rotation, and transparency) on the contents of a View object. So, if you have a TextView object, you can move, rotate, grow, or shrink the text. If it has a background image, the background image will be transformed along with the text. The animation package provides all the classes used in a tween animation.
概要翻译一下就是:视图动画可以作用在View上使之执行一系列诸如:平移、旋转、缩放和透明度变化的补间动画,因此视图动画也叫补间动画。视图动画可以通过XML和Android Code两种方式进行定义,推荐使用XML的方式来保证代码的可读性和可重用性。需要注意的是:视图动画只是修改了View在屏幕上的绘制坐标和尺寸,并未改变View的真实属性值。 比如:将一个Button通过animation移动到新的位置之后,他的点击事件依旧会在原位置被触发,而点击新位置不会有任何反应。
基础使用
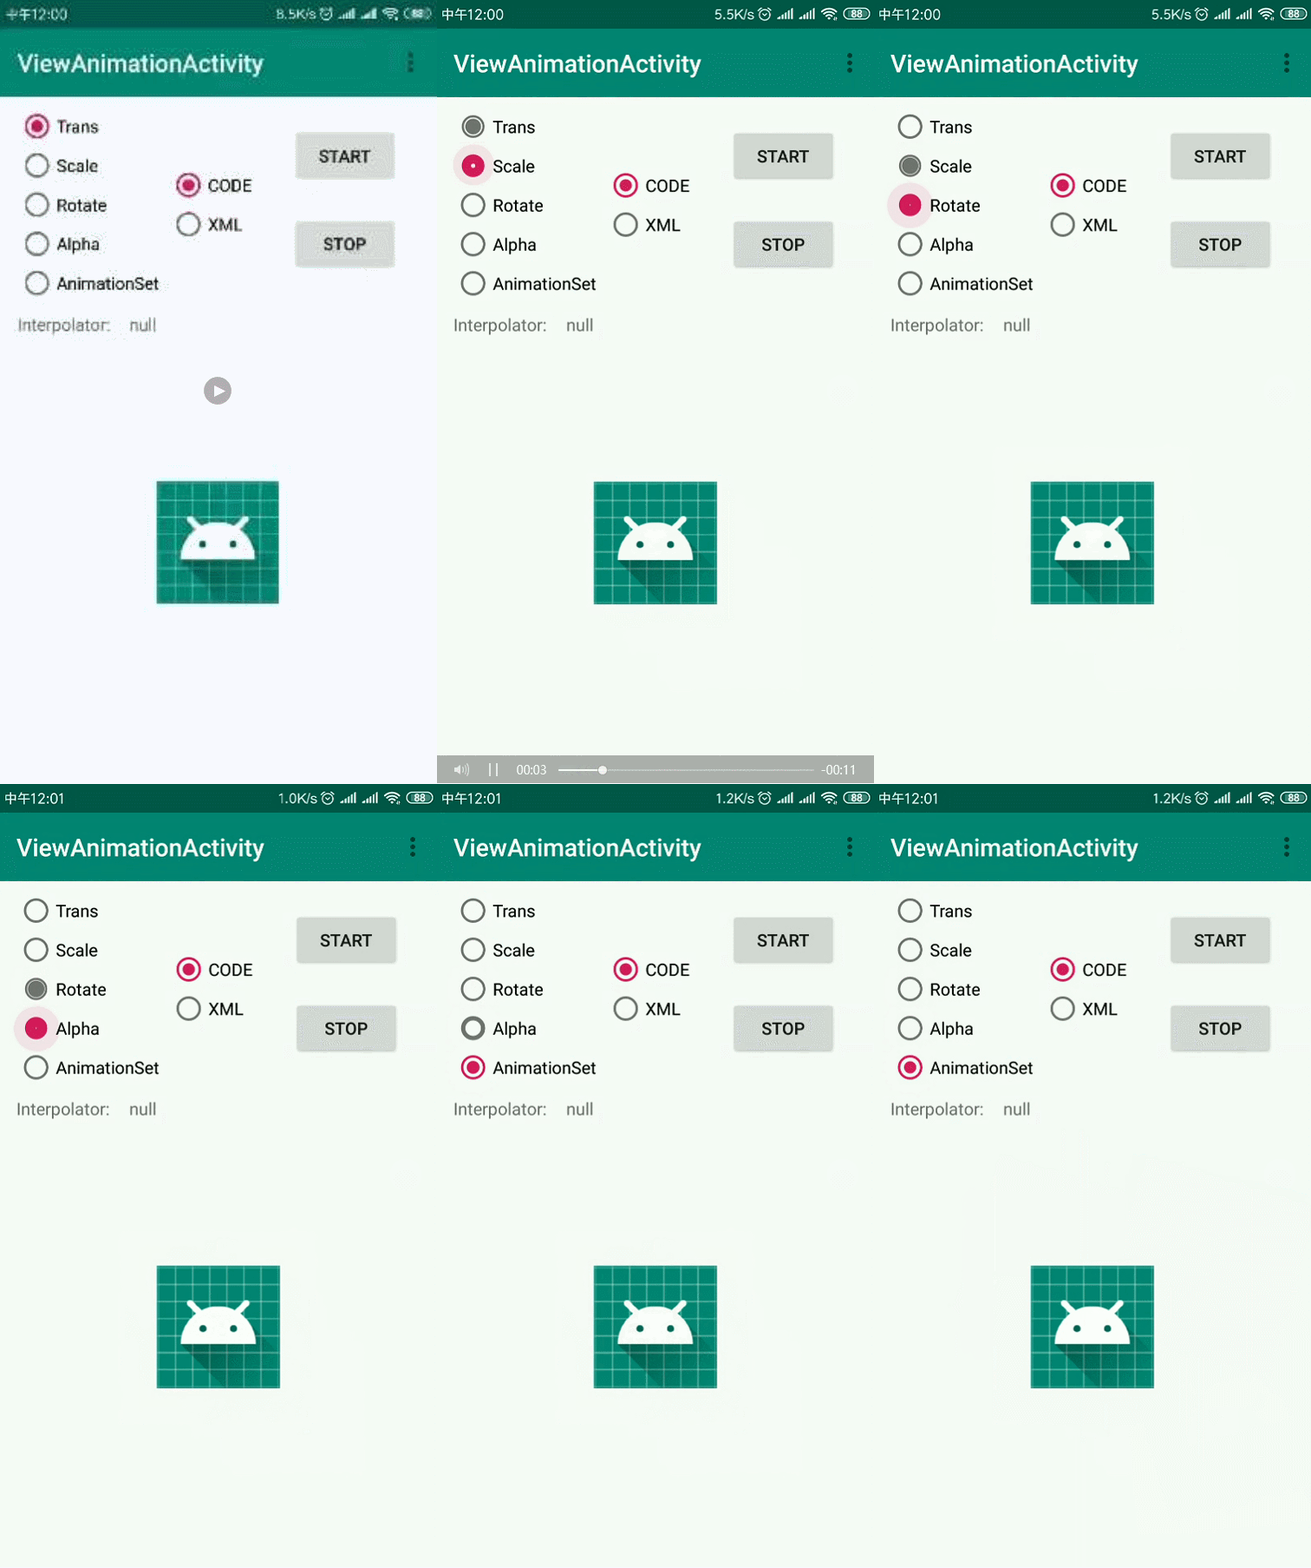
先来看个GIF动画效果,对Animation有个直观的了解。
Animation alphaAnimation = new AlphaAnimation(1f, 0f);
doAnimation(alphaAnimation);

/**
 * 开始动画
 * @param animation
 */
private void doAnimation(Animation animation){
    cancelAnimation();

    //动画监听
    animation.setAnimationListener(new Animation.AnimationListener() {
        @Override
        public void onAnimationStart(Animation animation) {
            //动画开始
            Log.d(TAG, "onAnimationStart");
        }
        @Override
        public void onAnimationEnd(Animation animation) {
            //动画结束
            Log.d(TAG, "onAnimationEnd");
        }
        @Override
        public void onAnimationRepeat(Animation animation) {
            //动画重复执行时触发
            Log.d(TAG, "onAnimationRepeat");
        }
    });
    //开始动画
    mImageView.startAnimation(animation);
}

/**
 * 清除动画
 */
private void cancelAnimation(){
    Animation animation = mImageView.getAnimation();
    if(animation != null && animation.hasStarted() && !animation.hasEnded()){
        animation.cancel();
        mImageView.clearAnimation();
    }
}
动画的开始、监听和停止行为的实现,代码添加了详细注释,就不过多解释了。
Alpha
代码实现
//1f——100%不透明
//0f——100%透明
Animation alphaAnimation = new AlphaAnimation(1f, 0f);
alphaAnimation.setDuration(2000);       //动画时间设置
alphaAnimation.setFillAfter(false);     //动画结束之后是否停留在结束为止
alphaAnimation.setFillBefore(true);     //动画结束之后是否回到开始位置
alphaAnimation.setRepeatCount(1);       //动画重复次数,可以指定重复多次播放动画
alphaAnimation.setRepeatMode(Animation.REVERSE);    //动画重复播放模式,RESTART——重新开始    REVERSE——动画倒放
XML实现
动画的xml文件是需要放到项目的res/anim文件夹下的。
<?xml version="1.0" encoding="utf-8"?>
<alpha xmlns:android="http://schemas.android.com/apk/res/android"
    android:fromAlpha="1"
    android:toAlpha="0.5">
</alpha>
通过AnimationUtils.loadAnimation方法加载动画xml
Animation alphaAnimation = AnimationUtils.loadAnimation(Activity.this,
                        R.anim.alpha_animation);
Translate
代码实现
//Type 指定动画移动类型,ABSOLUTE——绝对坐标值
//                      RELATIVE_TO_SELF——自身尺寸乘以value
//                      RELATIVE_TO_PARENT——父布局尺寸乘以value
//Value 起始值,根据Type不同取值意义不同
Animation transAnimation = new TranslateAnimation(Animation.ABSOLUTE, 0f, Animation.ABSOLUTE,
                200f, Animation.ABSOLUTE, 0f, Animation.ABSOLUTE, 200f);
参数分为四组分别为:fromX,toX,fromY,toY,每一组有两个参数第一个表明取值类型,第二个为取值大小。
XML实现
<?xml version="1.0" encoding="utf-8"?>
<translate xmlns:android="http://schemas.android.com/apk/res/android"
    android:fromXDelta="0"
    android:toXDelta="100%"
    android:fromYDelta="0"
    android:toYDelta="100%" >
</translate>
四个属性的取值类型只能是百分比,表示控件自身的百分比。
Scale
代码实现
//value 起始值,乘以自身尺寸倍数
//pivotType  缩放圆心取值类型,
//           ABSOLUTE——绝对坐标值
//           RELATIVE_TO_SELF——自身尺寸乘以value(如:value= 0.5则表示以自身中心点位原点就行缩放)
//           RELATIVE_TO_PARENT——父布局尺寸乘以value
Animation scaleAnimation = new ScaleAnimation(1f, 1.5f, 1f, 1.5f,
                Animation.RELATIVE_TO_SELF, 0.5f, Animation.RELATIVE_TO_SELF, 0.5f);
前四个参数分别为:fromX、toX、fromY、toY,值为float类型意为自身尺寸的倍数。后四个参数是用来确定缩放原点位置的,如上述代码所示是以控件中心为缩放原点进行缩放的。不同的pivotType和pivotValue可以确定不同的缩放原点,具体取值参考上面的注释。
XML实现
<?xml version="1.0" encoding="utf-8"?>
<scale xmlns:android="http://schemas.android.com/apk/res/android"
    android:fromXScale="100%"
    android:toXScale="150%"
    android:fromYScale="100%"
    android:toYScale="150%"
    android:pivotX="50%"
    android:pivotY="50%">
</scale>
属性取值同样只能是百分比,表示控件自身的百分比。
Rotate
代码实现
//value 起始值,乘以自身尺寸倍数
//pivotType  缩放圆心取值类型
//           ABSOLUTE——绝对坐标值
//           RELATIVE_TO_SELF——自身尺寸乘以value(如:value= 0.5则表示以自身中心点位原点就行缩放)
//           RELATIVE_TO_PARENT——父布局尺寸乘以value
 Animation rotateAnimation = new RotateAnimation(0, 360,
                Animation.RELATIVE_TO_SELF, 0.5f, Animation.RELATIVE_TO_SELF, 0.5f);
前两个参数确定旋转的角度,后四个参数确定旋转的原点,与ScaleAnimation参数含义相同。
XML实现
<?xml version="1.0" encoding="utf-8"?>
<rotate xmlns:android="http://schemas.android.com/apk/res/android"
    android:fromDegrees="0"
    android:toDegrees="360"
    android:pivotX="50%"
    android:pivotY="50%">
</rotate>
Animation Set
当需要使用多个Animation一起播放时,就要用到AnimationSet。如果某个属性在AnimationSet和其子项Animation中同时设置,那么AnimationSet中的属性值会覆盖其子项的属性值。
代码实现
AnimationSet animationSet = new AnimationSet(true);
animationSet.addAnimation(getTransAnimation());      //添加Animation
animationSet.addAnimation(getScaleAnimation());
animationSet.addAnimation(getRotateAnimation());
animationSet.addAnimation(getAlphaAnimation());

animationSet.setDuration(2000);       //动画时间设置
animationSet.setFillAfter(false);     //动画结束之后是否停留在结束为止
animationSet.setFillBefore(true);     //动画结束之后是否回到开始位置
animationSet.setRepeatCount(1);       //动画重复次数,可以指定重复多次播放动画
animationSet.setRepeatMode(Animation.REVERSE);    //动画重复播放模式,RESTART——重新开始
                                                  //                REVERSE——动画倒放
XML实现
<?xml version="1.0" encoding="utf-8"?>
<set xmlns:android="http://schemas.android.com/apk/res/android"
    android:duration="2000"
    android:fillBefore="true"
    android:repeatMode="reverse" >

    <alpha android:fromAlpha="1"
        android:toAlpha="0"/>

    <translate android:fromXDelta="0"
        android:toXDelta="100%"
        android:fromYDelta="0"
        android:toYDelta="100%"/>
</set>
Interpolator
差值器是用来定义动画变化率的对象。Android系统提供了众多的Interpolator,虽然繁多但是使用简单,我们只需要知道每种Interpolator的使用效果就好了。
switch (id){
    case R.id.clear:
        mInterpolator = null;
        break;
    case R.id.AccelerateDecelerateInterpolator:
        //在动画开始与结束的地方速率改变比较慢,在中间的时候加速
        interpolatorName = "AccelerateDecelerateInterpolator";
        mInterpolator = new AccelerateDecelerateInterpolator();
        break;
    case R.id.AccelerateInterpolator:
        //在动画开始的地方速率改变比较慢,然后开始加速
        interpolatorName = "AccelerateInterpolator";
        mInterpolator = new AccelerateInterpolator();
        break;
    case R.id.AnticipateInterpolator:
        //开始的时候向后然后向前甩
        interpolatorName = "AnticipateInterpolator";
        mInterpolator = new AnticipateInterpolator();
        break;
    case R.id.AnticipateOvershootInterpolator:
        //开始的时候向后然后向前甩一定值后返回最后的值
        interpolatorName = "AnticipateOvershootInterpolator";
        mInterpolator = new AnticipateOvershootInterpolator();
        break;
    case R.id.BounceInterpolator:
        //动画结束的时候弹起
        interpolatorName = "BounceInterpolator";
        mInterpolator = new BounceInterpolator();
        break;
    case R.id.CycleInterpolator:
        //动画循环播放特定的次数,速率改变沿着正弦曲线
        interpolatorName = "CycleInterpolator";
        mInterpolator = new CycleInterpolator(7);
        break;
    case R.id.DecelerateInterpolator:
        //在动画开始的地方快然后慢
        interpolatorName = "DecelerateInterpolator";
        mInterpolator = new DecelerateInterpolator();
        break;
    case R.id.LinearInterpolator:
        //以常量速率改变
        interpolatorName = "LinearInterpolator";
        mInterpolator = new LinearInterpolator();
        break;
    case R.id.OvershootInterpolator:
        //向前甩一定值后再回到原来位置
        interpolatorName = "OvershootInterpolator";
        mInterpolator = new OvershootInterpolator();
        break;
}
使用
animation.setInterpolator(mInterpolator);
<?xml version="1.0" encoding="utf-8"?>
<set xmlns:android="http://schemas.android.com/apk/res/android"
    android:shareInterpolator="@android:anim/accelerate_decelerate_interpolator"
    android:duration="2000"
    android:fillBefore="true"
    android:repeatMode="reverse">

    <alpha/>
    <scale/>
    <rotate/>
</set>
其他应用场景
Activity切换动画
Intent activityAnimIntent = new Intent(AnimationActivity.this, ActivityAnimationActivity.class);
startActivity(activityAnimIntent);
//activity 切换动画
overridePendingTransition(R.anim.activity_enter_alpha_animation,R.anim.activity_out_alpha_animation);
在startActivity之后使用overridePendingTransition来设置Activity进入和退出动画。
PopupWindow显示动画
实现很简单不多啰嗦了直接看代码吧。
<style name="PopupWindowAnimationStyle">
    <item name="android:windowEnterAnimation">@anim/popup_enter_anim</item>
    <item name="android:windowExitAnimation">@anim/popup_exit_anim</item>
</style>
private void showImgPopupWindow(View anchor) {
    if (mPopupWindow == null) {
        ImageView view = new ImageView(this);
        view.setBackgroundColor(Color.parseColor("#FF989898"));
        view.setImageDrawable(getDrawable(R.mipmap.ic_launcher));

        mPopupWindow = new PopupWindow(view, anchor.getMeasuredWidth(), anchor.getMeasuredWidth());
        //设置动画效果
        mPopupWindow.setAnimationStyle(R.style.PopupWindowAnimationStyle);
    }
    if (mPopupWindow.isShowing()) {
        mPopupWindow.dismiss();
    } else {
        mPopupWindow.showAsDropDown(anchor);
    }
}
Dialog显示动画
跟PopupWindow完全一个套路。
dialog.getWindow().setWindowAnimations(R.style.PopupWindowAnimationStyle);
当然也可以跟Popupwindow一样通过定义style来实现。
ViewGroup的子控件进场动画
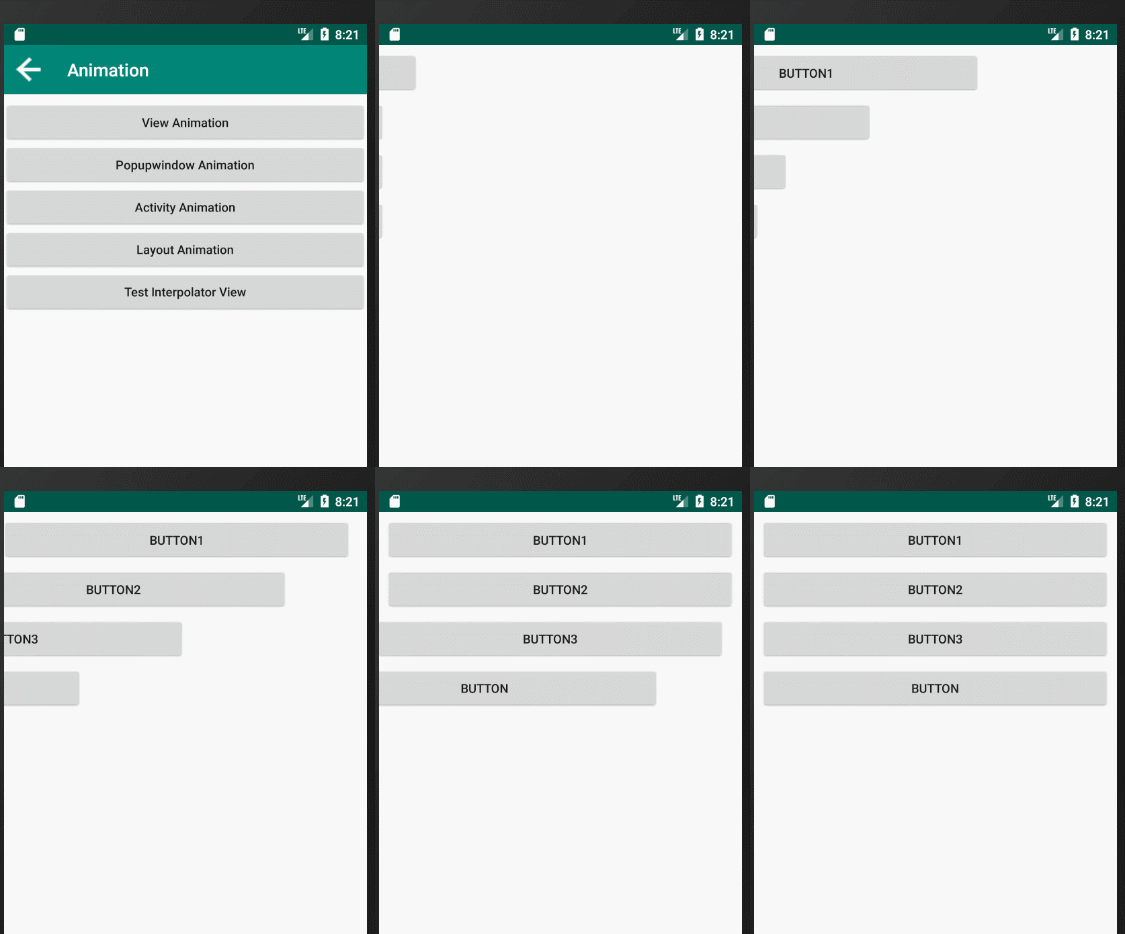
LayoutAnimation是作用在ViewGroup上的,来为ViewGroup的子控件的第一次进场提供动画效果。如:LinearLayout、RelativeLayout和ListView等。
实现方式如下:
第一步:在anim文件下定义动画效果:
<?xml version="1.0" encoding="utf-8"?>
<translate xmlns:android="http://schemas.android.com/apk/res/android"
    android:fromXDelta="-100%"
    android:fromYDelta="0"
    android:toXDelta="0"
    android:toYDelta="0"
    android:duration="2000">
</translate>
第二步:新建一个layout_animation.xml文件,以layoutAnimation标签开头:
<?xml version="1.0" encoding="utf-8"?>
<layoutAnimation xmlns:android="http://schemas.android.com/apk/res/android"
    android:animation="@anim/left_to_right_anim"
    android:animationOrder="normal"
    android:delay="0.2">
</layoutAnimation>
需要说明的是android:delay属性,取值为分数或者百分数,表示当前执行动画效果的子控件延时其整个动画过程的百分之多少执行。如取值0,所有的子控件同时执行动画效果。取值1,当前子控件必须等上一个控件执行完动画才开始执行。
第三步:在想要实现动画效果的ViewGroup中设置android:layoutAnimation="":
<android.support.constraint.ConstraintLayout xmlns:android="http://schemas.android.com/apk/res/android"
    xmlns:app="http://schemas.android.com/apk/res-auto"
    xmlns:tools="http://schemas.android.com/tools"
    android:layout_width="match_parent"
    android:layout_height="match_parent"

    android:layoutAnimation="@anim/layout_animation">
当然也有其代码实现,相对xml实现要简洁一点:
Animation animation = AnimationUtils.loadAnimation(this,R.anim.left_to_right_anim);
LayoutAnimationController controller = new LayoutAnimationController(animation);
controller.setDelay(0.2f);
controller.setOrder(LayoutAnimationController.ORDER_REVERSE);
rootView.setLayoutAnimation(controller);
还有如android.support.v4.app.Fragment的切换动画(只有v4包中的Fragment才用视图动画)都很简单就不提了。
 Android动画


 本文详细介绍了Android中的ViewAnimation,包括Alpha、Translate、Scale和Rotate等动画类型的具体应用方式、属性设置及特性。并探讨了AnimationSet的使用方法以及Interpolator的作用。


 1078
1078

 被折叠的 条评论
为什么被折叠?


