


一、内置Servlet容器
1.1 定制和修改Servlet容器配置
(1)在application.properties/yaml文件中修改。示例:
server.port=8081
#项目路径
server.servlet.context-path=/dmf
server.tomcat.uri-encoding=UTF-8


//通用的Servlet容器配置
server.xxx
//Tomcat的设置
server.tomcat.xxx
这些配置对应的是ServerProperties,这是个配置类,对应的就是服务器的相关配置。
(2)代码里设置。
Spring boot1.x和Spring Boot2.x的配置方法有些不同。
SpringBoot1.x定制和修改Servlet容器的相关配置示例:
@Configuration
public class MyConfig{
    @Bean  //必须要加到容器中才能生效
    public EmbeddedServletContainerCustomizer embeddedServletContainerCustomizer(){
        return new EmbeddedServletContainerCustomizer() {
            @Override
            public void customize(ConfigurableEmbeddedServletContainer container) {
                //在这里修改相关配置即可
                container.setPort(8088);
            }
        };
    }
}
SpringBoot2.x定制和修改Servlet容器的相关配置示例:
@Configuration
public class MyConfig{
    @Bean //必须要加到容器中才能生效
	public ConfigurableServletWebServerFactory configurableServletWebServerFactory(){
	    //修改tomcat相关配置
		TomcatServletWebServerFactory factory= new TomcatServletWebServerFactory();
		factory.setPort(8083);
		return factory;
	}

    //或者使用下面这种方法,泛型根据具体的servlet容器来写。
    @Bean
	public WebServerFactoryCustomizer<TomcatServletWebServerFactory> webServerFactoryCustomizer(){
		return new WebServerFactoryCustomizer<TomcatServletWebServerFactory>(){
			@Override
			public void customize(TomcatServletWebServerFactory factory) {
				factory.setPort(8084);
			}
		};
	}
}
上面这两种方法二选一,原理都是一样的。
1.2 切换内置Servlet容器
Spring Boot是默认使用tomcat容器的。同时SpringBoot也支持Jetty、Undertow等内置Sevlet容器,可以根据需要切换相应的Servlet容器
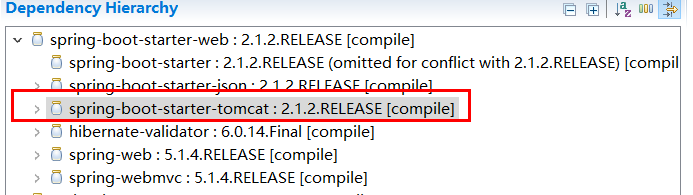
步骤:
1、在web-Starter里排除tomcat的依赖。
       <dependency>
			<groupId>org.springframework.boot</groupId>
			<artifactId>spring-boot-starter-web</artifactId>
			<exclusions>
				<exclusion>
					<artifactId>spring-boot-starter-tomcat</artifactId>
					<groupId>org.springframework.boot</groupId>
				</exclusion>
			</exclusions>
		</dependency>
2、导入其他的Servlet容器依赖。
        <!--引入Jetty-->
        <dependency>
			<artifactId>spring-boot-starter-jetty</artifactId>
			<groupId>org.springframework.boot</groupId>
		</dependency>

		<!--引入Undertow-->
		<dependency>
			<artifactId>spring-boot-starter-undertow</artifactId>
			<groupId>org.springframework.boot</groupId>
		</dependency>
1.3、内置Servlet容器原理
1.3.1 自动配置原理(2.x版本)
这里以2.x版本为例。以tomcat为例。找到内置Servlet容器的自动配置类。在spring-boot-autoconfigure.jar下的org.springframework.boot.autoconfigure.web.servlet.ServletWebServerFactoryAutoConfiguration.class和org.springframework.boot.autoconfigure.web.embedded.EmbeddedWebServerFactoryCustomizerAutoConfiguration.class
ServletWebServerFactoryAutoConfiguration:

@Configuration
@AutoConfigureOrder(Ordered.HIGHEST_PRECEDENCE)
@ConditionalOnClass(ServletRequest.class)
@ConditionalOnWebApplication(type = Type.SERVLET)
@EnableConfigurationProperties(ServerProperties.class)
//BeanPostProcessorsRegistrar是这个类的内部类
@Import({ ServletWebServerFactoryAutoConfiguration.BeanPostProcessorsRegistrar.class,
		ServletWebServerFactoryConfiguration.EmbeddedTomcat.class,
		ServletWebServerFactoryConfiguration.EmbeddedJetty.class,
		ServletWebServerFactoryConfiguration.EmbeddedUndertow.class })
public class ServletWebServerFactoryAutoConfiguration {

    //往容器中导入了ServletWebServerFactoryCustomizer
    //servletWeb服务工程定制器
	@Bean
	public ServletWebServerFactoryCustomizer servletWebServerFactoryCustomizer(
			ServerProperties serverProperties) {
		return new ServletWebServerFactoryCustomizer(serverProperties);
	}
   //导入了TomcatServletWebServerFactoryCustomizer
	@Bean
	@ConditionalOnClass(name = "org.apache.catalina.startup.Tomcat")//当容器中有Tomcat类就生效
	public TomcatServletWebServerFactoryCustomizer tomcatServletWebServerFactoryCustomizer(
			ServerProperties serverProperties) {
		return new TomcatServletWebServerFactoryCustomizer(serverProperties);
	}
   //这个类的作用是往容器中添加一些组件
	public static class BeanPostProcessorsRegistrar
			implements ImportBeanDefinitionRegistrar, BeanFactoryAware {

		private ConfigurableListableBeanFactory beanFactory;

		@Override
		public void setBeanFactory(BeanFactory beanFactory) throws BeansException {
			if (beanFactory instanceof ConfigurableListableBeanFactory) {
				this.beanFactory = (ConfigurableListableBeanFactory) beanFactory;
			}
		}

		@Override
		public void registerBeanDefinitions(AnnotationMetadata importingClassMetadata,
				BeanDefinitionRegistry registry) {
			if (this.beanFactory == null) {
				return;
			}
			//往容器中添加了WebServerFactoryCustomizerBeanPostProcessor组件(web服务工厂定制器的后置处理器)。
			//这个类实现了BeanPostProcessor,属于bean的后置处理器。作用是在bean初始化前后加一些自己的逻辑处理
			registerSyntheticBeanIfMissing(registry,
					"webServerFactoryCustomizerBeanPostProcessor",
					WebServerFactoryCustomizerBeanPostProcessor.class);
			registerSyntheticBeanIfMissing(registry,
					"errorPageRegistrarBeanPostProcessor",
					ErrorPageRegistrarBeanPostProcessor.class);
		}

		private void registerSyntheticBeanIfMissing(BeanDefinitionRegistry registry,
				String name, Class<?> beanClass) {
			if (ObjectUtils.isEmpty(
					this.beanFactory.getBeanNamesForType(beanClass, true, false))) {
				RootBeanDefinition beanDefinition = new RootBeanDefinition(beanClass);
				beanDefinition.setSynthetic(true);
				registry.registerBeanDefinition(name, beanDefinition);
			}
		}

	}

}

EmbeddedWebServerFactoryCustomizerAutoConfiguration:

@Configuration
@ConditionalOnWebApplication
@EnableConfigurationProperties(ServerProperties.class)
public class EmbeddedWebServerFactoryCustomizerAutoConfiguration {

	@Configuration
	//当容器中存在Tomcat相关类就生效,下面几个也是如此,也就是说我们导入哪个依赖,哪个就生效
	@ConditionalOnClass({ Tomcat.class, UpgradeProtocol.class })
	public static class TomcatWebServerFactoryCustomizerConfiguration {

        //导入了TomcatWebServerFactoryCustomizer ,TomcatWeb服务工厂定制器
		@Bean
		public TomcatWebServerFactoryCustomizer tomcatWebServerFactoryCustomizer(
				Environment environment, ServerProperties serverProperties) {
			return new TomcatWebServerFactoryCustomizer(environment, serverProperties);
		}

	}

	@Configuration
	@ConditionalOnClass({ Server.class, Loader.class, WebAppContext.class })
	public static class JettyWebServerFactoryCustomizerConfiguration {

		@Bean
		public JettyWebServerFactoryCustomizer jettyWebServerFactoryCustomizer(
				Environment environment, ServerProperties serverProperties) {
			return new JettyWebServerFactoryCustomizer(environment, serverProperties);
		}

	}

	@Configuration
	@ConditionalOnClass({ Undertow.class, SslClientAuthMode.class })
	public static class UndertowWebServerFactoryCustomizerConfiguration {

		@Bean
		public UndertowWebServerFactoryCustomizer undertowWebServerFactoryCustomizer(
				Environment environment, ServerProperties serverProperties) {
			return new UndertowWebServerFactoryCustomizer(environment, serverProperties);
		}

	}
	@Configuration
	@ConditionalOnClass(HttpServer.class)
	public static class NettyWebServerFactoryCustomizerConfiguration {

		@Bean
		public NettyWebServerFactoryCustomizer nettyWebServerFactoryCustomizer(
				Environment environment, ServerProperties serverProperties) {
			return new NettyWebServerFactoryCustomizer(environment, serverProperties);
		}

	}

}
这两个类的作用是往Spring容器中导入了一些Web服务工厂定制器(xxxWebServerFactoryCustomizer)。而ServletWebServerFactoryAutoConfiguration中使用了@Import注解导入了BeanPostProcessorsRegistrar、EmbeddedTomcat、EmbeddedJetty和EmbeddedUndertow组件。其中后面三个都在ServletWebServerFactoryConfiguration类中,根据依赖的Servle容器使其中一个生效。而BeanPostProcessorsRegistrar是ServletWebServerFactoryAutoConfiguration的内部类(代码见上文),它的作用是往容器中导入了WebServerFactoryCustomizerBeanPostProcessor组件。源码示例:
ServletWebServerFactoryConfiguration:

@Configuration
class ServletWebServerFactoryConfiguration {

	@Configuration
	//如果有这三个类就生效,即如果依赖了tomcat,这个就生效,下面的也是如此
	@ConditionalOnClass({ Servlet.class, Tomcat.class, UpgradeProtocol.class })
	//如果有ServletWebServerFactory就不生效,所以容器中应该只有一个ServletWebServerFactory
	@ConditionalOnMissingBean(value = ServletWebServerFactory.class, search = SearchStrategy.CURRENT)
	public static class EmbeddedTomcat {

        //往容器中导入了TomcatServletWebServerFactory 组件,它继承了ServletWebServerFactory类。
		@Bean
		public TomcatServletWebServerFactory tomcatServletWebServerFactory() {
			return new TomcatServletWebServerFactory();
		}

	}

	@Configuration
	@ConditionalOnClass({ Servlet.class, Server.class, Loader.class,
			WebAppContext.class })
	@ConditionalOnMissingBean(value = ServletWebServerFactory.class, search = SearchStrategy.CURRENT)
	public static class EmbeddedJetty {

		@Bean
		public JettyServletWebServerFactory JettyServletWebServerFactory() {
			return new JettyServletWebServerFactory();
		}

	}
	@Configuration
	@ConditionalOnClass({ Servlet.class, Undertow.class, SslClientAuthMode.class })
	@ConditionalOnMissingBean(value = ServletWebServerFactory.class, search = SearchStrategy.CURRENT)
	public static class EmbeddedUndertow {

		@Bean
		public UndertowServletWebServerFactory undertowServletWebServerFactory() {
			return new UndertowServletWebServerFactory();
		}

	}

}
EmbeddedTomcat往容器中导入了一个TomcatServletWebServerFactory组件,它继承了ServletWebServerFactory类,也继承了WebServerFactory类。WebServerFactoryCustomizerBeanPostProcessor实现了BeanPostProcessor,属于Spring的后置处理器,所以它在Spring创建bean时生效,它的作用就是在WebServerFactory初始化时调用上面自动配置类注入的那些Web服务工厂定制器(xxxWebServerFactoryCustomizer)。代码如下(只截取主要代码):
public class WebServerFactoryCustomizerBeanPostProcessor implements BeanPostProcessor, BeanFactoryAware {

    private List<WebServerFactoryCustomizer<?>> customizers;

    ...
    //bean初始化前调用
	@Override
	public Object postProcessBeforeInitialization(Object bean, String beanName)
			throws BeansException {
		//判断这个bean的类型是WebServerFactory
	    //TomcatServletWebServerFactory继承了WebServerFactory,所以它初始化时,会往下执行
		if (bean instanceof WebServerFactory) {
			postProcessBeforeInitialization((WebServerFactory) bean);
		}
		return bean;
	}
    //bean初始化后调用
	@Override
	public Object postProcessAfterInitialization(Object bean, String beanName)
			throws BeansException {
		return bean;
	}

	@SuppressWarnings("unchecked")
	private void postProcessBeforeInitialization(WebServerFactory webServerFactory) {
		LambdaSafe
		         //获取Web服务工厂定制器(WebServerFactoryCustomizer)
				.callbacks(WebServerFactoryCustomizer.class, getCustomizers(),
						webServerFactory)
				.withLogger(WebServerFactoryCustomizerBeanPostProcessor.class)
				//调用customizer的customize方法,customize方法就是根据相关配置初始化Servlet容器
				.invoke((customizer) -> customizer.customize(webServerFactory));
	}

	private Collection<WebServerFactoryCustomizer<?>> getCustomizers() {
		if (this.customizers == null) {
			// Look up does not include the parent context
			this.customizers = new ArrayList<>(getWebServerFactoryCustomizerBeans());
			this.customizers.sort(AnnotationAwareOrderComparator.INSTANCE);
			this.customizers = Collections.unmodifiableList(this.customizers);
		}
		return this.customizers;
	}

	@SuppressWarnings({ "unchecked", "rawtypes" })
	private Collection<WebServerFactoryCustomizer<?>> getWebServerFactoryCustomizerBeans() {
	    //返回WebServerFactoryCustomizer类型的Customizer(定制器)
	    //上面自动配置类注册的Web服务工厂定制器(xxxWebServerFactoryCustomizer)就是继承了WebServerFactoryCustomizer,
	    //所以这里将那些Customizer(定制器)返回
		return (Collection) this.beanFactory
				.getBeansOfType(WebServerFactoryCustomizer.class, false, false).values();
	}
}
所以当Spring容器创建TomcatServletWebServerFactory的bean时,会调用WebServerFactoryCustomizerBeanPostProcessor ,然后获取所有的Web服务工厂定制器(xxxWebServerFactoryCustomizer),然后调用定制器的customize方法,这个方法是根据配置创建servlet容器。
所以这就是我们在代码实现Servlet容器配置时,需要往容器中注入一个WebServerFactoryCustomizer,而定制器(Customizer)的customize方法实际上也是设置传入的WebServerFactory的属性。
也可以通过注入一个ConfigurableServletWebServerFactory来实现。ConfigurableServletWebServerFactory实现了ServletWebServerFactory,所以自动配置的TomcatServletWebServerFactory(假设容器是tomcat)就不生效,使用我们的,而ConfigurableServletWebServerFactory又继承了WebServerFactory,所以它会走WebServerFactoryCustomizerBeanPostProcessor的流程,经行servlet容器配置。
1.3.2 启动原理
步骤:
1、Spring Boot启动运行run方法。执行到SpringApplication的run(String… args)方法。
只截取相关代码:
public class SpringApplication {

public ConfigurableApplicationContext run(String... args) {
	   ...

		ConfigurableApplicationContext context = null;
	    ...
	       //调用createApplicationContext方法,返回的是
	       //org.springframework.boot.web.servlet.context.AnnotationConfigServletWebServerApplicationContext类
			context = createApplicationContext();

	   ...

			refreshContext(context);

	    ...

		return context;
}

protected ConfigurableApplicationContext createApplicationContext() {
		Class<?> contextClass = this.applicationContextClass;
		if (contextClass == null) {
			try {
				switch (this.webApplicationType) {
				case SERVLET:
				//DEFAULT_SERVLET_WEB_CONTEXT_CLASS=
				//org.springframework.boot.web.servlet.context.AnnotationConfigServletWebServerApplicationContext
					contextClass = Class.forName(DEFAULT_SERVLET_WEB_CONTEXT_CLASS);
					break;
				case REACTIVE:
					contextClass = Class.forName(DEFAULT_REACTIVE_WEB_CONTEXT_CLASS);
					break;
				default:
					contextClass = Class.forName(DEFAULT_CONTEXT_CLASS);
				}
			}
			catch (ClassNotFoundException ex) {
				throw new IllegalStateException(
						"Unable create a default ApplicationContext, "
								+ "please specify an ApplicationContextClass",
						ex);
			}
		}
		return (ConfigurableApplicationContext) BeanUtils.instantiateClass(contextClass);
	}

}
如果是web应用context的类型就是AnnotationConfigServletWebServerApplicationContext。
2、执行refreshContext(context);SpringBoot刷新IOC容器(创建IOC容器对象,并初始化容器,创建容器中的每一
个组件)。一路执行,到refresh(ApplicationContext applicationContext)方法。
protected void refresh(ApplicationContext applicationContext) {
		Assert.isInstanceOf(AbstractApplicationContext.class, applicationContext);
		//将applicationContext强转成AbstractApplicationContext类型,然后调用refresh()方法。
		((AbstractApplicationContext) applicationContext).refresh();
	}
AbstractApplicationContext的refresh()方法。
@Override
	public void refresh() throws BeansException, IllegalStateException {
		synchronized (this.startupShutdownMonitor) {
			// Prepare this context for refreshing.
			prepareRefresh();

			// Tell the subclass to refresh the internal bean factory.
			ConfigurableListableBeanFactory beanFactory = obtainFreshBeanFactory();

			// Prepare the bean factory for use in this context.
			prepareBeanFactory(beanFactory);

			try {
				// Allows post-processing of the bean factory in context subclasses.
				postProcessBeanFactory(beanFactory);

				// Invoke factory processors registered as beans in the context.
				invokeBeanFactoryPostProcessors(beanFactory);

				// Register bean processors that intercept bean creation.
				registerBeanPostProcessors(beanFactory);

				// Initialize message source for this context.
				initMessageSource();

				// Initialize event multicaster for this context.
				initApplicationEventMulticaster();

				// Initialize other special beans in specific context subclasses.
				onRefresh();

				// Check for listener beans and register them.
				registerListeners();

				// Instantiate all remaining (non-lazy-init) singletons.
				finishBeanFactoryInitialization(beanFactory);

				// Last step: publish corresponding event.
				finishRefresh();
			}

			catch (BeansException ex) {
				if (logger.isWarnEnabled()) {
					logger.warn("Exception encountered during context initialization - " +
							"cancelling refresh attempt: " + ex);
				}

				// Destroy already created singletons to avoid dangling resources.
				destroyBeans();

				// Reset 'active' flag.
				cancelRefresh(ex);

				// Propagate exception to caller.
				throw ex;
			}

			finally {
				// Reset common introspection caches in Spring's core, since we
				// might not ever need metadata for singleton beans anymore...
				resetCommonCaches();
			}
		}
	}
主要是onRefresh()方法。因为AbstractApplicationContext是由applicationContext强转的,而applicationContext是AnnotationConfigServletWebServerApplicationContext类型的,所以调用的其实是AnnotationConfigServletWebServerApplicationContext的onRefresh()方法,而AnnotationConfigServletWebServerApplicationContext的onRefresh()方法是从它的父类继承过来的,也就是ServletWebServerApplicationContext的onRefresh()方法。
@Override
	protected void onRefresh() {
		super.onRefresh();
		try {
			createWebServer();
		}
		catch (Throwable ex) {
			throw new ApplicationContextException("Unable to start web server", ex);
		}
	}
它调用了createWebServer方法。
private void createWebServer() {
		WebServer webServer = this.webServer;
		ServletContext servletContext = getServletContext();
		if (webServer == null && servletContext == null) {

		   //获取ServletWebServerFactory
			ServletWebServerFactory factory = getWebServerFactory();
			//执行getWebServer方法
			this.webServer = factory.getWebServer(getSelfInitializer());
		}
		else if (servletContext != null) {
			try {
				getSelfInitializer().onStartup(servletContext);
			}
			catch (ServletException ex) {
				throw new ApplicationContextException("Cannot initialize servlet context",
						ex);
			}
		}
		initPropertySources();
	}

protected ServletWebServerFactory getWebServerFactory() {
		// Use bean names so that we don't consider the hierarchy
		//获取ServletWebServerFactory类型的bean名称
		String[] beanNames = getBeanFactory()
				.getBeanNamesForType(ServletWebServerFactory.class);
		if (beanNames.length == 0) {
			throw new ApplicationContextException(
					"Unable to start ServletWebServerApplicationContext due to missing "
							+ "ServletWebServerFactory bean.");
		}
		if (beanNames.length > 1) {
			throw new ApplicationContextException(
					"Unable to start ServletWebServerApplicationContext due to multiple "
							+ "ServletWebServerFactory beans : "
							+ StringUtils.arrayToCommaDelimitedString(beanNames));
		}
		return getBeanFactory().getBean(beanNames[0], ServletWebServerFactory.class);
	}
在上文的自动配置原理中我们知道了自动配置往容器中注入了TomcatServletWebServerFactory(以tomcat为例,其他Servlet容器相同),而这个类实际上继承了ServletWebServerFactory。所以在这里会被拿到,执行getWebServer方法。TomcatServletWebServerFactory的getWebServer方法:
@Override
	public WebServer getWebServer(ServletContextInitializer... initializers) {
        //创建了tomcat容器对象
		Tomcat tomcat = new Tomcat();
		//配置tomcat相关配置
		File baseDir = (this.baseDirectory != null) ? this.baseDirectory
				: createTempDir("tomcat");
		tomcat.setBaseDir(baseDir.getAbsolutePath());
		Connector connector = new Connector(this.protocol);
		tomcat.getService().addConnector(connector);
		customizeConnector(connector);
		tomcat.setConnector(connector);
		tomcat.getHost().setAutoDeploy(false);
		configureEngine(tomcat.getEngine());
		for (Connector additionalConnector : this.additionalTomcatConnectors) {
			tomcat.getService().addConnector(additionalConnector);
		}
		prepareContext(tomcat.getHost(), initializers);
		return getTomcatWebServer(tomcat);
	}

TomcatWebServer 类
protected TomcatWebServer getTomcatWebServer(Tomcat tomcat) {
		return new TomcatWebServer(tomcat, getPort() >= 0);
	}


public class TomcatWebServer implements WebServer {
   ...
   public TomcatWebServer(Tomcat tomcat, boolean autoStart) {
		Assert.notNull(tomcat, "Tomcat Server must not be null");
		this.tomcat = tomcat;
		this.autoStart = autoStart;
		initialize();
	}

	private void initialize() throws WebServerException {
		logger.info("Tomcat initialized with port(s): " + getPortsDescription(false));
		synchronized (this.monitor) {
			try {
				addInstanceIdToEngineName();

				Context context = findContext();
				context.addLifecycleListener((event) -> {
					if (context.equals(event.getSource())
							&& Lifecycle.START_EVENT.equals(event.getType())) {
						// Remove service connectors so that protocol binding doesn't
						// happen when the service is started.
						removeServiceConnectors();
					}
				});

				// Start the server to trigger initialization listeners
				//启动tomcat
				this.tomcat.start();

				// We can re-throw failure exception directly in the main thread
				rethrowDeferredStartupExceptions();

				try {
					ContextBindings.bindClassLoader(context, context.getNamingToken(),
							getClass().getClassLoader());
				}
				catch (NamingException ex) {
					// Naming is not enabled. Continue
				}

				// Unlike Jetty, all Tomcat threads are daemon threads. We create a
				// blocking non-daemon to stop immediate shutdown
				startDaemonAwaitThread();
			}
			catch (Exception ex) {
				stopSilently();
				throw new WebServerException("Unable to start embedded Tomcat", ex);
			}
		}
	}
}
二、外置Servlet容器
2.1 使用外置Servlet容器
嵌入式的Servlet的容器用起来简单、便携。但是也有缺点:默认不支持jsp,优化定制比较复杂。所以在适当场景下,我们还是需要外部的servlet容器。
使用外置Servlet容器步骤:
1、创建war类型的maven项目。创建好web项目的目录结构(必须有web.xml文件)。
2、将嵌入式的servlet容器依赖的scope指定为provided。
<dependency>
   <groupId>org.springframework.boot</groupId>
   <artifactId>spring-boot-starter-tomcat</artifactId>
   <scope>provided</scope>
</dependency>
3、编写一个SpringBootServletInitializer类型的子类,并重写configure方法。
public class ServletInitializer extends SpringBootServletInitializer {

	@Override
	protected SpringApplicationBuilder configure(SpringApplicationBuilder application) {
		return application.sources(SpringBootWebDemo1Application.class);
	}

}
4、启动容器。
2.2 外置Servlet容器启动原理
原理对比;
jar:执行SpringBoot主类的main方法,调用SpringApplication的run方法,启动Spring的ioc容器,创建嵌入式的Servlet容器。
war:启动服务器,服务器启动SpringBoot的SpringBootServletInitializer,启动Spring的ioc容器。
Servlet3.0+定义了几个web应用在启动时的规则:
(1)容器在启动时会去每个jar包下找META-INF/services/javax.servlet.ServletContainerInitializer文件,如果有则根据这个文件内容创建ServletContainerInitializer的实现类实例。
(2)可以使用@HandlesTypes注解加载需要的类。
启动原理:
1、启动tomcat容器。
2、容器根据Servlet的规则创建SpringServletContainerInitializer。该类在在spring-web-xxx.jar下,这个jar包的META-INF/services/javax.servlet.ServletContainerInitializer文件内容就是SpringServletContainerInitializer的全类名。
@HandlesTypes(WebApplicationInitializer.class)
public class SpringServletContainerInitializer implements ServletContainerInitializer {
    @Override
    //@HandlesTypes标注的所有这个类型的类都传入到onStartup方法的Set中
	public void onStartup(@Nullable Set<Class<?>> webAppInitializerClasses, ServletContext servletContext)
			throws ServletException {

		List<WebApplicationInitializer> initializers = new LinkedList<>();

		if (webAppInitializerClasses != null) {
			for (Class<?> waiClass : webAppInitializerClasses) {
			    //如果这个类不是接口和抽象类,就会创建实例
				if (!waiClass.isInterface() && !Modifier.isAbstract(waiClass.getModifiers()) &&
						WebApplicationInitializer.class.isAssignableFrom(waiClass)) {
					try {
						initializers.add((WebApplicationInitializer)
								ReflectionUtils.accessibleConstructor(waiClass).newInstance());
					}
					catch (Throwable ex) {
						throw new ServletException("Failed to instantiate WebApplicationInitializer class", ex);
					}
				}
			}
		}

		if (initializers.isEmpty()) {
			servletContext.log("No Spring WebApplicationInitializer types detected on classpath");
			return;
		}

		servletContext.log(initializers.size() + " Spring WebApplicationInitializers detected on classpath");
		AnnotationAwareOrderComparator.sort(initializers);
		for (WebApplicationInitializer initializer : initializers) {
		   //每个WebApplicationInitializer调用自己的onStartup方法。
			initializer.onStartup(servletContext);
		}
	}

}
3、SpringBootServletInitializer实现了WebApplicationInitializer接口。所以SpringBootServletInitializer的实现类(上文的ServletInitializer )会被创建对象,并执行onStartup方法。
4、SpringBootServletInitializer实例执行onStartup方法时调用了createRootApplicationContext方法。
protected WebApplicationContext createRootApplicationContext(
			ServletContext servletContext) {
		SpringApplicationBuilder builder = createSpringApplicationBuilder();
		builder.main(getClass());
		ApplicationContext parent = getExistingRootWebApplicationContext(servletContext);
		if (parent != null) {
			this.logger.info("Root context already created (using as parent).");
			servletContext.setAttribute(
					WebApplicationContext.ROOT_WEB_APPLICATION_CONTEXT_ATTRIBUTE, null);
			builder.initializers(new ParentContextApplicationContextInitializer(parent));
		}
		builder.initializers(
				new ServletContextApplicationContextInitializer(servletContext));
		builder.contextClass(AnnotationConfigServletWebServerApplicationContext.class);
		//调用configure方法,子类(上文的ServletInitializer )重写了这个方法
		//并且将SpringBoot的主程序类传入了进来。
		builder = configure(builder);
		builder.listeners(new WebEnvironmentPropertySourceInitializer(servletContext));
		//使用builder创建一个Spring应用
		SpringApplication application = builder.build();
		if (application.getAllSources().isEmpty() && AnnotationUtils
				.findAnnotation(getClass(), Configuration.class) != null) {
			application.addPrimarySources(Collections.singleton(getClass()));
		}
		Assert.state(!application.getAllSources().isEmpty(),
				"No SpringApplication sources have been defined. Either override the "
						+ "configure method or add an @Configuration annotation");
		// Ensure error pages are registered
		if (this.registerErrorPageFilter) {
			application.addPrimarySources(
					Collections.singleton(ErrorPageFilterConfiguration.class));
		}
		//启动Spring应用
		return run(application);
	}
5、Spring应用启动后就创建ioc容器。执行到这一步就和内置Servlet容器启动原理相同了。


 1087
1087


 被折叠的 条评论
为什么被折叠?
被折叠的 条评论
为什么被折叠?
 到【灌水乐园】发言


