


nexus是广为人知的搭建maven私有仓库的工具。
本文记录nexus在安装配置过程中的一些笔记。
使用docker安装nexus
docker-compose.yml配置:
version: '2'

services:
  nexus:
    image: sonatype/nexus3:3.2.0
    ports:
      - 8081:8081
    volumes:
      - /mnt/nexus-data:/nexus-data:Z
第一次启动时会报错,提示挂载的目录写权限不足。需要修改一下挂载目录的所有者:
mkdir nexus-data && chown -R 200 /mnt/nexus-data 参考文档:
https://github.com/sonatype/docker-nexus3
在maven配置文件内,设置私有仓库的账号密码。
有两个地方可以修改maven配置。
一个是global配置。
mac下:如果是使用brew安装:/usr/local/Cellar/maven/3.3.9/libexec/conf/settings.xml
centOS下: /usr/local/apache-maven-3.3.9/conf/settings.xml
Intellij IDE:/Applications/IntelliJ IDEA.app/Contents/plugins/maven/lib/maven3/conf/settings.xml
一个是当前用户的配置:~/.m2/settings.xml
该文件默认不存在,手动创建后, 会覆盖global的配置。
创建settings.xml文件,并将代码拷贝进去:
<settings>
  <mirrors>
    <mirror>
      <!--This sends everything else to /public -->
      <id>nexus</id>
      <mirrorOf>*</mirrorOf>
      <url>http://localhost:8081/repository/maven-public/</url>
    </mirror>
  </mirrors>
  <profiles>
    <profile>
      <id>nexus</id>
      <!--Enable snapshots for the built in central repo to direct -->
      <!--all requests to nexus via the mirror -->
      <repositories>
        <repository>
          <id>central</id>
          <url>http://central</url>
          <releases><enabled>true</enabled></releases>
          <snapshots><enabled>true</enabled></snapshots>
        </repository>
      </repositories>
     <pluginRepositories>
        <pluginRepository>
          <id>central</id>
          <url>http://central</url>
          <releases><enabled>true</enabled></releases>
          <snapshots><enabled>true</enabled></snapshots>
        </pluginRepository>
      </pluginRepositories>
    </profile>
  </profiles>
  <activeProfiles>
    <!--make the profile active all the time -->
    <activeProfile>nexus</activeProfile>
  </activeProfiles>

<servers>
    <server>
      <id>nexus</id>
      <username>admin</username>
      <password>admin123</password>
    </server>
  </servers>

</settings> 将<mirror><url>标签内的地址修改成nexus服务的地址。
<servers>标签内填写nexus服务的账号密码,发布maven项目到nexus时,需要用到。
<server><id>下id需要跟<mirror><id>一致。
拉取maven项目
当拉取maven项目时,流程是:
- nexus检查本地是否存在该项目。
- 如果存在, 直接将该项目返回给客户端。
- 如果不存在,从maven官方仓库中拉取项目,并保存到本地。之后返回给客户端。
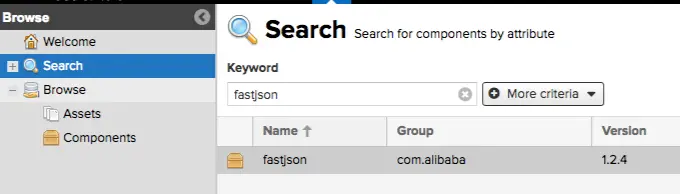
在nexus的web页面上,可以搜索到之前拉取的项目。
发布项目到nexus仓库
首先在项目的pom.xml文件内,指定发布地址:
    <distributionManagement>
        <repository>
            <id>nexus</id>
            <name>Releases</name>
            <url>http://{your-nexus-ip}/repository/maven-releases</url>
        </repository>
        <snapshotRepository>
            <id>nexus</id>
            <name>Snapshot</name>
            <url>http://{your-nexus-ip}/repository/maven-snapshots</url>
        </snapshotRepository>
</distributionManagement> 此处注意:release版本要配置到<repository>标签内。snapshot版本配置到<snapshotRepository>标签内。
使用命令发布项目:mvn clean deploy
log显示上传发布的地址:
[INFO] --- maven-install-plugin:2.5.2:install (default-install) @ base ---
[INFO] Installing /Users/Franklin/Documents/work/hldh/cloud/cloud-base-repo/pom.xml to /Users/Franklin/.m2/repository/com/hldh/cloud/base/1.0-SNAPSHOT/base-1.0-SNAPSHOT.pom
[INFO]
[INFO] --- maven-deploy-plugin:2.8.2:deploy (default-deploy) @ base ---
Downloading: http://nexus.store.com/repository/maven-snapshots/com/hldh/cloud/base/1.0-SNAPSHOT/maven-metadata.xml
Downloaded: http://nexus.store.com/repository/maven-snapshots/com/hldh/cloud/base/1.0-SNAPSHOT/maven-metadata.xml (591 B at 2.7 KB/sec)
Uploading: http://nexus.store.com/repository/maven-snapshots/com/hldh/cloud/base/1.0-SNAPSHOT/base-1.0-20170107.083838-2.pom
Uploaded: http://nexus.store.com/repository/maven-snapshots/com/hldh/cloud/base/1.0-SNAPSHOT/base-1.0-20170107.083838-2.pom (6 KB at 24.7 KB/sec)
Downloading: http://nexus.store.com/repository/maven-snapshots/com/hldh/cloud/base/maven-metadata.xml
Downloaded: http://nexus.store.com/repository/maven-snapshots/com/hldh/cloud/base/maven-metadata.xml (276 B at 2.8 KB/sec)
Uploading: http://nexus.store.com/repository/maven-snapshots/com/hldh/cloud/base/1.0-SNAPSHOT/maven-metadata.xml
Uploaded: http://nexus.store.com/repository/maven-snapshots/com/hldh/cloud/base/1.0-SNAPSHOT/maven-metadata.xml (591 B at 3.0 KB/sec)
Uploading: http://nexus.store.com/repository/maven-snapshots/com/hldh/cloud/base/maven-metadata.xml
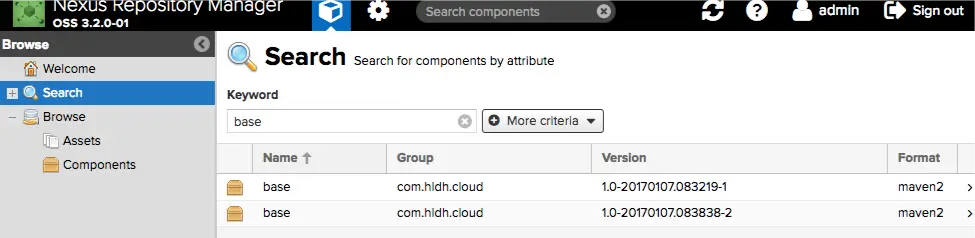
Uploaded: http://nexus.store.com/repository/maven-snapshots/com/hldh/cloud/base/maven-metadata.xml (276 B at 1.1 KB/sec) 说明项目已经发布到nexus上了。
这时候在nexus的web页面上, 就能search到刚刚发布的项目了:
上传第三方jar包到nexus
发布不带pom文件的独立jar包:
mvn deploy:deploy-file -DgroupId=<group-id> \
 -DartifactId=<artifact-id> \
 -Dversion=<version> \
 -Dpackaging=<type-of-packaging> \
 -Dfile=<path-to-file> \
 -DrepositoryId=<id-to-map-on-server-section-of-settings.xml> \
-Durl=<url-of-the-repository-to-deploy> -DrepositoryId的值即为在setttings.xml里面配置的server id。
默认情况下,maven会自动为jar包创建pom文件,如果只想保留独立jar包,可以使用参数关闭这个特性:
-DgeneratePom=false
发布带有pom的jar包
mvn deploy:deploy-file -DpomFile=<path-to-pom> \
 -Dfile=<path-to-file> \
 -DrepositoryId=<id-to-map-on-server-section-of-settings.xml> \
 -Durl=<url-of-the-repository-to-deploy>
参考:
https://maven.apache.org/guides/mini/guide-3rd-party-jars-remote.html
使用nexus常见错误分析
-
Request Entity Too Large[INFO] ------------------------------------------------------------------------ [INFO] BUILD FAILURE [INFO] ------------------------------------------------------------------------ [INFO] Total time: 0.984 s [INFO] Finished at: 2017-01-08T15:20:02+08:00 [INFO] Final Memory: 12M/309M [INFO] ------------------------------------------------------------------------ [ERROR] Failed to execute goal org.apache.maven.plugins:maven-deploy-plugin:2.7:deploy-file (default-cli) on project standalone-pom: Failed to deploy artifacts: Could not transfer artifact emay:emayclient:jar:4.3.4 from/to nexus (http://nexus.store.com/repository/maven-releases/): Failed to transfer file: http://nexus.store.com/repository/maven-releases/emay/emayclient/4.3.4/emayclient-4.3.4.jar. Return code is: 413, ReasonPhrase: Request Entity Too Large. -> [Help 1]原因:nexus服务使用了nginx做反向代理,jar包的大小超过了nginx所允许的范围。
解决方法:修改nginx.conf配置,将client_max_body_size设置为一个较大的值:server { client_max_body_size 10M; listen 80; server_name localhost; location / { proxy_pass http://127.0.0.1:8000/; } } -
maven编译时,报错:
Failure to find org.jfrog.maven.annomojo:maven-plugin-anno:jar:1.4.0 in http://myrepo:80/artifactory/repo
was cached in the local repository, resolution will not be reattempted until the update interval of MyRepo has elapsed or updates are forced -> [Help 1]
原因:服务器之前是使用的官方maven库拉取依赖,本地已经存在jar包,配置了nexus仓库之后,跟之前本地的jar包产生了冲突。
解决方法:删除~/.m2/repository目录下对应的jar包。 或者干脆从新download一遍所有jar包。mvn clean install -U-U表示强制更新所有依赖
-
拉取到本地的第三方库,只有lastUpdated文件,却不见pom和jar文件:
本地报错:[WARNING] The POM for xxx.jar is missing, no dependency information available我一直以为是nexus有bug,代理maven中央仓库时出错。
最后找了好久,发现原来是这个库的groupId改了,而且它还删除了maven中央仓库的groupId对应的包,maven找不到对应的pom和jar包,就只会创建lastUpdated文件。
这次更坚信了nexus的代理机制是很健壮的,出问题一般都是自己本地的问题。
nexus官方文档:
http://books.sonatype.com/nexus-book/reference3/maven.html#maven-sect-single-group


 7507
7507

 被折叠的 条评论
为什么被折叠?
被折叠的 条评论
为什么被折叠?
 到【灌水乐园】发言


