


1.Springboot 集成 Swagger3
(1)版本spring-boot-starter-parent:2.3.5.RELEASE
引入Swagger3 pom
 <dependency>
    <groupId>io.springfox</groupId>
    <artifactId>springfox-boot-starter</artifactId>
    <version>3.0.0</version>
</dependency>
(2)SwaggerConfig 配置类
import io.swagger.annotations.ApiOperation;
import org.springframework.context.annotation.Bean;
import org.springframework.context.annotation.Configuration;
import springfox.documentation.builders.ApiInfoBuilder;
import springfox.documentation.builders.PathSelectors;
import springfox.documentation.builders.RequestHandlerSelectors;
import springfox.documentation.oas.annotations.EnableOpenApi;
import springfox.documentation.service.*;
import springfox.documentation.spi.DocumentationType;
import springfox.documentation.spring.web.plugins.Docket;
@Configuration
@EnableOpenApi
public class SwaggerConfig {
@Bean
public Docket createRestApi() {
return new Docket(DocumentationType.OAS_30)
.apiInfo(apiInfo())
.select()
.apis(RequestHandlerSelectors.withMethodAnnotation(ApiOperation.class))
.paths(PathSelectors.any())
.build();
}
private ApiInfo apiInfo() {
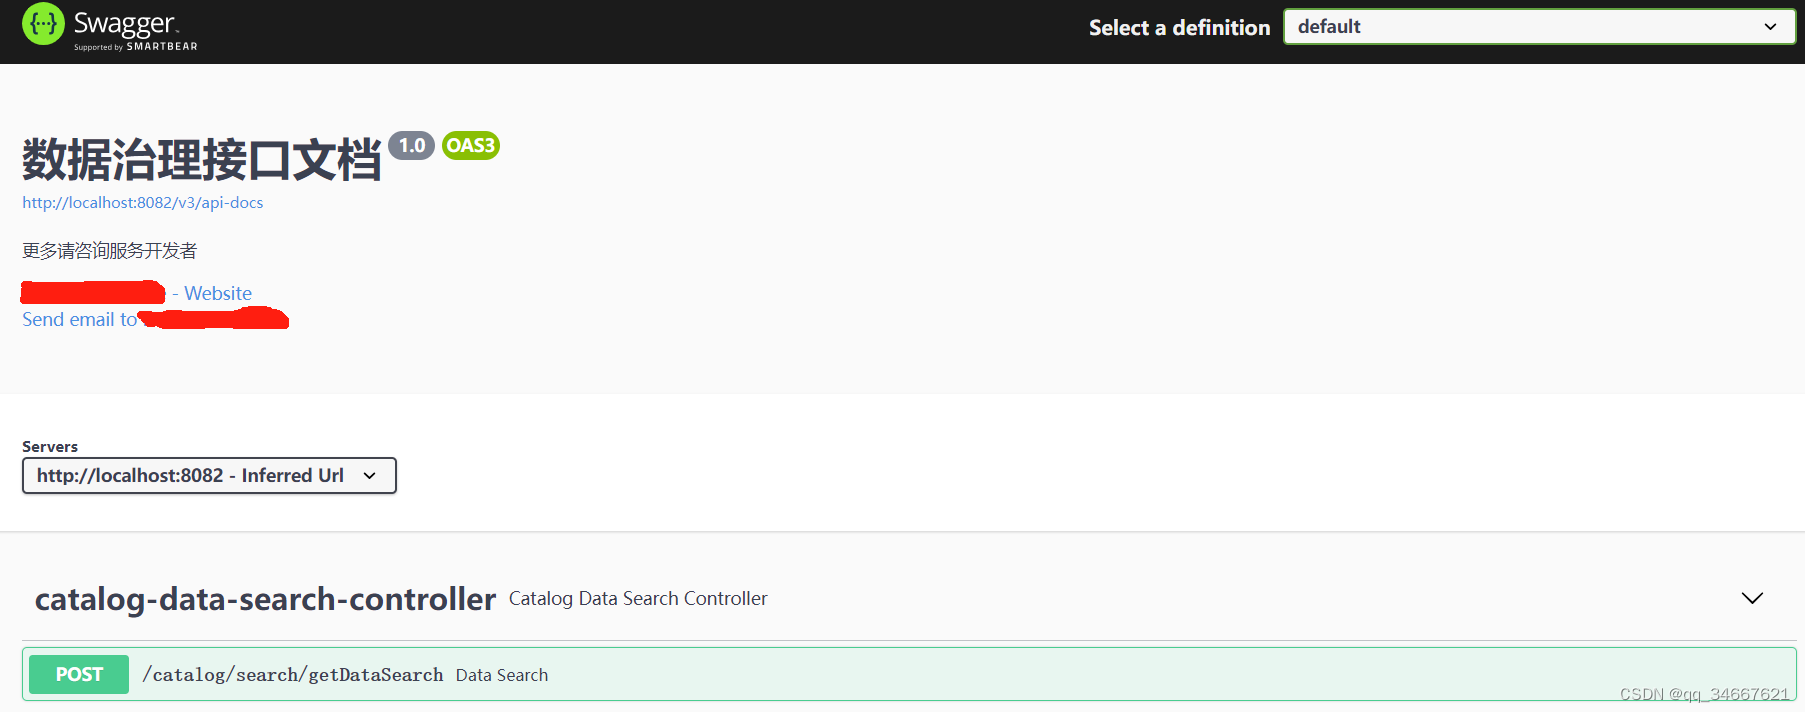
return new ApiInfoBuilder()
.title("接口文档")//标题
.description("更多请咨询服务开发者")//描述
//附加信息
.contact(new Contact("Data", "http://www.baidu.com", "email@111.com"))
.version("1.0")//版本
.build();
}
}
(3)如果有权限认证放行相关接口页面
"/swagger-resources/**", "/swagger-ui/**", "/webjars/**", "/v3/**", "/doc.html/**"
(4)配置开关,一般只在测试环境开启
springfox:
  documentation:
    swagger-ui:
      enabled: true # false关闭swagger-ui界面 但不关闭openapi
(5)访问http://localhost:8082/swagger-ui/index.html
2.Gateway整合Swagger3
(1)Gateway服务引入pom
<!-- swagger3 -->
<dependency>
    <groupId>io.springfox</groupId>
    <artifactId>springfox-boot-starter</artifactId>
    <version>3.0.0</version>
</dependency>
(2)添加SwaggerProvider类到Gateway服务
import lombok.AllArgsConstructor;
import org.springframework.cloud.gateway.config.GatewayProperties;
import org.springframework.cloud.gateway.route.RouteLocator;
import org.springframework.cloud.gateway.support.NameUtils;
import org.springframework.context.annotation.Primary;
import org.springframework.stereotype.Component;
import springfox.documentation.swagger.web.SwaggerResource;
import springfox.documentation.swagger.web.SwaggerResourcesProvider;
import java.util.ArrayList;
import java.util.List;

@Component
@Primary
@AllArgsConstructor
public class SwaggerProvider implements SwaggerResourcesProvider {

    public static final String API_URI = "/v3/api-docs";

    private final RouteLocator routeLocator;

    private final GatewayProperties gatewayProperties;

    /**
     * 这个类是整合的核心,主要切换Select a definition选择框。
     * SwaggerResource设置子服务的name、location、version
     * 根据服务名切换
     */
    @Override
    public List<SwaggerResource> get() {
        List<SwaggerResource> resources = new ArrayList<>();
        List<String> routes = new ArrayList<>();
        //取出gateway的route
        routeLocator.getRoutes().subscribe(route -> routes.add(route.getId()));
        //结合配置的route-路径(Path),和route过滤,只获取有效的route节点
        gatewayProperties.getRoutes().stream().filter(routeDefinition -> routes.contains(routeDefinition.getId()))
                .forEach(routeDefinition -> routeDefinition.getPredicates().stream()
                        .filter(predicateDefinition -> ("Path").equalsIgnoreCase(predicateDefinition.getName()))
                        .forEach(predicateDefinition -> resources.add(swaggerResource(routeDefinition.getId(),
                                predicateDefinition.getArgs().get(NameUtils.GENERATED_NAME_PREFIX + "0")
                                        .replace("/**", API_URI)))));
        return resources;
    }

    private SwaggerResource swaggerResource(String name, String location) {
        SwaggerResource swaggerResource = new SwaggerResource();
        swaggerResource.setName(name);
        swaggerResource.setLocation(location);
        swaggerResource.setSwaggerVersion("3.0.0");
        return swaggerResource;
    }

}
(3)Gateway yml配置
spring:
  #############################新增网关配置###########################
  cloud:
    gateway:
      discovery:
        locator:
          enabled: true #开启从注册中心动态创建路由的功能,利用微服务名进行路由
      httpclient:
        connect-timeout: 30000
        response-timeout: 30s
      routes:

        - id: service
          uri: lb://service
          predicates:
            - Path=/service/data/**
          filters:
            - StripPrefix=1
(4)添加子服务配置
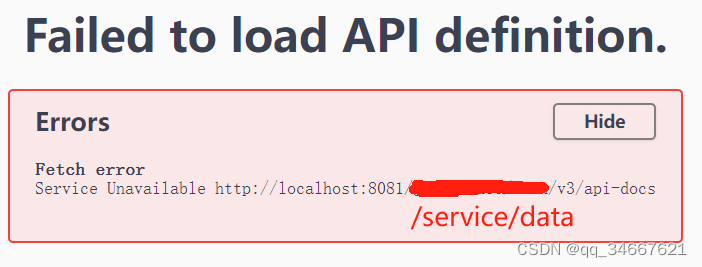
因StripPrefix去掉第一个路由,实际通过网关的请求地址为: http://localhost:8081/service/data/v3/api-docs
转发后的请求地址:http://localhost:8082/data/v3/api-docs
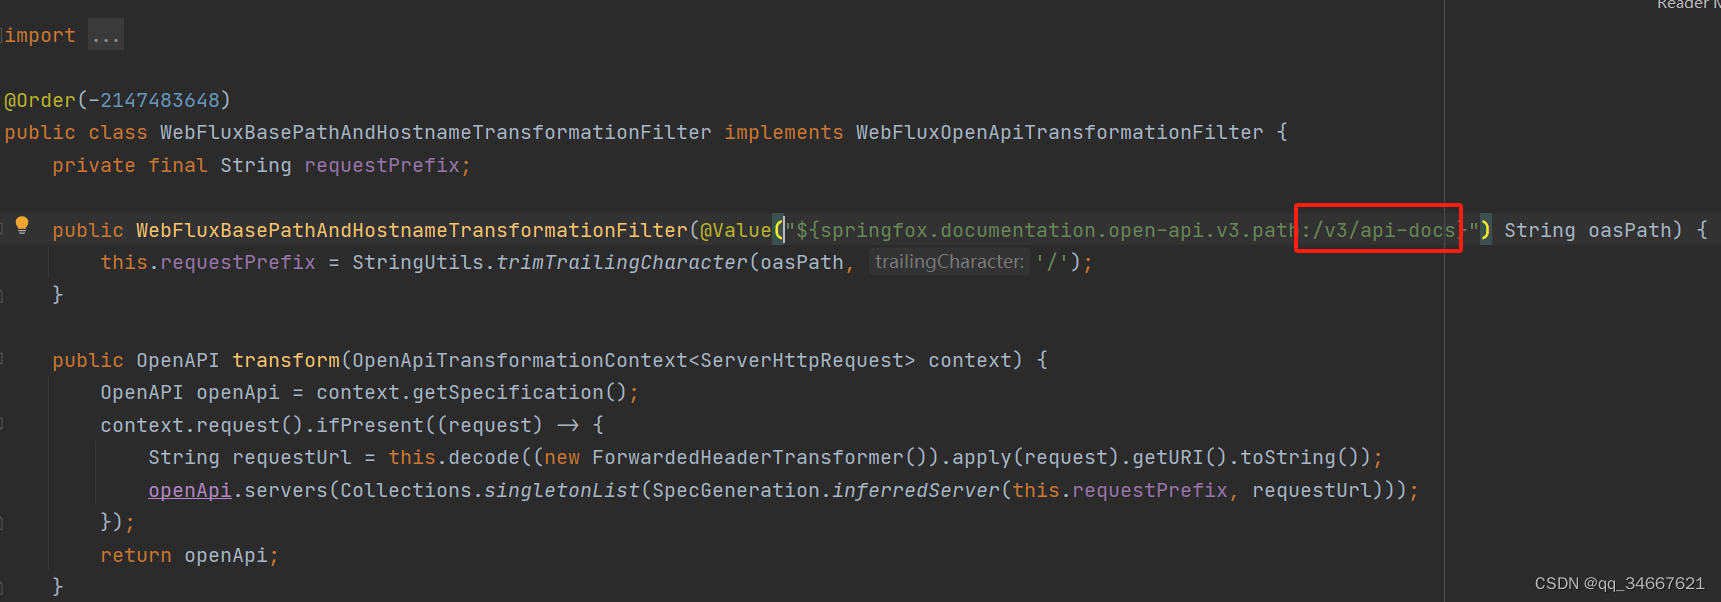
而Swagger3默认的请求:http://localhost:8082/v3/api-docs
导致通过网关请求失败,如下图
在子服务添加如下配置:
springfox:
  documentation:
    open-api:
      v3:
        path: /data/v3/api-docs
(5)通过网关访问http://localhost:8081/swagger-ui/index.html

通过Select a definition 切换服务


 2256
2256


 被折叠的 条评论
为什么被折叠?
被折叠的 条评论
为什么被折叠?
 到【灌水乐园】发言


