


一、VueCLI的使用和单文件组件
1. VueCLI的使用
1.1 前期环境
- 安装 node,会附带 npm。
1.2 安装Vue脚手架工具 @vue/cli
npm install -g @vue/cli
# OR 指定版本
npm install -g @vue/cli@4.5.9
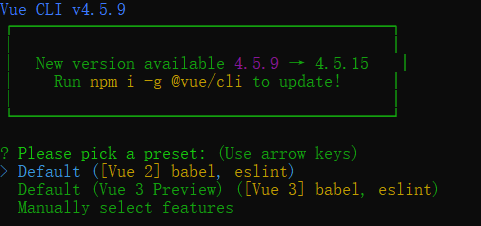
1.3 创建一个 vue 项目
- 运行以下命令来创建一个新项目:
vue create hello-world
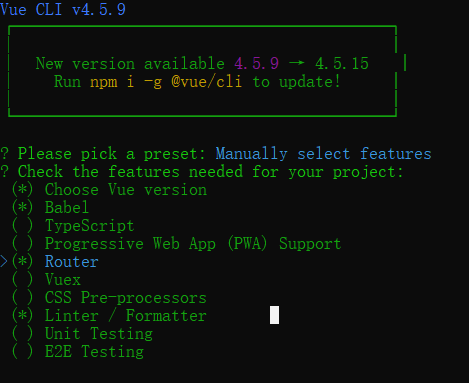
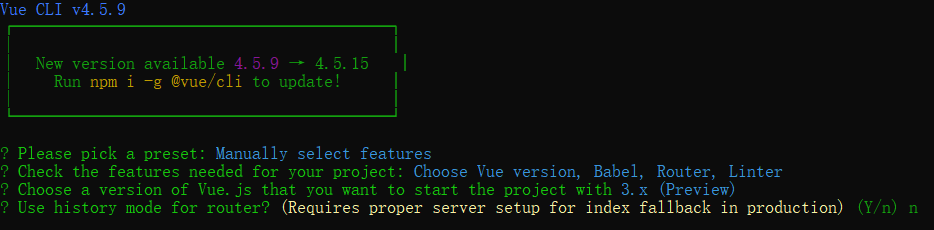
- 你会被提示选取一个 preset。你可以选默认的包含了基本的 Babel + ESLint 设置的 preset,也可以选“手动选择特性”来选取需要的特性。
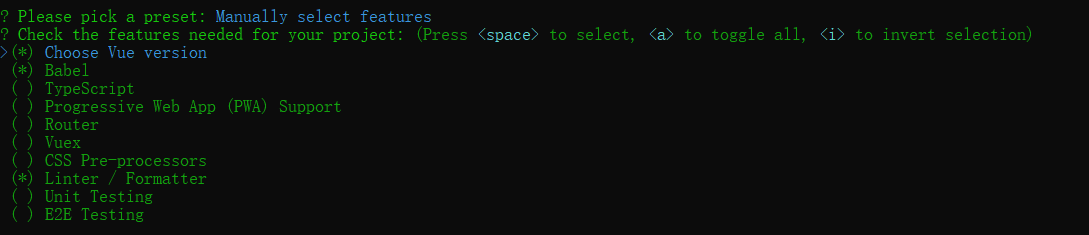
- 演示手动配置,选择 Manually select features
- 选择需要的工具,空格键选择,选择完毕回车进入下一步。
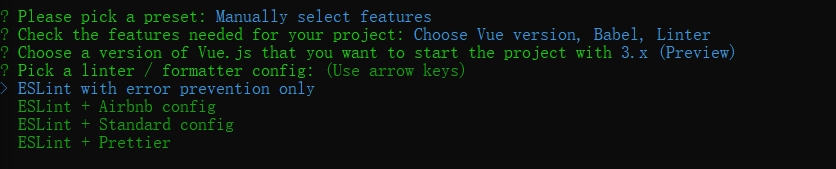
- 选择 Vue 的版本,进入下一步。
- 选择 ESLint 的配置,默认第一项错误时警告,进入下一步。
- 选择 lint 的校验模式,默认第一项保存时校验,进入下一步。
- 选择配置项是保存在新的文件中,还是保存在 package.json 中,进入下一步。
- 选择是否将本次手动配置的过程保存为预设配置,不保存输入 N 即可,配置完成,回车开始安装。
- 安装完毕。
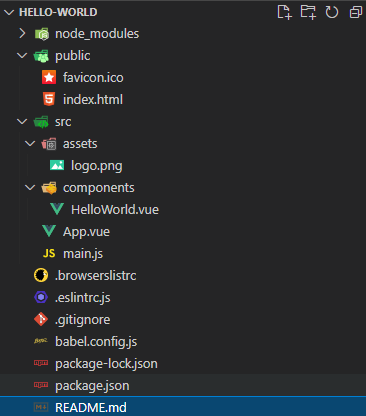
- 目录结构如下:


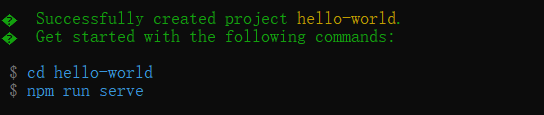
1.4 启动项目
- 进入项目文件夹
cd hello-world
- 启动
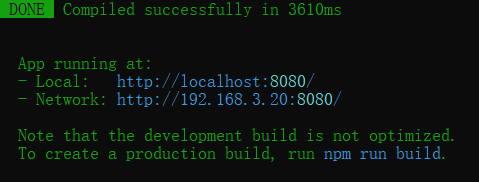
npm run serve
- 启动完成
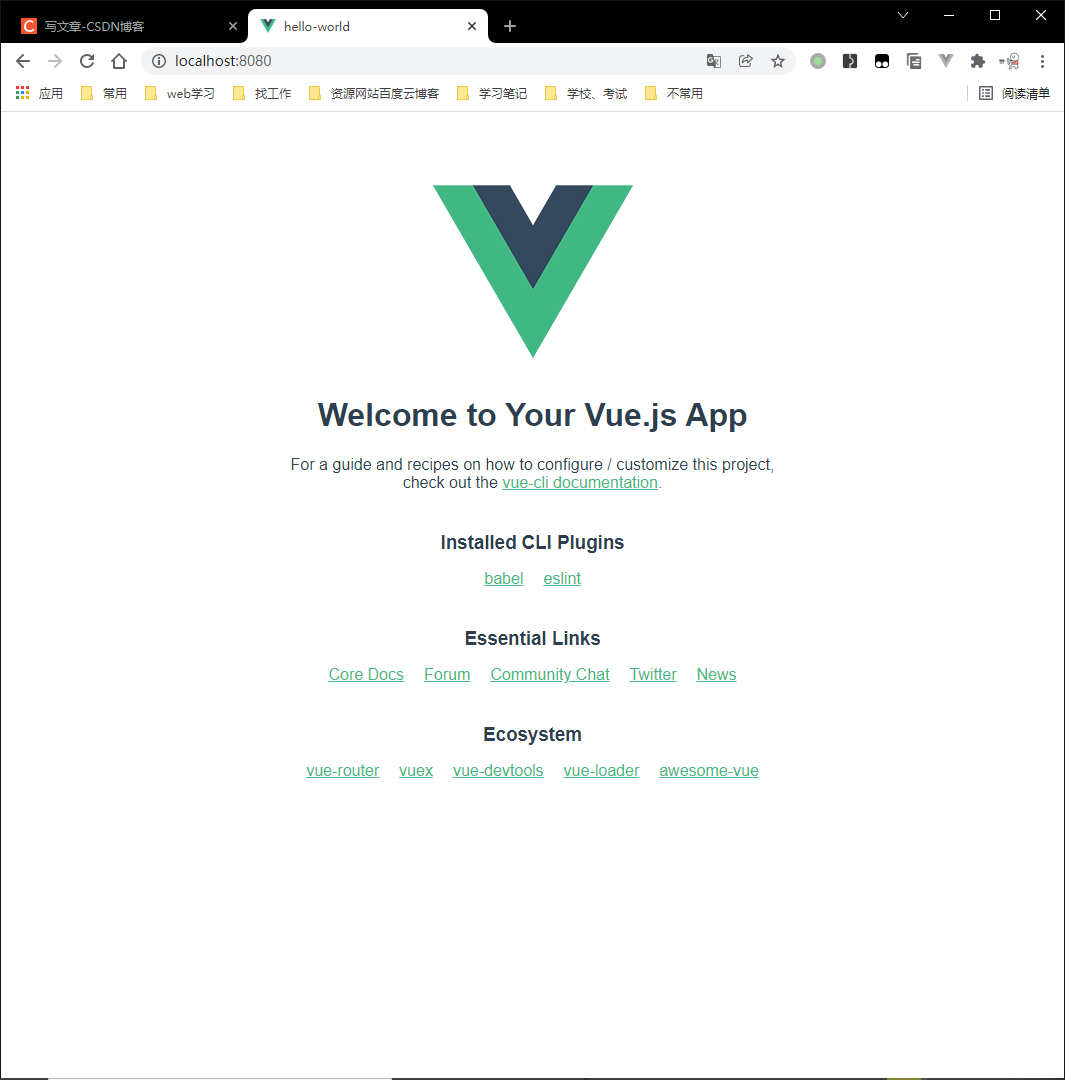
- 打开网页查看效果: http://localhost:8080/
2. 单文件组件
- Vue 单文件组件(又名
*.vue文件,缩写为 SFC)是一种特殊的文件格式,它允许将 Vue 组件的模板(template)、逻辑(js)与 样式(css)封装在单个文件中。- 以上面创建的 App.vue 示例:
<template>
  <img alt="Vue logo" src="./assets/logo.png">
  <HelloWorld msg="Welcome to Your Vue.js App"/>
</template>

<script>
import HelloWorld from './components/HelloWorld.vue'

export default {
  name: 'App',
  components: {
    HelloWorld
  }
}
</script>

<style>
#app {
  font-family: Avenir, Helvetica, Arial, sans-serif;
  -webkit-font-smoothing: antialiased;
  -moz-osx-font-smoothing: grayscale;
  text-align: center;
  color: #2c3e50;
  margin-top: 60px;
}
</style>
- 正如所见,Vue SFC 是经典的 HTML、CSS 与 JavaScript 三个经典组合的自然延伸。
- 每个
*.vue文件由三种类型的顶层代码块组成:<template>、<script>与<style>:
<script>部分是一个标准的 JavaScript 模块。它应该导出一个 Vue 组件定义作为其默认导出。<template>部分定义了组件的模板。<style>部分定义了与此组件关联的 CSS。
二、使用单文件组件编写 TodoList
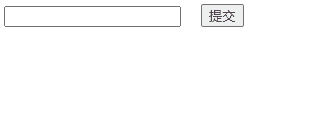
<template>
  <div>
    <input type="text" v-model="inputValue" />
    <button class="button" @click="handleAddItem">提交</button>
  </div>
  <ul>
    <li v-for="(item, index) in list" :key="index">
      {{ item }}
    </li>
  </ul>
</template>

<script>
import { ref, reactive } from "vue";
export default {
  name: "App",
  setup() {
    const inputValue = ref("");
    const list = reactive([]);

    const handleAddItem = () => {
      list.push(inputValue.value);
      inputValue.value = "";
    };
    return { list, inputValue, handleAddItem };
  },
};
</script>

<style>
.button {
  margin-left: 20px;
}
</style>
三、Vue-Router 路由的理解和使用
1. 创建一个包含Vue-Router的项目
其它配置同vue项目的创建一致,需要修改的地方如下:
- 在手动配置时,需要勾选上 Router 工具项
- 在配置 router 的 history mode 时,选择 no,使用哈希路由的模式(适配性更加简单)
2. Vue-Router 的基本使用
- 路由是根据 url 的不同,展示不同的内容。
- router-link 是跳转路由的标签,通过传递 `to` 来指定链接。
<router-link to="/">Home</router-link> |
<router-link to="/about">About</router-link>
- router-view 负责展示当前路由对应的组件内容。
<router-view/>
- 定义路由,通常需要配置 path、name 和 component 这三个属性。
const routes = [
  {
    path: '/',
    name: 'Home',
    // 同步加载路由,跟随首页一起加载
    component: Home
  },
  {
    path: '/about',
    name: 'About',
    // 异步加载路由,懒加载,只有跳转到该路由时才加载。
    // 优点:首页加载更快;缺点:跳转页面时速度较慢。
    component: () => import('../views/About.vue')
  }
]

四、Vuex 的理解和使用
1. Vuex 的语法详解
- Vuex 是一个数据管理框架。
- 常用的三个概念 state、mutations、actions。
2. State
- state 用来存放全局的数据。
// VueX 创建了一个全局唯一的仓库
export default createStore({
  state: {
    name: 'hy'
  }
})
- this.$store 可以获取到 store 实例。
- this.$store.state.name 获取到 store 实例中 state 中 name 属性的值。
<template>
  <div class="home">
    <h1>{{ myName }}</h1>
  </div>
</template>

<script>
export default {
  name: "Home",
  computed: {
    myName() {
      return this.$store.state.name;
    },
  },
};
</script>

3. 通过 Matation 和 action 更改 state 中的数据
- 更改 Vuex 的 store 中的状态的唯一方法是提交 mutation。
- 要唤醒一个 mutation 处理函数,你需要调用对应的 store.commit 方法。
- Action 提交的是 mutation,而不是直接变更状态。
- Action 可以包含任意异步操作。
- Action 通过 store.dispatch 方法触发。
更改数据的步骤:
- dispatch 方法,派发一个 action,名字叫做 change。
- 感知到 change 这个 action,执行 store 中的 actions 下面的 change 方法。
- commit 提交一个叫做 change 的数据改变。
- mutation 感知到提交的 change 改变,执行 change 方法。
import { createStore } from 'vuex'

// VueX 创建了一个全局唯一的仓库
export default createStore({
  state: {
    name: 'hy'
  },
  mutations: {
    // 接受的第一个参数是state
    change(state, str) {
      state.name = str;
    }
  },
  actions: {
    // 接受的第一个参数是 store 实例
    change(store, str) {
      store.commit('change', str);
    }
  },
})
<template> <div class="home"> <h1 @click="handleClick">{{ myName }}</h1> </div> </template> <script> export default { name: "Home", computed: { myName() { return this.$store.state.name; }, }, methods: { handleClick() { this.$store.dispatch("change", 'hy666666'); }, }, }; </script>

4. CompositionAPI 中如何使用 Vuex
- 可以通过调用
useStore函数,来在setup钩子函数中访问 store。- 这与在组件中使用选项式 API 访问
this.$store是等效的。import { createStore } from 'vuex' // VueX 创建了一个全局唯一的仓库 export default createStore({ state: { name: 'hy' }, mutations: { // 接受的第一个参数是state change(state, str) { state.name = str; } }, actions: { // 接受的第一个参数是 store 实例 changeName(store, str) { setTimeout(() => { store.commit('change', str); }, 2000); } }, })<template> <div class="home"> <h1 @click="handleClick">{{ name }}</h1> </div> </template> <script> import { toRefs } from "vue"; import { useStore } from "vuex"; export default { name: "Home", setup() { const store = useStore(); const { name } = toRefs(store.state); const handleClick = () => { store.dispatch("changeName", "hy666666"); }; return { name, handleClick }; }, }; </script>

五、使用 axios 发送 ajax 请求
- 测试接口:https://www.fastmock.site/mock/9dc8e6ff4098e74b6a424f5f17ee4702/test/test
import { createStore } from 'vuex'
import axios from 'axios'

// VueX 创建了一个全局唯一的仓库
export default createStore({
  state: {
    name: 'hy'
  },
  mutations: {
    // 接受的第一个参数是state
    change(state, str) {
      state.name = str;
    }
  },
  actions: {
    // 接受的第一个参数是 store 实例
    changeName(store) {
      axios.get('https://www.fastmock.site/mock/9dc8e6ff4098e74b6a424f5f17ee4702/test/test')
        .then((response) => {
          const data = response.data.message;
          store.commit('change', data);
        })
    }
  },
})
<template> <div class="home"> <h1 @click="handleClick">{{ name }}</h1> </div> </template> <script> import { toRefs } from "vue"; import { useStore } from "vuex"; // https://www.fastmock.site/mock/9dc8e6ff4098e74b6a424f5f17ee4702/test/test export default { name: "Home", setup() { const store = useStore(); const { name } = toRefs(store.state); const handleClick = () => { store.dispatch("changeName"); }; return { name, handleClick }; }, }; </script>


 3420
3420


 被折叠的 条评论
为什么被折叠?
被折叠的 条评论
为什么被折叠?
 到【灌水乐园】发言


