


Spring Cloud Stream
Spring Cloud Stream支持与多种消息中间件整合,如Kafka 、RabbitMQ 等 消息机制引入到微服务,使用SpringIntegration 提供与消息代理之间的连接.
应用模型

-
消息发送通道接口Source
消息发送通道接口, 用于Spring Cloud Stream 与外界通道的绑定,通过注解的方式定义消息通道的名称,发送的消息Spring Cloud Stream会将它序列化,通过MessageChannel接口发送到中间件中, -
消息通道Channel
向消息中间件发送消息时,需要指定所要发送的消息队列或主题的名称,需要定义好消息通道,消息通道具体发送到哪个消息队列则在项目配置文件中进行配置。 -
消息绑定器Binder
定义绑定器作为中间层,实现了应用程序与具体消息中间件细节之间的隔离,向应用程序暴露统一的消息通道。Spring Cloud Stre am 默认提供了对RabbitMQ 和Apache Kafka 的绑定器
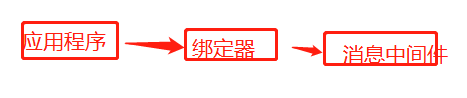
当需要升级或者更改不同的消息中间件时,应用程序只需要更换对应的绑定器即可, 而不需要修改任何应用逻辑。 -
消息监昕通道接口Sink
消息监昕通道接口,当从消息中间件中接收到一个待处理消息时,该接口将负责把消息数据反序列化为Jav a 对象,然后交由业务所定义的具体业务处理方法进行处理。
编程模型
- 声明和绑定消息通道
告诉Spring Cloud Srearn 框架,要连接到消息中间件的哪个通道上
• @EnableBinding:
将我们的应用变成一个Spring Cloud Stream 应用。本身就包含@ Configuration 注解
• @Input:
用在消息监昕通道接口的方法定义上,用来绑定一个接受消息通道
(Sink 接口)
public interface Sink {
	String INPUT = ”input ”;
	//SInk 接口最重要的就是提供一个消息订阅通道, 通过该通道进行消息订阅
	@Input(Sink . INPUT)
	SubscribableChannel input ( ) ;
}
只需在应用配置中设置该消息通道所绑定的Kafka 或RabbitMQ 的消息队列(主题),就可以进行消息
监控了。
• @Output
用在消息发送通道接口的方法定义上,用来绑定消息发送的通道。
(source接口)
public interface Source {
	String OUTPUT = ” output ";
	//Source 接口最重要的就是提供一个消息通道, 可以进行消息发送
	@Output ( Source . OUTPUT)
	MessageChannel output() ;
}
和Sink 接口一样, Source 接口里定义了一个名称为output 的消息发送通道。
Processor 接口:
Spring Cloud Stream 还提供了一个开箱即用的消息通道接口定义Processor
Processor 接口同时继承了Source 和Sink 这两个接口,该接口所定义的通道是一个消
息发送通道同时也是一个消息监听通道。
//Process 接口是同时继承Source 和Sink
public interface Processor extends Source , Sink {}
- 访问消息通道
使用@EnableBinding 绑定的每一个接口, Spring Cloud Stream 都会自动构建一个
Bean , 并实现该接口。当我们通过该Bean 调用哪些注解了@Input 或@Output 的方法时,
就会返回相应的消息发送或订阅通道。
通过source.output()方法获取消息发送通道(MessageChannel ),就可以发送消息了
//通过Source 接口发送消息
@Component
public class HelloWorldSender {
	@Autowired
	private Source source ;
	//或
	//@Autowired
    // private MessageChannel output ;


	public HelloWorldSender (Source source) {
		this . source = source ;
	}
}
//调用Source 中所提供的MessageChannel 发送消息
public void sayHello (String name ) {
	source.output().send(MessageBuilder.withPayload(name). build ());
	//或
	//output.send (MessageBuilder.withPayload (name ).build ());
}
如果在项目中定义了多个消息通道, 在注入的时候还可以增加限定,例如:
可以通过@ Qualifier 限定所要使用的消息通道
@Qualifier ("myOutput " )
MessageChannel output
- 发布或监昕消息
在消息监昕处理时可以使用Spring Integration 的注解或者Spring Cloud Stream 的@StreamListener 注解来实现,一个简单的消息监昕处理代码示例如下:
@EnableBinding (Sink.class )
public class UserMsgHandler {
	@Autowired
	UserService userService ;
	//使用StreamListener 注册一个消息监昕处理
	@StreamListener (Sink.INPUT)
	public void onUserMsg(UserMsg usermsg) {
		userService.log(usermsg) ;
	}
}
MessageConverter 机制会使用contentType 头所指定的消息内容格式(默认为application/j son ),将所接收的消息负载进行反序列化, 解析为Java对象。比如,前面的示例中Spring Cloud S tream 会自动将消息通道中的消息负载反序列化为UserMsg 对象,
消息监听返回数据到其他消息通道时, 可以使用@SendTo 注解指定返回数据的输出
通道
//绑定接口需要替换成Processor
@EnableBinding (Processor.class )
public class TransformProcessor {
	@Autowired
	UserService userService ;
	//@StreamListener 指定监听的通道,@SendTo 指定消息发送的通道
	@StreamListener (Processor.INPUT)
	@SendTo(Processor.OUTPUT)
	public UserResult handle(UserMsg usermsg) {
	return userService . log(usermsg);
	}
}
因为需要发送消息, 因此@EnableBinding 中的参数也需要更改为Processor ,
否则Spring Cloud Stream 不会为我们创建MessageChannel, 也就无法进行后续
的消息发送。
使用kafka作为消息队列
A 对用户微服务添加消息生成
在发送过程中由于使用了消息队列,对transId 需要进行保存传输,使服务日志链不断
- 构建用户变更消息发送器。首先需要在用户微服务中添加对Spring CloudStream 的依赖:
< dependency>
< groupid>org . springframework . cloud< /groupid>
< artifactid>spring-cloud- starter - stream- kafka< /artifactid>
< /dependency>
- 在启动的时候绑定Spring Cloud Stream 的消息代理:
import
@EnableDiscoveryClient
//启动绑定
@EnableBinding (Source.class )
@SpringBootApplication
public class Application {
	public static void main ( String [] args) {
	SpringApplication.run (Application.class, args) ;
	}
}
- 通过在应用引导类中添加@EnableBinding 注解就可以让Spring Cloud Stream 启用一
个消息代理,同时绑定到Source 接口所定义的消息通道( output )中,通过该通道就可以
实现用户变更消息的发送了,具体发送代码如下:
package com . cd826dong . clouddemo . user.service;
import
@Component
public class UserMsgSender {
protected Logger l ogger= LoggerFactory.getLogger(this . getClass( ) ) ;
	//消息的发送就是通过该接口实现的
	@Autowired
	private Source source ;

	public UserMsgSender(Source source) {
		this.source= source ;
	}
	public void sendMsg(UserMsg userMsg) {
		this.logger.debug (”发送用户消息: {} ”, userMsg) ;
		this.source.output( ).send(MessageBuilder.withPayload (userMsg).build()) ;
	}
}
- 需要在用户管理服务的代码中增加消息发送代码。完成修改后的代码如下:
package com.cd826dong.clouddemo.user.service;
import
@Service
public class UserService {
   @Autowired
   protected UserRepository userRepository;
   @Autowired
   protected UserMsgSender userMsgSender;
   @Autowired
   protected Tracer tracer ;
   //下面省略了其他不需要修改的方法
   public UserDto save (UserDto userDto) {
   	User user= this.userRepository . findOne(userDto . getid( ));
   	if (null == user) {
   		user= new User ();
   	}
   	user.setNickname (userDto.getNickname());
   	user.setAvatar(userDt.getAvatar()) ;
   	this.userRepository.save(user) ;
   	//发送用户更新消息
   	this.sendMsg(UserMsg . UA_UPDATE , user.getid()) ;
   	return new UserDto(user) ;
   }

   public void delete(Long id ) {
   	this.userRepository.delete ( id) ;
   	 //发送用户删除消息
   	this.sendMsg(UserMsg.UA_DELETE , id) ;
   }

    //调用UserMsgSender 发送用户变更消息
   protected void sendMsg(String action , Long userid) {
   	this.userMsgSender.sendMsg(new UserMsg(action, userid, this.getTracerid()));
   }

    //获取Sleuth 生成的统一追踪ID
   protected String getTracerid ( ) {
   return this.tracer.getCurrentSpan().traceidString( );
   }
}
- 配置kafka连接
Spring Cloud 怎么知道具体发送到哪个消息中间件及哪个主题呢?因此,我们
还需要对用户微服务做一些配置,告诉Spring Cloud 相应的Kafka 地址等配置信息。所需
要配置的内容如下:
//Kafka 及zoo keeper 配置信息
//Kafka 中的发布主题( Topic ) ,
spring.cloud.stream.bindings.output.destination=cd826-cloud-usertopic
// 在消息发送的时候需要将消息对象转化成JSON 格式的字符串来发送
spring.cloud.stream.bindings.output .content - type=application/json
spring.cloud.stream.kafka.binder.brokers=localhost
spring.cloud.stream.kafka.binder.defaultBrokerPort=9092
spring.cloud.stream kafka.binder.zkNodes=localhost
B 为商品微服务添加消息监昕功能
在发送过程中由于使用了消息队列,对transId 需要进行保存,使服务日志链不断
- 首先在商品微服务项目中添加对Spring Cloud Stream 的依赖。
< dependency>
< groupid>org.springframework.cloud< /groupid>
< artifactid>spring-cloud-starter- stream- kafka< /artifactid>
< /dependency>
- 启动的时候去绑定Sprin g Cloud Stream 的消息代理。
package com . cd826dong . clouddemo . product ;
import
@EnableFeignClients
@EnableDiscoveryClient
//将Spring Cloud Stream 绑定到Sink 所定义的input 通道上,启用一个消息代理,
@EnableBinding(Sink.class )
@SpringBootApplication
@EnableJpaRepositories ({ ”co .cd826dong.**.repository ” })
@ComponentScan (”com.cd826dong.** ” )
public class Application {
	protected Logger logger= LoggerFactory . getLogger(this . getClass()) ;
	public static void main (String [] args ) {
		SpringApplication.run (Application.class , args );

	}
	//一个简单的监听处理,Sink 接口是一个消息订阅接口
	@StreamListener(Sink.INPUT)
	public void onUserMsgSink(UserMsg userMsg) {//自动将input 消息通道中的消息反序列化成该UserMsg 类型。
	this.logger.debug( ” receive user msg : {} ”, userMsg);
	}
}
- 商品微服务的配置文件中增加如下配置:
//Kafka 及zoo keeper 配置信息
//Kafka 中的订阅 主题( Topic ) ,
spring.cloud.stream.bindings.input.destination=cd826-cloud-usertopic
// 在消息发送的时候需要将消息对象转化成JSON 格式的字符串来发送
spring.cloud.stream.bindings.input.content - type=application/json
//指定消费者组,kafka一个消费者组只消费一次prition分区中的消息,不需要每个微服务实例都处理一遍
spring.cloud.stream.bindings.input.group=productGroup
spring.cloud.stream.kafka.binder.brokers=localhost
spring.cloud.stream.kafka.binder.defaultBrokerPort=9092
spring.cloud.stream kafka.binder.zkNodes=localhost
- 将消息代理的绑定、监昕代码及具体业务处理全部统一到一个类UserMsgListener 中
package com.cd826dong.clouddemo.product.mq ;
import
//这里要使用自EnableBinding 开启消息监昕
@ EnableBinding (Sink.class )
public class UserMsgListener {
	protected Logger logger= LoggerFactory . getLogger(this . getClass ());
	@Autowired
	protected UserRedisRepository userRedisRepository ;
	//将监听器绑定到input 消息通道
	@StreamListener (Sink.INPUT)
	public void onUserMsgSink(UserMsg userMsg) {
		if(UserMsg.UA_UPDATE.equalsignoreCase(userMsg.getAction( ) ) ) {
			//收到用户更新消息
			this.logger.debug (” 收到用户更新消息, 所要更新用户的ID : {} ”,
			userMsg.getUserid ());
			this.userRedisRepository.delete(userMsg.getUserid( ));
		} else if (UserMsg.UA DELETE.equalsigioreCase(userMsg.getAction () ) ) {
			//收到用户删除消息
			this.logger.debug (” 收到用户删除消息, 所删除用户的ID : {} ”,userMsg.getUserid {));
			this.userRedisRepository.delete (userMsg.getUserid ( )) ;
		} else {
			//收到未知类型的消息
			this.logger.debug (”收到未知用户消息,用户的ID:{} ” ,userMsg.getUserid() );
	}
}
C 自定义消息通道
前面的示例都是使用Spr ing Cloud Strem 中Source 和Sink 接口所提供的默认消息通道input , output 而在实际生产项目中需要的可能不止一个消息通道,而且需要给消息通道起一个有意义的名称,这样代码维护起来也清晰。
- 增加一个自定义消息发送或者接收的接口
package com.cd826dong.clouddemo.product.mq;
import org.springframework.cloud.stream.annotation.Input ;
import org.springframework.messaging.SubscribableChannel ;
//这里自定义一个名称为inboundUserMsg 的消息通道
public interface SpringCloudBookChannels {
	@Input (”inboundUserMsg”)l
	SubscribableChannel userMsgs();
}
自定义消息通道接口的关键是需要定义一个返回值为SubscribableChannel 的方法。该方法的方法名称可以自定义,但返回值必须是SubscribableChannel 类型,同时在该方法上
增加@Input注解,注解的参数就是自定义的消息通道名称, 这里设置为inboundUserMsg.
如果想自定义一个消息发送通道, 那么所要声明的方法如下:
@Output ( ”outboundUserMsg" )
//方法返回值类型的MessageChannel
MessageChannel userMsgSender() ;
- 将消息发送或者消息监昕者连接到该通道上
@EnableBinding(SpringCloudBookChannels.class)
public class UserMsgListener {
   //省略相同的代码
   @StreamListener ( ”inboundUserMsg” )
   public void onUserMsgSink(UserMsg userMsg) {
   //省略具体的处理代码
   }
}
修改的地方有两处
一处是将@EnableBinding 注解中的参数更改为SpringCloudBookChannels.class
另一处是将@StreamListener 注解的参数修改为inboundUserMsg
- 修改项目配置文件,将该消息通道绑定到消息中间件具体的消息主题上。
input 通道改为inboundUserMsg
//Kafka 及zoo keeper 配置信息
//Kafka 中的订阅 主题( Topic ) ,
spring.cloud.stream.bindings.inboundUserMsg.destination=cd826-cloud-usertopic
// 在消息发送的时候需要将消息对象转化成JSON 格式的字符串来发送
spring.cloud.stream.bindings.inboundUserMsg.content - type=application/json
//指定消费者组,kafka一个消费者组只消费一次prition分区中的消息,不需要每个微服务实例都处理一遍
spring.cloud.stream.bindings.inboundUserMsg.group=productGroup
spring.cloud.stream.kafka.binder.brokers=localhost
spring.cloud.stream.kafka.binder.defaultBrokerPort=9092
spring.cloud.stream kafka.binder.zkNodes=localhost
单元测试
Stream 为开发者提供了一个TestSupportBinder 来支持单元测试,TestsupportBinder 可以模拟访问消息通道,井进行消息的发送与监听。对于消息发送,TestsupportBinder 会注册一个类型为MessageCollector的Bean ,通过该Bean 可以获取到所发送的消息
@RunWith(SpringJUnit4ClassRunner.class)
@SpringApplicationConfiguration(classes = ExampleTest.MyProcessor . class)
@IntegrationTest ({ ” server.port=- 1 " })
@DirtiesContext
public class ExampleTest {
	@Autowired
	private Processor processor;
	@Autowired
	private BinderFactory<MessageChannel> binderFactory ;
	//通过注入该Bean ,可以判断消息发送是否成功
	@Autowired
	private MessageCollecto r messageCollector;
	@Test
	@SuppressWarnings ( ” unchecked ”)
	public void testWiring () {
		//这里模拟发送一个hello 的消息
		Message<String > message= new GenericMessage <>( ” hello ”);
		processor.input().send(message);
		//通过messageCollector 获取上面所发送的消息,并判断是否发送成功
		Message<String> received =
			(Message<String>) messageCollector.forChannel(processor.output()) . poll();
		assertThat(received.getPayload(), equalTo ( ” hello world " ));
	}
	//这里绑定了Processor, Spring Cloud Stream 会同时创建消息发送通道和消息监听通道
	//这样可以同时进行消息发送和监听的测试
	@SpringBootApplication
	@EnableBinding(Processor . class)
	public static class MyProcessor {
		@Autowired
		private Processor channels ;
		@Transformer(inputChannel = Processor . INPUT ,outputChannel = Processor.OUTPUT)
		public String transform(String in) {
			return in + ” world ";
		}
	}
}
错误处理
异步错误处理机制。
当出现异常时,Spring Cloud Stream异常包装成ErrorMessage,然后发送到该消息通道中
全局异常消息通道配置:
//异常消息通道的名称
spring.cloud.stream.bindings.error.destination=myGlobalErrorChannel
消息处理分发
支持将同一个消息通道中的消息,根据条件分发给不同的方法进行处理。相应的方法除了需要@StreamListener 注解外,还需要满足以下条件:
. 该方法没有返回值。
. 该方法只能处理独立的消息,不能是响应式消息处理器。
消息分发的条件可以通过@StreamListener 注解中的condition 属性设定,
在进行消息分发处理时, Spring Cloud Stream会对每一个条件进行求值, 所有符合条件的方法都会在同一个线程中执行,但并不保证执行的顺序。下面就是一个消息分发的示例:
@EnableBinding(Sink.class)
@EnableAutoConfiguration
public static class TestPojoWithAnnotatedArguments {
	//当消息头中type 参数的值为foo 时,使用该方法进行消息处理
	@StreamListener(target = Sink.INPUT, condition = ” headers [’type’]==’foo’” )
	publiC void receiveFoo(@Payload FooPojo fooPojo) {
	//省略具体消息处理
	}

 	//当消息头中type 参数的值为bar 时,使用该方法进行消息处理
	@StreamListener(target = Sink.INPUT , condition = ” headers [’type’]==’bar’”)
	public void receiveBar(@Payload BarPojo barPojo) {
		//省略具体消息处理
	}
}
消息绑定器
Spring Cloud Stream 通过提供了一个抽象的绑定器作为中间层,实现了与具体消息中间件(RabbitMQ 、Kakfa 等)连接
 在进行消息发送前, 需要调用绑定器的bindProducer ()方法,并根据所要绑定的具体消息代理,创建一个消息通道。bindProducer ()方法有以下3 个参数。
• name : 要绑定的消息代理的名称。
• outboundBindTarget : 本地中用来发送消息的通道。
• producerProperties :创建消息通道时的参数,如分区配置等。
对于消息监昕也一样,需要调用bindConsumer() 方法,创建一个消息监昕通道。
bindConsumer () 方法也有以下4 个参数。
• name :要绑定的消息代理的名称。
• group :消费者组名。
• inboundBindTarget : 本地中用来进行消息监昕的通道。
• consumerProperties :创建消息通道时的参数。
实现一个消息绑定器需要以下3 步:
(1)实现Binder 接口。
(2)通过@Configuration 注解对上面的实现类及所要连接的消息中间件进行相关配置的处理,井创建一个Bean 。
(3)在classpath 下的META-INF /spring. binders 文件中(如果没有可自行添加该文件)
按照下面的格式配置该绑定器。
kafka :
org.springframework.cloud.stream.binder.kafka.config.KafkaBinder
Configuration
假如说项目中使用了下面的依赖, 就会自动创建与Kafka 的连接。
< dependency>
< groupid>org . springframework . cloud< /groupid>
< artifactid>spring- cloud- starter- stream- kafka< /artifactid>
< /dependency>
如果项目中包含了多种类型的消息中间件, 那么可以通过下面的配置来设置默认绑定
器, 或者设置某个消息通道所使用的绑定器。
//配置默认的绑定器
spring.cloud.stream.defaultBinder=kafka
//配置input 通道所使用的绑定器
spring . cloud . stream . bindings .input.binder =kafka
//配置output 通道所使用的绑定器
spring.cloud.stream.bindings.output . binder=rabbit
//也可以针对不同通道设置所连接到的中间件
// input 通道连接到192.168 .0 .1 的RabbitMQ
spring.cloud.stream.bindings . input . destination=foo
spring.cloud.stream.bindings . input . binder=rabbitl
spring.cloud.stream.binders . rabbitl . type=rabbit
spring.cloud.stream.binders . rabbitl.environment . spring . rabbitmq .host=192.168 . 0 . 1
//output 通道连接到192.168.0.2 的RabbitMQ
spring . cloud.stream .bindings . output.destination=bar
spring . cloud.stream.bindings . output.binder=rabbit2
spring . cloud.stream.binders . rabbot2 . type=rabbit
spring . cloud.stream.binders . rabbit2.environment . spring . rabbitmq . host=192 . 168 . 0 .2
如果在项目中手动显式地进行了消息绑定器的自己直, Spring Cloud Stream 就
会禁用掉默认的消息绑定器配直, 因此此时必须保证项目中所用的每一个消息绑
定器都有相应的配直。
消息总线一-Spring Cloud Bus
Spring CloudBus 建构在Spring Cloud Stream 之上,是一个轻量级的通信组件,可以将分布式系统中的
节点与轻量级消息代理连接, 从而实现状态更改( 如上面说的配置信息更改) 广播或其他事件的广播。
在实现上Spring Cloud Bus 基于Spring 事件驱动模型。Spring 事件驱动模型包含以下3 个基本概念。
事件: ApplicationEvent;
事件监听者: ApplicationListener;
事件发布者: ApplicationEventPublisher
当修改配置数据并提交到版本管理之后,开发者只需要在配置服务器中访问/bus/refresh 端点,这样配置服务器就会发布配置刷新事件, 商品微服务和用户微服务监昕到事件之后就会自动执行配置刷新处理。下面让我们着手修改代码。
(1 )修改配置服务,引入Spring Cloud Bus , 只需要在项目依赖中增加如下配置即可。
< dependency>
< groupid>org.springframework.cloud< /groupid>
< artifactid>spring-cloud-starter-bus-kafka< /artifactid>
< /dependency>
更改服务器配置:
#关闭管理端点的安全认证,不然执行时会提示没有权限
management.security . enabled=false
#针对Kafka
spring . cloud.stream . kafka . binder.brokers=localhost
spring . cloud.stream . kafka . binder.defaultBrokerPort=9092
spring . cloud.stream . kafka . binder.zkNodes=localhost
#针对RabbitMQ
#spring . rabbitmq . host=localhost
#spring . rabbitmq . port=5672
#spring.rabbit mq . username=yourname
#spring . rabbitmq . password=yourpass


访问http://localhost:2200/ config/foo ,可以得到如下输出:Hi , I ’m development value !
接下来将productservice-dev.properties 文件中的foo 参数值修改为: Now, I’m changing … 。
然后提交到Git 仓库中。然后通过Postman 请求http://localhost:8888/bus/refresh 刷新配置,
再访问http://localhost:2200/ config/foo,就可以获取如下输出:Hi , Now , I ’m changing … .
假如,在更新配置后只想刷新部分微服务,那么此时可在访问/bus/refresh 端点时通过
destination 参数来指定所要刷新的微服务。例如, /bus /refresh?destination= productservice:2200,
这样只会刷新服务名称为productservice 、端口为2200 的微服务。同时在参数中还可以使用
通配符,如productservice:**, 表示要刷新所有productservice 实例。


 446
446


 被折叠的 条评论
为什么被折叠?
被折叠的 条评论
为什么被折叠?
 到【灌水乐园】发言


