


一、TextView及其子类
TextView及其子类间的继承关系图如下:
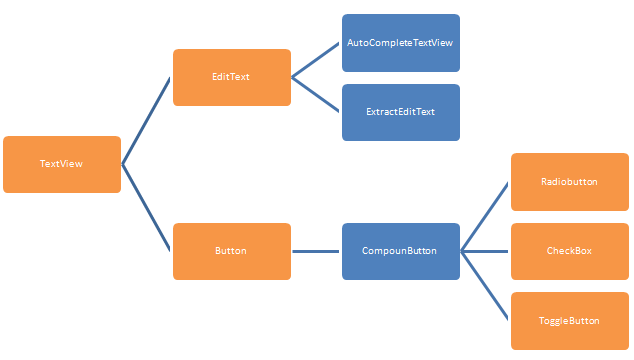
其中橙色框的控件是平时比较常用,所以也就具体总结一下几个常用的控件的使用方式
二、TextView
常用属性:
android:text 指定文本
android:textSize 文本大小,单位推荐用 sp
android:textColor 文本颜色
android:textSyte 设置文本框内文本的字体风格:如粗体、斜体等
android:hint 当该文本内容为空时,文本框内默认显示的提示文本
android:textAllCaps 设置是否将文本框的所有字母都显示为大写
android:singleLine 设置该文本是否为单行模式。如果设为true,文本框不会换行
java代码绑定TextView:
TextView textView=(TextView)findViewById(R.id.tvID);
当然也可以完全使用java代码生成TextView
        RelativeLayout root= (RelativeLayout) findViewById(R.id.root);
        TextView textView=new TextView(this);
        textView.setLayoutParams(new ViewGroup.LayoutParams(
                ViewGroup.LayoutParams.MATCH_PARENT,
                ViewGroup.LayoutParams.WRAP_CONTENT
        ));
        root.addView(textView);
EditText基本用法和TextView类似,有个特别常用的属性
android:inputType,指输入到EditText中的数据种类,如时间、密码、电话号码之类的
实例:
<?xml version="1.0" encoding="utf-8"?>
<RelativeLayout xmlns:android="http://schemas.android.com/apk/res/android"
xmlns:tools="http://schemas.android.com/tools"
android:layout_width="match_parent"
android:layout_height="match_parent"
android:id="@+id/root"
android:paddingBottom="@dimen/activity_vertical_margin"
android:paddingLeft="@dimen/activity_horizontal_margin"
android:paddingRight="@dimen/activity_horizontal_margin"
android:paddingTop="@dimen/activity_vertical_margin"
tools:context="com.example.yougel.textviewdemo.TextViewActivity">
<TextView
android:id="@+id/textId"
android:layout_width="wrap_content"
android:layout_height="wrap_content"
android:textSize="30sp"
android:textColor="@color/colorPrimary"
android:text="请输入密码" />
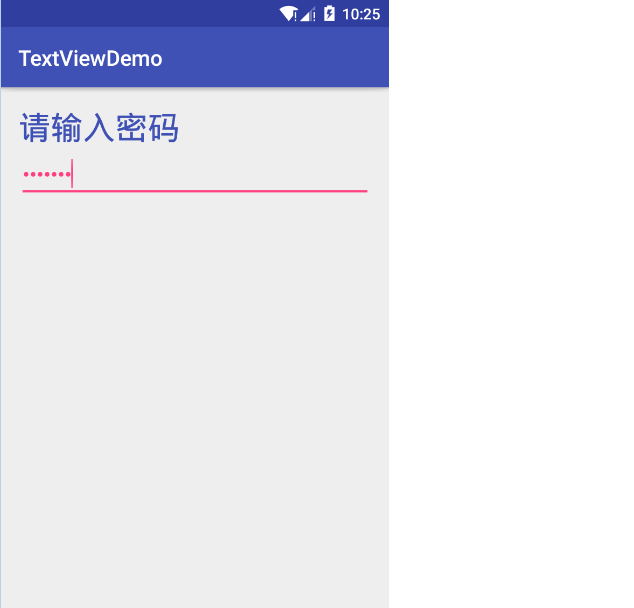
<EditText
android:layout_below="@id/textId"
android:layout_width="match_parent"
android:layout_height="wrap_content"
android:textSize="20sp"
android:textColor="@color/colorAccent"
android:textColorHint="@color/colorAccent"
android:inputType="textPassword"
android:hint="密码"/>
</RelativeLayout>结果:
三、Button
前面总结相对布局时,模仿了开发者头条的两个界面用到Button,Button的常用属性基本与TextView一样,主要了解一下自定义Button的背景以及Button的点击事件。
1、自定义Button的背景
官方提供的Button的样式往往不是我们想要的,这时,我们可以通过在drawable目录下新建一个drawable资源文件来自定义我们Button背景
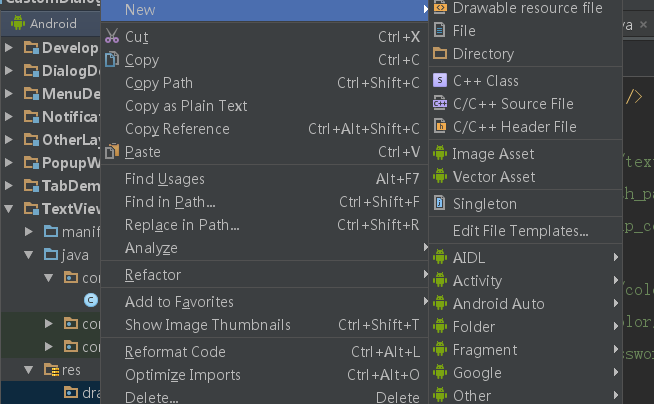
自定义一个drawable资源文件button_bg_style.xml
<?xml version="1.0" encoding="utf-8"?>
<selector xmlns:android="http://schemas.android.com/apk/res/android">
    <item android:state_pressed="false">
        <shape android:shape="rectangle">
            <solid android:color="@color/btn_bg_f"/>
            <corners android:radius="6dp"/>
            <stroke android:color="@color/colorPrimary" android:width="1dp"/>
        </shape>
    </item>
    <item android:state_pressed="true">
        <shape android:shape="rectangle">
            <solid android:color="@color/btn_bg_t"/>
            <corners android:radius="6dp"/>
            <stroke android:color="@color/colorPrimaryDark" android:width="1dp"/>
        </shape>
    </item>
</selector>
布局文件在上面TextView的基础上加一个Button:
<Button
        android:id="@+id/btn_set"
        android:layout_below="@id/passedit"
        android:layout_width="match_parent"
        android:layout_height="wrap_content"
        android:background="@drawable/button_bg_style"
        android:text="确定"
        android:textColor="@color/text"
        />
Activity中的代码:
package com.example.yougel.textviewdemo;

import android.support.v7.app.AppCompatActivity;
import android.os.Bundle;
import android.view.View;
import android.widget.Button;
import android.widget.EditText;
import android.widget.TextView;

public class TextViewActivity extends AppCompatActivity {

    TextView textView;
    EditText editText;
    Button button;
    @Override
    protected void onCreate(Bundle savedInstanceState) {
        super.onCreate(savedInstanceState);
        setContentView(R.layout.activity_text_view);
        initTextView();
    }
    public void initTextView(){
        textView= (TextView) findViewById(R.id.textId);
        editText= (EditText) findViewById(R.id.passedit);
        button= (Button) findViewById(R.id.btn_set);
        button.setOnClickListener(new View.OnClickListener() {
            @Override
            public void onClick(View v) {
                textView.setText("您输入的密码是:"+editText.getText());
            }
        });
    }
}
最后的界面效果:
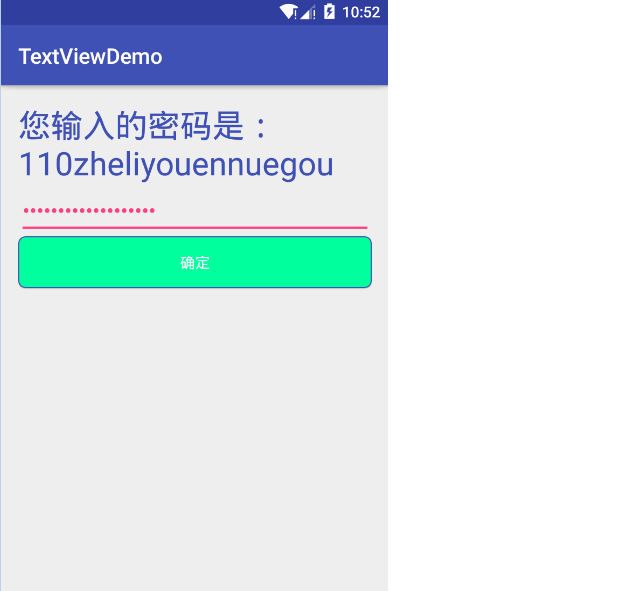
当然Button还有其他一些属性就不一一介绍,例如文字阴影效果之类的。
四、RadioButton、CheckBox和Switch
RadioButton的使用通常需要一个RadioGroup
布局文件中:
<TextView
android:layout_width="wrap_content"
android:layout_height="wrap_content"
android:text="@string/tv_Gender" />
<RadioGroup
android:layout_width="wrap_content"
android:layout_height="wrap_content"
android:orientation="horizontal"
android:id="@+id/rg_gender">
<RadioButton
android:layout_width="wrap_content"
android:layout_height="wrap_content"
android:text="@string/male"/>
<RadioButton
android:layout_width="wrap_content"
android:layout_height="wrap_content"
android:text="@string/female"/>
</RadioGroup>
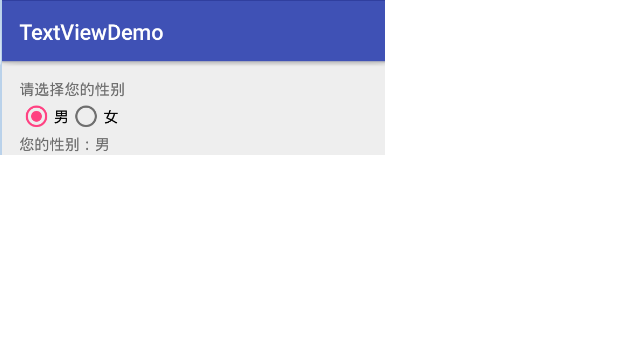
<TextView
android:layout_width="wrap_content"
android:layout_height="wrap_content"
android:id="@+id/result_gender"/>Activity中的代码:
RadioGroup rgGender;
rgGender= (RadioGroup) findViewById(R.id.rg_gender);
rgGender.setOnCheckedChangeListener(new RadioGroup.OnCheckedChangeListener() {
            @Override
            public void onCheckedChanged(RadioGroup radioGroup, int i) {
                int radioId=radioGroup.getCheckedRadioButtonId();//获取选中按钮的ID
                RadioButton checkedRadio= (RadioButton) findViewById(radioId);
                TextView result_gender= (TextView) findViewById(R.id.result_gender);
                result_gender.setText("您的性别:"+checkedRadio.getText());
            }
        });
界面:
RadioGroup也有android:orientation属性,用于设置单选按钮水平还是垂直排列
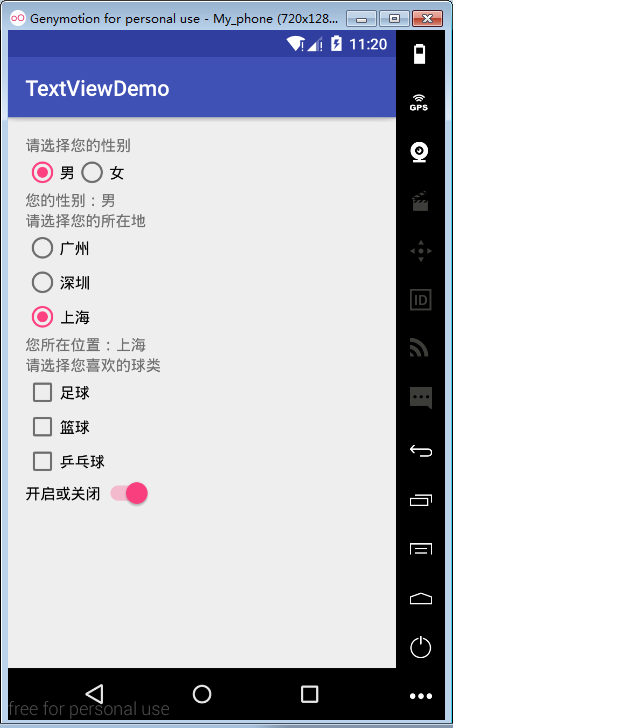
关于CheckBox与Switch与RadioButton类似只是不需要添加到一个组中,所以下面就直接展示所有代码已经界面
布局文件:
<?xml version="1.0" encoding="utf-8"?>
<LinearLayout xmlns:android="http://schemas.android.com/apk/res/android"
    xmlns:tools="http://schemas.android.com/tools"
    android:orientation="vertical"
    android:layout_width="match_parent"
    android:layout_height="match_parent"
    android:paddingBottom="@dimen/activity_vertical_margin"
    android:paddingLeft="@dimen/activity_horizontal_margin"
    android:paddingRight="@dimen/activity_horizontal_margin"
    android:paddingTop="@dimen/activity_vertical_margin"
    tools:context="com.example.yougel.textviewdemo.CompounButtonActivity">
    <TextView
        android:layout_width="wrap_content"
        android:layout_height="wrap_content"
        android:text="@string/tv_Gender" />
    <RadioGroup
        android:layout_width="wrap_content"
        android:layout_height="wrap_content"
        android:orientation="horizontal"
        android:id="@+id/rg_gender">
        <RadioButton
            android:layout_width="wrap_content"
            android:layout_height="wrap_content"
            android:text="@string/male"/>
        <RadioButton
            android:layout_width="wrap_content"
            android:layout_height="wrap_content"
            android:text="@string/female"/>
    </RadioGroup>
    <TextView
        android:layout_width="wrap_content"
        android:layout_height="wrap_content"
        android:id="@+id/result_gender"/>
    <TextView
        android:layout_width="wrap_content"
        android:layout_height="wrap_content"
        android:text="@string/tv_Place"/>
    <RadioGroup
        android:layout_width="wrap_content"
        android:layout_height="wrap_content"
        android:orientation="vertical"
        android:id="@+id/rg_place">
        <RadioButton
            android:layout_width="wrap_content"
            android:layout_height="wrap_content"
            android:text="@string/gz"/>
        <RadioButton
            android:layout_width="wrap_content"
            android:layout_height="wrap_content"
            android:text="@string/sz"/>
        <RadioButton
            android:layout_width="wrap_content"
            android:layout_height="wrap_content"
            android:text="@string/sh"/>
    </RadioGroup>
    <TextView
        android:layout_width="wrap_content"
        android:layout_height="wrap_content"
        android:id="@+id/result_place"/>
    <TextView
        android:layout_width="wrap_content"
        android:layout_height="wrap_content"
        android:text="@string/tv_ball"/>
    <CheckBox
        android:layout_width="wrap_content"
        android:layout_height="wrap_content"
        android:id="@+id/football"
        android:text="@string/football"/>
    <CheckBox
        android:layout_width="wrap_content"
        android:layout_height="wrap_content"
        android:id="@+id/basketball"
        android:text="@string/basketball"/>
    <CheckBox
        android:layout_width="wrap_content"
        android:layout_height="wrap_content"
        android:id="@+id/pingpang"
        android:text="@string/pingpang"/>
    <Switch
        android:layout_width="wrap_content"
        android:layout_height="wrap_content"
        android:text="@string/up_or_down"
        android:id="@+id/up_or_down"/>
</LinearLayout>
Activity代码:
package com.example.yougel.textviewdemo;

import android.content.Context;
import android.support.v7.app.AppCompatActivity;
import android.os.Bundle;
import android.widget.CheckBox;
import android.widget.CompoundButton;
import android.widget.RadioButton;
import android.widget.RadioGroup;
import android.widget.Switch;
import android.widget.TextView;
import android.widget.Toast;

public class CompounButtonActivity extends AppCompatActivity {

    RadioGroup rgGender,rgPlace;
    CheckBox ch1,ch2,ch3;
    Switch aSwitch;
    @Override
    protected void onCreate(Bundle savedInstanceState) {
        super.onCreate(savedInstanceState);
        setContentView(R.layout.activity_compoun_button);
        iniRadio();
        iniCheckbox();
        iniSwitch();
    }

    //初始化Radio
    public void iniRadio(){
        rgGender= (RadioGroup) findViewById(R.id.rg_gender);
        rgPlace=(RadioGroup) findViewById(R.id.rg_place);
        rgGender.setOnCheckedChangeListener(new RadioGroup.OnCheckedChangeListener() {
            @Override
            public void onCheckedChanged(RadioGroup radioGroup, int i) {
                int radioId=radioGroup.getCheckedRadioButtonId();//获取选中按钮的ID
                RadioButton checkedRadio= (RadioButton) findViewById(radioId);
                TextView result_gender= (TextView) findViewById(R.id.result_gender);
                result_gender.setText("您的性别:"+checkedRadio.getText());
            }
        });
        rgPlace.setOnCheckedChangeListener(new RadioGroup.OnCheckedChangeListener() {
            @Override
            public void onCheckedChanged(RadioGroup radioGroup, int i) {
                int radioId=radioGroup.getCheckedRadioButtonId();
                RadioButton checkedRadio= (RadioButton) findViewById(radioId);
                TextView result_place= (TextView) findViewById(R.id.result_place);
                result_place.setText("您所在位置:"+checkedRadio.getText());
            }
        });
    }
    //初始化CheckBox
    public void iniCheckbox(){
        ch1=(CheckBox) findViewById(R.id.football);
        ch2=(CheckBox)findViewById(R.id.basketball);
        ch3=(CheckBox)findViewById(R.id.pingpang);
        ch1.setOnCheckedChangeListener(new MyClick());
        ch2.setOnCheckedChangeListener(new MyClick());
        ch3.setOnCheckedChangeListener(new MyClick());
    }
    class MyClick implements CheckBox.OnCheckedChangeListener{

        @Override
        public void onCheckedChanged(CompoundButton compoundButton, boolean b) {
            Toast.makeText(
                getContext(),
                (b?"选中了":"取消了")+compoundButton.getText(),
                Toast.LENGTH_SHORT
            ).show();
        }
    }
    //初始化开关
    public void iniSwitch(){
        aSwitch= (Switch) findViewById(R.id.up_or_down);
        aSwitch.setOnCheckedChangeListener(new CompoundButton.OnCheckedChangeListener() {
            @Override
            public void onCheckedChanged(CompoundButton compoundButton, boolean b) {
                Toast.makeText(
                        getContext(),
                        (b?"开启":"关闭"),
                        Toast.LENGTH_SHORT
                ).show();
            }
        });
    }
    private Context getContext(){
        return  this;
    }
}
界面:


 1170
1170

 被折叠的 条评论
为什么被折叠?
被折叠的 条评论
为什么被折叠?
 到【灌水乐园】发言


