


Nginx优势
- C语言架构,可阅读性强
- 文档超级全面
- 开源社区活跃,问题能够得到很快的反应
- 性能高
安装
指令安装方式
apt-get install nginx
源码安装方式
预先安装要求
sudo apt-get install openssl libssl-dev libpcre3 libpcre3-dev zlib1g-dev -y
wget http://nginx.org/download/nginx-1.16.1.tar.gz
tar xvf nginx-1.16.1.tar.gz
cd nginx-1.16.1
./configure
make
make install
操作
控制方式
- 启动的时候
- conf文件解析的时候
- 运行时候的接收到请求
3.1 http
3.2 rtmp
3.3 smtp
启动
下面指令中nginx.conf是配置文件
cd /usr/local/nginx
./sbin/nignx -c conf/nginx.conf

conf原理
配置进程数
worker_processes 1;
配置每一个进程对应的连接数
events {
	worker_connections  1024;
}
链接方式
键值对的链接方式
比如下面复制自nginx.conf的这部分代码内容
http {
    include       mime.types;
    default_type  application/octet-stream;

    sendfile        on;
    #tcp_nopush     on;

    #keepalive_timeout  0;
    keepalive_timeout  65;

    #gzip  on;

		server {
        listen       80;
        server_name  localhost;

        #charset koi8-r;

        #access_log  logs/host.access.log  main;

        location / {
            root   html;
            index  index.html index.htm;
        }
        error_page   500 502 503 504  /50x.html;
        location = /50x.html {
            root   html;
        }
    }
}
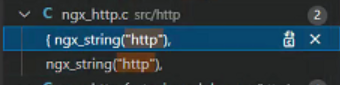
我们可以去源码中搜索==“http”==,可以找到下图结果
static ngx_command_t  ngx_http_commands[] = {

    { ngx_string("http"),
      NGX_MAIN_CONF|NGX_CONF_BLOCK|NGX_CONF_NOARGS,
      ngx_http_block,
      0,
      0,
      NULL },

      ngx_null_command
};


static ngx_core_module_t  ngx_http_module_ctx = {
    ngx_string("http"),
    NULL,
    NULL
};
不难发现,这是依据conf文件中的配置项去匹配对应的任务,比如这里的gnx_http_block就是启动http_server的入口函数。
配置路径
location /request_path {
		root   resource_path;
		index  index.html index.htm;
}
如果需要请求该资源,则需要发出如下请求
请求路径
- 上述例子中的==request_path ==便是由外界请求该地址处相关资源的路径,对外路径
- 默认为 / 不带其他路径
GET /request_path HTTP/1.1
资源路径
- 上述例子中的resource_path便是内部访问资源的路径
- 默认为html
转发路径
location /request_path {
		proxy_pass http://192.168.1.17:8888
}
设置负载均衡
下例中设置服务器192.168.1.28与服务器192.168.1.29:8888的负载均衡为2:1, 即外界访问192.168.1.28两次后将访问192.168.1.29:8888一次,接着两次将继续访问server 192.168.1.28
http {
upstream backend {
server 192.168.1.28 weight=2;
server 192.168.1.29:8888 weight=1;
}
server {
listen 9999;
location / {
root html;
proxy_pass http://backend;
}
}
}


 1660
1660


 被折叠的 条评论
为什么被折叠?
被折叠的 条评论
为什么被折叠?
 到【灌水乐园】发言


