


1、hystrix是Netflix开发的用于分布式限流熔断的组件,其作用就是进行系统的过载保护,接下来我们来看看在spring-cloud中如何使用hystrix。
2、hystrix的作用及就是过载保护,就像我们家庭用电中的保险丝一样,当负载较大的时候保险丝回进行熔断,以保护哥电路元器件,在网络应用系统中也同样回面临这样的问题,因此hystrix出现了。
3、hystrix熔断的方式一共有两种:
第一种:超时触发熔断,顾名思义就是当业务代码执行超时的时候会触发断路器进行熔断。
第二种:资源隔离触发熔断,含义就是当资源被消耗完成就触发熔断,资源隔离触发降级在hystrix中主要有线程池、信号量。
4、Hystrix常用案例:
第一:演示超时触发熔断:
项目pom.xml:
    <dependencies>
        <dependency>
            <groupId>org.springframework.boot</groupId>
            <artifactId>spring-boot-starter-web</artifactId>
        </dependency>

        <dependency>
            <groupId>org.springframework.cloud</groupId>
            <artifactId>spring-cloud-starter-netflix-eureka-client</artifactId>
        </dependency>

        <dependency>
            <groupId>org.springframework.cloud</groupId>
            <artifactId>spring-cloud-starter-netflix-hystrix</artifactId>
        </dependency>

        <dependency>
            <groupId>com.wzy</groupId>
            <artifactId>order-feignclient</artifactId>
            <version>${project.version}</version>
        </dependency>
    </dependencies>
项目启动类:
@SpringBootApplication
@EnableDiscoveryClient
@EnableFeignClients(clients = {OrderFeignClient.class})

//其他的注解不要管,因为我还集成了其他组件,主要看这个开启断路器
@EnableCircuitBreaker
public class UserService {

    public static void main(String[] args) {
        SpringApplication.run(UserService.class, args);
    }
}
超时触发熔断案例:
@RestController
@RequestMapping("say")
public class HystrixTestController {
超时触发降级
@GetMapping("sayHello")
配置一个熔断后,进行方法降级,降级的方式是sayHelloFallback,只要方法签名与被保护的方法签名一致即可
@HystrixCommand(fallbackMethod = "sayHelloFallback",commandProperties = {
配置超时时间为1秒
@HystrixProperty(name="execution.isolation.thread.timeoutInMilliseconds", value = "1000")
})
public String sayHello(String userName){
try {
业务方法我们让线程sleep 1.2秒
Thread.sleep(1200L);
} catch (InterruptedException e) {
e.printStackTrace();
}
return "hello, " + userName;
}
超时后触发熔断,熔断后回自动进行降级,fallback可理解为退路,就是服务出现问题后的退路,
hystrix在触发熔断的时候回调用我们的fallback退路处理方法。
public String sayHelloFallback(String userName){
return "fallback :" + userName;
}
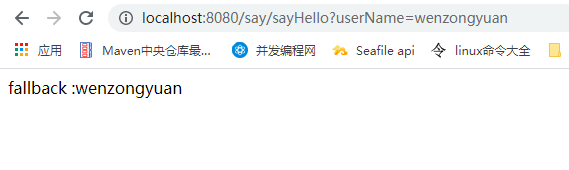
}演示效果:调用到降级方法了吧!
第二:演示常用的线程池进行熔断配置:
    常用的线程池隔离进行熔断控制的配置详解
    @GetMapping("sayHi")
    @HystrixCommand(
            1、配置一个hystrix命令的key,建议配置为一个唯一key,可以不配置,默认为被标注解的方法名称。
            commandKey = "com.wzy.userservice.controller.sayHi",

            2、hystrix命令的分组,可用于某组方法调用情况进行统计,可不配置,默认使用被标注方法所在的class 名称。
            groupKey = "com.wzy.userservice.controller",

            3、配置线程池的key, 用来表示线程池,默认是groupKey的取值,因此默认情况同一个类中所有的HystrixCommand是使用用一个线程池。
            threadPoolKey = "com.wzy.userservice.controller",

            4、配置回退方法
            fallbackMethod = "sayHiFallback",

            5、配置hystrixCommand属性,可配置属性见HystrixCommandProperties
            commandProperties = {
                    不配置默认就是线程池隔离,因此上面的超时触发熔断的案例也是在使用线程池进行隔离
                    @HystrixProperty(name = "execution.isolation.strategy", value = "THREAD"),

                    配置如果方法执行超时,是否需要中断执行方法的线程,默认是true
                    @HystrixProperty(name = "execution.isolation.thread.interruptOnTimeout", value = "true"),

                    配置如果取消方法执行,是否需要中断执行方法的线程,默认是true
                    @HystrixProperty(name = "execution.isolation.thread.interruptOnFutureCancel", value = "true"),

                    配置是否开启熔断,默认是true
                    @HystrixProperty(name = "circuitBreaker.enabled", value = "true"),

                    配置熔断的滑动窗口时间,默认是5秒
                    @HystrixProperty(name = "circuitBreaker.sleepWindowInMilliseconds", value = "5"),

                    配置滑动窗口时间段内的最小请求数,默认是20次
                    @HystrixProperty(name = "circuitBreaker.requestVolumeThreshold", value = "20"),

                    配置滑动窗口时间段内的请求的错误百分比,默认是50,也就是50%,这就是默认在5秒内,请求在20次及以上,如果错误率是50%就回开启熔断。
                    @HystrixProperty(name = "circuitBreaker.errorThresholdPercentage", value = "50"),

            },

            6、配置线程池属性,可配置属性见HystrixThreadPoolProperties类
            threadPoolProperties = {
                    配置线程池的核心线程数,默认是10个
                    @HystrixProperty(name = "coreSize", value = "10"),

                    配置线程池的最大线程数,默认是10个
                    @HystrixProperty(name = "coreSize", value = "10"),

                    配置线程池的最大线程数,默认是10个
                    @HystrixProperty(name = "coreSize", value = "10"),
            }

    )
    public String sayHi(String userName) {
        try {
            Thread.sleep(1200L);
        } catch (InterruptedException e) {
            e.printStackTrace();
        }
        return "hi, " + userName;
    }

    public String sayHiFallback(String userName) {
        return "fallback :" + userName;
    }
从这里可以看出来,上面的超时触发熔断的案例也是在使用线程池隔离的方式。
第三:演示信号量进行熔断限流:
    @GetMapping("sayNihao")
    @HystrixCommand(

            1、配置回退方法
            fallbackMethod = "sayNihaoFallback",

            2、配置hystrixCommand属性,可配置属性见HystrixCommandProperties
            commandProperties = {

                    配置使用信号量进行熔断控制,不配置默认是线程池。
                    @HystrixProperty(name = "execution.isolation.strategy", value = "SEMAPHORE"),

                    即使是使用信号量控制熔断,也可以配置执行业务的线程的超时时间
                    @HystrixProperty(name = "execution.isolation.thread.timeoutInMilliseconds", value = "200"),

                    配置信号量的最大数,不配置默认是10
                    @HystrixProperty(name = "execution.isolation.semaphore.maxConcurrentRequests", value = "1"),

                    配置回退方法的信号量最大数,不配置默认是10
                    @HystrixProperty(name = "fallback.isolation.semaphore.maxConcurrentRequests", value = "1")
            }

    )
    public String sayNihao(String userName) throws InterruptedException {
        Thread.sleep(1000L);
        System.out.println("线程名称:" + Thread.currentThread().getName());
        return "你好, " + userName;
    }

    public String sayNihaoFallback(String userName) {
        return "fallback :" + userName;
    }
5、openfeign使用hystrix进行熔断配置:
首先我们需要了解到,在openfeign中,默认就将其对hystrix进行的整合,在 spring-cloud-starter-openfeign 这个包中,默认就依赖了 feign-hystrix 这个包,因此我们可以直接在openfeign中使用hystrix,那么怎么使用呢?我们来一探究竟!
1、配置feignClient的回退处理类fallback,这样在处理feignClient调用提供者失败的时候就会进入到回退方法:
@FeignClient(value = "order-service", fallback = OpenfeignHystrixFallBack.class)
public interface OrderFeignClient {

    @PostMapping("save")
    boolean saveOrder(@RequestBody OrderDto orderDto);

    @GetMapping("findById/{id}")
    OrderDto findById(@PathVariable("id") String id);

    @GetMapping("findAll")
    Collection <OrderDto> findAll();

}
回退类的写法:
/**
 * orderFeignClient的回退fallback实现
 */
@Component  //注意一定需要放在spring的容器中
public class OpenfeignHystrixFallBack implements OrderFeignClient {
    @Override
    public boolean saveOrder(OrderDto orderDto) {
        return false;
    }

    @Override
    public OrderDto findById(String id) {
        OrderDto orderDto = new OrderDto();
        orderDto.setId("1");
        orderDto.setMoney(1000);
        orderDto.setPriductName("煊赫门");
        return orderDto;
    }

    @Override
    public Collection<OrderDto> findAll() {
        OrderDto orderDto = new OrderDto();
        orderDto.setId("1");
        orderDto.setMoney(1000);
        orderDto.setPriductName("煊赫门");
        ArrayList <OrderDto> objects = new ArrayList <>();
        objects.add(orderDto);
        return objects;
    }
}
以上就完成了feignClient的回退方法的配置。
2、那么我们能够为feignClient中的单个方法进行配置吗?就像在常用案例中给sayHello方法配置熔断策略那样。档案当然是可以的,接下来我们来配置一下:
首先必须开启feign的hystrix功能,开启方式为配置如下:
feign.hystrix.enabled=true其次配置一个默认的hystrixCommand, 不配置也行,配置的话回更加规范一点:
          hystrix.command.default.execution.timeout.enable=true
          hystrix.command.default.execution.isolation.thread.timeoutInMilliseconds=3000
接下来为feignClient中的单个方法进行hystrixCommand的配置:
          配置OrderFeignClient中的saveOrder方法入参是OrderDto的熔断配置的资源隔离为 信号量隔离,且最大并发数为1
hystrix.command.OrderFeignClient#saveOrder(OrderDto).execution.isolation.strategy=SEMAPHORE
hystrix.command.OrderFeignClient#saveOrder(OrderDto).execution.isolation.semaphore.maxConcurrentRequests=1

          配置OrderFeignClient中的findAll方法的熔断配置的资源隔离为线程池
hystrix.command.OrderFeignClient#findAll().execution.isolation.strategy=THREAD

          配置OrderFeignClient中的findById入方法入参是String的熔断配置的资源隔离为线程池
hystrix.command.OrderFeignClient#findById(String).execution.isolation.strategy=THREAD

          配置OrderFeignClient的线程池信息,按照feignClient name进行匹配,例如order-service就是OrderFeignClient的name。一个feignClient与线程池的关系是1对1。
hystrix.threadpool.order-service.coreSize=2
hystrix.threadpool.order-service.maxQueueSize=1000
hystrix.threadpool.order-service.queueSizeRejectionThreshold=800
由上面可以看出来,可以将每一个feignClient中的每一个方法都配置一个HystrixCommand,默认的格式的 feignclien类型t#方法名称(参数类型. . . ),同时也可以为当个feignClient配置一个线程池。
6、hystrix-dashboard的使用
上面我们基本上把使用hystrix的方式都讲完了,那么我们如何监控每一个HystrixCommand的状态呢? 这个时候hystrix-dashboard就派上用场了。
使用步骤:
1、构建一个hystrix-dashboard的服务,pom.xml文件如下:
    <parent>
        <artifactId>spring-cloud-hystrix-demo1</artifactId>
        <groupId>com.wzy</groupId>
        <version>0.0.1-SNAPSHOT</version>
    </parent>
    <modelVersion>4.0.0</modelVersion>

    <artifactId>hystrix-dashboard</artifactId>

    <dependencies>
        <dependency>
            <groupId>org.springframework.cloud</groupId>
            <artifactId>spring-cloud-starter-netflix-hystrix-dashboard</artifactId>
        </dependency>
    </dependencies>
2、启动类如下:
@EnableHystrixDashboard   开启hystrix-dashboard
@SpringBootApplication
public class SpringCloudHystrixDashboardApplication {

    public static void main(String[] args) {
        SpringApplication.run(SpringCloudHystrixDashboardApplication.class, args);
    }

}
3、配置文件如下:
server.port=9091
spring.application.name=hystrix-dashboard

//暴露actuator的端点
management.endpoints.jmx.exposure.include=*
management.endpoints.web.exposure.include=*
management.endpoint.health.show-details=always

配置允许的数据流,我们配置为所有的,在springboot 2.3 以后才出现的
hystrix.dashboard.proxy-stream-allow-list=*
4、改造被监控的项目
需要引入 spring-boot-starter-actuator 依赖,并且暴露hystrix.stream:
management.endpoints.web.exposure.include=*5、访问hystrix的管理页面:localhost:9091/hystrix:

输入http://localhost:8080/actuator/hystrix.stream 然后点击Monitor Stream,会出现如下页面:
这就是hystrix-dashboard


 321
321


 被折叠的 条评论
为什么被折叠?
被折叠的 条评论
为什么被折叠?
 到【灌水乐园】发言


