


文章目录
- 一、实现从底部自定义像Activity一样的全屏弹窗的功能
- 二、实现从底部弹出带手势拖拽的列表弹窗的功能
- 三、实现从底部弹出带手势拖拽的列表弹窗(带选中效果)的功能
- 四、实现在Activity中间弹出的List列表弹窗的功能
- 五、实现在Activity中间弹出的List列表弹窗(带选中效果)的功能
- 六、实现仿手机单指长按传送门从左右上下方平移进入的功能
- 七、实现从顶部带TextView(点击取消)的弹窗的功能
- 八、实现自定义下拉阴影弹窗的功能
- 九、实现在任何处垂直带气泡Attach弹窗(未超屏)的功能
- 十、实现在中间显示带标题、内容、输入框(带有hint名)和确认取消按钮的弹窗的功能
- 十一、尝试22个不同动画(弹窗)
- 十二、实现左右边抽屉(drawer)弹窗---------第三方项目_XPopup源码的github地址
一、实现从底部自定义像Activity一样的全屏弹窗的功能
实现:

主工程项目要导入的第三方项目library,如下图:
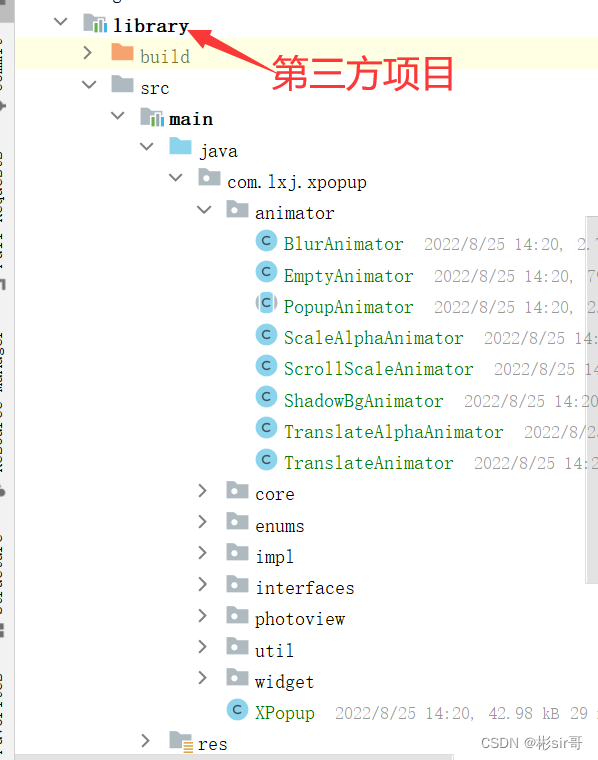
温馨提示:第三方项目library里面的不同弹窗有很多:从顶部弹窗、从底部弹窗、自由定位弹窗、自定义全屏弹窗、显示旋转弹窗(动画)…,适合工作,你想改什么样的弹窗就在这项目library里直接拿就即可,就是方便。订阅后CSDN私聊我,我就发给第三方项目library
代码:
1、CustomFullScreenPopup.kt
class CustomFullScreenPopup(context: Context) : FullScreenPopupView(context) {
    override fun getImplLayoutId(): Int {
        return R.layout.custom_fullscreen_popup
    }

    override fun onShow() {
        super.onShow()
        Log.e("tag", "CustomFullScreenPopup onShow")
    }

    override fun onDismiss() {
        super.onDismiss()
        Log.e("tag", "CustomFullScreenPopup onDismiss")
    }
}
custom_fullscreen_popup.xml
<?xml version="1.0" encoding="utf-8"?>
<androidx.core.widget.NestedScrollView xmlns:android="http://schemas.android.com/apk/res/android"
    android:layout_width="match_parent"
    android:background="#fff"
    android:layout_height="match_parent">

    <LinearLayout
        android:layout_width="match_parent"
        android:layout_height="match_parent"
        android:orientation="vertical"
        android:padding="0dp">

        <TextView
            android:layout_marginTop="40dp"
            android:textSize="20sp"
            android:textColor="#111"
            android:text="全屏弹窗"
            android:gravity="center"
            android:padding="15dp"
            android:layout_width="match_parent"
            android:layout_height="wrap_content"/>

        <TextView
            android:layout_width="match_parent"
            android:layout_height="wrap_content"
            android:padding="10dp"
            android:text="我是全屏弹窗,可以设置任意的动画器。我看起来就像一个从底部弹出的Activity,可以用来做一些登录,选择界面。"
            android:textColor="#333"
            android:textSize="18sp" />

        <EditText
            android:layout_width="match_parent"
            android:layout_height="wrap_content"
            android:layout_marginTop="15dp"
            android:hint="测试软键盘交互" />

        <View
            android:background="#ccc"
            android:layout_width="match_parent"
            android:layout_height="300dp" />

        <EditText
            android:layout_width="match_parent"
            android:layout_height="wrap_content"
            android:layout_marginTop="15dp"
            android:hint="测试软键盘交互" />

        <View
            android:background="#9C27B0"
            android:layout_width="match_parent"
            android:layout_height="150dp" />

        <EditText
            android:layout_width="match_parent"
            android:layout_height="wrap_content"
            android:layout_marginTop="85dp"
            android:hint="测试软键盘交互" />
        <View
            android:background="#AC5959"
            android:layout_width="match_parent"
            android:layout_height="150dp" />

        <EditText
            android:layout_width="match_parent"
            android:layout_height="wrap_content"
            android:layout_marginTop="85dp"
            android:hint="测试软键盘交互55" />

    </LinearLayout>

</androidx.core.widget.NestedScrollView>
2、MainActivity.kt
class MainActivity : AppCompatActivity() {
    var popupView: BasePopupView? = null
    override fun onCreate(savedInstanceState: Bundle?) {
        super.onCreate(savedInstanceState)
        setContentView(R.layout.activity_main)

        btnFullScreenPopup.setOnClickListener { //全屏弹窗,看起来像Activity
            popupView = CustomFullScreenPopup(this@MainActivity)
            XPopup.Builder(this@MainActivity)
                .isLightStatusBar(true)
                .autoOpenSoftInput(true)
                .asCustom(popupView)
                .show()
        }
    }
}
activity_main.xml
<?xml version="1.0" encoding="utf-8"?>
<LinearLayout xmlns:android="http://schemas.android.com/apk/res/android"
    android:layout_width="match_parent"
    android:layout_height="match_parent"
    android:gravity="center">

    <Button
        android:id="@+id/btnFullScreenPopup"
        android:layout_width="match_parent"
        android:layout_height="wrap_content"
        android:layout_marginTop="10dp"
        android:text="自定义全屏弹窗"
        android:textAllCaps="false" />
</LinearLayout>
主工程的build.gradle中增加:
allprojects {
    repositories {
        google()
        jcenter()
        maven { url 'https://jitpack.io' }//加上
    }
}
二、实现从底部弹出带手势拖拽的列表弹窗的功能
实现:

主工程项目要导入的第三方项目library,如下图:
温馨提示:第三方项目library里面的不同弹窗有很多:从顶部弹窗、从底部弹窗、自由定位弹窗、自定义全屏弹窗、显示旋转弹窗(动画)…,适合工作,你想改什么样的弹窗就在这项目library里直接拿就即可,就是方便。订阅后CSDN私聊我,我就发给第三方项目library
代码:
MainActivity.kt
class MainActivity : AppCompatActivity() {

    override fun onCreate(savedInstanceState: Bundle?) {
        super.onCreate(savedInstanceState)
        setContentView(R.layout.activity_main)

        btnShowBottomList.setOnClickListener { //从底部弹出,带手势拖拽的列表弹窗
            XPopup.Builder(this@MainActivity)
                .isDarkTheme(true)
                .hasShadowBg(true)
                .moveUpToKeyboard(false)
                .isCoverSoftInput(true) //
                .asBottomList(
                    "请选择一项",
                    arrayOf(
                        "条目1",
                        "条目2",
                        "条目3",
                        "条目4",
                        "条目5",
                        "条目6",
                        "条目7"
                    )
                ) { position, text ->
                    Toast.makeText(this@MainActivity, "click $text", Toast.LENGTH_SHORT).show()
                }.show()
        }
    }
}
主工程的build.gradle中加上:
allprojects {
    repositories {
        google()
        jcenter()
        maven { url 'https://jitpack.io' }//加上
    }
}
三、实现从底部弹出带手势拖拽的列表弹窗(带选中效果)的功能
实现:

主工程项目要导入的第三方项目library,如下图:
温馨提示:第三方项目library里面的不同弹窗有很多:从顶部弹窗、从底部弹窗、自由定位弹窗、自定义全屏弹窗、显示旋转弹窗(动画)…,适合工作,你想改什么样的弹窗就在这项目library里直接拿就即可,就是方便。订阅后CSDN私聊我,我就发给第三方项目library
代码:
MainActivity.kt
class MainActivity : AppCompatActivity() {

    override fun onCreate(savedInstanceState: Bundle?) {
        super.onCreate(savedInstanceState)
        setContentView(R.layout.activity_main)

        btnShowBottomListWithCheck.setOnClickListener { //从底部弹出,带手势拖拽的列表弹窗,带选中效果
            XPopup.Builder(this@MainActivity)
                .isDestroyOnDismiss(true) //对于只使用一次的弹窗,推荐设置这个
                .asBottomList(
                    "标题可以没有",
                    arrayOf(
                        "条目1",
                        "条目2",
                        "条目3",
                        "条目4",
                        "条目5"
                    ),
                    null, 2
                ) { position, text ->
                    Toast.makeText(this@MainActivity, "click $text", Toast.LENGTH_SHORT).show()
                }.show()
        }
    }
}
主工程的build.gradle中加上:
allprojects {
    repositories {
        google()
        jcenter()
        maven { url 'https://jitpack.io' }//加上
    }
}
四、实现在Activity中间弹出的List列表弹窗的功能
实现:

主工程项目要导入的第三方项目library,如下图:
温馨提示:第三方项目library里面的不同弹窗有很多:从顶部弹窗、从底部弹窗、自由定位弹窗、自定义全屏弹窗、显示旋转弹窗(动画)…,适合工作,你想改什么样的弹窗就在这项目library里直接拿就即可,就是方便。订阅后CSDN私聊我,我就发给第三方项目library
代码:
MainActivity.kt
class MainActivity : AppCompatActivity() {

    override fun onCreate(savedInstanceState: Bundle?) {
        super.onCreate(savedInstanceState)
        setContentView(R.layout.activity_main)

        btnShowCenterList.setOnClickListener {//在中间弹出的List列表弹窗
            XPopup.Builder(this@MainActivity)
                //.maxWidth(600)
                .maxHeight(800)
                .isDarkTheme(true)
                .isDestroyOnDismiss(true) //对于只使用一次的弹窗,推荐设置这个
                .asCenterList(
                    "请选择一项",
                    arrayOf(
                        "textView1",
                        "textView2",
                        "textView3",
                        "textView4",
                        "textView1",
                        "textView2",
                        "textView3",
                        "textView4",
                        "textView1",
                        "textView2",
                        "textView3",
                        "textView4",
                        "textView1",
                        "textView2",
                        "textView3",
                        "textView4",
                        "textView1",
                        "textView2",
                        "textView3",
                        "textView4"
                    )
                ) { position, text ->
                    Toast.makeText(this@MainActivity, "click $text", Toast.LENGTH_SHORT).show()
                }
                .show()
        }
    }
}
主工程的build.gradle中加上:
allprojects {
    repositories {
        google()
        jcenter()
        maven { url 'https://jitpack.io' }//加上
    }
}
五、实现在Activity中间弹出的List列表弹窗(带选中效果)的功能
实现:

主工程项目要导入的第三方项目library,如下图:
温馨提示:第三方项目library里面的不同弹窗有很多:从顶部弹窗、从底部弹窗、自由定位弹窗、自定义全屏弹窗、显示旋转弹窗(动画)…,适合工作,你想改什么样的弹窗就在这项目library里直接拿就即可,就是方便。订阅后CSDN私聊我,我就发给第三方项目library
代码:
MainActivity.kt
class MainActivity : AppCompatActivity() {

    override fun onCreate(savedInstanceState: Bundle?) {
        super.onCreate(savedInstanceState)
        setContentView(R.layout.activity_main)

        btnShowCenterListWithCheck.setOnClickListener {//在中间弹出的List列表弹窗,带选中效果
            XPopup.Builder(this@MainActivity)
                .isDestroyOnDismiss(true) //对于只使用一次的弹窗,推荐设置这个
                .asCenterList(
                    "请选择一项",
                    arrayOf(
                        "textView1",
                        "textView2",
                        "textView3",
                        "textView4",
                        "textView1",
                        "textView2",
                        "textView3",
                        "textView4"
                    ),
                    null, 1
                ) { position, text ->
                    Toast.makeText(this@MainActivity, "click $text", Toast.LENGTH_SHORT).show()
                }
                .show()
        }
    }
}
主工程的build.gradle中加上:
allprojects {
    repositories {
        google()
        jcenter()
        maven { url 'https://jitpack.io' }//加上
    }
}
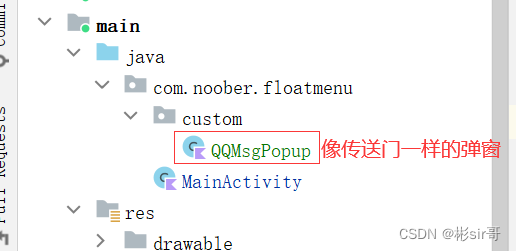
六、实现仿手机单指长按传送门从左右上下方平移进入的功能
实现:

项目:
温馨提示:第三方项目library里面的不同弹窗有很多:从顶部弹窗、从底部弹窗、自由定位弹窗、自定义全屏弹窗、显示旋转弹窗(动画)…,适合工作,你想改什么样的弹窗就在这项目library里直接拿就即可,就是方便。订阅后CSDN私聊我,我就发给第三方项目library
代码:
QQMsgPopup.kt
class QQMsgPopup(context: Context) : PositionPopupView(context) {
    override fun getImplLayoutId(): Int {
        return R.layout.popup_qq_msg
    }
}
popup_qq_msg.xml
<?xml version="1.0" encoding="utf-8"?>
<LinearLayout xmlns:android="http://schemas.android.com/apk/res/android"
    android:orientation="vertical" android:layout_width="match_parent"
    android:background="@drawable/bg_round2"
    android:layout_height="wrap_content">
    <TextView
        android:padding="20dp"
        android:textColor="#E43838"
        android:textSize="16sp"
        android:text="我是QQ的消息弹窗,嘿嘿!!!"
        android:gravity="center"
        android:layout_width="match_parent"
        android:layout_height="wrap_content" />
</LinearLayout>
MainActivity.kt
class MainActivity : AppCompatActivity() {

    override fun onCreate(savedInstanceState: Bundle?) {
        super.onCreate(savedInstanceState)
        setContentView(R.layout.activity_main)

        btnShowPosition1.setOnClickListener {
            XPopup.Builder(this@MainActivity)

                //从右平移进入
                .offsetY(600)
                .offsetX(400)
                .popupAnimation(PopupAnimation.TranslateFromRight)

                //从上方平移进入(右)
//                .offsetY(600)
//                .offsetX(400)
//                .popupAnimation(PopupAnimation.TranslateFromTop)

                //从上方平移进入(右)
//                .offsetY(600)
//                .offsetX(400)
//                .popupAnimation(PopupAnimation.TranslateFromBottom)

                //从左平移进入
//                .offsetY(600)
//                .offsetX(-100)
//                .popupAnimation(PopupAnimation.TranslateFromLeft)

                //从上方平移进入(左)
//                .offsetY(600)
//                .offsetX(-100)
//                .popupAnimation(PopupAnimation.TranslateFromTop)

                //从下方平移进入(左)
//                .offsetY(600)
//                .offsetX(-100)
//                .popupAnimation(PopupAnimation.TranslateFromBottom)

                .asCustom(QQMsgPopup(this@MainActivity))
                .show()
        }
    }
}
MainActivity.kt代码中:
.popupAnimation(PopupAnimation.TranslateFromRight)
PopupAnimation.java,仿手机单指长按传送门从左右上下方平移进入:
public enum PopupAnimation {
......
    // 平移,不带透明渐变
    TranslateFromLeft,  // 从左平移进入
    TranslateFromRight, // 从右平移进入
    TranslateFromTop,   // 从上方平移进入
    TranslateFromBottom, // 从下方平移进入
......
}
主工程的build.gradle中加上:
allprojects {
    repositories {
        google()
        jcenter()
        maven { url 'https://jitpack.io' }//加上
    }
}
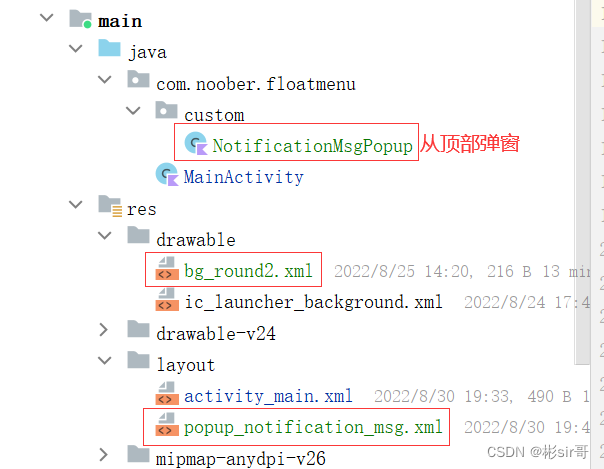
七、实现从顶部带TextView(点击取消)的弹窗的功能
实现:

项目:
温馨提示:第三方项目library里面的不同弹窗有很多:从顶部弹窗、从底部弹窗、自由定位弹窗、自定义全屏弹窗、显示旋转弹窗(动画)…,适合工作,你想改什么样的弹窗就在这项目library里直接拿就即可,就是方便。订阅后CSDN私聊我,我就发给第三方项目library
引入依赖包:
implementation 'com.blankj:utilcode:1.30.6'
代码:
NotificationMsgPopup.kt
class NotificationMsgPopup(context: Context) : PositionPopupView(context) {
    override fun getImplLayoutId(): Int {
        return R.layout.popup_notification_msg
    }

    override fun onCreate() {
        super.onCreate()
        findViewById<View>(R.id.tvClose).setOnClickListener(
            OnClickListener { dismiss() })
    }

    override fun getPopupWidth(): Int {
        return ScreenUtils.getScreenWidth()
    }
}
popup_notification_msg.xml
<?xml version="1.0" encoding="utf-8"?>
<LinearLayout xmlns:android="http://schemas.android.com/apk/res/android"
    android:layout_width="match_parent"
    android:layout_height="wrap_content"
    android:background="@color/colorPrimary"
    android:orientation="vertical">

    <TextView
        android:layout_width="match_parent"
        android:layout_height="wrap_content"
        android:layout_marginTop="20dp"
        android:gravity="center"
        android:padding="20dp"
        android:text="我是从顶部向下弹窗的自由定位弹窗,可以做一些通知的UI交互。\n这里只是用自由定位Position弹窗来演示,\n其他弹窗如Attach弹窗,PartShadow弹窗都能实现这个效果,感兴趣的朋友可以试试!!!"
        android:textColor="#fff"
        android:textSize="16sp" />

    <TextView
        android:id="@+id/tvClose"
        android:layout_width="100dp"
        android:layout_height="wrap_content"
        android:layout_gravity="center_horizontal"
        android:layout_marginBottom="20dp"
        android:background="@drawable/bg_round2"
        android:gravity="center"
        android:paddingTop="10dp"
        android:paddingBottom="10dp"
        android:text="我知道了!"
        android:textColor="#222" />
</LinearLayout>
bg_round2.xml
<?xml version="1.0" encoding="utf-8"?>
<shape xmlns:android="http://schemas.android.com/apk/res/android" android:shape="rectangle">
    <corners android:radius="100dp"/>
    <solid android:color="#fff"/>
</shape>
MainActivity.kt
class MainActivity : AppCompatActivity() {

    override fun onCreate(savedInstanceState: Bundle?) {
        super.onCreate(savedInstanceState)
        setContentView(R.layout.activity_main)

        btnShowPosition3.setOnClickListener {
            XPopup.Builder(this@MainActivity)
                .isDestroyOnDismiss(true) //对于只使用一次的弹窗,推荐设置这个
                .popupAnimation(PopupAnimation.TranslateFromTop)
                .asCustom(NotificationMsgPopup(this@MainActivity))
                .show()
        }
    }
}
主工程的build.gradle中加上:
allprojects {
    repositories {
        google()
        jcenter()
        maven { url 'https://jitpack.io' }//加上
    }
}
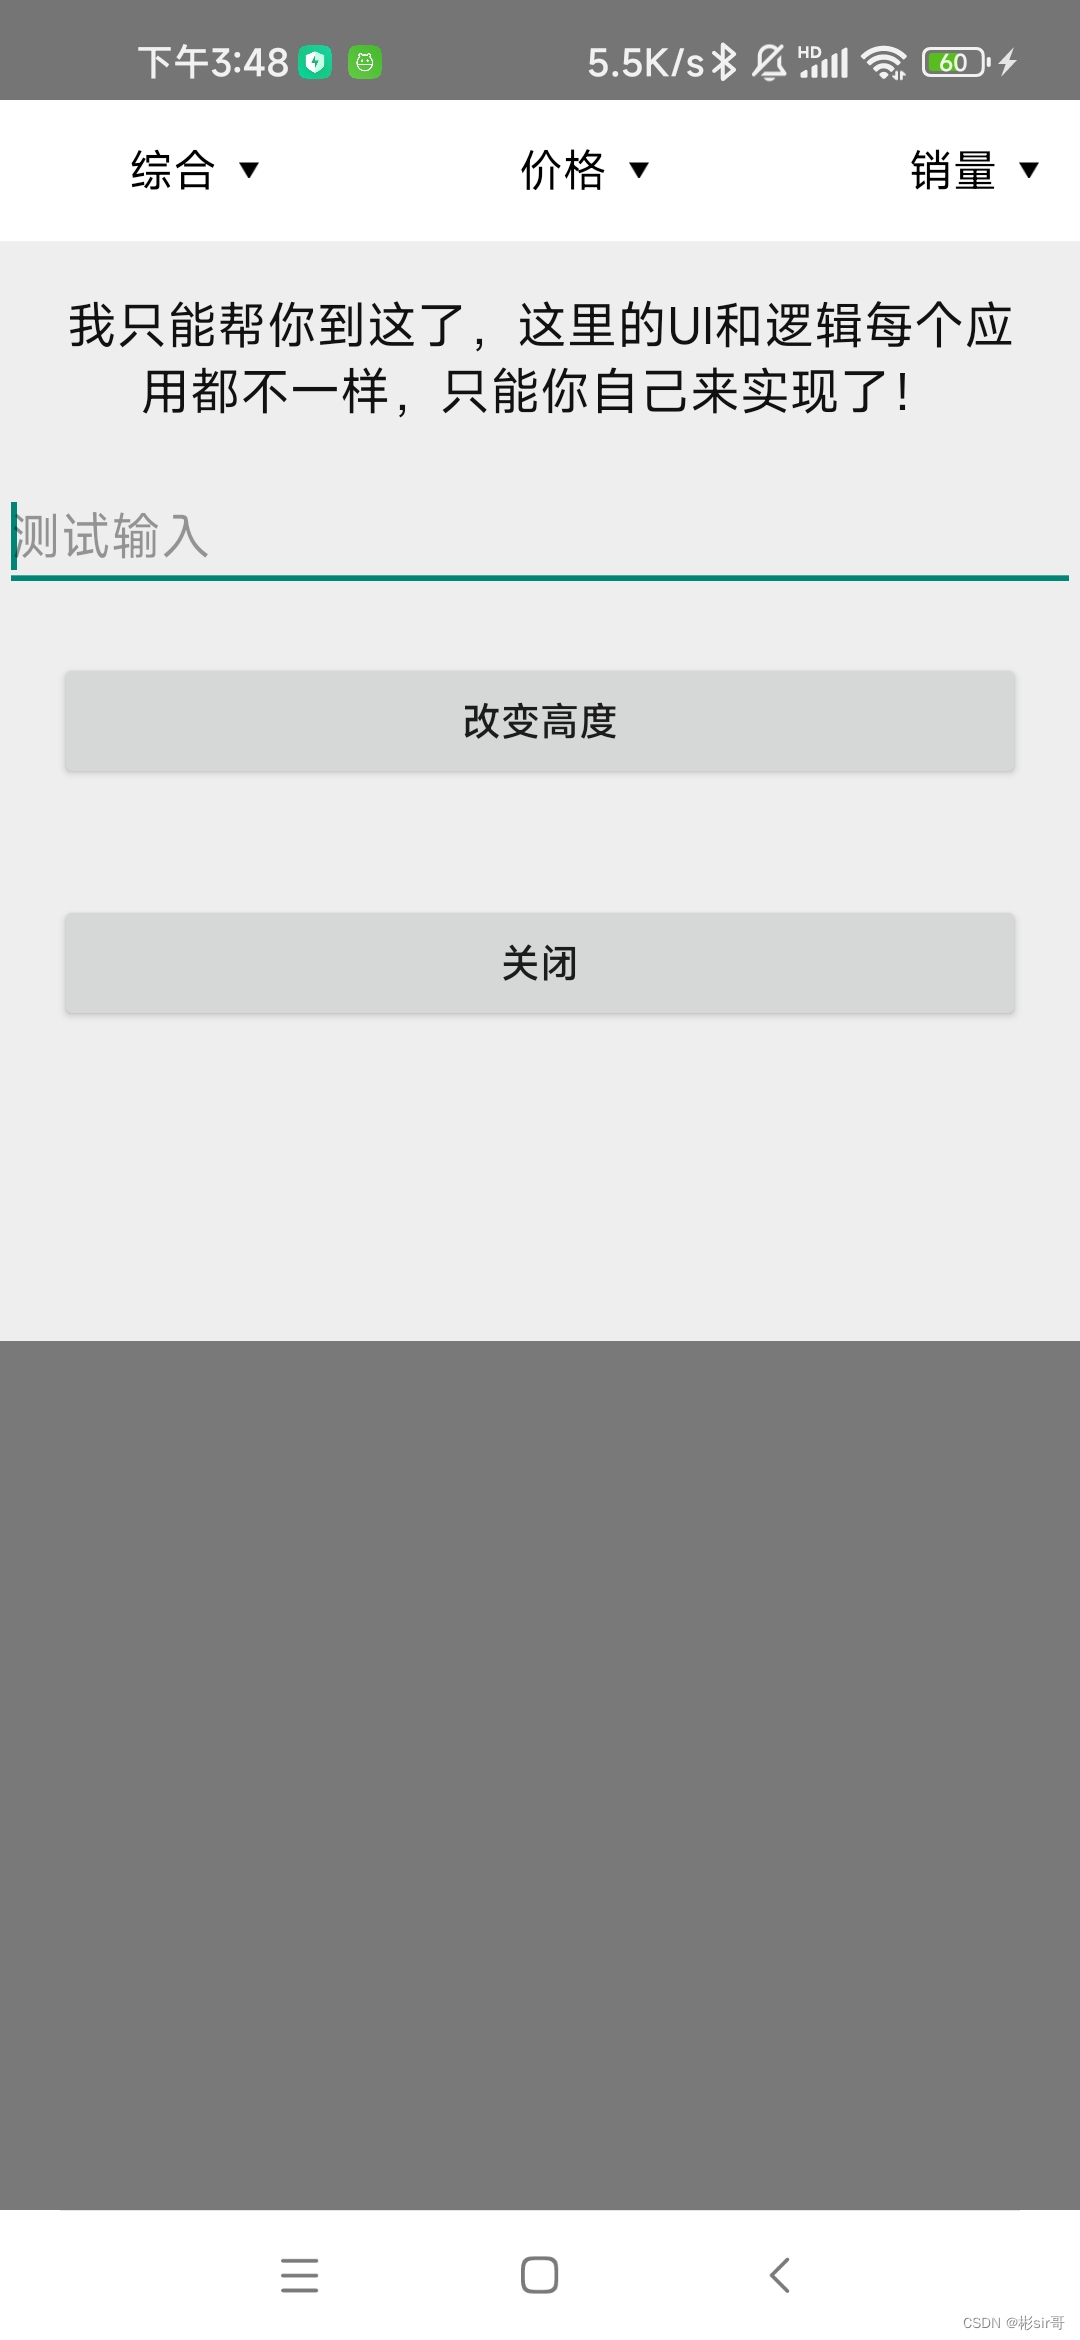
八、实现自定义下拉阴影弹窗的功能
实现:
项目:
温馨提示:第三方项目library里面的不同弹窗有很多:从顶部弹窗、从底部弹窗、自由定位弹窗、自定义全屏弹窗、显示旋转弹窗(动画)…,适合工作,你想改什么样的弹窗就在这项目library里直接拿就即可,就是方便。订阅后CSDN私聊我,我就发给第三方项目library
代码:
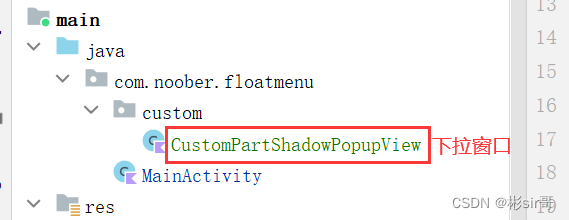
CustomPartShadowPopupView.kt
class CustomPartShadowPopupView(context: Context) : PartShadowPopupView(context) {
    override fun getImplLayoutId(): Int {
        return R.layout.custom_part_shadow_popup
    }

    override fun onCreate() {
        super.onCreate()
        btnClose.setOnClickListener { dismiss() }
    }

    override fun onShow() {
        super.onShow()
        Log.e("tag", "CustomPartShadowPopupView onShow")
    }

    override fun onDismiss() {
        super.onDismiss()
        Log.e("tag", "CustomPartShadowPopupView onDismiss")
    }
}
custom_part_shadow_popup.xml
<?xml version="1.0" encoding="utf-8"?>
<androidx.core.widget.NestedScrollView xmlns:android="http://schemas.android.com/apk/res/android"
    android:layout_width="match_parent"
    android:layout_height="400dp"
    android:background="#eeeeee"
    android:scrollbars="vertical">

    <LinearLayout
        android:layout_width="match_parent"
        android:layout_height="wrap_content"
        android:orientation="vertical">

        <TextView
            android:id="@+id/text"
            android:layout_width="match_parent"
            android:layout_height="wrap_content"
            android:gravity="center"
            android:padding="18dp"
            android:text="我只能帮你到这了,这里的UI和逻辑每个应用都不一样,只能你自己来实现了!"
            android:textColor="#111"
            android:textSize="18sp" />

        <EditText
            android:layout_width="match_parent"
            android:layout_height="wrap_content"
            android:hint="测试输入" />

        <Button
            android:id="@+id/ch"
            android:layout_width="match_parent"
            android:layout_height="wrap_content"
            android:layout_margin="20dp"
            android:text="改变高度" />

        <Button
            android:id="@+id/btnClose"
            android:layout_width="match_parent"
            android:layout_height="wrap_content"
            android:layout_margin="20dp"
            android:text="关闭" />
    </LinearLayout>
</androidx.core.widget.NestedScrollView>
MainActivity.kt
class MainActivity : AppCompatActivity(), View.OnClickListener {
    private var popupView: CustomPartShadowPopupView? = null
    override fun onCreate(savedInstanceState: Bundle?) {
        super.onCreate(savedInstanceState)
        setContentView(R.layout.activity_main)
        tv_all.setOnClickListener(this)
        tv_price.setOnClickListener(this)
        tv_sales.setOnClickListener(this)
    }

    private fun showPartShadow(v: View) {
        popupView = XPopup.Builder(this@MainActivity)
            .atView(v)
            .isViewMode(true)
            .autoOpenSoftInput(true)
            .setPopupCallback(object : SimpleCallback() {
                override fun onShow(popupView: BasePopupView) {
                    Toast.makeText(this@MainActivity, "Show显示了", Toast.LENGTH_SHORT).show()
                }

                override fun onDismiss(popupView: BasePopupView) {
                    Toast.makeText(this@MainActivity, "关闭Show了", Toast.LENGTH_SHORT).show()
                }
            })
            .asCustom(CustomPartShadowPopupView(this@MainActivity)) as CustomPartShadowPopupView
        popupView!!.show()
    }

    override fun onClick(v: View) {
        when (v.id) {
            R.id.tv_all, R.id.tv_price, R.id.tv_sales -> showPartShadow(v)
        }
    }
}
activity_main.xml
<?xml version="1.0" encoding="utf-8"?>
<LinearLayout xmlns:android="http://schemas.android.com/apk/res/android"
    android:layout_width="match_parent"
    android:layout_height="match_parent"
    android:background="#f2f2f2"
    android:orientation="vertical">

    <LinearLayout
        android:id="@+id/ll_container"
        android:layout_width="match_parent"
        android:layout_height="wrap_content"
        android:background="#fff">

        <Space
            android:layout_width="0dp"
            android:layout_height="0dp"
            android:layout_weight="1" />

        <TextView
            android:id="@+id/tv_all"
            android:layout_width="wrap_content"
            android:layout_height="wrap_content"
            android:background="?android:attr/selectableItemBackground"
            android:drawableRight="@mipmap/dropdown"
            android:drawablePadding="8dp"
            android:padding="15dp"
            android:text="综合"
            android:textColor="#000"
            android:textSize="16sp" />

        <Space
            android:layout_width="0dp"
            android:layout_height="0dp"
            android:layout_weight="2" />

        <TextView
            android:id="@+id/tv_price"
            android:layout_width="wrap_content"
            android:layout_height="wrap_content"
            android:background="?android:attr/selectableItemBackground"
            android:drawableRight="@mipmap/dropdown"
            android:drawablePadding="8dp"
            android:padding="15dp"
            android:text="价格"
            android:textColor="#000"
            android:textSize="16sp" />

        <Space
            android:layout_width="0dp"
            android:layout_height="0dp"
            android:layout_weight="2" />

        <TextView
            android:id="@+id/tv_sales"
            android:layout_width="wrap_content"
            android:layout_height="wrap_content"
            android:background="?android:attr/selectableItemBackground"
            android:drawableRight="@mipmap/dropdown"
            android:drawablePadding="8dp"
            android:padding="15dp"
            android:text="销量"
            android:textColor="#000"
            android:textSize="16sp" />
    </LinearLayout>
</LinearLayout>
activity_main.xml中代码,如下图:

dropdown.png图片,需要的话可以CSDN私聊我,我就发
主工程的build.gradle中加上:
allprojects {
    repositories {
        google()
        jcenter()
        maven { url 'https://jitpack.io' }//加上
    }
}
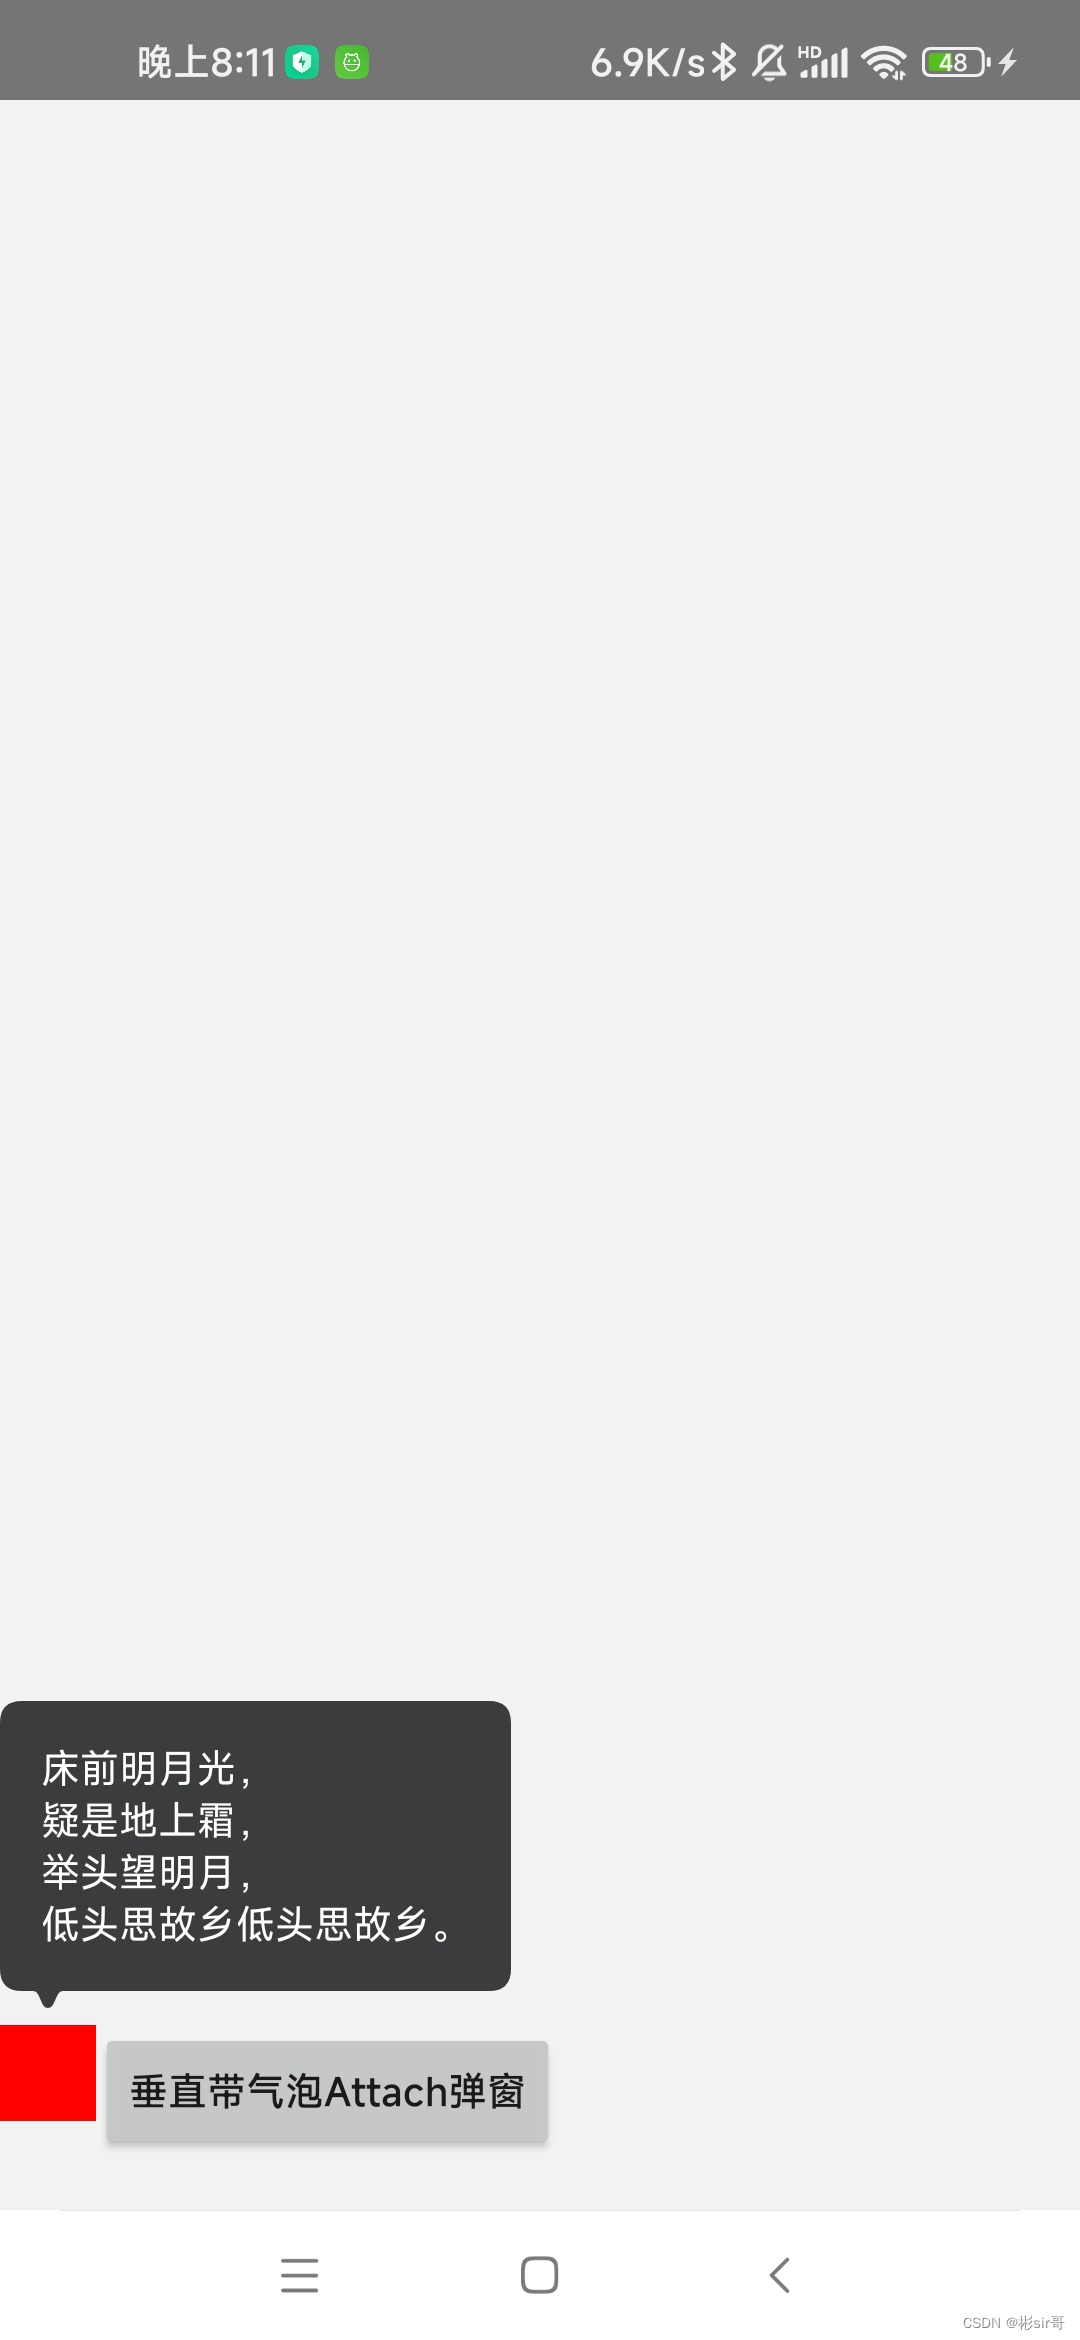
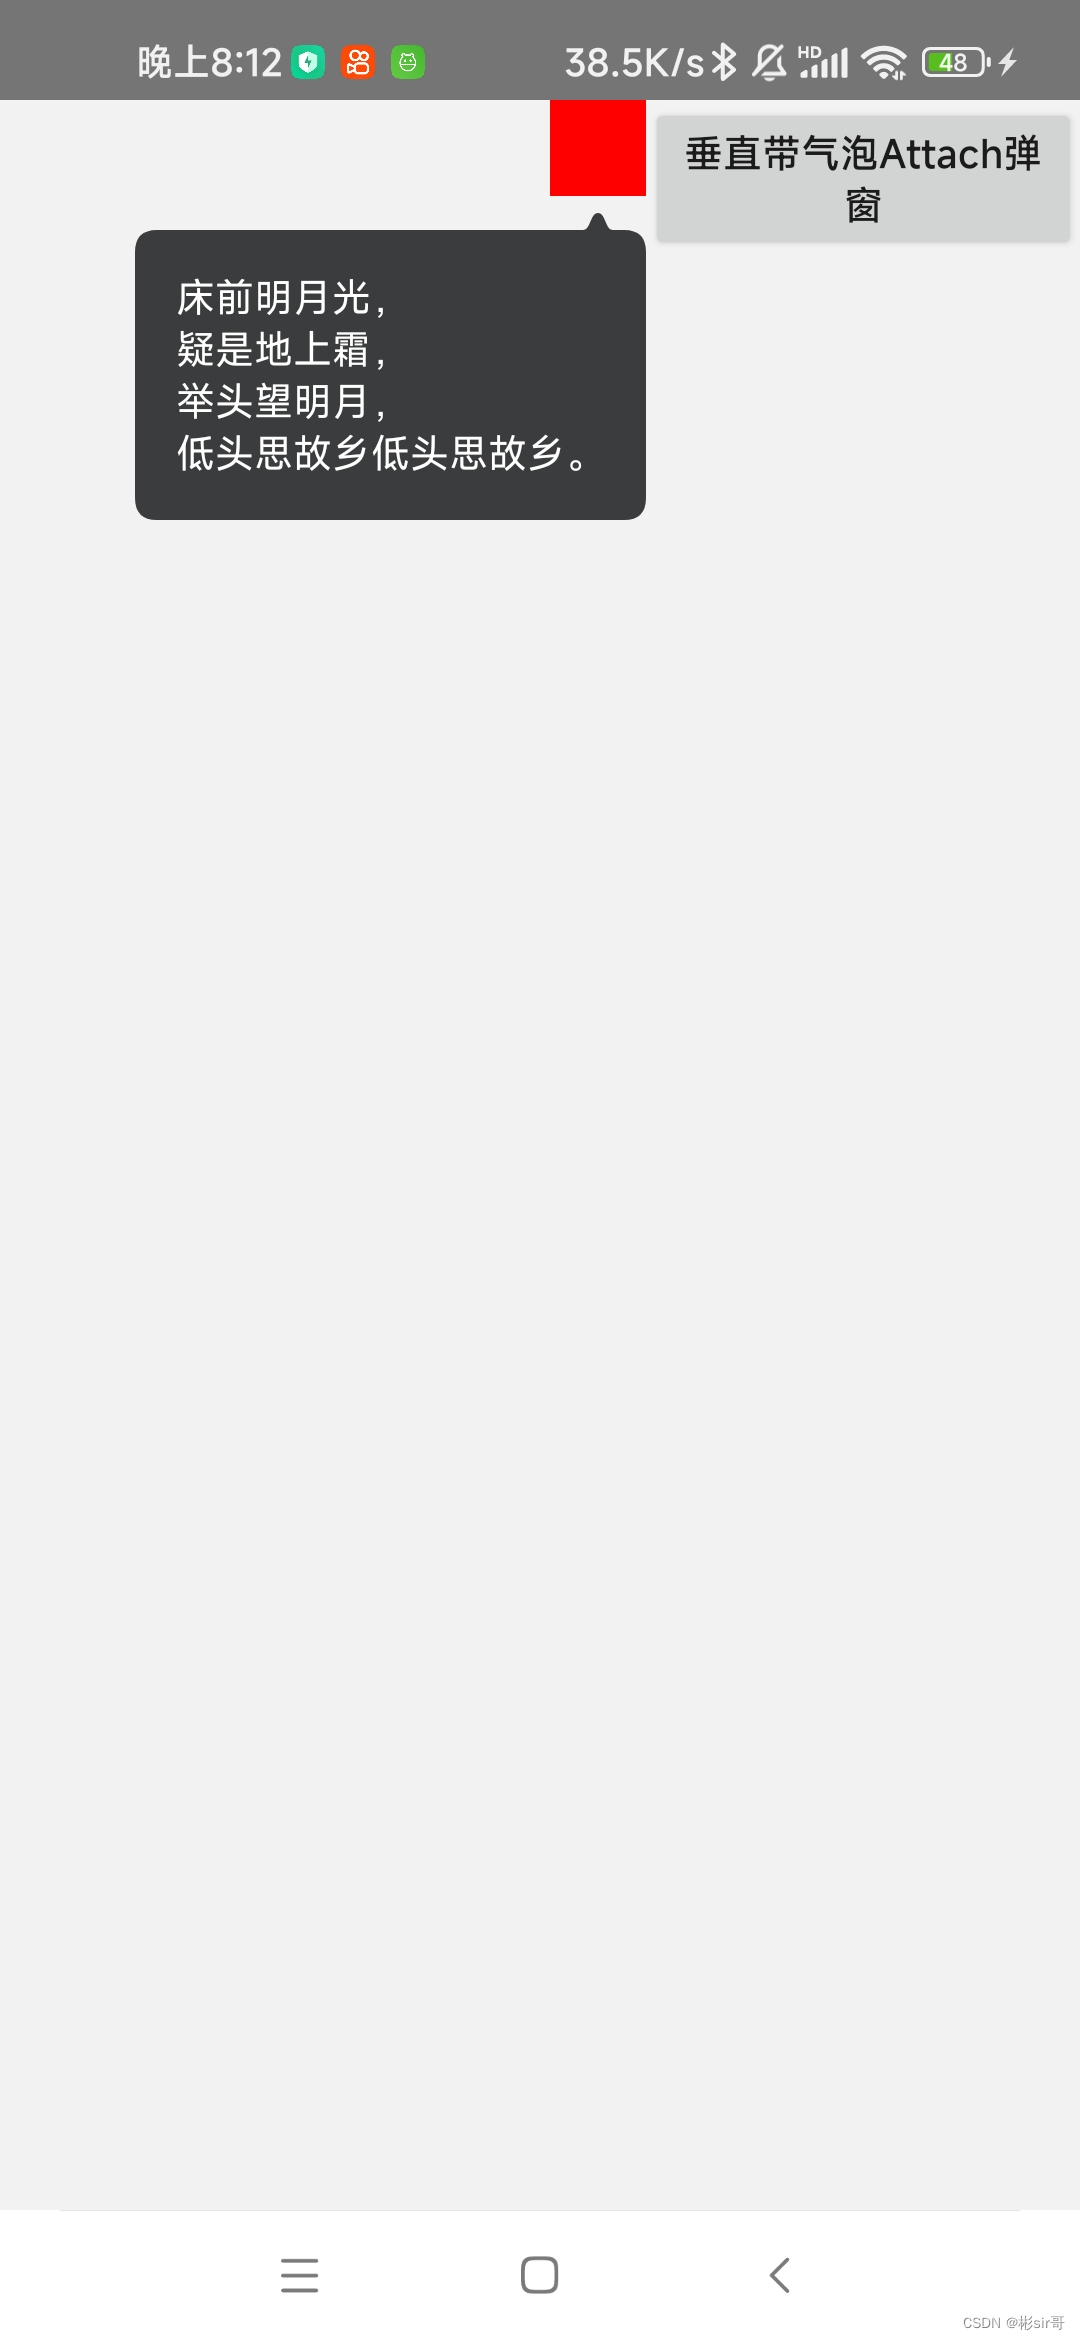
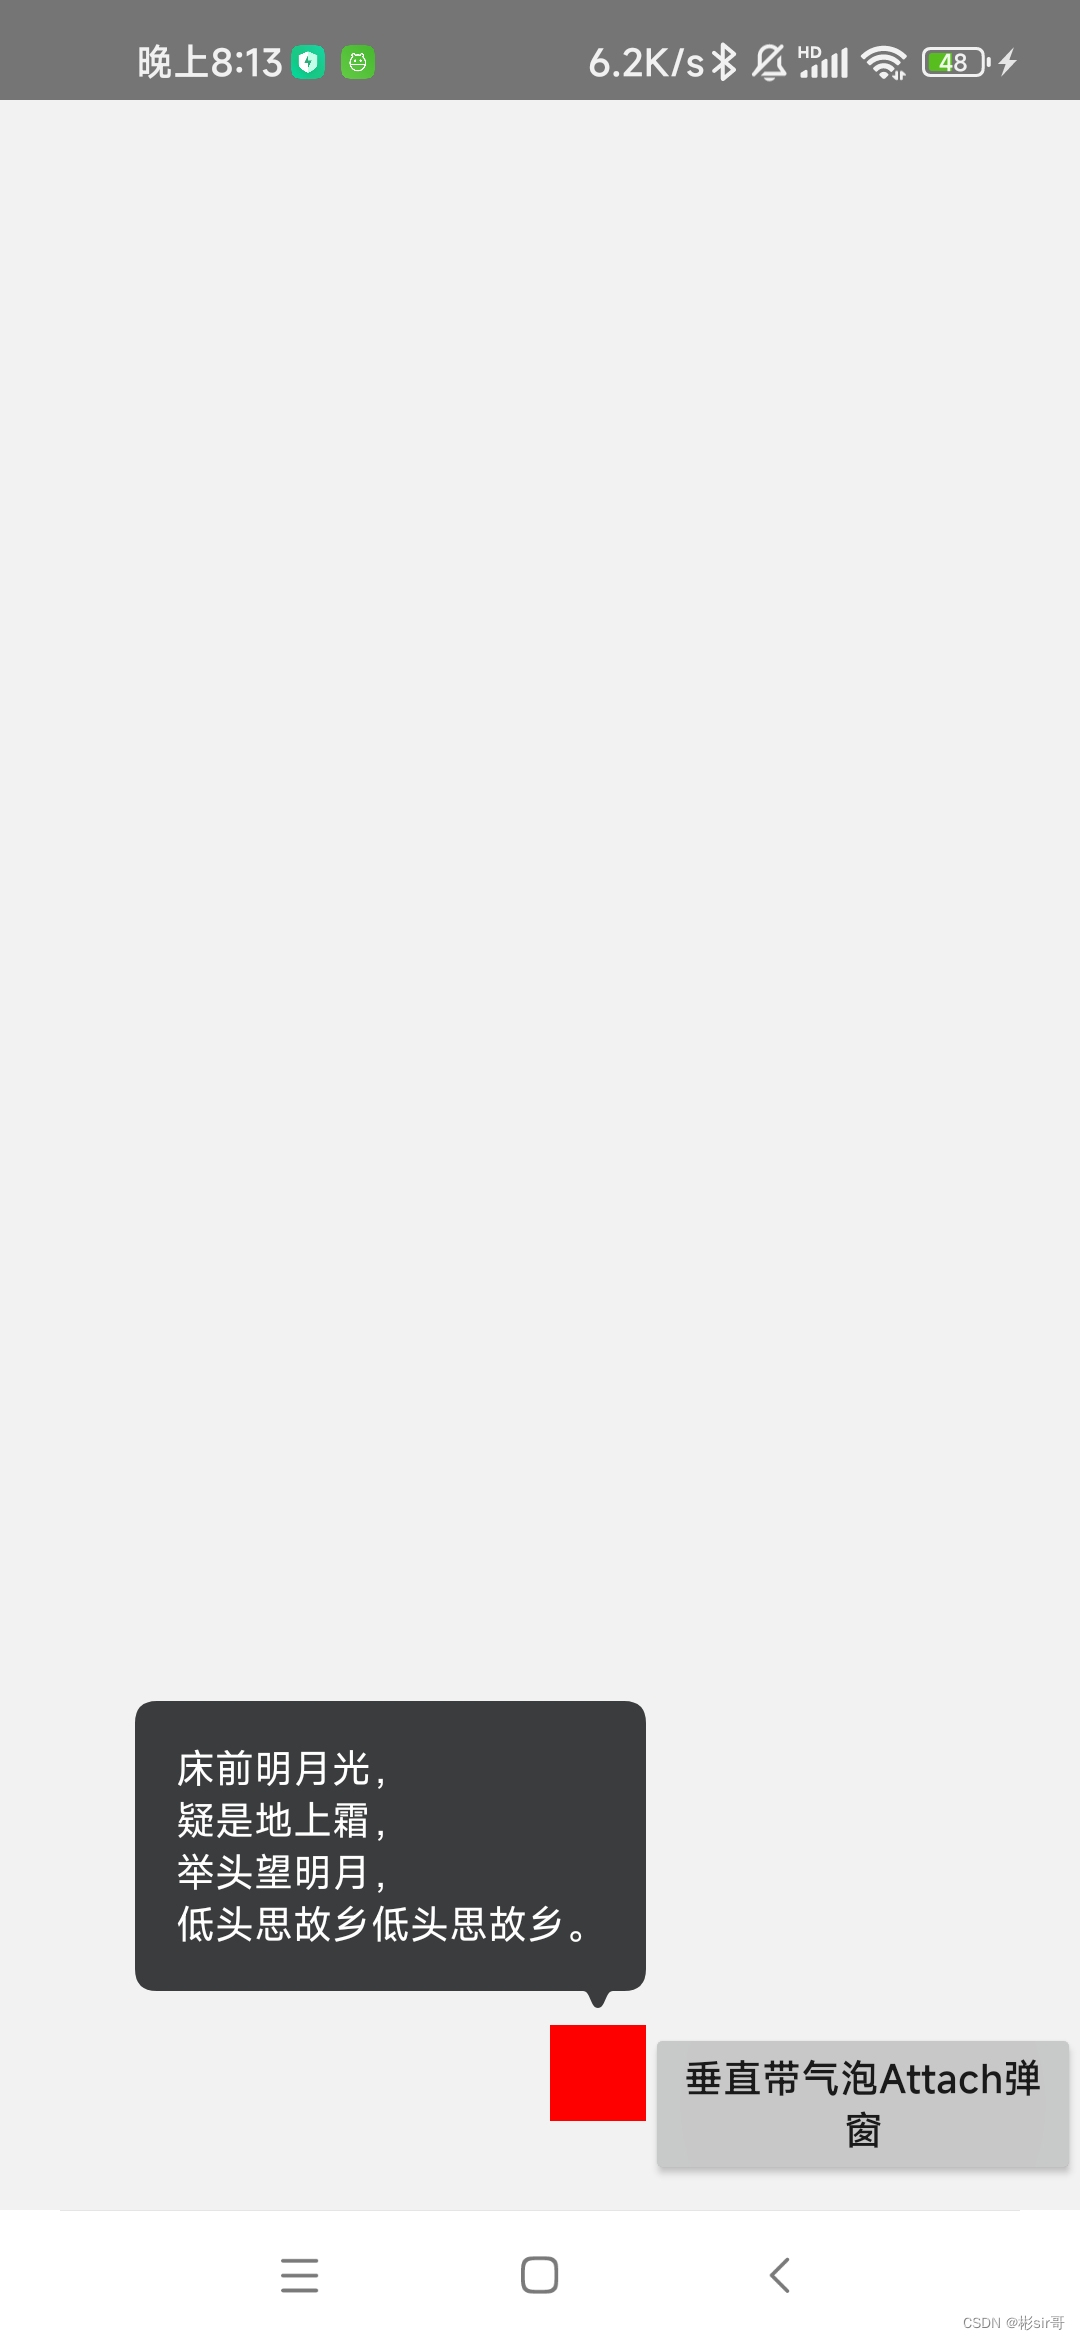
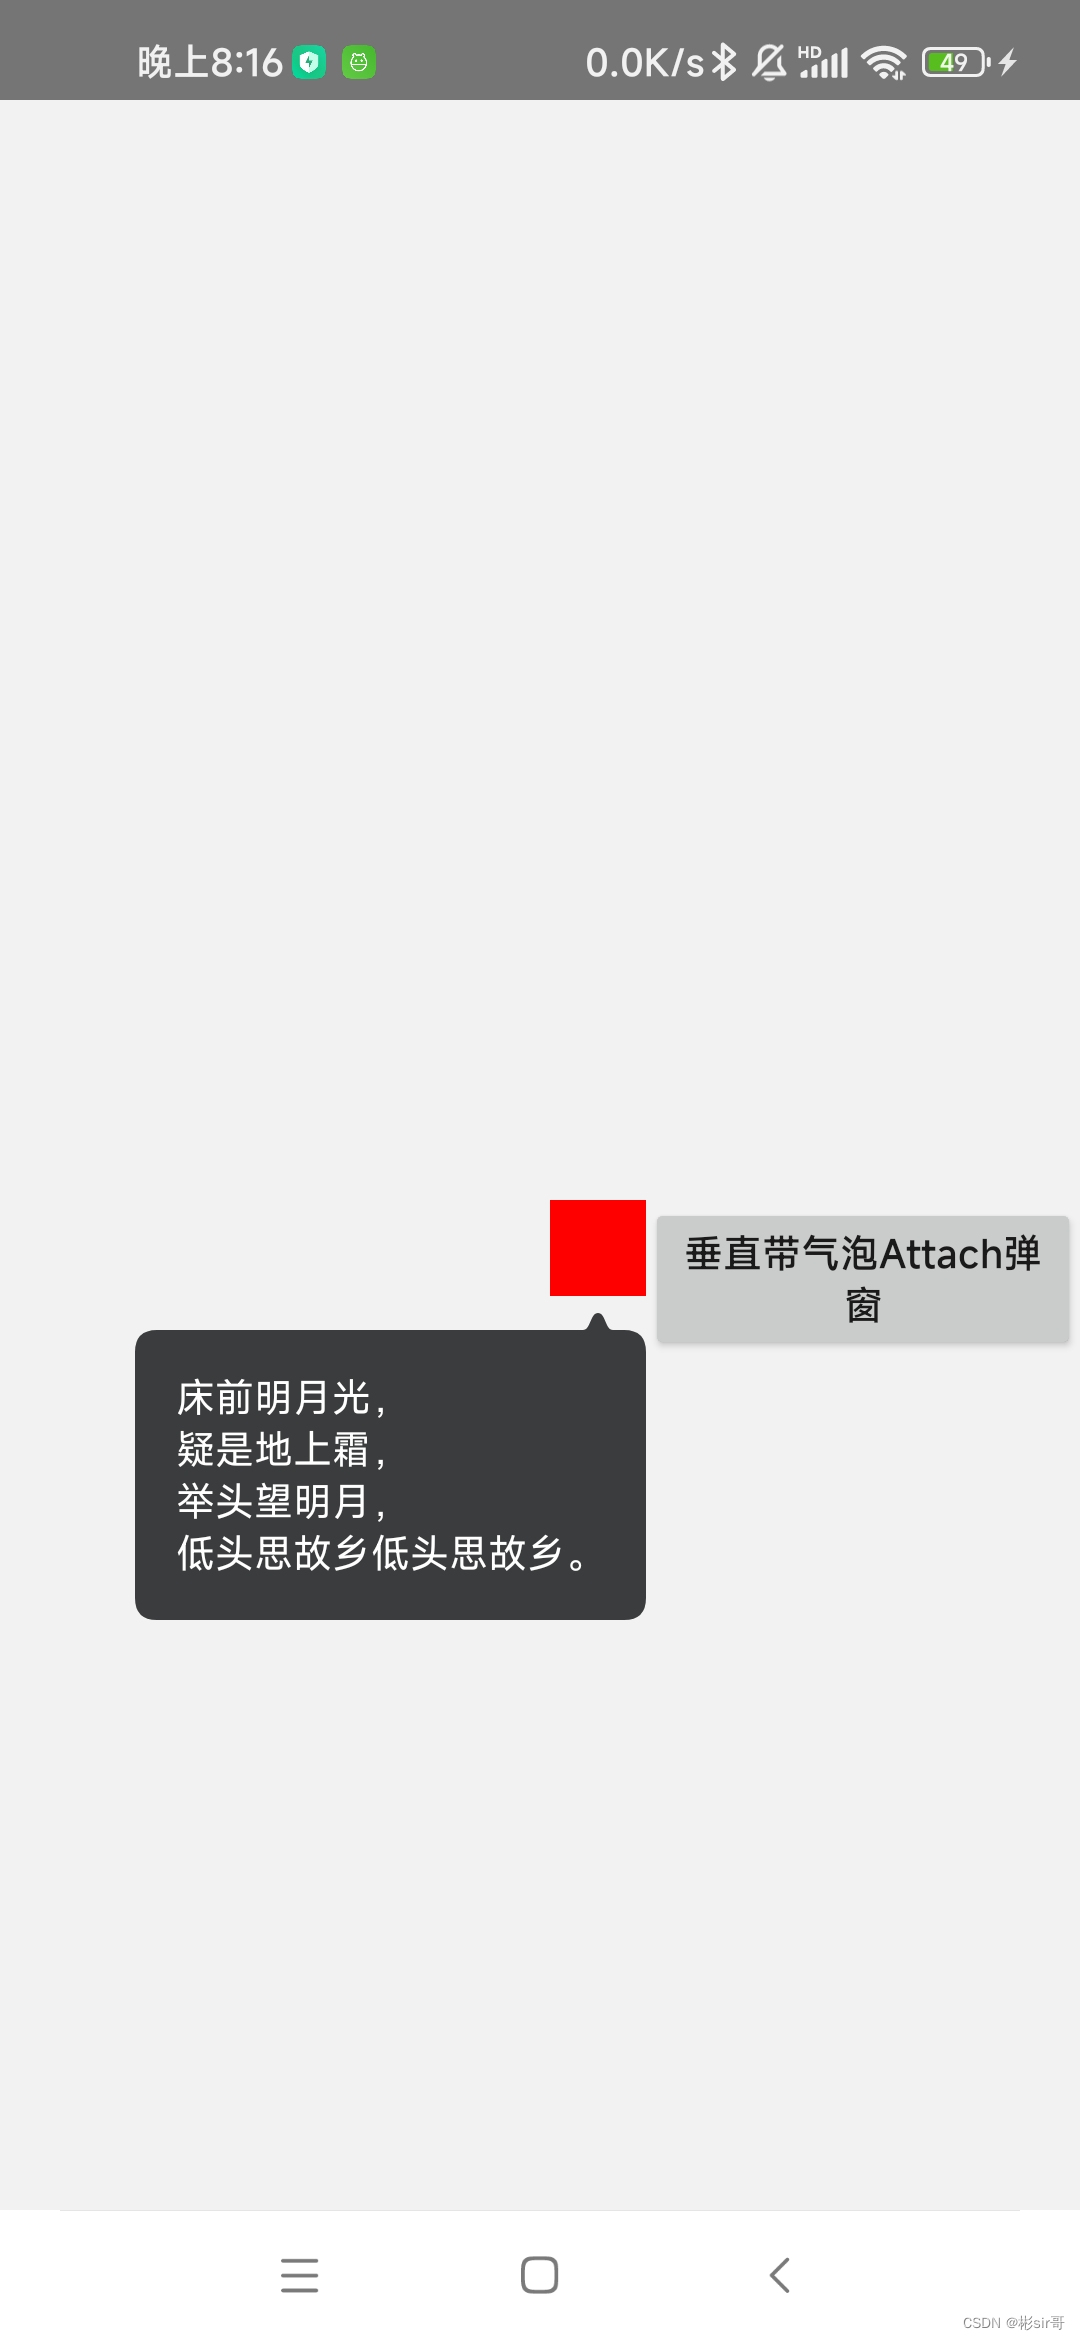
九、实现在任何处垂直带气泡Attach弹窗(未超屏)的功能
实现:
项目:
温馨提示:第三方项目library里面的不同弹窗有很多:从顶部弹窗、从底部弹窗、自由定位弹窗、自定义全屏弹窗、显示旋转弹窗(动画)…,适合工作,你想改什么样的弹窗就在这项目library里直接拿就即可,就是方便。订阅后CSDN私聊我,我就发给第三方项目library
代码:
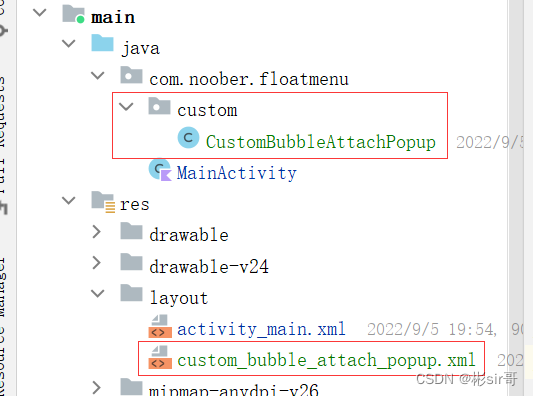
CustomBubbleAttachPopup.kt
public class CustomBubbleAttachPopup extends BubbleAttachPopupView {
    public CustomBubbleAttachPopup(@NonNull Context context) {
        super(context);
    }

    @Override
    protected int getImplLayoutId() {
        return R.layout.custom_bubble_attach_popup;
    }

    @Override
    protected void onCreate() {
        super.onCreate();
        final TextView tv = findViewById(R.id.tv);
        tv.setOnClickListener(new OnClickListener() {
            @Override
            public void onClick(View v) {
//                tv.setText(tv.getText() + "\n 啊哈哈哈啊哈");
//                tv.setText("\n 啊哈哈哈啊哈");
                dismiss();
            }
        });
    }
}
custom_bubble_attach_popup.xml
<?xml version="1.0" encoding="utf-8"?>
<LinearLayout xmlns:android="http://schemas.android.com/apk/res/android"
    android:layout_width="wrap_content"
    android:layout_height="wrap_content"
    android:orientation="vertical"
    android:padding="15dp">

    <TextView
        android:id="@+id/tv"
        android:layout_width="match_parent"
        android:layout_height="match_parent"
        android:text="床前明月光,\n疑是地上霜,\n举头望明月,\n低头思故乡低头思故乡。"
        android:textColor="#fff" />
</LinearLayout>
MainActivity.kt
class MainActivity : AppCompatActivity() {
    override fun onCreate(savedInstanceState: Bundle?) {
        super.onCreate(savedInstanceState)
        setContentView(R.layout.activity_main)
        btnBubbleAttachPopup2.setOnClickListener {
            XPopup.Builder(this@MainActivity)
                .isDestroyOnDismiss(true) //对于只使用一次的弹窗,推荐设置这个
                .atView(vv)
                .hasShadowBg(false) // 去掉半透明背景
                .offsetY(XPopupUtils.dp2px(this@MainActivity, 6f))
                .asCustom(
                    CustomBubbleAttachPopup(this@MainActivity)
                        //.setBubbleBgColor(Color.RED)  //气泡背景
                        .setArrowWidth(XPopupUtils.dp2px(this@MainActivity, 5f))
                        .setArrowHeight(
                            XPopupUtils.dp2px(
                                this@MainActivity,
                                6f
                            )
                        )
                        .setArrowRadius(XPopupUtils.dp2px(this@MainActivity, 3f))
                )
                .show()
        }
    }
}
主工程的build.gradle中加上:
allprojects {
    repositories {
        google()
        jcenter()
        maven { url 'https://jitpack.io' }//加上
    }
}
十、实现在中间显示带标题、内容、输入框(带有hint名)和确认取消按钮的弹窗的功能
实现:

主工程项目要导入的第三方项目library,如下图:
温馨提示:第三方项目library里面的不同弹窗有很多:从顶部弹窗、从底部弹窗、自由定位弹窗、自定义全屏弹窗、显示旋转弹窗(动画)…,适合工作,你想改什么样的弹窗就在这项目library里直接拿就即可,就是方便。订阅后CSDN私聊我,我就发给第三方项目library
代码:
MainActivity.kt
class MainActivity : AppCompatActivity() {
    override fun onCreate(savedInstanceState: Bundle?) {
        super.onCreate(savedInstanceState)
        setContentView(R.layout.activity_main)
        btnShowInputConfirm.setOnClickListener {
            XPopup.Builder(this@MainActivity)
                .hasStatusBarShadow(false)
                //.dismissOnBackPressed(false)
                .isDestroyOnDismiss(true) //对于只使用一次的弹窗对象,推荐设置这个
                .autoOpenSoftInput(true)
                .isDarkTheme(false)
                //.isViewMode(true)
                .setPopupCallback(DemoXPopupListener())
                //.autoFocusEditText(false) //是否让弹窗内的EditText自动获取焦点,默认是true
                //.moveUpToKeyboard(false)   //是否移动到软键盘上面,默认为true
                .asInputConfirm(
                    "我是标题", "大萨达撒大所大所大", null, "我是默认Hint文字"
                ) {
                    //                                          new XPopup.Builder(getContext()).asLoading().show();
                }
                .show()
        }
    }

    internal class DemoXPopupListener : SimpleCallback() {
        var fEvaluator = FloatEvaluator()
        var iEvaluator = FloatEvaluator()
        override fun onCreated(pv: BasePopupView) {
            Log.e("tag", "onCreated")
        }

        override fun onShow(popupView: BasePopupView) {
            Log.e("tag", "onShow")
        }

        override fun onDismiss(popupView: BasePopupView) {
            Log.e("tag", "onDismiss")
        }

        override fun beforeDismiss(popupView: BasePopupView) {
            Log.e("tag", "beforeDismiss")
        }

        //如果你自己想拦截返回按键事件,则重写这个方法,返回true即可
        override fun onBackPressed(popupView: BasePopupView): Boolean {
            Log.e("tag", "拦截的返回按键,按返回键XPopup不会关闭了")
            Toast.makeText(
                popupView.context,
                "onBackPressed返回true,拦截了返回按键,按返回键XPopup不会关闭了",
                Toast.LENGTH_SHORT
            ).show()
            return true
        }

        override fun onDrag(
            popupView: BasePopupView,
            value: Int,
            percent: Float,
            upOrLeft: Boolean
        ) {
            super.onDrag(popupView, value, percent, upOrLeft)
            Log.e("tag", "value: $value  percent: $percent")
            //            ((Activity) popupView.getContext()).getWindow().getDecorView().setTranslationX(value);
//            float e = fEvaluator.evaluate(percent, 1.0, 0.8);
//            View decorView = ((Activity) popupView.getContext()).getWindow().getDecorView();
//            decorView.setScaleX(e);
//            decorView.setScaleY(e);
//            FloatEvaluator iEvaluator = new FloatEvaluator();
//            View decorView = ((Activity) popupView.getContext()).getWindow().getDecorView();
//            float t = iEvaluator.evaluate(percent, 0, -popupView.getMeasuredWidth()/2);
//            decorView.setTranslationX(t);
        }

        override fun onKeyBoardStateChanged(popupView: BasePopupView, height: Int) {
            super.onKeyBoardStateChanged(popupView, height)
            Log.e("tag", "onKeyBoardStateChanged height: $height")
        }

        override fun onClickOutside(popupView: BasePopupView) {
            super.onClickOutside(popupView)
            Log.e("tag", "onClickOutside")
        }
    }
}
主工程的build.gradle中加上:
allprojects {
    repositories {
        google()
        jcenter()
        maven { url 'https://jitpack.io' }//加上
    }
}
十一、尝试22个不同动画(弹窗)
实现:
主工程项目要导入的第三方项目library,如下图:
温馨提示:第三方项目library里面的不同弹窗有很多:从顶部弹窗、从底部弹窗、自由定位弹窗、自定义全屏弹窗、显示旋转弹窗(动画)…,适合工作,你想改什么样的弹窗就在这项目library里直接拿就即可,就是方便。订阅后CSDN私聊我,我就发给第三方项目library
代码:
PopupAnimation.java,22个不同动画(注释有解释)
public enum PopupAnimation {
    // 缩放 + 透明渐变
    ScaleAlphaFromCenter, // 从中心进行缩放+透明渐变
    ScaleAlphaFromLeftTop, //从左上角进行缩放+透明渐变
    ScaleAlphaFromRightTop, //从右上角进行缩放+透明渐变
    ScaleAlphaFromLeftBottom, //从左下角进行缩放+透明渐变
    ScaleAlphaFromRightBottom, //从右下角进行缩放+透明渐变

    // 平移 + 透明渐变
    TranslateAlphaFromLeft,  // 从左平移进入
    TranslateAlphaFromRight, // 从右平移进入
    TranslateAlphaFromTop,   // 从上方平移进入
    TranslateAlphaFromBottom, // 从下方平移进入

    // 平移,不带透明渐变
    TranslateFromLeft,  // 从左平移进入
    TranslateFromRight, // 从右平移进入
    TranslateFromTop,   // 从上方平移进入
    TranslateFromBottom, // 从下方平移进入

    // 滑动 + 透明渐变
    ScrollAlphaFromLeft,
    ScrollAlphaFromLeftTop,
    ScrollAlphaFromTop,
    ScrollAlphaFromRightTop,
    ScrollAlphaFromRight,
    ScrollAlphaFromRightBottom,
    ScrollAlphaFromBottom,
    ScrollAlphaFromLeftBottom,

    //禁用动画
    NoAnimation
}
MainActivity.kt
class MainActivity : AppCompatActivity() {
    lateinit var data: Array<PopupAnimation>
    var list = ArrayList<String>()
    var adapter: ArrayAdapter<*>? = null

    override fun onCreate(savedInstanceState: Bundle?) {
        super.onCreate(savedInstanceState)
        setContentView(R.layout.activity_main)
        initViews()
    }

    private fun initViews() {
        data = PopupAnimation.values()
        for (i in 0..data.size - 1) {
            list.add(data[i].toString());
        }
        adapter = ArrayAdapter(this, android.R.layout.activity_list_item, android.R.id.text1, list)
        listview.adapter = adapter
        listview.setOnItemClickListener { adapterView, view, position, l ->
            XPopup.Builder(this@MainActivity)
                .popupAnimation(data[position])
                .asConfirm(
                    "演示应用不同的动画",
                    "你可以为弹窗选择任意一种动画,但这并不必要,因为我已经默认给每种弹窗设定了最佳动画!对于你自定义的弹窗,可以随心选择心仪的动画方案。",
                    null
                )
                .show()
        }
    }
}
主工程的build.gradle中加上:
allprojects {
    repositories {
        google()
        jcenter()
        maven { url 'https://jitpack.io' }//加上
    }
}
十二、实现左右边抽屉(drawer)弹窗---------第三方项目_XPopup源码的github地址
一、测试
实现:
二、项目
温馨提示:第三方项目library里面的弹窗有很多:从顶部弹窗、从底部弹窗、自由定位弹窗、自定义全屏弹窗、显示旋转弹窗(动画)…,适合工作,你想改什么样的弹窗就在这项目library里直接拿就即可,就是方便
三、代码
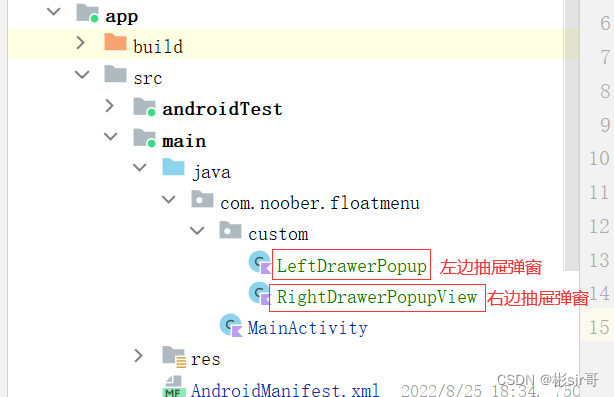
1、左边Drawer弹窗,LeftDrawerPopup.kt
class LeftDrawerPopup(context: Context) : DrawerPopupView(context) {
    override fun getImplLayoutId(): Int {
        return R.layout.custom_pager_drawer
    }
}
2、右边Drawer弹窗,RightDrawerPopupView.kt
class RightDrawerPopupView(context: Context) : DrawerPopupView(context) {
    override fun getImplLayoutId(): Int {
        return R.layout.custom_list_drawer
    }
}
3、MainActivity.kt
class MainActivity : AppCompatActivity() {
    var popupView: BasePopupView? = null
    override fun onCreate(savedInstanceState: Bundle?) {
        super.onCreate(savedInstanceState)
        setContentView(R.layout.activity_main)

        btnShowDrawerLeft.setOnClickListener {
            XPopup.Builder(this@MainActivity)
                .isDestroyOnDismiss(true) //对于只使用一次的弹窗,推荐设置这个
                .isViewMode(true) //使用了Fragment,必须开启View模式
                .asCustom(PagerDrawerPopup(this@MainActivity)) //                        .asCustom(new ListDrawerPopupView(getContext()))
                .show()
        }

        btnShowDrawerRight.setOnClickListener {
            popupView =
                XPopup.Builder(this@MainActivity) //                        .isDestroyOnDismiss(true) //对于只使用一次的弹窗,推荐设置这个
                    .autoOpenSoftInput(true)
                    .popupPosition(PopupPosition.Right) //右边
                    .hasStatusBarShadow(true) //启用状态栏阴影
                    .setPopupCallback(DemoXPopupListener())
                    .asCustom(ListDrawerPopupView(this@MainActivity))
            popupView!!.show()
        }
    }

    internal class DemoXPopupListener : SimpleCallback() {
        var fEvaluator = FloatEvaluator()
        var iEvaluator = FloatEvaluator()
        override fun onCreated(pv: BasePopupView) {
            Log.e("tag", "onCreated")
        }

        override fun onShow(popupView: BasePopupView) {
            Log.e("tag", "onShow")
        }

        override fun onDismiss(popupView: BasePopupView) {
            Log.e("tag", "onDismiss")
        }

        override fun beforeDismiss(popupView: BasePopupView) {
            Log.e("tag", "beforeDismiss")
        }

        //如果你自己想拦截返回按键事件,则重写这个方法,返回true即可
        override fun onBackPressed(popupView: BasePopupView): Boolean {
            Log.e("tag", "拦截的返回按键,按返回键XPopup不会关闭了")
            Toast.makeText(
                popupView.context,
                "onBackPressed返回true,拦截了返回按键,按返回键XPopup不会关闭了",
                Toast.LENGTH_SHORT
            ).show()
            return true
        }

        override fun onDrag(
            popupView: BasePopupView,
            value: Int,
            percent: Float,
            upOrLeft: Boolean
        ) {
            super.onDrag(popupView, value, percent, upOrLeft)
            Log.e("tag", "value: $value  percent: $percent")
        }

        override fun onKeyBoardStateChanged(popupView: BasePopupView, height: Int) {
            super.onKeyBoardStateChanged(popupView, height)
            Log.e("tag", "onKeyBoardStateChanged height: $height")
        }

        override fun onClickOutside(popupView: BasePopupView) {
            super.onClickOutside(popupView)
            Log.e("tag", "onClickOutside")
        }
    }
}
四、下载源码github地址:实现左右边抽屉(drawer)弹窗---------第三方项目_XPopup源码的github地址


 735
735

 被折叠的 条评论
为什么被折叠?
被折叠的 条评论
为什么被折叠?
 到【灌水乐园】发言


