


目录
服务器的端口
每个服务器会开放三个端口,这点可以通过配置文件中看出来
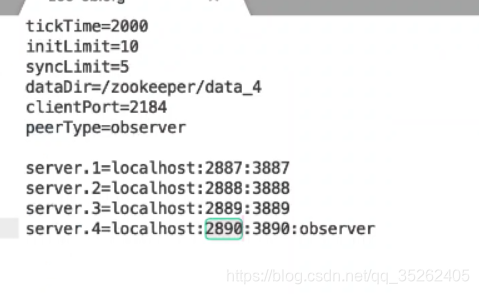
- clientPort:客户端访问的端口
- ip第一个冒号后的端口:负责通过数据,与其他服务器通信的端口
- ip第二个冒号后的端口:负责投票的端口
Zxid
在 ZAB 协议的事务编号 Zxid 设计中,Zxid 是一个 64 位的数字。
其中低 32 位是一个简单的单调递增的计数器,针对客户端每一个事务请求,计数器加 1;
而高 32 位则代表 Leader 周期 epoch 的编号。
每个当选产生一个新的 Leader 服务器,就会从这个 Leader 服务器上取出其本地日志中最大事务的ZXID,并从中读取 epoch 值,然后加 1,以此作为新的 epoch,并将低 32 位从 0 开始计数。
集群启动
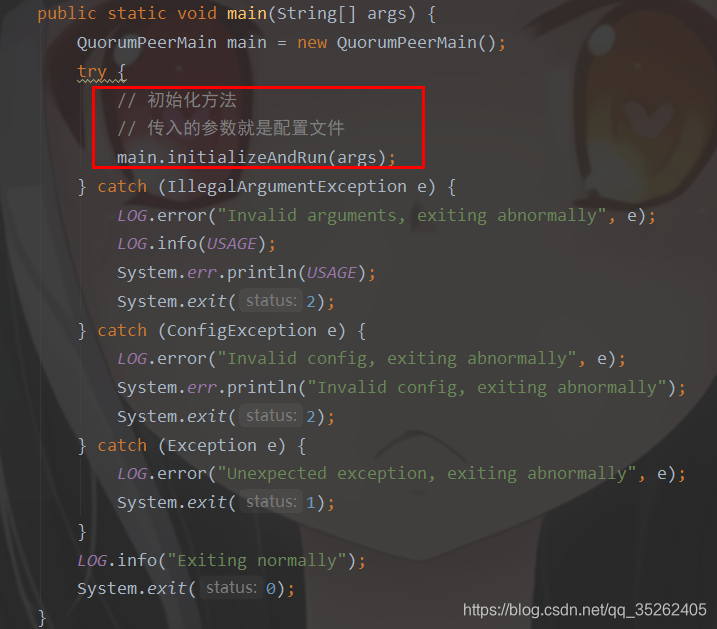
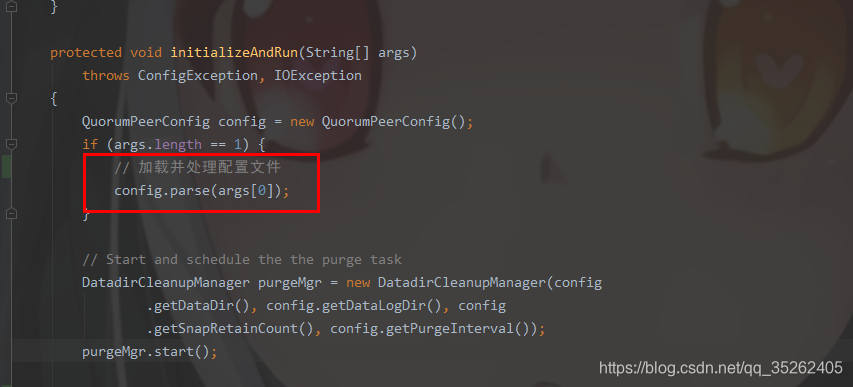
同样是通过QuorumPeerMain的main方法启动服务器,同样是先通过initializeAndRun方法进行初始化
这个parse方法就是对配置文件的解析
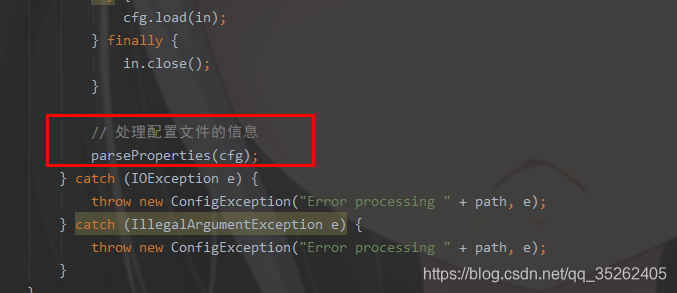
其中的parseProperties方法就是解析配置文件的方法,其中我会分析几个关键的地方
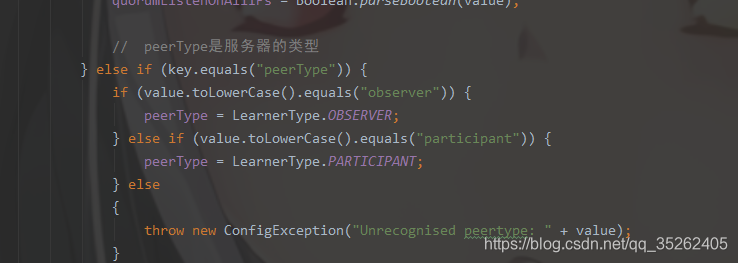
配置文件中的peerType属性就是配置服务器类型,一般都是配置观察者的时候使用的
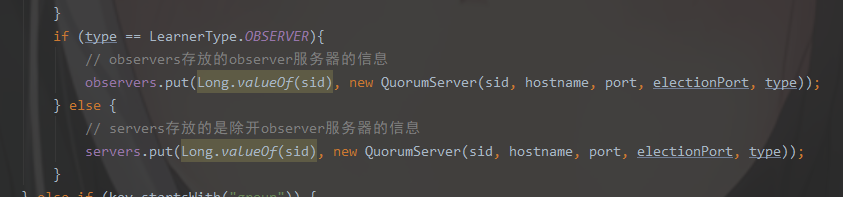
后面会将配置的信息存放在一个map中,可以发现观察者服务器与其他服务器存放的位置不同
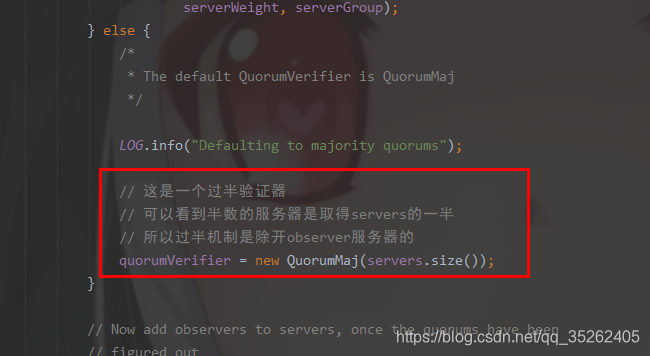
到最后会创建一个过半验证器,而这个过半数其实就是前面servers的数量的一般,是除开观察者的
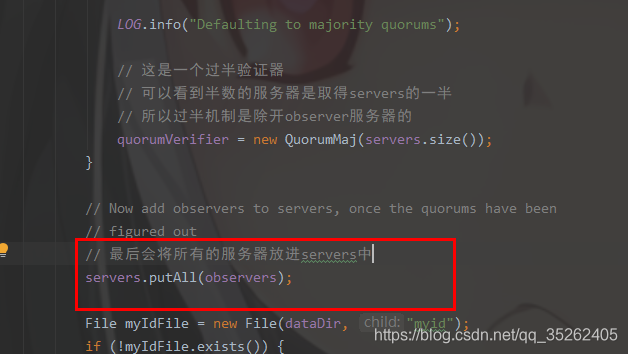
创建过半验证器后会将所有服务器都放入servers中
集群启动的方式和单机模式有所不同
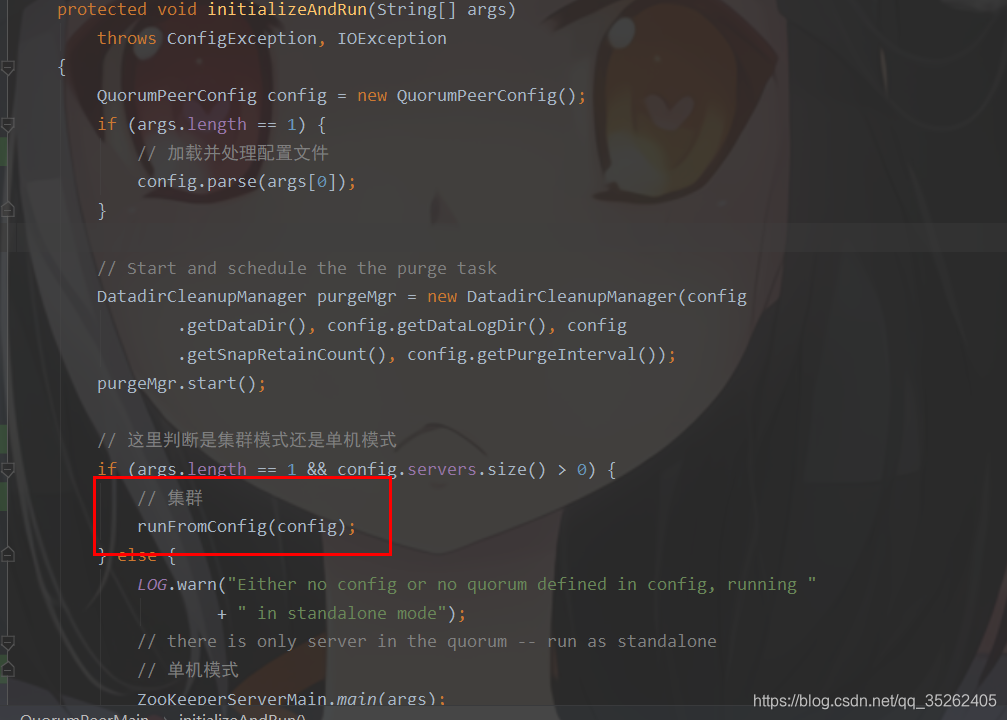
这个方法中主要干了三件事:
- 打开socket
- 配置服务器对象
- 启动服务器
public void runFromConfig(QuorumPeerConfig config) throws IOException {
  try {
      ManagedUtil.registerLog4jMBeans();
  } catch (JMException e) {
      LOG.warn("Unable to register log4j JMX control", e);
  }

  LOG.info("Starting quorum peer");
  try {
      ServerCnxnFactory cnxnFactory = ServerCnxnFactory.createFactory();
      // 打开socket
      cnxnFactory.configure(config.getClientPortAddress(),
                            config.getMaxClientCnxns());

      // 下面都是将配置文件中的配置设置到quorumPeer对象中
      // 这个quorumPeer相当于当前服务器
      quorumPeer = getQuorumPeer();

      quorumPeer.setQuorumPeers(config.getServers());
      quorumPeer.setTxnFactory(new FileTxnSnapLog(
              new File(config.getDataLogDir()),
              new File(config.getDataDir())));
      quorumPeer.setElectionType(config.getElectionAlg());
      quorumPeer.setMyid(config.getServerId());
      quorumPeer.setTickTime(config.getTickTime());
      quorumPeer.setInitLimit(config.getInitLimit());
      quorumPeer.setSyncLimit(config.getSyncLimit());
      quorumPeer.setQuorumListenOnAllIPs(config.getQuorumListenOnAllIPs());
      quorumPeer.setCnxnFactory(cnxnFactory);
      quorumPeer.setQuorumVerifier(config.getQuorumVerifier());
      quorumPeer.setClientPortAddress(config.getClientPortAddress());
      quorumPeer.setMinSessionTimeout(config.getMinSessionTimeout());
      quorumPeer.setMaxSessionTimeout(config.getMaxSessionTimeout());
      quorumPeer.setZKDatabase(new ZKDatabase(quorumPeer.getTxnFactory()));
      quorumPeer.setLearnerType(config.getPeerType());
      quorumPeer.setSyncEnabled(config.getSyncEnabled());

      // sets quorum sasl authentication configurations
      quorumPeer.setQuorumSaslEnabled(config.quorumEnableSasl);
      if(quorumPeer.isQuorumSaslAuthEnabled()){
          quorumPeer.setQuorumServerSaslRequired(config.quorumServerRequireSasl);
          quorumPeer.setQuorumLearnerSaslRequired(config.quorumLearnerRequireSasl);
          quorumPeer.setQuorumServicePrincipal(config.quorumServicePrincipal);
          quorumPeer.setQuorumServerLoginContext(config.quorumServerLoginContext);
          quorumPeer.setQuorumLearnerLoginContext(config.quorumLearnerLoginContext);
      }

      quorumPeer.setQuorumCnxnThreadsSize(config.quorumCnxnThreadsSize);
      quorumPeer.initialize();

      // 启动服务器
      quorumPeer.start();
      quorumPeer.join();
  } catch (InterruptedException e) {
      // warn, but generally this is ok
      LOG.warn("Quorum Peer interrupted", e);
  }
}
在启动服务器的方法中主要干了下面几件事,最后就是执行执行run方法
@Override
public synchronized void start() {
    // 导入快照信息到内存
    loadDataBase();
    // 开启线程接收客户端请求
    cnxnFactory.start();
    // 开始领导者选举
    startLeaderElection();
    // 启动线程,执行run方法
    super.start();
}
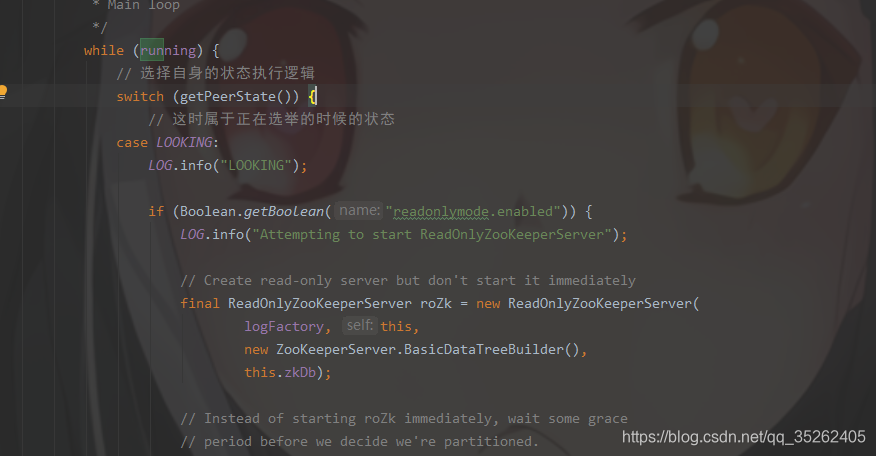
进入run方法我们主要关注那个while循环,这个while循环里有个选择语句,其中选择的就是当前服务器的状态,总共有下面四种状态
- LOOKING:选举状态
- OBSERVING:观察者
- FOLLOWING:跟随者
- LEADING:领导者
这里就先不分析领导者选举了,就LEADING和FOLLOWING这两个状态来分析
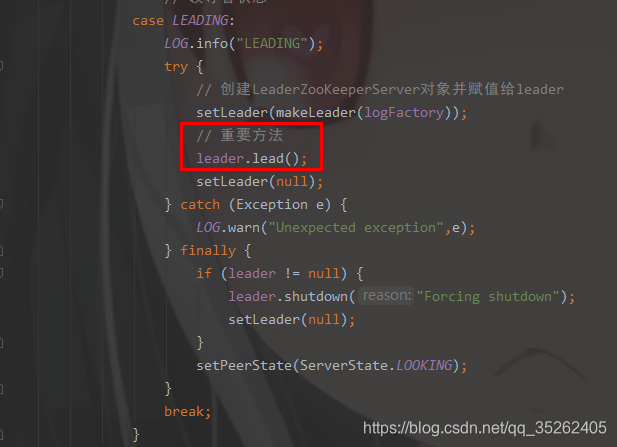
- LEADING
这里只分析lead方法
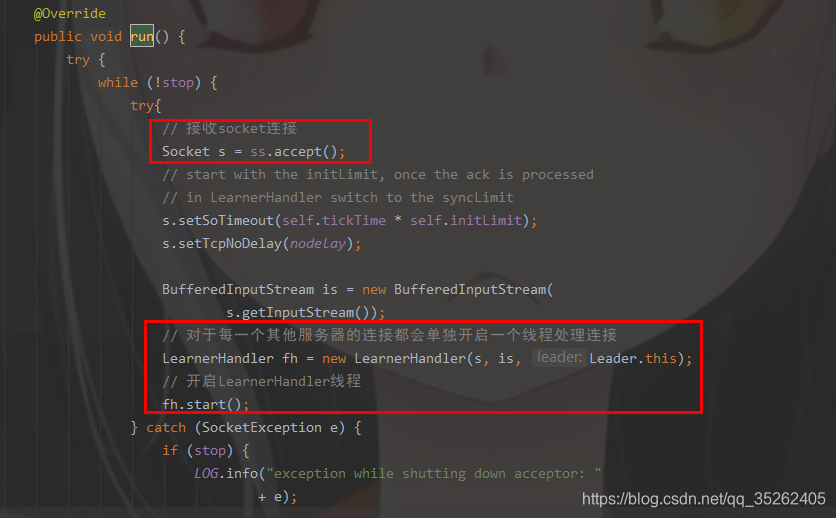
主要是开启了线程
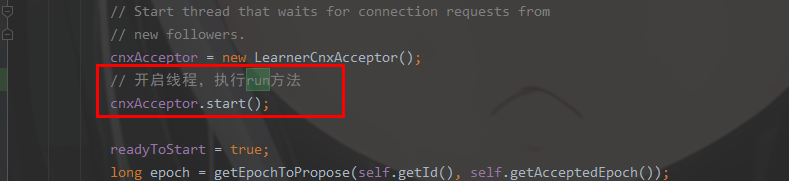
在run方法中主要是接收了socket连接,这里的连接自然是learner的连接(learner包括follower和observer),然后会为每一个连接的服务器socket开启一个LearnerHandler线程
这里自然来分析一下LearnerHandler线程
@Override
public void run() {
    try {
        leader.addLearnerHandler(this);
        tickOfNextAckDeadline = leader.self.tick.get()
                + leader.self.initLimit + leader.self.syncLimit;

        ia = BinaryInputArchive.getArchive(bufferedInput);
        bufferedOutput = new BufferedOutputStream(sock.getOutputStream());
        oa = BinaryOutputArchive.getArchive(bufferedOutput);

        QuorumPacket qp = new QuorumPacket();
        // 接收learner发送的数据
        ia.readRecord(qp, "packet");
        if(qp.getType() != Leader.FOLLOWERINFO && qp.getType() != Leader.OBSERVERINFO){
        	LOG.error("First packet " + qp.toString()
                    + " is not FOLLOWERINFO or OBSERVERINFO!");
            return;
        }
        byte learnerInfoData[] = qp.getData();
        if (learnerInfoData != null) {
        	if (learnerInfoData.length == 8) {
        		ByteBuffer bbsid = ByteBuffer.wrap(learnerInfoData);
        		this.sid = bbsid.getLong();
        	} else {
        		LearnerInfo li = new LearnerInfo();
        		ByteBufferInputStream.byteBuffer2Record(ByteBuffer.wrap(learnerInfoData), li);
        		this.sid = li.getServerid();
        		this.version = li.getProtocolVersion();
        	}
        } else {
        	this.sid = leader.followerCounter.getAndDecrement();
        }

        LOG.info("Follower sid: " + sid + " : info : "
                + leader.self.quorumPeers.get(sid));

        if (qp.getType() == Leader.OBSERVERINFO) {
              learnerType = LearnerType.OBSERVER;
        }

        // 拿到leader自身的领导者版本
        long lastAcceptedEpoch = ZxidUtils.getEpochFromZxid(qp.getZxid());

        long peerLastZxid;
        StateSummary ss = null;
        long zxid = qp.getZxid();

        // 这里this.getSid()是每个learner的id
        // 这个方法是得到当前最新的领导者版本号
        // 这个方法会把所有线程中对应的learner的版本号拿出来对比,得到一个最新的
        long newEpoch = leader.getEpochToPropose(this.getSid(), lastAcceptedEpoch);

        if (this.getVersion() < 0x10000) {
            // we are going to have to extrapolate the epoch information
            long epoch = ZxidUtils.getEpochFromZxid(zxid);
            ss = new StateSummary(epoch, zxid);
            // fake the message
            leader.waitForEpochAck(this.getSid(), ss);
        } else {
            byte ver[] = new byte[4];
            ByteBuffer.wrap(ver).putInt(0x10000);

            // 这里leader也会创建以和Packet对象封装需要发送给learner的信息
            QuorumPacket newEpochPacket = new QuorumPacket(Leader.LEADERINFO, ZxidUtils.makeZxid(newEpoch, 0), ver, null);
            // 将数据发送给learner
            oa.writeRecord(newEpochPacket, "packet");
            // 刷新
            bufferedOutput.flush();
            // 创建一个ack包接收follower发送回来的数据
            QuorumPacket ackEpochPacket = new QuorumPacket();
            // 接收follower发送的ack数据
            ia.readRecord(ackEpochPacket, "packet");
            if (ackEpochPacket.getType() != Leader.ACKEPOCH) {
                LOG.error(ackEpochPacket.toString()
                        + " is not ACKEPOCH");
                return;
			}
			// 省略若干代码、、、、、、、
}
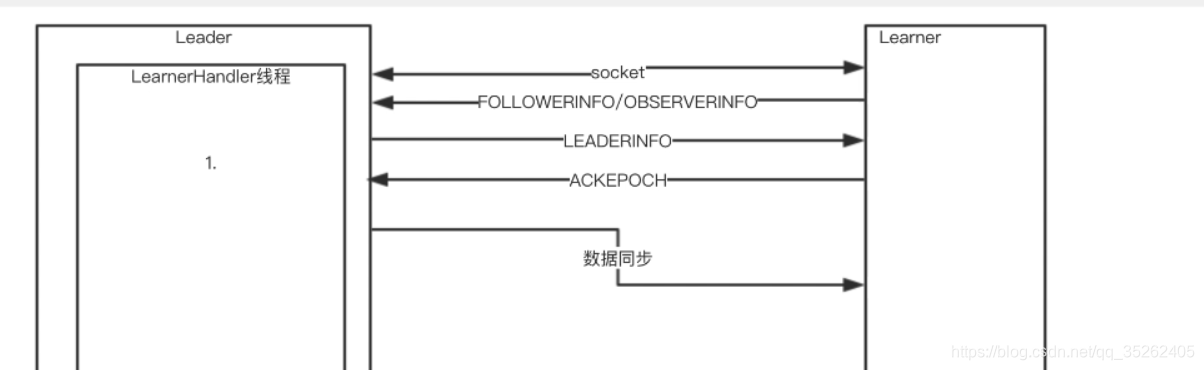
这里主要干了如下几件事情
- 接收learner发送的FOLLOWERINFO数据
- 计算出最新的epoch,主要的逻辑就是通过所有自身的Zxid和超过一半learner的Zxid(这里使用了过半机制)找到最新的epoch,并且最后加1
- 向learner发送LEADERINFO数据
- 接收follower返回的ACKEPOCH数据
这里比较复杂的就getEpochToPropose方法,这个方法就是用来寻找最新的epoch的
public long getEpochToPropose(long sid, long lastAcceptedEpoch) throws InterruptedException, IOException {
    synchronized(connectingFollowers) {
        if (!waitingForNewEpoch) {
            return epoch;
        }
        if (lastAcceptedEpoch >= epoch) {
            epoch = lastAcceptedEpoch+1;
        }
        if (isParticipant(sid)) {
            connectingFollowers.add(sid);
        }
        QuorumVerifier verifier = self.getQuorumVerifier();
        // containsQuorum是过半机制的验证
        if (connectingFollowers.contains(self.getId()) &&
                                        verifier.containsQuorum(connectingFollowers)) {
            waitingForNewEpoch = false;
            self.setAcceptedEpoch(epoch);
            connectingFollowers.notifyAll();
        } else {
            long start = Time.currentElapsedTime();
            long cur = start;
            long end = start + self.getInitLimit()*self.getTickTime();
            while(waitingForNewEpoch && cur < end) {
                connectingFollowers.wait(end - cur);
                cur = Time.currentElapsedTime();
            }
            if (waitingForNewEpoch) {
                throw new InterruptedException("Timeout while waiting for epoch from quorum");
            }
        }
        return epoch;
    }
}
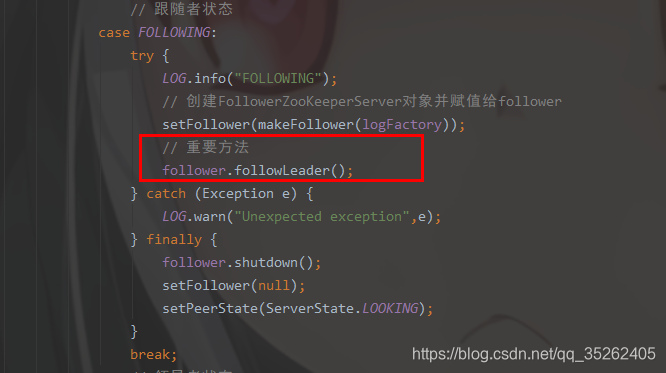
- FOLLOWING
同样这里只是分析followLeader方法
这里只分析前面和leader建立连接和拿到最新的epoch
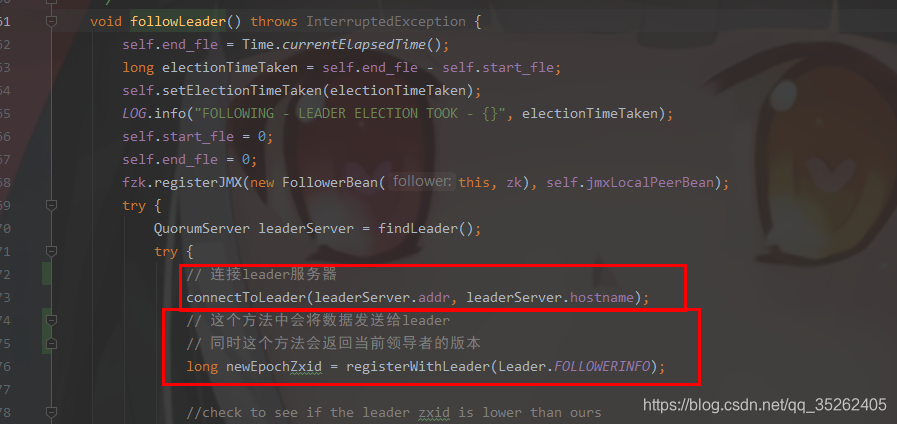
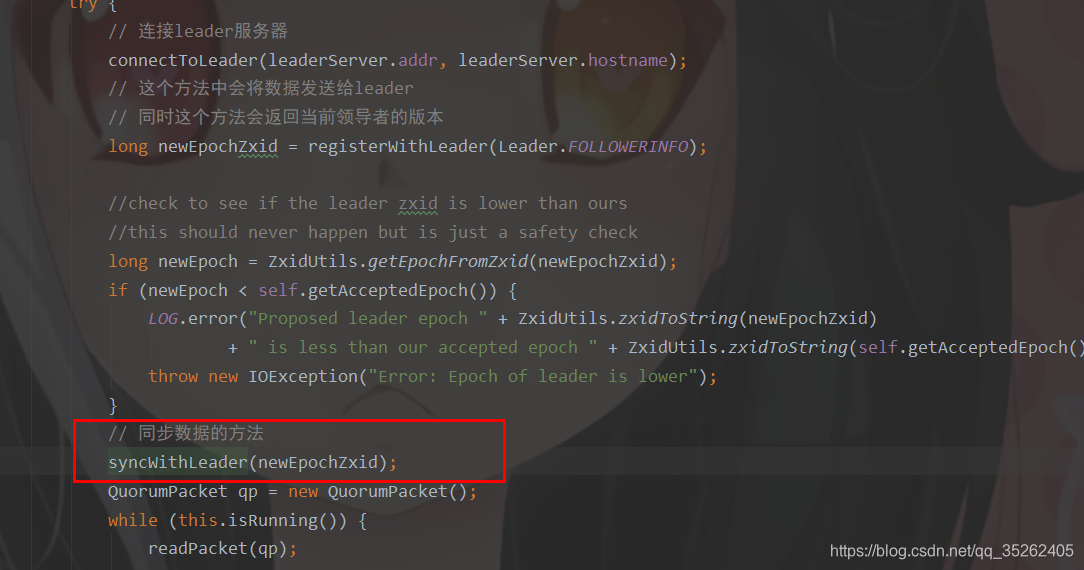
与leader连接只是单纯的socket连接,就不再分析了,这里主要分析registerWithLeader方法
protected long registerWithLeader(int pktType) throws IOException{

	// 省略若干代码、、、、、、

    // 将数据发送给leader
    writePacket(qp, true);
    // 接收leader发送的数据
    readPacket(qp);
    final long newEpoch = ZxidUtils.getEpochFromZxid(qp.getZxid());
if (qp.getType() == Leader.LEADERINFO) {
    	// we are connected to a 1.0 server so accept the new epoch and read the next packet
    	leaderProtocolVersion = ByteBuffer.wrap(qp.getData()).getInt();
    	byte epochBytes[] = new byte[4];
    	final ByteBuffer wrappedEpochBytes = ByteBuffer.wrap(epochBytes);
    	if (newEpoch > self.getAcceptedEpoch()) {
    		wrappedEpochBytes.putInt((int)self.getCurrentEpoch());
    		self.setAcceptedEpoch(newEpoch);
    	} else if (newEpoch == self.getAcceptedEpoch()) {
    		// since we have already acked an epoch equal to the leaders, we cannot ack
    		// again, but we still need to send our lastZxid to the leader so that we can
    		// sync with it if it does assume leadership of the epoch.
    		// the -1 indicates that this reply should not count as an ack for the new epoch
            wrappedEpochBytes.putInt(-1);
    	} else {
    		throw new IOException("Leaders epoch, " + newEpoch + " is less than accepted epoch, " + self.getAcceptedEpoch());
    	}
    	// 封装ack数据
    	QuorumPacket ackNewEpoch = new QuorumPacket(Leader.ACKEPOCH, lastLoggedZxid, epochBytes, null);
    	// 发送ack数据给leader
    	writePacket(ackNewEpoch, true);
        return ZxidUtils.makeZxid(newEpoch, 0);

// 省略若干代码、、、、、、
}
这个方法主要干了下面几件事
- 将FOLLOWERINFO数据发送给leader
- 接收leader发送的LEADERINFO数据并得到最新的epoch
- 向leader发送ACKEPOCH数据
至于observer的逻辑就不再分析了,和follower的相差无几,下面就是集群启动时的大致流程,至于数据同步会在下面分析。
同步数据
在分析同步数据之前我们先回顾一下zookeeper的容灾备份机制,zookeeper有两种机制来保障数据的持久性,一个是快照数据,一个事务日志。
其中快照数据包含了某一时刻之前的所有数据,但是zookeeper不会再每一次持久化的时候打快照,这个频率也不是固定的。
不过肯定的是只是通过快照是无法保障数据的完整性的,还需要事务日志的协助,其中事务日志最多只能保存最近500次事务的日志。
不过如果事务日志和快照数据同时起作用那么就可以保障数据的完整性,一般zookeeper再启动时会先将快照数据导入内存,然后查看快照数据最新的事务id时多少,然后查看事务日志是不是还有更新的数据,如果有就通过事务日志将没有持久化的数据重新执行一遍并持久化。
承接上面的集群启动我们先回到LeaderHandler的run方法
// 省略若干代码、、、、、、、、
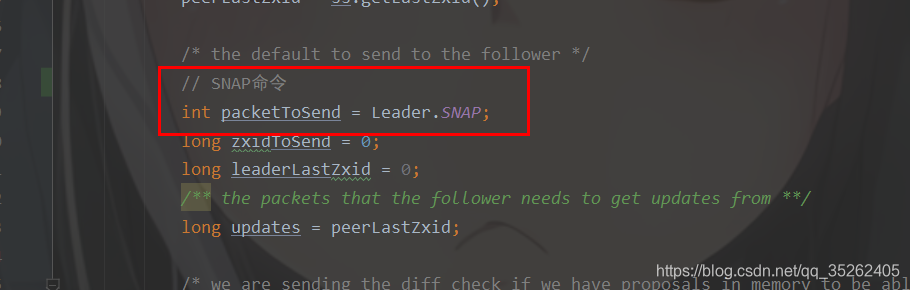
/* the default to send to the follower */
// SNAP命令
int packetToSend = Leader.SNAP;
long zxidToSend = 0;
long leaderLastZxid = 0;
/** the packets that the follower needs to get updates from **/
long updates = peerLastZxid;
/* we are sending the diff check if we have proposals in memory to be able to
* send a diff to the
*/
ReentrantReadWriteLock lock = leader.zk.getZKDatabase().getLogLock();
ReadLock rl = lock.readLock();
try {
rl.lock();
final long maxCommittedLog = leader.zk.getZKDatabase().getmaxCommittedLog();
final long minCommittedLog = leader.zk.getZKDatabase().getminCommittedLog();
LOG.info("Synchronizing with Follower sid: " + sid
+" maxCommittedLog=0x"+Long.toHexString(maxCommittedLog)
+" minCommittedLog=0x"+Long.toHexString(minCommittedLog)
+" peerLastZxid=0x"+Long.toHexString(peerLastZxid));
LinkedList<Proposal> proposals = leader.zk.getZKDatabase().getCommittedLog();
// peerLastZxid是learner的最新事务id
if (peerLastZxid == leader.zk.getZKDatabase().getDataTreeLastProcessedZxid()) {
// Follower is already sync with us, send empty diff
LOG.info("leader and follower are in sync, zxid=0x{}",
Long.toHexString(peerLastZxid));
packetToSend = Leader.DIFF;
zxidToSend = peerLastZxid;
// 如果learner的还有需要同步的数据的话
// 就是learner的事务id不等于leader的事务id
} else if (proposals.size() != 0) {
LOG.debug("proposal size is {}", proposals.size());
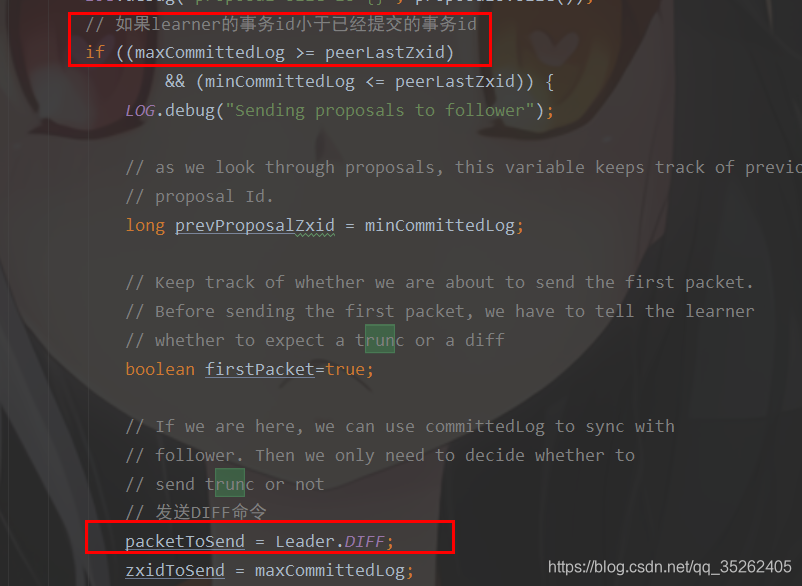
// 如果learner的事务id小于已经提交的事务id
if ((maxCommittedLog >= peerLastZxid)
&& (minCommittedLog <= peerLastZxid)) {
LOG.debug("Sending proposals to follower");
// as we look through proposals, this variable keeps track of previous
// proposal Id.
long prevProposalZxid = minCommittedLog;
// Keep track of whether we are about to send the first packet.
// Before sending the first packet, we have to tell the learner
// whether to expect a trunc or a diff
boolean firstPacket=true;
// If we are here, we can use committedLog to sync with
// follower. Then we only need to decide whether to
// send trunc or not
// 发送DIFF命令
packetToSend = Leader.DIFF;
zxidToSend = maxCommittedLog;
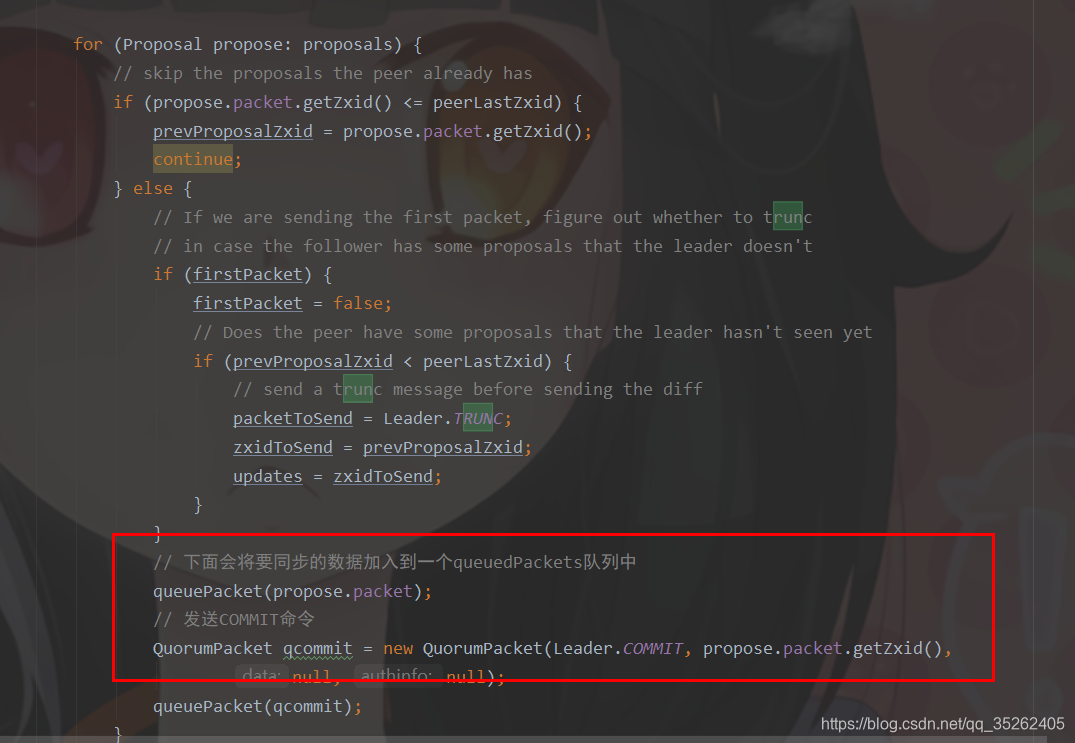
for (Proposal propose: proposals) {
// skip the proposals the peer already has
if (propose.packet.getZxid() <= peerLastZxid) {
prevProposalZxid = propose.packet.getZxid();
continue;
} else {
// If we are sending the first packet, figure out whether to trunc
// in case the follower has some proposals that the leader doesn't
if (firstPacket) {
firstPacket = false;
// Does the peer have some proposals that the leader hasn't seen yet
if (prevProposalZxid < peerLastZxid) {
// send a trunc message before sending the diff
packetToSend = Leader.TRUNC;
zxidToSend = prevProposalZxid;
updates = zxidToSend;
}
}
// 下面会将要同步的数据加入到一个queuedPackets队列中
queuePacket(propose.packet);
// 发送COMMIT命令
QuorumPacket qcommit = new QuorumPacket(Leader.COMMIT, propose.packet.getZxid(),
null, null);
queuePacket(qcommit);
}
}
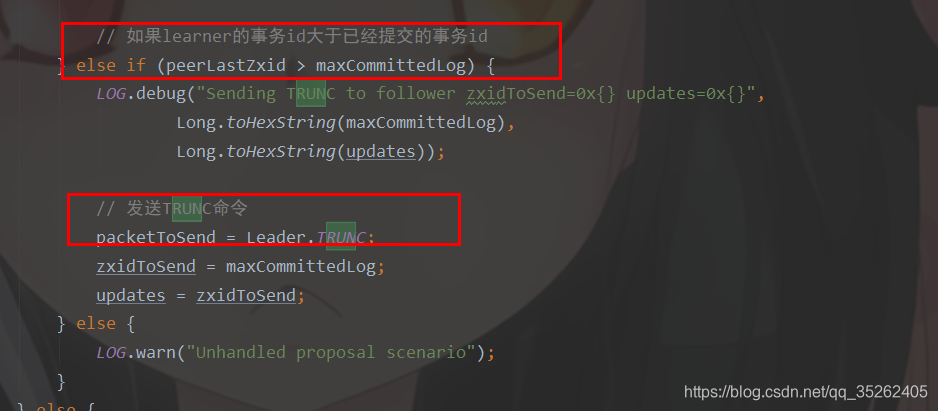
// 如果learner的事务id大于已经提交的事务id
} else if (peerLastZxid > maxCommittedLog) {
LOG.debug("Sending TRUNC to follower zxidToSend=0x{} updates=0x{}",
Long.toHexString(maxCommittedLog),
Long.toHexString(updates));
// 发送TRUNC命令
packetToSend = Leader.TRUNC;
zxidToSend = maxCommittedLog;
updates = zxidToSend;
} else {
LOG.warn("Unhandled proposal scenario");
}
} else {
// just let the state transfer happen
LOG.debug("proposals is empty");
}
LOG.info("Sending " + Leader.getPacketType(packetToSend));
leaderLastZxid = leader.startForwarding(this, updates);
} finally {
rl.unlock();
}
QuorumPacket newLeaderQP = new QuorumPacket(Leader.NEWLEADER,
ZxidUtils.makeZxid(newEpoch, 0), null, null);
if (getVersion() < 0x10000) {
oa.writeRecord(newLeaderQP, "packet");
} else {
queuedPackets.add(newLeaderQP);
}
bufferedOutput.flush();
//Need to set the zxidToSend to the latest zxid
if (packetToSend == Leader.SNAP) {
zxidToSend = leader.zk.getZKDatabase().getDataTreeLastProcessedZxid();
}
oa.writeRecord(new QuorumPacket(packetToSend, zxidToSend, null, null), "packet");
bufferedOutput.flush();
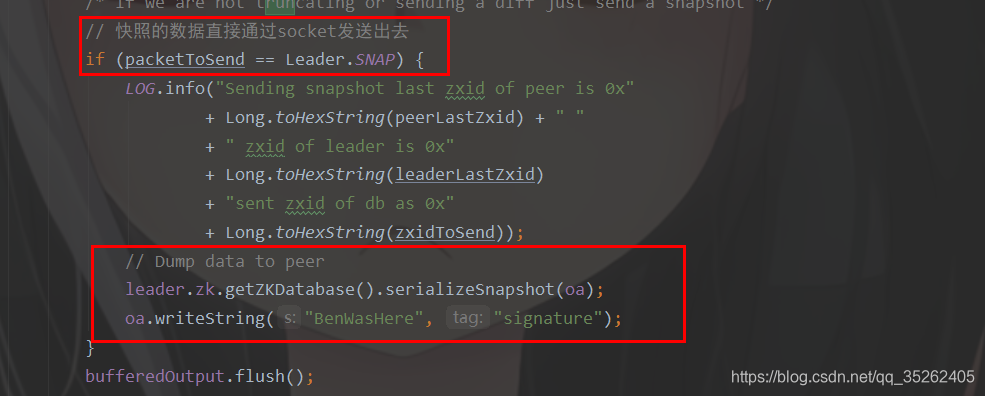
/* if we are not truncating or sending a diff just send a snapshot */
// 快照的数据直接通过socket发送出去
if (packetToSend == Leader.SNAP) {
LOG.info("Sending snapshot last zxid of peer is 0x"
+ Long.toHexString(peerLastZxid) + " "
+ " zxid of leader is 0x"
+ Long.toHexString(leaderLastZxid)
+ "sent zxid of db as 0x"
+ Long.toHexString(zxidToSend));
// Dump data to peer
leader.zk.getZKDatabase().serializeSnapshot(oa);
oa.writeString("BenWasHere", "signature");
}
bufferedOutput.flush();
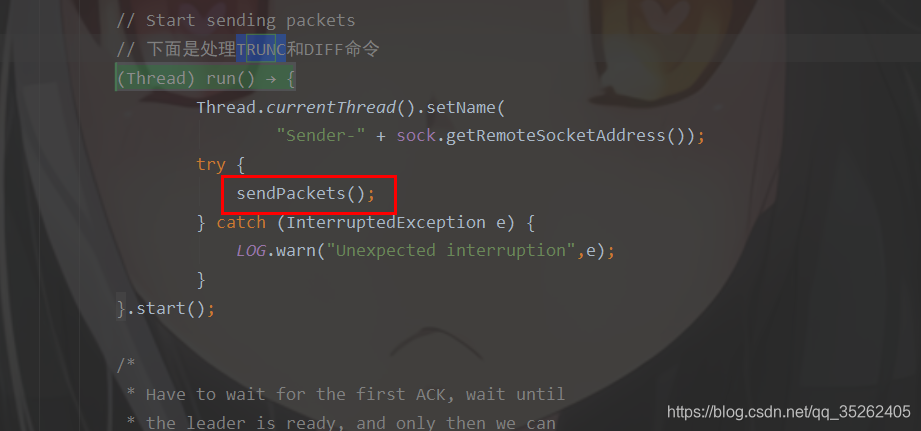
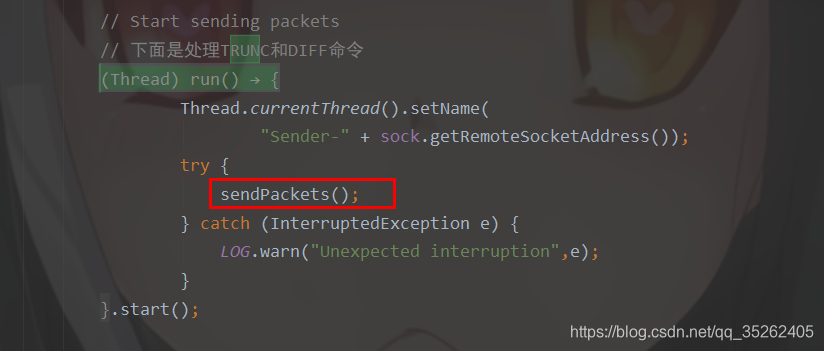
// Start sending packets
// 下面是处理TRUNC和DIFF命令
new Thread() {
public void run() {
Thread.currentThread().setName(
"Sender-" + sock.getRemoteSocketAddress());
try {
sendPackets();
} catch (InterruptedException e) {
LOG.warn("Unexpected interruption",e);
}
}
}.start();
// 省略若干代码、、、、、、、、
在上面的逻辑中,leader接收到learner的事务id,通过分析事务id,与自身已提交的事务id作对比,来决定与learner同步数据的方式,总共有如下三种方式:
- SNAP:如果learner的事务id比leader中事务日志的最小id还要小的时候,就需要通过快照数据的方式同步数据
- TRUNC:如果learner的事务id比leader中事务日志的最小id大但是比最大的id小的时候,就需要通过事务日志的方式同步数据
- DIFF:如果learner的事务id比leader中事务日志的最大id还要大的时候,就需要learner删除多余的数据
下面会逐个分析每种方式的执行逻辑
- SNAP
一开始就会赋值SNAP命令
如果是SNAP方式同步数据会直接将需要同步的数据发送给learner
至于learner如果同步的数据就需要承接上面集群启动,在连接leader之后就是同步数据,通过syncWithLeader方法实现的
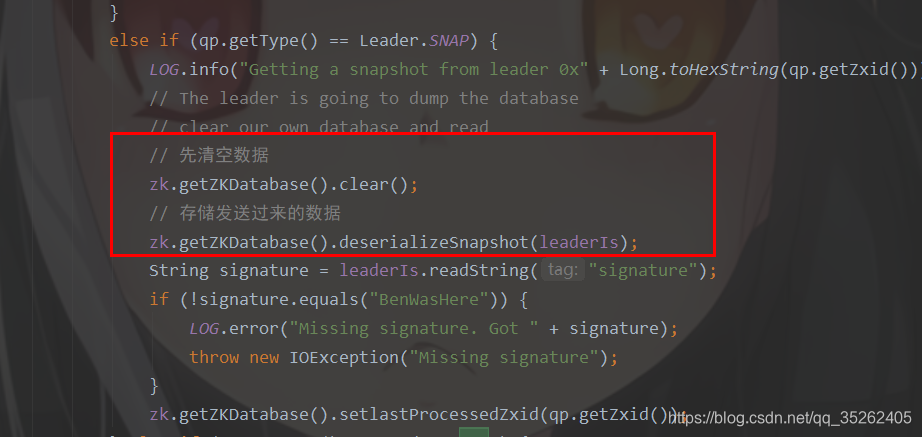
在syncWithLeader方法中对于SNAP的处理如下,差不多就是两个步骤
- 清空数据
- 添加快照数据
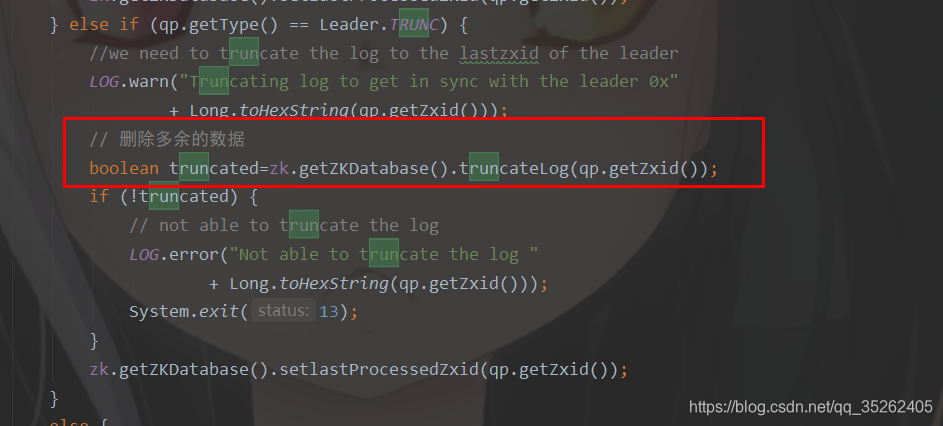
- TRUNC
如果learner的事务id大于已经提交的事务id就会发送TRUNC命令
在后面会开启一个线程去发送TRUNC命令
在learner的syncWithLeader方法中只是将多余的数据删除
- DIFF
如果learner的事务id小于已经提交的事务id就会发送DIFF命令
并且会将需要同步的数据通过COMMIT发送过去,这里是先放到了一个队列中
同样是通过一个线程发送的数据
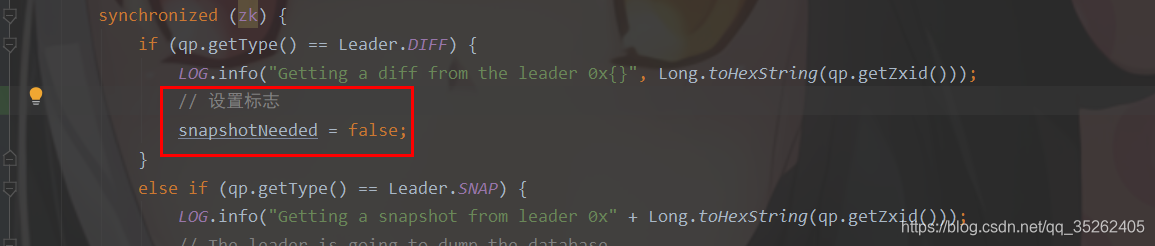
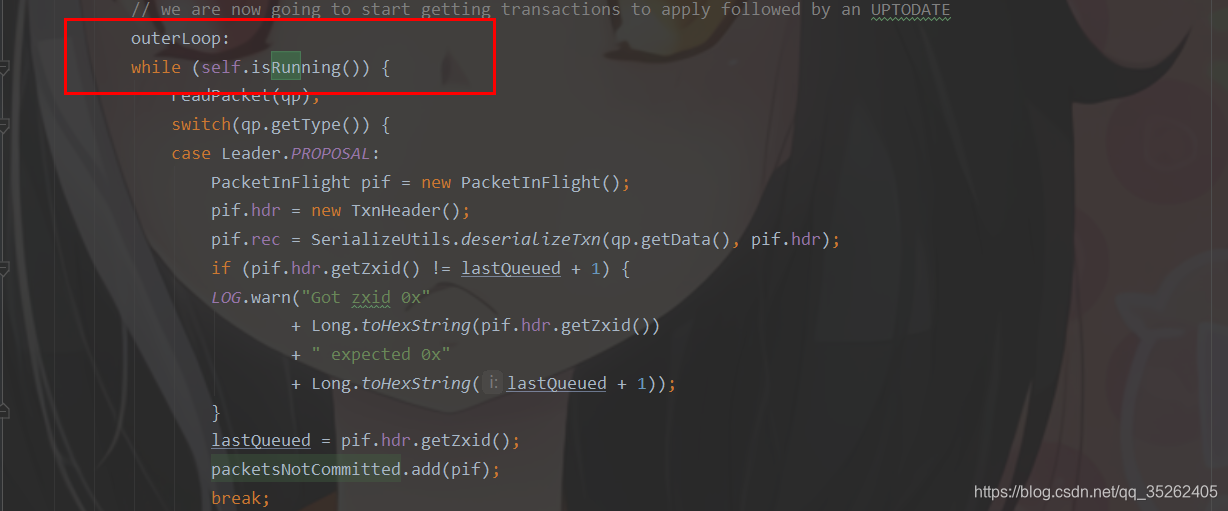
在learner的syncWithLeader方法先是设置了一个标志位

前面我们直到leader发送了COMMIT命令,在这里也将需要同步的数据放到了一个队列中
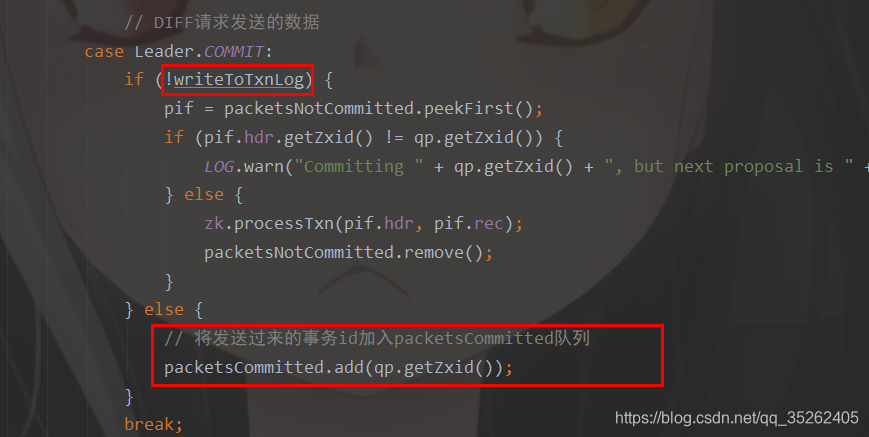
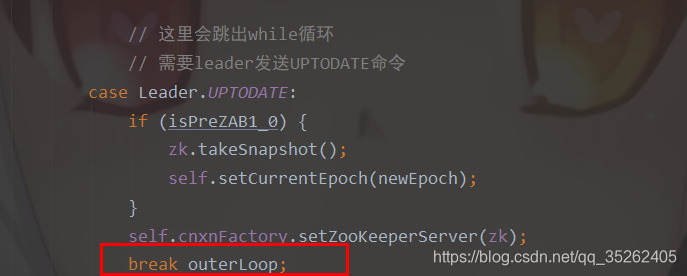
不过这里需要注意的是这里已经进入了一个while循环中,只有通过leader发送UPTODATE命令才能跳出循环
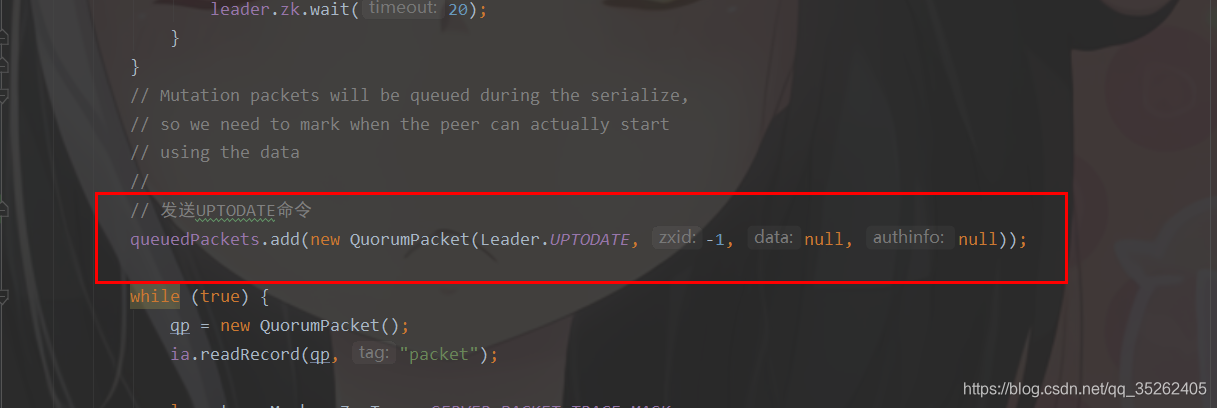
leader也是会发送UPTODATE命令
最后在learner中就会完成数据的提交并同步
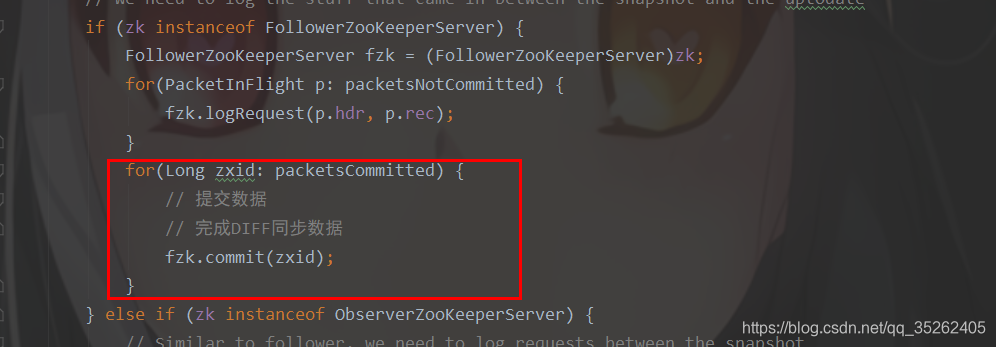
这也就是集群模式下zookeeper的同步数据的方式,也是因为zookeeper通过快照和事务日志的方式持久化数据,所以zookeeper有如此的逻辑来同步数据。
客户端发送请求
处理器链
首先我们来了解一下各种服务器端的处理器链,因为zookeeper服务器有三种角色,所以自然有三种不同的服务端对象,分别是
- LeaderZooKeeperServer
- FollowerZooKeeperServer
- ObserverZooKeeperServer
自然各自的服务器都有其各自的处理器链,在下面setupRequestProcessors方法中就会初始化处理器链,这个方法每种服务器对象都做了重写。
    public synchronized void startup() {
        if (sessionTracker == null) {
            createSessionTracker();
        }
        startSessionTracker();
        // 初始化处理器链
        setupRequestProcessors();
        registerJMX();
        setState(State.RUNNING);
        notifyAll();
    }
LeaderZooKeeperServer
@Override
protected void setupRequestProcessors() {
/**
* 下面总共初始化了两条处理器链
* PrepRequestProcessor---->ProposalRequestProcessor---->CommitProcessor---->ToBeAppliedRequestProcessor---->FinalRequestProcessor
* SyncRequestProcessor---->AckRequestProcessor
*/
RequestProcessor finalProcessor = new FinalRequestProcessor(this);
RequestProcessor toBeAppliedProcessor = new Leader.ToBeAppliedRequestProcessor(
finalProcessor, getLeader().toBeApplied);
commitProcessor = new CommitProcessor(toBeAppliedProcessor,
Long.toString(getServerId()), false,
getZooKeeperServerListener());
commitProcessor.start();
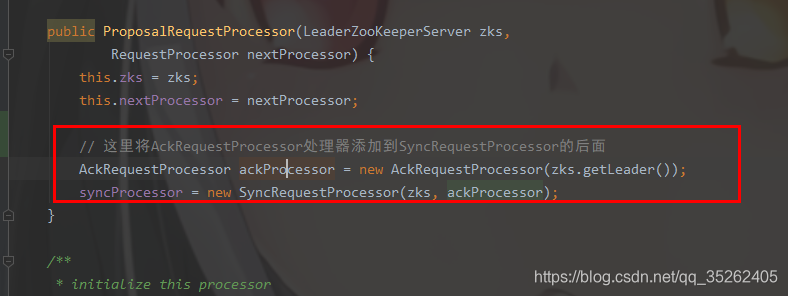
// 这里ProposalRequestProcessor的构造器将AckRequestProcessor添加到SyncRequestProcessor的后面
ProposalRequestProcessor proposalProcessor = new ProposalRequestProcessor(this,
commitProcessor);
// 启动了SyncRequestProcessor处理器
proposalProcessor.initialize();
firstProcessor = new PrepRequestProcessor(this, proposalProcessor);
((PrepRequestProcessor)firstProcessor).start();
}
- PrepRequestProcessor:ACL安全验证,接收数据
- ProposalRequestProcessor:负责投票
- CommitProcessor:负责提交
- ToBeAppliedRequestProcessor
- FinalRequestProcessor:更新内存,返回response,触发事件
同时单独启动了SyncRequestProcessor处理器
- SyncRequestProcessor
- AckRequestProcessor
需要注意在ProposalRequestProcessor的构造方法中将AckRequestProcessor添加到SyncRequestProcessor的后面
FollowerZooKeeperServer
@Override
protected void setupRequestProcessors() {
   /**
    * 下面总共初始化了两条处理器链
    * FollowerRequestProcessor---->CommitProcessor---->FinalRequestProcessor
    * SyncRequestProcessor---->SendAckRequestProcessor
    */
    RequestProcessor finalProcessor = new FinalRequestProcessor(this);
    commitProcessor = new CommitProcessor(finalProcessor,
            Long.toString(getServerId()), true,
            getZooKeeperServerListener());
    commitProcessor.start();
    firstProcessor = new FollowerRequestProcessor(this, commitProcessor);
    ((FollowerRequestProcessor) firstProcessor).start();
    // 这里创建了一个SendAckRequestProcessor处理器,在SyncRequestProcessor的后面
    syncProcessor = new SyncRequestProcessor(this,
            new SendAckRequestProcessor((Learner)getFollower()));
    // 开启了SyncRequestProcessor处理器
    syncProcessor.start();
}
- FollowerRequestProcessor
- CommitProcessor
- FinalRequestProcessor
同样的单独启动了SyncRequestProcessor处理器
- SyncRequestProcessor
- SendAckRequestProcessor
ObserverZooKeeperServer
@Override
protected void setupRequestProcessors() {
    /**
     * 下面总共初始化了一条处理器链
     * 而且还可以设置开启一个单独的处理器SyncRequestProcessor
     * 这个处理器如果开启了就可以使得观察者能够对事务的持久化和打快照
     * ObserverRequestProcessor---->CommitProcessor---->FinalRequestProcessor
     */
    // We might consider changing the processor behaviour of
    // Observers to, for example, remove the disk sync requirements.
    // Currently, they behave almost exactly the same as followers.
    RequestProcessor finalProcessor = new FinalRequestProcessor(this);
    commitProcessor = new CommitProcessor(finalProcessor,
            Long.toString(getServerId()), true,
            getZooKeeperServerListener());
    commitProcessor.start();
    firstProcessor = new ObserverRequestProcessor(this, commitProcessor);
    ((ObserverRequestProcessor) firstProcessor).start();

    /*
     * Observer should write to disk, so that the it won't request
     * too old txn from the leader which may lead to getting an entire
     * snapshot.
     *
     * However, this may degrade performance as it has to write to disk
     * and do periodic snapshot which may double the memory requirements
     */
    // 判断是否开启SyncRequestProcessor处理器
    if (syncRequestProcessorEnabled) {
        syncProcessor = new SyncRequestProcessor(this, null);
        syncProcessor.start();
    }
}
- ObserverRequestProcessor
- CommitProcessor
- FinalRequestProcessor
需要注意的是观察者的服务器可以开启或者关闭SyncRequestProcessor处理器,如果开启这个处理器,就可以使得观察者能对事务的持久化和打快照。
客户端向Leader发送请求
流程解析
这里我们直接从处理器链开始分析,而且PrepRequestProcessor处理器我们之前已经分析过了,就不再赘述了,直接从第二个处理器ProposalRequestProcessor开始分析。
这个处理器是负责处理投票的,会发现这个处理器直接调用下一个处理器CommitProcessor的processRequest方法
public void processRequest(Request request) throws RequestProcessorException {
// LOG.warn("Ack>>> cxid = " + request.cxid + " type = " +
// request.type + " id = " + request.sessionId);
// request.addRQRec(">prop");
/* In the following IF-THEN-ELSE block, we process syncs on the leader.
* If the sync is coming from a follower, then the follower
* handler adds it to syncHandler. Otherwise, if it is a client of
* the leader that issued the sync command, then syncHandler won't
* contain the handler. In this case, we add it to syncHandler, and
* call processRequest on the next processor.
*/
if(request instanceof LearnerSyncRequest){
zks.getLeader().processSync((LearnerSyncRequest)request);
} else {
// 会直接调用下一个处理器
// 调用下一个处理器的processRequest方法
nextProcessor.processRequest(request);
if (request.hdr != null) {
// We need to sync and get consensus on any transactions
try {
// propose方法会去投票
zks.getLeader().propose(request);
} catch (XidRolloverException e) {
throw new RequestProcessorException(e.getMessage(), e);
}
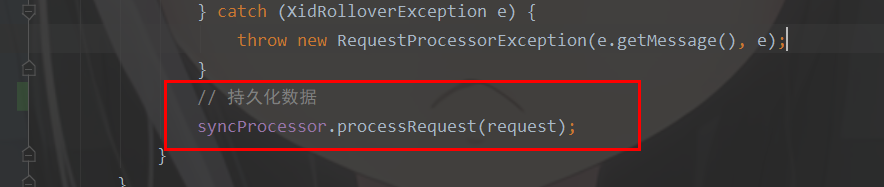
// 持久化数据
syncProcessor.processRequest(request);
}
}
}
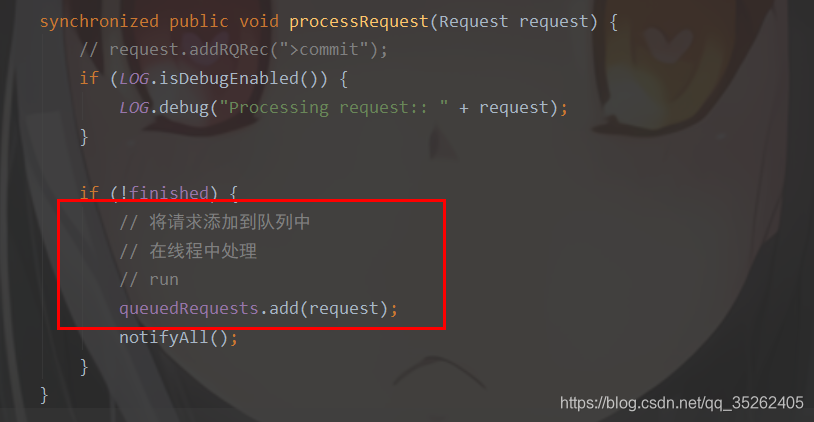
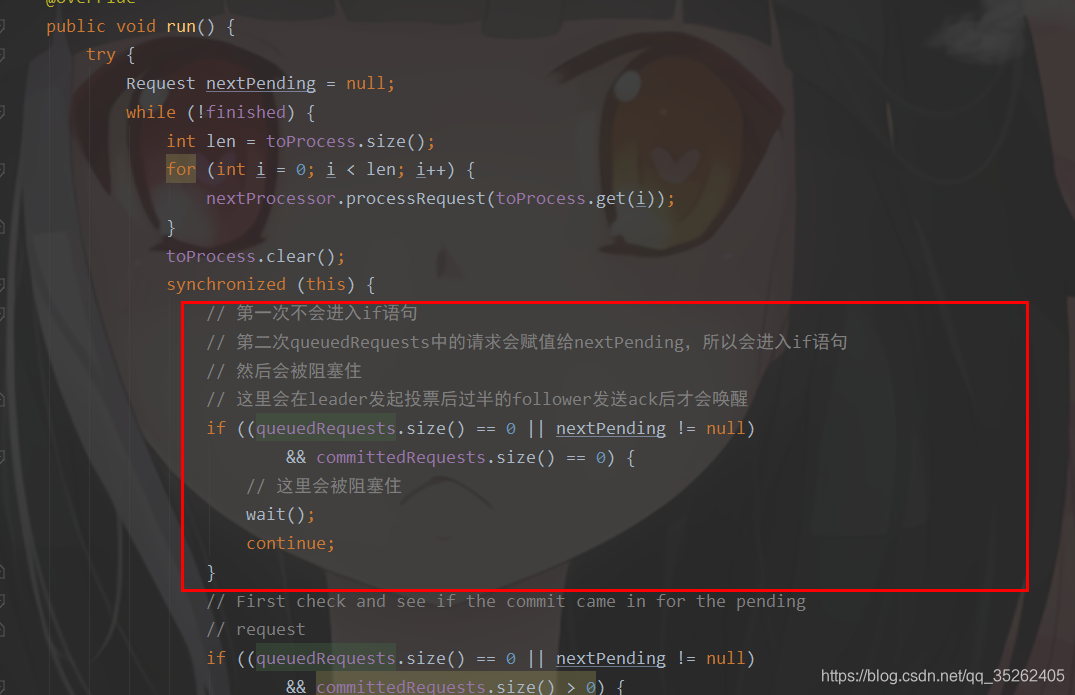
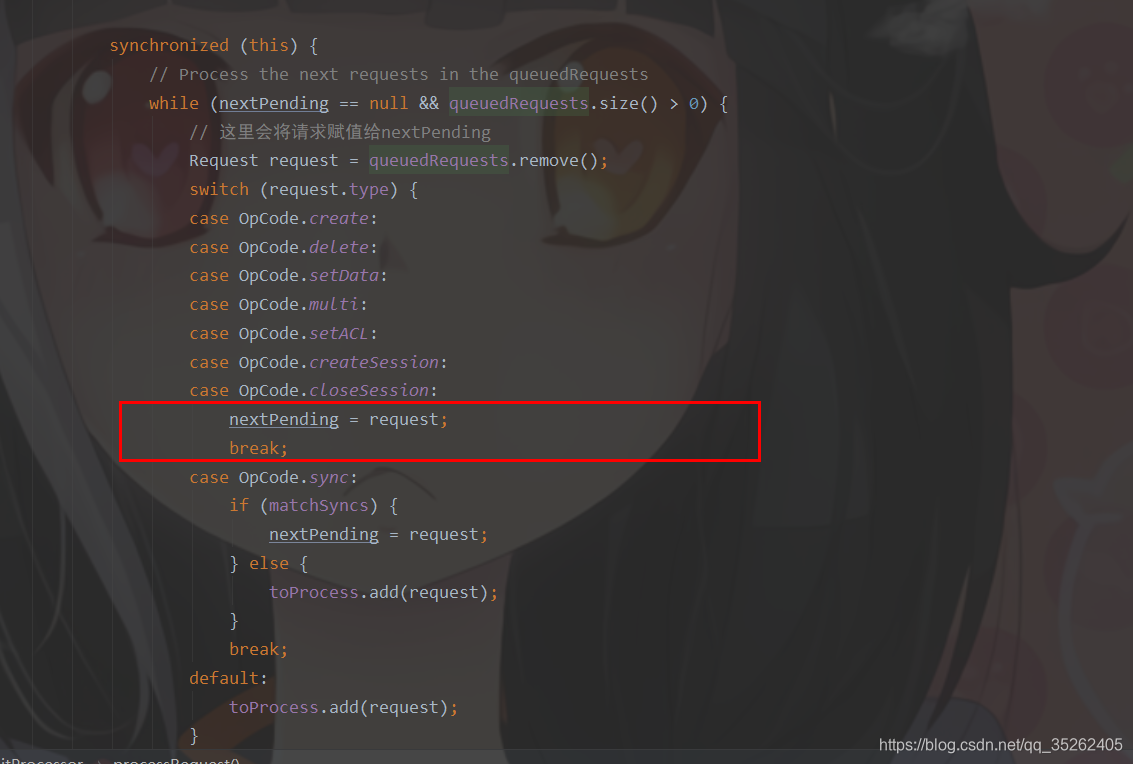
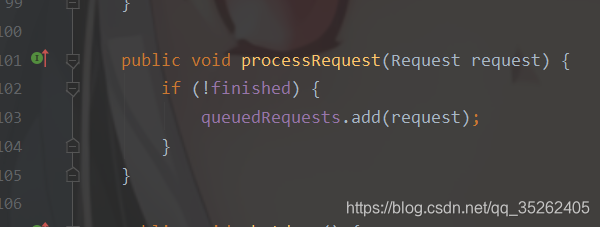
主要还是将请求添加到queuedRequests队列中,主要逻辑在run方法中
这里第一次不会进入if语句,第二次queuedRequests中的请求会赋值给nextPending,所以会进入if语句,然后会被阻塞住
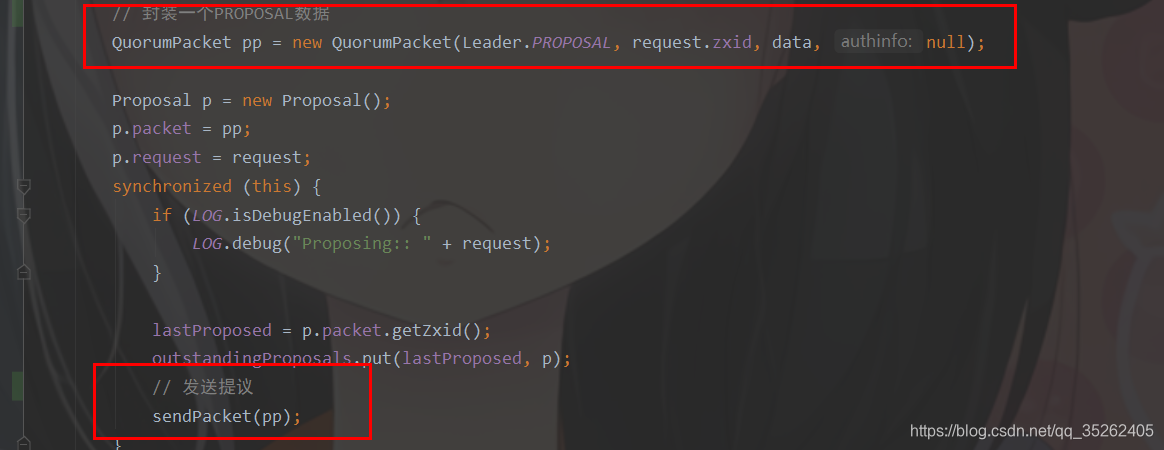
那么回到ProposalRequestProcessor处理器,回调用propose去完成投票,或者说发出一个提议
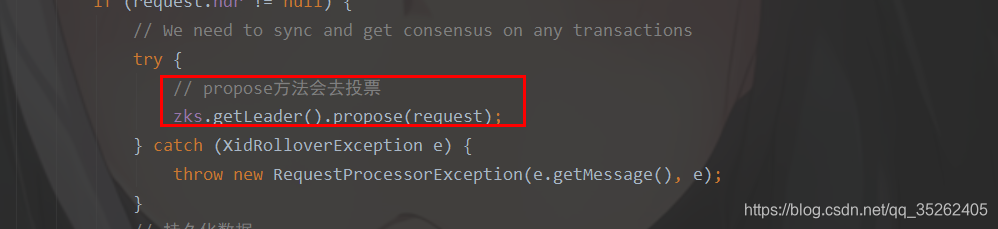
这里只是向follower发送了一个PROPOSAL请求或者说提议
然后会调用SyncRequestProcessor处理器持久化数据
这里我们可以看看follower是怎么处理PROPOSAL请求的,在Follower对象中follower会不停的接收leader的请求并处理
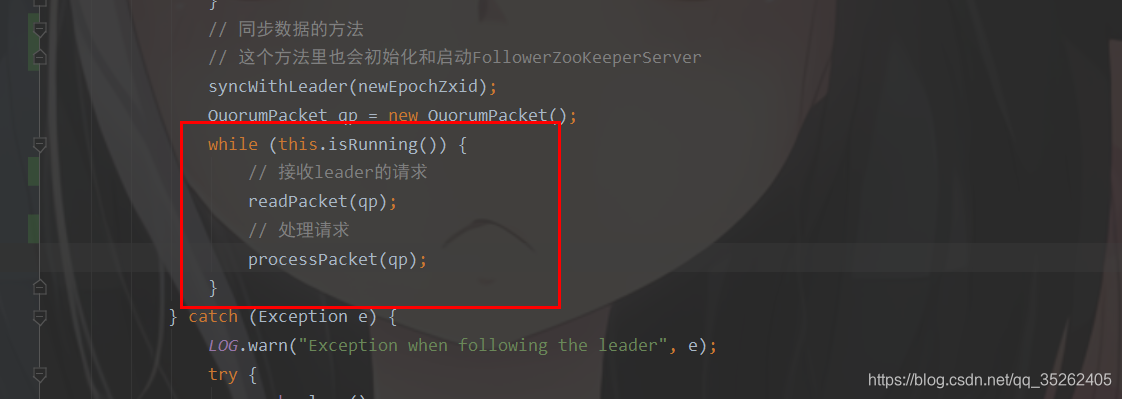
下面是处理的逻辑
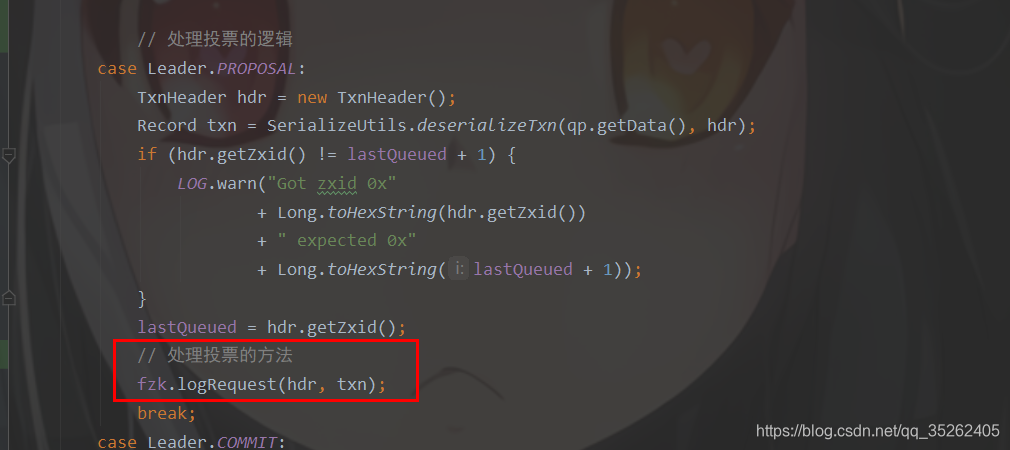
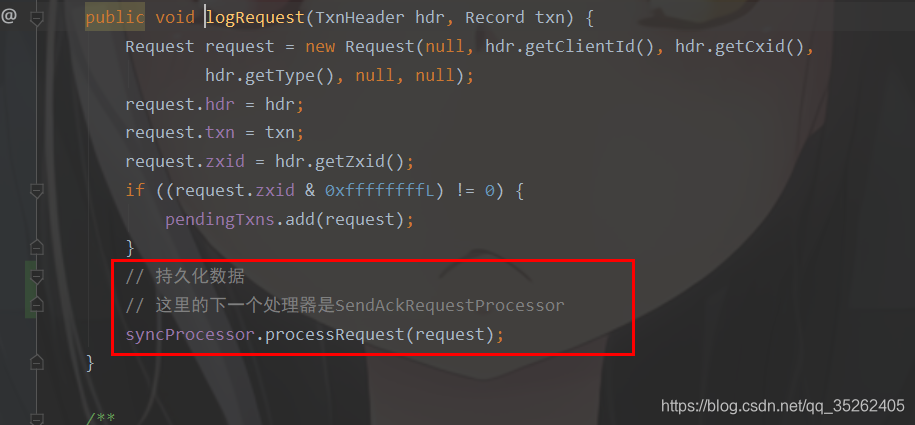
我们会发现这里会直接调用SyncRequestProcessor处理器持久化数据
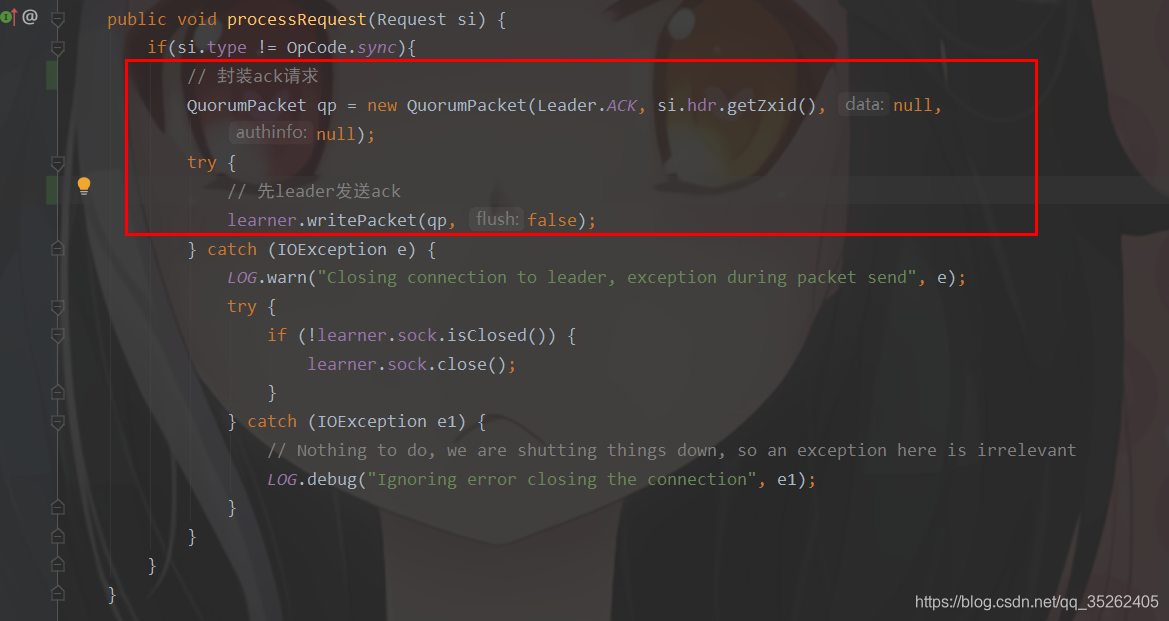
如果SyncRequestProcessor持久化成功会调用下一个处理器就是SendAckRequestProcessor,这里会发现SendAckRequestProcessor的逻辑只是想leader发送Ack请求
那么就需要回到leader端对应的LearnerHandler接收请求,下面是处理的逻辑

这里主要是通过将发送ack请求的follower的id收集起来,然后通过过半验证机制判断是否可以提交。
当验证通过后通过commit方法提交事务,发送COMMIT给所有的follower,通过inform方法发送INFORM给所有的observer,最后通过zk.commitProcessor.commit方法将请求添加到committedRequests队列中,唤醒之前的阻塞。
synchronized public void processAck(long sid, long zxid, SocketAddress followerAddr) {

	// 省略若干代码、、、、、、

    if (lastCommitted >= zxid) {
        if (LOG.isDebugEnabled()) {
            LOG.debug("proposal has already been committed, pzxid: 0x{} zxid: 0x{}",
                    Long.toHexString(lastCommitted), Long.toHexString(zxid));
        }
        // The proposal has already been committed
        return;
    }
    Proposal p = outstandingProposals.get(zxid);
    if (p == null) {
        LOG.warn("Trying to commit future proposal: zxid 0x{} from {}",
                Long.toHexString(zxid), followerAddr);
        return;
    }

    // 添加learner的id
    // 用来过半机制的验证
    p.ackSet.add(sid);
    if (LOG.isDebugEnabled()) {
        LOG.debug("Count for zxid: 0x{} is {}",
                Long.toHexString(zxid), p.ackSet.size());
    }
    // 这里的containsQuorum是过半机制验证
    if (self.getQuorumVerifier().containsQuorum(p.ackSet)){
        if (zxid != lastCommitted+1) {
            LOG.warn("Commiting zxid 0x{} from {} not first!",
                    Long.toHexString(zxid), followerAddr);
            LOG.warn("First is 0x{}", Long.toHexString(lastCommitted + 1));
        }
        outstandingProposals.remove(zxid);
        if (p.request != null) {
            toBeApplied.add(p);
        }

        if (p.request == null) {
            LOG.warn("Going to commmit null request for proposal: {}", p);
        }
        // 提交事务
        commit(zxid);
        inform(p);
        // 提交请求
        // 唤醒Commit处理器的阻塞
        zk.commitProcessor.commit(p.request);
        if(pendingSyncs.containsKey(zxid)){
            for(LearnerSyncRequest r: pendingSyncs.remove(zxid)) {
                sendSync(r);
            }
        }
    }
}
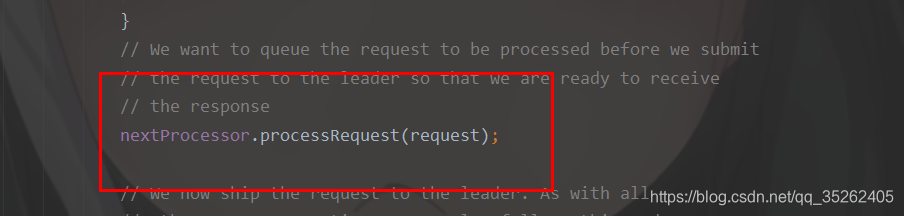
这里就会将提交的请求交给下一个处理器处理

整体流程
- PrepRequestProcessor负责ACL安全验证,接收请求
- ProposalRequestProcessor直接调用CommitProcessor处理器,但是会被阻塞住
- ProposalRequestProcessor调用
propose去投票,向follower发送PROPOSAL请求 - leader调用SyncRequestProcessor持久化数据
- follower接收PROPOSAL请求并通过SyncRequestProcessor持久化数据
- 如果follower持久化数据成功就会调用SendAckRequestProcessor处理器发送ACK请求
- leader接收ACK请求然后执行过半验证直到通过
- 过半验证通过会向所有的follower发送COMMIT,向所有的observer发送INFORM,将请求添加到一个提交队列中同时唤醒前面的阻塞
- 在leader端将请求交给CommitProcessor的下一个处理器处理
客户端向follower发送请求
流程解析
同样我们直接分析FollowerRequestProcessor处理器,首先还是将请求添加到队列中,具体逻辑在run方法中
首先还是交给下一个处理器去处理,不过这里不会再做分析,主要还是对于请求转发的分析
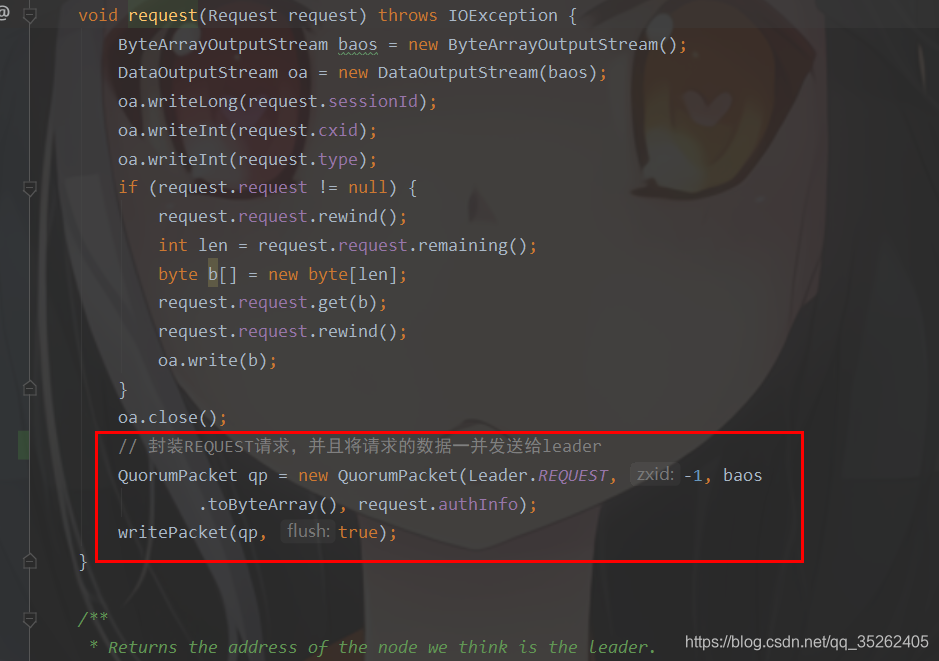
这里会将请求交给request方法处理
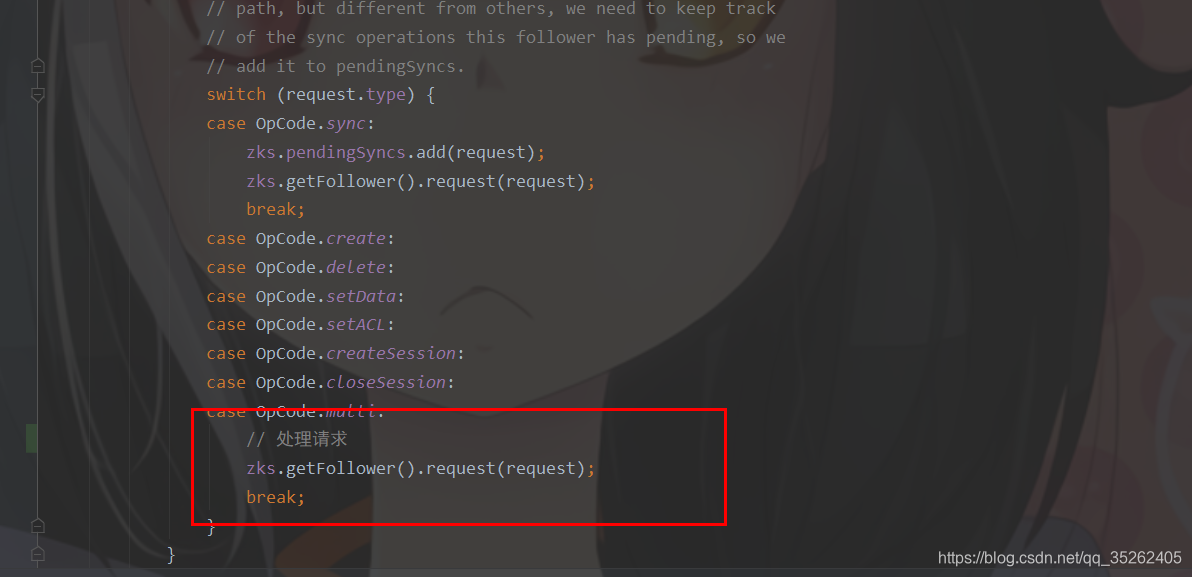
这个request方法主要还是向leader发送REQUEST请求
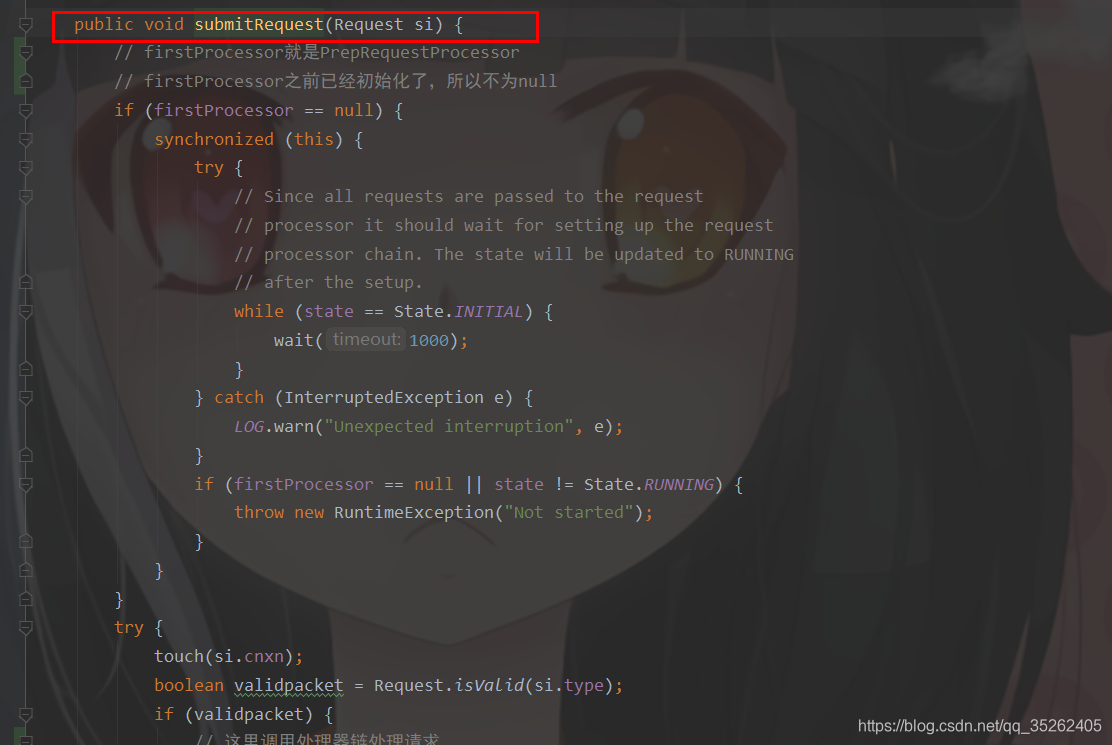
回到LearnerHandler中,发现这里调用的是submitRequest方法

然后发现这个方法就是客户端直接对leader请求时调用的方法,那么接下来的逻辑就与上面客户端直接向leader请求的逻辑无异了
整体流程
- FollowerRequestProcessor向leader发送REQUEST请求
- leader接收REQUEST请求并调用
submitRequest方法处理请求 - 同上面的客户端直接向leader发送请求


 3316
3316


 被折叠的 条评论
为什么被折叠?
被折叠的 条评论
为什么被折叠?
 到【灌水乐园】发言


