


安装一下吧!
下载地址
Elasticsearch下载地址
kibana下载地址
Ik分词器下载地址(下不了,让别人帮忙下)
如果是阿里云服务器,记得开端口,不是的话,防火墙没关也要开端口
mkdir /usr/local/soft #文件移进来
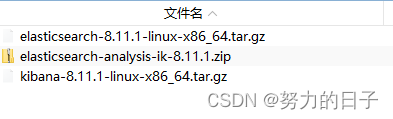
解压
cd /usr/local/soft
tar -zxvf elasticsearch-8.11.1-linux-x86_64.tar.gz -C /usr/local/
tar -zxvf kibana-8.11.1-linux-x86_64.tar.gz -C /usr/local
unzip -d /usr/local/elasticsearch-8.11.1/plugins/ik elasticsearch-analysis-ik-8.11.1.zip
mkdir /usr/local/elasticsearch-8.11.1/data
修改配置文件
elasticsearch.yml 配置
vim /usr/local/elasticsearch-8.11.1/config/elasticsearch.yml
cluster.name: es-01
node.name: es-node01
path.data: /usr/local/elasticsearch-8.11.1/data
path.logs: /usr/local/elasticsearch-8.11.1/logs
network.host: 0.0.0.0
http.port: 9200
#重要 8.x需要(启动后停止再去打开会出现,不用提前写)
xpack.security.enabled: false
xpack.security.http.ssl:
  enabled: false
  keystore.path: certs/http.p12
vim /usr/local/elasticsearch-8.11.1/config/jvm.options
# 512m 1g 2g 4g(默认) 根据机器大小决定
-Xms1g
-Xmx1g
vim /etc/sysctl.conf
vm.max_map_count=262145
kibana配置
vim /usr/local/kibana-8.11.1/config/kibana.yml
server.port: 5601
server.host: "0.0.0.0"
elasticsearch.hosts: ["http://你的ESIp:9200"]
i18n.locale: "zh-CN"
创建es用户并赋予权限
groupadd es
useradd es -g es -p es # -g 密码
chown -R es:es  /usr/local/elasticsearch-8.11.1/
chown -R es:es  /usr/local/elasticsearch-8.11.1/data
chown -R es:es  /usr/local/elasticsearch-8.11.1/logs

#kibana
chown -R es:es /usr/local/kibana-8.11.1/
启动
./usr/local/elasticsearch-8.11.1/bin/elasticsearch -d
nohup /usr/local/kibana-8.11.1/bin/kibana &
停止
kill -9 pid


 1万+
1万+


 被折叠的 条评论
为什么被折叠?
被折叠的 条评论
为什么被折叠?
 到【灌水乐园】发言


