


转载自:http://blog.csdn.net/ccy0122/article/details/53241648

首先是自定义一些属性,可自己再添加,挺基础的,上代码
- <?xml version=“1.0” encoding=“utf-8”?>
- <resources>
- <declare-styleable name=“RoundIndicatorView”>
- <!–最大数值–>
- <attr name=“maxNum” format=“integer”/>
- <!–圆盘起始角度–>
- <attr name=“startAngle” format=“integer”/>
- <!–圆盘扫过的角度–>
- <attr name=“sweepAngle” format=“integer”/>
- </declare-styleable>
- </resources>

<?xml version="1.0" encoding="utf-8"?>
<resources>
    <declare-styleable name="RoundIndicatorView">
        <!--最大数值-->
        <attr name="maxNum" format="integer"/>
        <!--圆盘起始角度-->
        <attr name="startAngle" format="integer"/>
        <!--圆盘扫过的角度-->
        <attr name="sweepAngle" format="integer"/>
    </declare-styleable>
</resources>
接着在构造方法里初始化自定义属性和画笔:
- private void initAttr(AttributeSet attrs) {
- TypedArray array = context.obtainStyledAttributes(attrs,R.styleable.RoundIndicatorView);
- maxNum = array.getInt(R.styleable.RoundIndicatorView_maxNum,500);
- startAngle = array.getInt(R.styleable.RoundIndicatorView_startAngle,160);
- sweepAngle = array.getInt(R.styleable.RoundIndicatorView_sweepAngle,220);
- //内外圆弧的宽度
- sweepInWidth = dp2px(8);
- sweepOutWidth = dp2px(3);
- array.recycle();
- }
- private void initPaint() {
- paint = new Paint(Paint.ANTI_ALIAS_FLAG);
- paint.setDither(true);
- paint.setStyle(Paint.Style.STROKE);
- paint.setColor(0xffffffff);
- paint_2 = new Paint(Paint.ANTI_ALIAS_FLAG);
- paint_3 = new Paint(Paint.ANTI_ALIAS_FLAG);
- paint_4 = new Paint(Paint.ANTI_ALIAS_FLAG);
- }
private void initAttr(AttributeSet attrs) {
    TypedArray array = context.obtainStyledAttributes(attrs,R.styleable.RoundIndicatorView);
    maxNum = array.getInt(R.styleable.RoundIndicatorView_maxNum,500);
    startAngle = array.getInt(R.styleable.RoundIndicatorView_startAngle,160);
    sweepAngle = array.getInt(R.styleable.RoundIndicatorView_sweepAngle,220);
    //内外圆弧的宽度
    sweepInWidth = dp2px(8);
    sweepOutWidth = dp2px(3);
    array.recycle();
}

private void initPaint() {
    paint = new Paint(Paint.ANTI_ALIAS_FLAG);
    paint.setDither(true);
    paint.setStyle(Paint.Style.STROKE);
    paint.setColor(0xffffffff);
    paint_2 = new Paint(Paint.ANTI_ALIAS_FLAG);
    paint_3 = new Paint(Paint.ANTI_ALIAS_FLAG);
    paint_4 = new Paint(Paint.ANTI_ALIAS_FLAG);
}
接下来重写onMeasure,也是比较简单,对于不是确定值的直接给定300*400的大小:
- @Override
- protected void onMeasure(int widthMeasureSpec, int heightMeasureSpec) {
- super.onMeasure(widthMeasureSpec, heightMeasureSpec);
- int wSize = MeasureSpec.getSize(widthMeasureSpec);
- int wMode = MeasureSpec.getMode(widthMeasureSpec);
- int hSize = MeasureSpec.getSize(heightMeasureSpec);
- int hMode = MeasureSpec.getMode(heightMeasureSpec);
- if (wMode == MeasureSpec.EXACTLY ){
- mWidth = wSize;
- }else {
- mWidth =dp2px(300);
- }
- if (hMode == MeasureSpec.EXACTLY ){
- mHeight= hSize;
- }else {
- mHeight =dp2px(400);
- }
- setMeasuredDimension(mWidth,mHeight);
- }
@Override

protected void onMeasure(int widthMeasureSpec, int heightMeasureSpec) {

    super.onMeasure(widthMeasureSpec, heightMeasureSpec);

    int wSize = MeasureSpec.getSize(widthMeasureSpec);

    int wMode = MeasureSpec.getMode(widthMeasureSpec);

    int hSize = MeasureSpec.getSize(heightMeasureSpec);

    int hMode = MeasureSpec.getMode(heightMeasureSpec);


    if (wMode == MeasureSpec.EXACTLY ){

        mWidth = wSize;

    }else {

        mWidth =dp2px(300);

    }

    if (hMode == MeasureSpec.EXACTLY ){

        mHeight= hSize;

    }else {

        mHeight =dp2px(400);

    }

    setMeasuredDimension(mWidth,mHeight);

}
核心部分onDraw来了,注意圆的半径不要在构造方法里就去设置,那时候是得不到view的宽高值的,所以我在onDraw方法里设置半径,默认就view宽度的1/4吧。把原点移到view的中心去:
- @Override
- protected void onDraw(Canvas canvas) {
- super.onDraw(canvas);
- radius = getMeasuredWidth()/4; //不要在构造方法里初始化,那时还没测量宽高
- canvas.save();
- canvas.translate(mWidth/2,(mWidth)/2);
- drawRound(canvas); //画内外圆弧
- drawScale(canvas);//画刻度
- drawIndicator(canvas); //画当前进度值
- drawCenterText(canvas);//画中间的文字
- canvas.restore();
- }
@Override
protected void onDraw(Canvas canvas) {
    super.onDraw(canvas);
    radius = getMeasuredWidth()/4; //不要在构造方法里初始化,那时还没测量宽高
    canvas.save();
    canvas.translate(mWidth/2,(mWidth)/2);
    drawRound(canvas);  //画内外圆弧
    drawScale(canvas);//画刻度
    drawIndicator(canvas); //画当前进度值
    drawCenterText(canvas);//画中间的文字
    canvas.restore();
}
步骤清晰,按顺序画出仪表盘的四个部分,我们一个一个部分的看
drawRound():这个很简单,内外圆弧所需的属性都已经定义好了,画笔是白色的,我们通过setAlpha()设置一下它的透明度,范围是00~ff。
- private void drawRound(Canvas canvas) {
- canvas.save();
- //内圆
- paint.setAlpha(0x40);
- paint.setStrokeWidth(sweepInWidth);
- RectF rectf = new RectF(-radius,-radius,radius,radius);
- canvas.drawArc(rectf,startAngle,sweepAngle,false,paint);
- //外圆
- paint.setStrokeWidth(sweepOutWidth);
- int w = dp2px(10);
- RectF rectf2 = new RectF(-radius-w , -radius-w , radius+w , radius+w);
- canvas.drawArc(rectf2,startAngle,sweepAngle,false,paint);
- canvas.restore();
- }
private void drawRound(Canvas canvas) {
    canvas.save();
    //内圆
    paint.setAlpha(0x40);
    paint.setStrokeWidth(sweepInWidth);
    RectF rectf = new RectF(-radius,-radius,radius,radius);
    canvas.drawArc(rectf,startAngle,sweepAngle,false,paint);
    //外圆
    paint.setStrokeWidth(sweepOutWidth);
    int w = dp2px(10);
    RectF rectf2 = new RectF(-radius-w , -radius-w , radius+w , radius+w);
    canvas.drawArc(rectf2,startAngle,sweepAngle,false,paint);
    canvas.restore();
}
第一部分完成,如图

drawScale():如果你看过几篇自定义view文章,应该都知道了靠旋转画布来画刻度和文字的套路了,调用canvas.rotate就可以旋转画布,负数代表顺时针,这里我们打算把起始位置旋转到原点正上方,即270度的地方,这样画刻度和文字的坐标就很好计算了,每画完一次让画布逆时针转一个刻度间隔,一直循环到画完。我们观察一下原图,粗的刻度线一共有6条,数字的刻度是再粗刻度线下面的,每两个粗刻度线之间有5条细刻度线,并且中间那条细刻度线下方有对应文字。我们把扫过的角度除以30,就是每个刻度的间隔了,然后通过判断就可以画对应刻度和文字了。
关于获取文字的宽高,有两种方法,一种是paint.measureText(text)测量文字宽度,返回值类型是float,但是得不到高度。另一种是Rect rect = new Rect();paint.getTextBounds(text,0,text.length(),rect); 将文字的属性放入rect里,不过是int值,我们画的文字够小的了,所以最好用第一种,除非需要高度值。
另外,我发现绘制文字时,坐标值代表的是文字的左下角,不同于一般的从左上角,所以canvas.drawText传入的xy坐标是text的左下角坐标
- private String[] text ={“较差”,“中等”,“良好”,“优秀”,“极好”};
- private void drawScale(Canvas canvas) {
- canvas.save();
- float angle = (float)sweepAngle/30;//刻度间隔
- canvas.rotate(-270+startAngle); //将起始刻度点旋转到正上方(270)
- for (int i = 0; i <= 30; i++) {
- if(i%6 == 0){ //画粗刻度和刻度值
- paint.setStrokeWidth(dp2px(2));
- paint.setAlpha(0x70);
- canvas.drawLine(0, -radius-sweepInWidth/2,0, -radius+sweepInWidth/2+dp2px(1), paint);
- drawText(canvas,i*maxNum/30+“”,paint);
- }else { //画细刻度
- paint.setStrokeWidth(dp2px(1));
- paint.setAlpha(0x50);
- canvas.drawLine(0,-radius-sweepInWidth/2,0, -radius+sweepInWidth/2, paint);
- }
- if(i==3 || i==9 || i==15 || i==21 || i==27){ //画刻度区间文字
- paint.setStrokeWidth(dp2px(2));
- paint.setAlpha(0x50);
- drawText(canvas,text[(i-3)/6], paint);
- }
- canvas.rotate(angle); //逆时针
- }
- canvas.restore();
- }
- private void drawText(Canvas canvas ,String text ,Paint paint) {
- paint.setStyle(Paint.Style.FILL);
- paint.setTextSize(sp2px(8));
- float width = paint.measureText(text); //相比getTextBounds来说,这个方法获得的类型是float,更精确些
- // Rect rect = new Rect();
- // paint.getTextBounds(text,0,text.length(),rect);
- canvas.drawText(text,-width/2 , -radius + dp2px(15),paint);
- paint.setStyle(Paint.Style.STROKE);
- }
private String[] text ={"较差","中等","良好","优秀","极好"};
private void drawScale(Canvas canvas) {
    canvas.save();
    float angle = (float)sweepAngle/30;//刻度间隔
    canvas.rotate(-270+startAngle); //将起始刻度点旋转到正上方(270)
    for (int i = 0; i <= 30; i++) {
        if(i%6 == 0){   //画粗刻度和刻度值
            paint.setStrokeWidth(dp2px(2));
            paint.setAlpha(0x70);
            canvas.drawLine(0, -radius-sweepInWidth/2,0, -radius+sweepInWidth/2+dp2px(1), paint);
            drawText(canvas,i*maxNum/30+"",paint);
        }else {         //画细刻度
            paint.setStrokeWidth(dp2px(1));
            paint.setAlpha(0x50);
            canvas.drawLine(0,-radius-sweepInWidth/2,0, -radius+sweepInWidth/2, paint);
        }
        if(i==3 || i==9 || i==15 || i==21 || i==27){  //画刻度区间文字
            paint.setStrokeWidth(dp2px(2));
            paint.setAlpha(0x50);
            drawText(canvas,text[(i-3)/6], paint);
        }
        canvas.rotate(angle); //逆时针
    }
    canvas.restore();
}
    private void drawText(Canvas canvas ,String text ,Paint paint) {
        paint.setStyle(Paint.Style.FILL);
        paint.setTextSize(sp2px(8));
        float width = paint.measureText(text); //相比getTextBounds来说,这个方法获得的类型是float,更精确些
//        Rect rect = new Rect();
//        paint.getTextBounds(text,0,text.length(),rect);
        canvas.drawText(text,-width/2 , -radius + dp2px(15),paint);
        paint.setStyle(Paint.Style.STROKE);
    }
第二部分完毕,看图
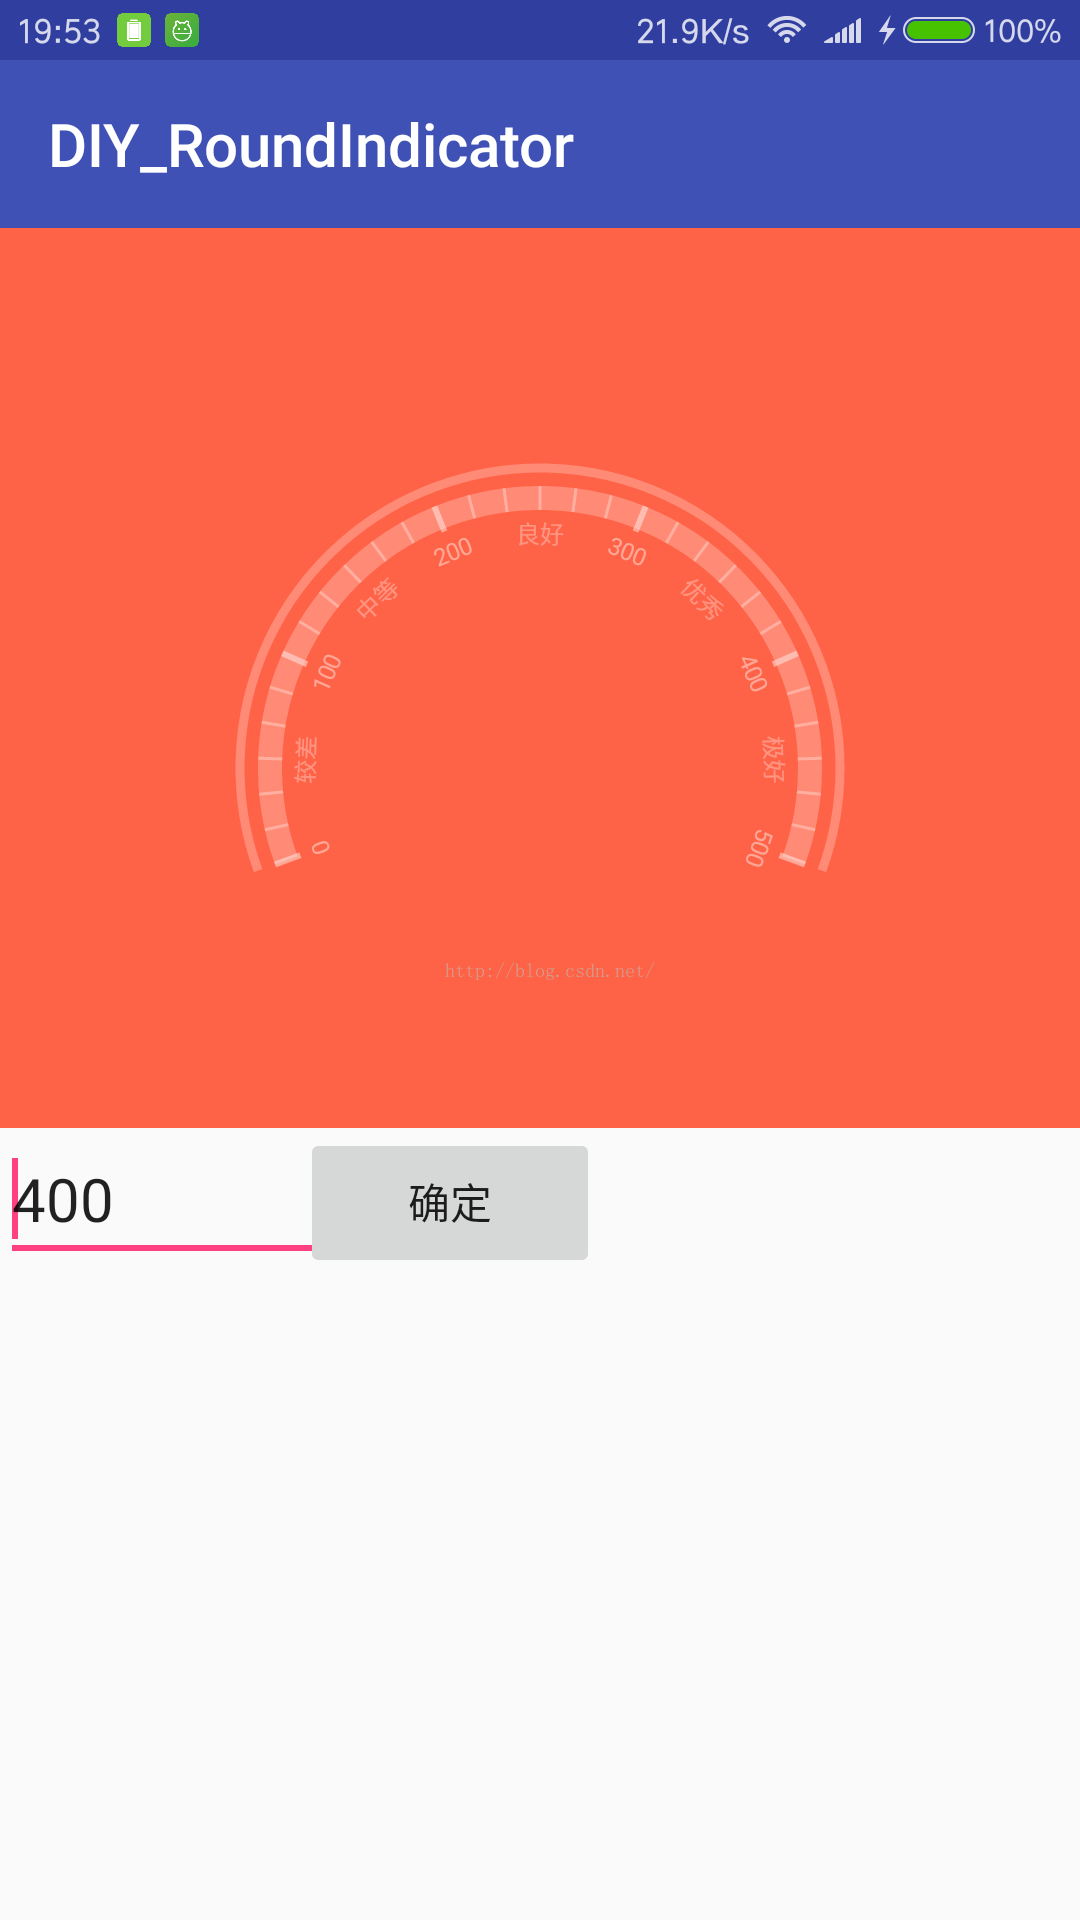
drawIndicator:这一步是画外圆弧上的进度值,观察原图,发现有三个问题需要解决:表示进度的弧度值和小圆点的坐标怎么计算,进度值的透明度渐变怎么实现?小圆点像光源一样边缘模糊的效果怎么实现?
对于坐标计算,其实也较简单,将当前值比上最大值,得到一个比例就可以计算进度条扫过的弧度,小圆点呢绘制与进度条的尾端,角度已经有了(起始角度+扫过的角度),用三角函数就可以算了。
对于颜色渐变,可以用paint的shader渲染,它有5个子类
BitmapShader位图
LinearGradient线性渐变
RadialGradient光束渐变
SweepGradient梯度渐变
ComposeShader混合渐变
我们使用梯度渐变来实现,传入坐标和一个颜色数组就可以实现对颜色的梯度渐变,这里我们对颜色的修改当然只是修改它的透明度,我们知道32位的颜色值前8位就是表示透明度的。
对于小圆点有光源一样的边缘模糊效果,我用的是paint的setMaskFilter,其中有一个子类BlurMaskFilter可以实现边缘模糊效果~( 不知道有没有什么别的方法实现这种效果) 具体看代码
- private int[] indicatorColor = {0xffffffff,0x00ffffff,0x99ffffff,0xffffffff};
private int[] indicatorColor = {0xffffffff,0x00ffffff,0x99ffffff,0xffffffff};- private void drawIndicator(Canvas canvas) {
- canvas.save();
- paint_2.setStyle(Paint.Style.STROKE);
- int sweep;
- if(currentNum<=maxNum){
- sweep = (int)((float)currentNum/(float)maxNum*sweepAngle);
- }else {
- sweep = sweepAngle;
- }
- paint_2.setStrokeWidth(sweepOutWidth);
- Shader shader =new SweepGradient(0,0,indicatorColor,null);
- paint_2.setShader(shader);
- int w = dp2px(10);
- RectF rectf = new RectF(-radius-w , -radius-w , radius+w , radius+w);
- canvas.drawArc(rectf,startAngle,sweep,false,paint_2);
- float x = (float) ((radius+dp2px(10))*Math.cos(Math.toRadians(startAngle+sweep)));
- float y = (float) ((radius+dp2px(10))*Math.sin(Math.toRadians(startAngle+sweep)));
- paint_3.setStyle(Paint.Style.FILL);
- paint_3.setColor(0xffffffff);
- paint_3.setMaskFilter(new BlurMaskFilter(dp2px(3), BlurMaskFilter.Blur.SOLID)); //需关闭硬件加速
- canvas.drawCircle(x,y,dp2px(3),paint_3);
- canvas.restore();
- }
private void drawIndicator(Canvas canvas) {
    canvas.save();
    paint_2.setStyle(Paint.Style.STROKE);
    int sweep;
    if(currentNum<=maxNum){
        sweep = (int)((float)currentNum/(float)maxNum*sweepAngle);
    }else {
        sweep = sweepAngle;
    }
    paint_2.setStrokeWidth(sweepOutWidth);
    Shader shader =new SweepGradient(0,0,indicatorColor,null);
    paint_2.setShader(shader);
    int w = dp2px(10);
    RectF rectf = new RectF(-radius-w , -radius-w , radius+w , radius+w);
    canvas.drawArc(rectf,startAngle,sweep,false,paint_2);
    float x = (float) ((radius+dp2px(10))*Math.cos(Math.toRadians(startAngle+sweep)));
    float y = (float) ((radius+dp2px(10))*Math.sin(Math.toRadians(startAngle+sweep)));
    paint_3.setStyle(Paint.Style.FILL);
    paint_3.setColor(0xffffffff);
    paint_3.setMaskFilter(new BlurMaskFilter(dp2px(3), BlurMaskFilter.Blur.SOLID)); //需关闭硬件加速
    canvas.drawCircle(x,y,dp2px(3),paint_3);
    canvas.restore();
}
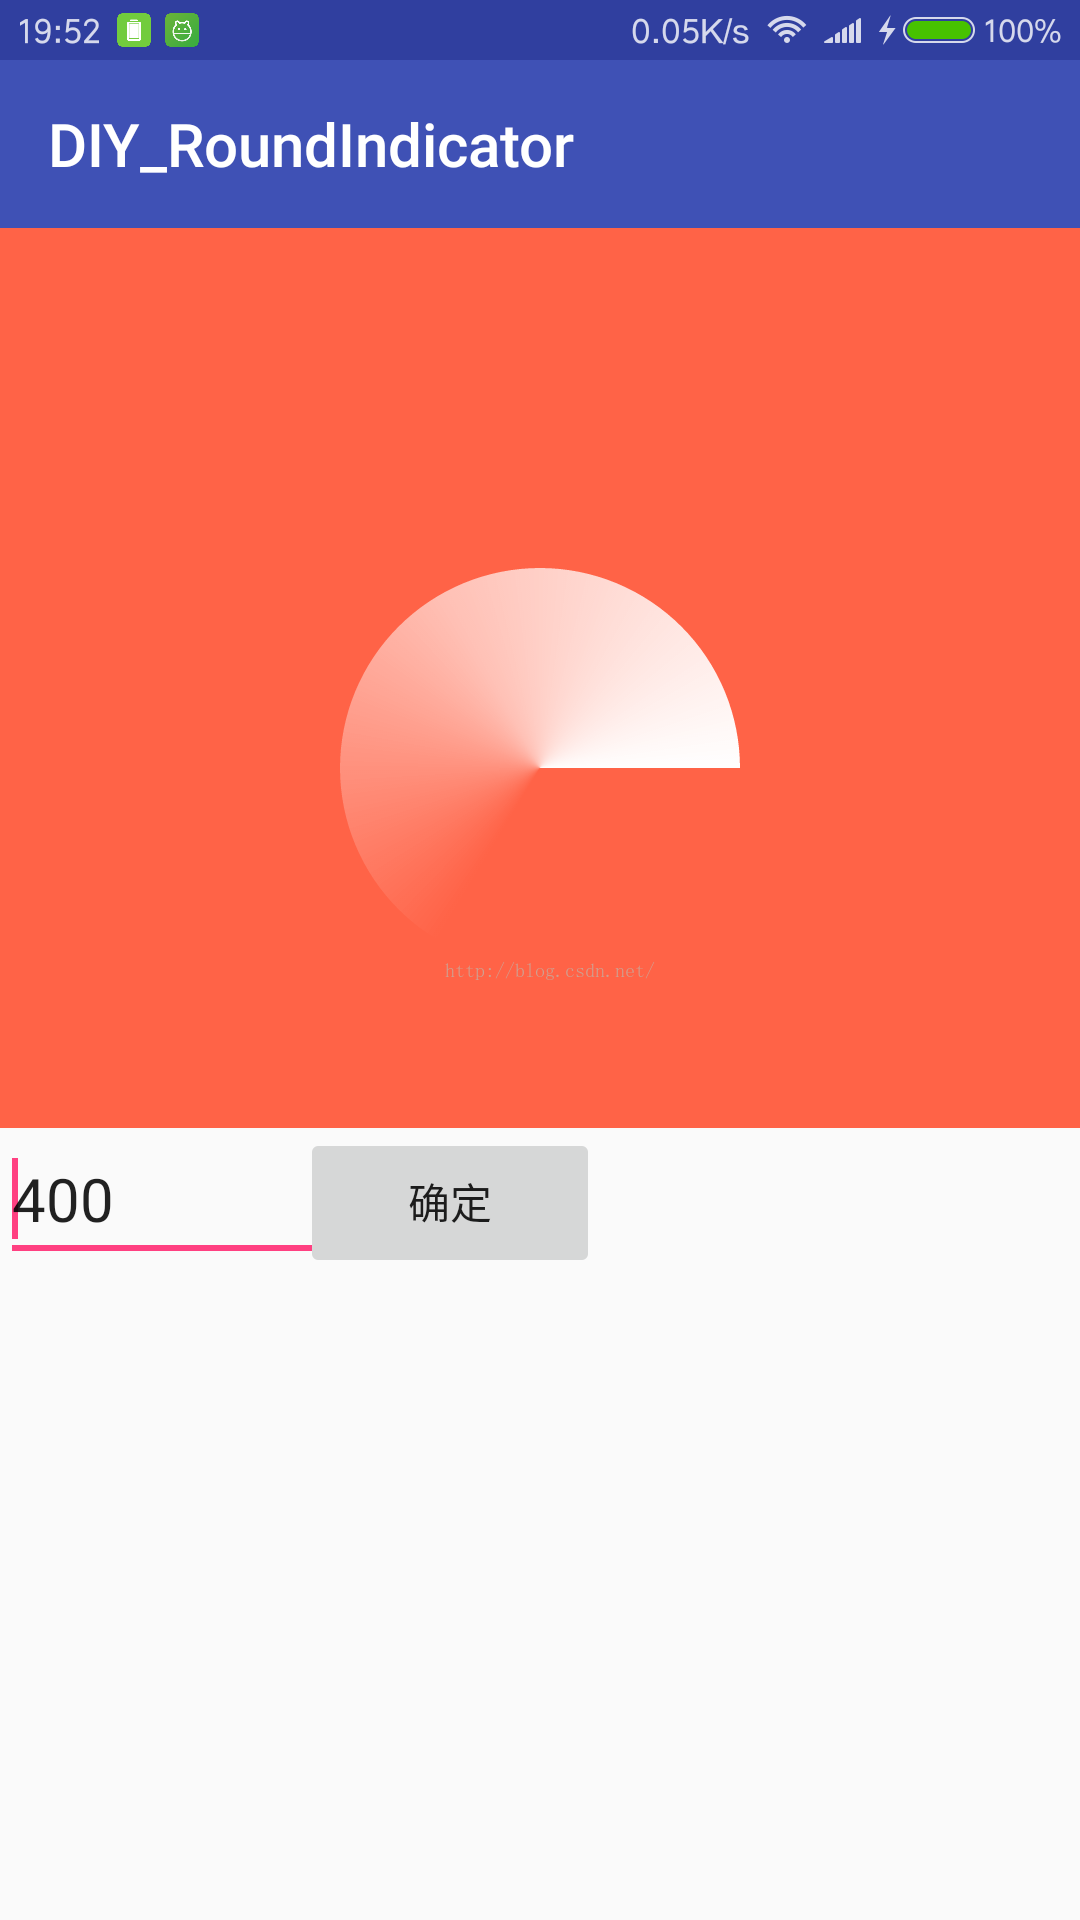
记得关闭硬件加速,就是加一句<activity Android:hardwareAccelerated=”false” >
第三部完毕,看图

drawCenterText:这步简单,注意刚才说的绘制文字时从左下角开始的和两种测量文字宽度的区别就好。
- private void drawCenterText(Canvas canvas) {
- canvas.save();
- paint_4.setStyle(Paint.Style.FILL);
- paint_4.setTextSize(radius/2);
- paint_4.setColor(0xffffffff);
- canvas.drawText(currentNum+”“,-paint_4.measureText(currentNum+“”)/2,0,paint_4);
- paint_4.setTextSize(radius/4);
- String content = ”信用”;
- if(currentNum < maxNum*1/5){
- content += text[0];
- }else if(currentNum >= maxNum*1/5 && currentNum < maxNum*2/5){
- content += text[1];
- }else if(currentNum >= maxNum*2/5 && currentNum < maxNum*3/5){
- content += text[2];
- }else if(currentNum >= maxNum*3/5 && currentNum < maxNum*4/5){
- content += text[3];
- }else if(currentNum >= maxNum*4/5){
- content += text[4];
- }
- Rect r = new Rect();
- paint_4.getTextBounds(content,0,content.length(),r);
- canvas.drawText(content,-r.width()/2,r.height()+20,paint_4);
- canvas.restore();
- }
private void drawCenterText(Canvas canvas) {
    canvas.save();
    paint_4.setStyle(Paint.Style.FILL);
    paint_4.setTextSize(radius/2);
    paint_4.setColor(0xffffffff);
    canvas.drawText(currentNum+"",-paint_4.measureText(currentNum+"")/2,0,paint_4);
    paint_4.setTextSize(radius/4);
    String content = "信用";
    if(currentNum < maxNum*1/5){
        content += text[0];
    }else if(currentNum >= maxNum*1/5 && currentNum < maxNum*2/5){
        content += text[1];
    }else if(currentNum >= maxNum*2/5 && currentNum < maxNum*3/5){
        content += text[2];
    }else if(currentNum >= maxNum*3/5 && currentNum < maxNum*4/5){
        content += text[3];
    }else if(currentNum >= maxNum*4/5){
        content += text[4];
    }
    Rect r = new Rect();
    paint_4.getTextBounds(content,0,content.length(),r);
    canvas.drawText(content,-r.width()/2,r.height()+20,paint_4);
    canvas.restore();
}
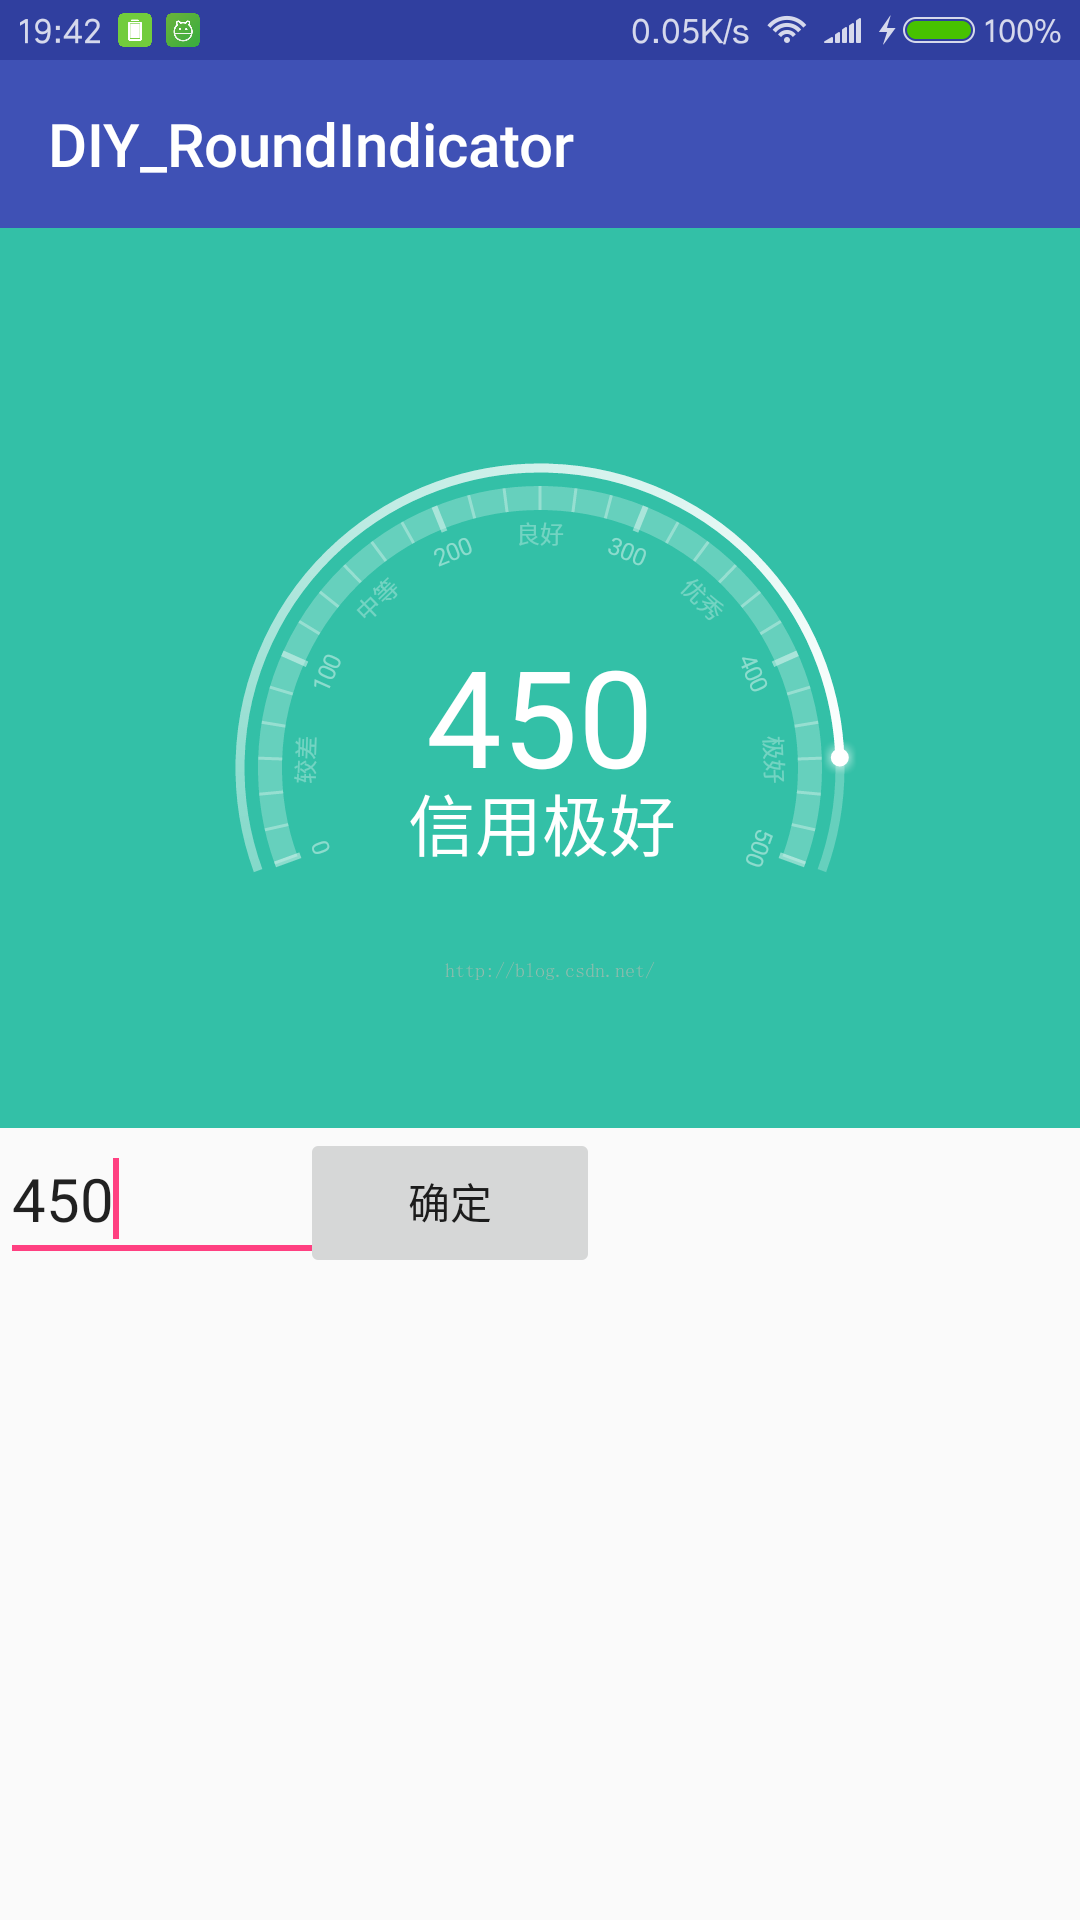
到这里绘制部分差不多完成了。接下来要实现的是当改变值时的动画效果,同时改变背景颜色。
setCurrentNumAnim就是供用户调用的。我们可以通过属性动画来改变当前值,注意要给当前值(currentNum)加上setter和getter,因为属性动画内部需要调用它们。
对于动画的时间,简单写个计算公式就好,然后监听动画过程,在里面实现背景颜色的改变。怎么才能像支付宝芝麻信用那样红橙黄绿蓝的渐变呢?我按自己思路实现了一个可以三种颜色之间渐变的效果。
大家学习属性动画时应该了解过插值器估值器的作用,我就是用ArgbEvaluator估值器实现颜色渐变的,调用它的evaluate方法,传入一个0~1的比例,传入开始和结束的颜色,就可以根据当前比例得到介于这两个颜色之间的颜色值。
这里我实现了红到橙再到蓝的渐变,假设最大值是500,那么当前值x从0~250的过程中是从红到橙,x/(500/2)就可以得到一个0~1的变化比例,当前值从250~500的过程是橙到蓝,也需要一个0~1的变化过程的比例,计算方法就是(x-250)/(250) 其中250就是(500/2)得来的。按照这样的思路当然可以实现更多颜色之间的渐变,就是想办法在各区间里算出一个0~1的比例值就行。注意数据类型转换,上代码!
- public int getCurrentNum() {
- return currentNum;
- }
- public void setCurrentNum(int currentNum) {
- this.currentNum = currentNum;
- invalidate();
- }
- public void setCurrentNumAnim(int num) {
- float duration = (float)Math.abs(num-currentNum)/maxNum *1500+500; //根据进度差计算动画时间
- ObjectAnimator anim = ObjectAnimator.ofInt(this,“currentNum”,num);
- anim.setDuration((long) Math.min(duration,2000));
- anim.addUpdateListener(new ValueAnimator.AnimatorUpdateListener() {
- @Override
- public void onAnimationUpdate(ValueAnimator animation) {
- int value = (int) animation.getAnimatedValue();
- int color = calculateColor(value);
- setBackgroundColor(color);
- }
- });
- anim.start();
- }
- private int calculateColor(int value){
- ArgbEvaluator evealuator = new ArgbEvaluator();
- float fraction = 0;
- int color = 0;
- if(value <= maxNum/2){
- fraction = (float)value/(maxNum/2);
- color = (int) evealuator.evaluate(fraction,0xFFFF6347,0xFFFF8C00); //由红到橙
- }else {
- fraction = ( (float)value-maxNum/2 ) / (maxNum/2);
- color = (int) evealuator.evaluate(fraction,0xFFFF8C00,0xFF00CED1); //由橙到蓝
- }
- return color;
- }
public int getCurrentNum() {
    return currentNum;
}

public void setCurrentNum(int currentNum) {
    this.currentNum = currentNum;
    invalidate();
}
public void setCurrentNumAnim(int num) {
    float duration = (float)Math.abs(num-currentNum)/maxNum *1500+500; //根据进度差计算动画时间
    ObjectAnimator anim = ObjectAnimator.ofInt(this,"currentNum",num);
    anim.setDuration((long) Math.min(duration,2000));
    anim.addUpdateListener(new ValueAnimator.AnimatorUpdateListener() {
        @Override
        public void onAnimationUpdate(ValueAnimator animation) {
            int value = (int) animation.getAnimatedValue();
            int color = calculateColor(value);
            setBackgroundColor(color);
        }
    });
    anim.start();
}
private int calculateColor(int value){
    ArgbEvaluator evealuator = new ArgbEvaluator();
    float fraction = 0;
    int color = 0;
    if(value <= maxNum/2){
        fraction = (float)value/(maxNum/2);
        color = (int) evealuator.evaluate(fraction,0xFFFF6347,0xFFFF8C00); //由红到橙
    }else {
        fraction = ( (float)value-maxNum/2 ) / (maxNum/2);
        color = (int) evealuator.evaluate(fraction,0xFFFF8C00,0xFF00CED1); //由橙到蓝
    }
    return color;
}
锵锵锵~ 完毕外部调用setCurrentNumAnim就可以动画的改变数值啦

好了,还有最后一个问题,就是前面提到的
为什么透明度渐变的颜色数组是这样的
- private int[] indicatorColor = {0xffffffff,0x00ffffff,0x99ffffff,0xffffffff};
private int[] indicatorColor = {0xffffffff,0x00ffffff,0x99ffffff,0xffffffff};大概就是从不透明–>透明–>半透明–>不透明的变化
问:第一个不是多余的么?为什么要一开始不透明?
答:我也有点纳闷,因为sweepGradient颜色渐变是从x正轴开始的,如果我颜色数组是这样的,即从透明–>半透明–>不透明:
- private int[] indicatorColor = {0x00ffffff,0x99ffffff,0xffffffff};
private int[] indicatorColor = {0x00ffffff,0x99ffffff,0xffffffff};:
而我们的仪表盘这里是从160度开始,扫220度,也就是如果这样有一部分角度(0~20度)会变透明,不是我们想要的效果。。。所以我用了这样:
- private int[] indicatorColor = {0xffffffff,0x00ffffff,0x99ffffff,0xffffffff};

private int[] indicatorColor = {0xffffffff,0x00ffffff,0x99ffffff,0xffffffff};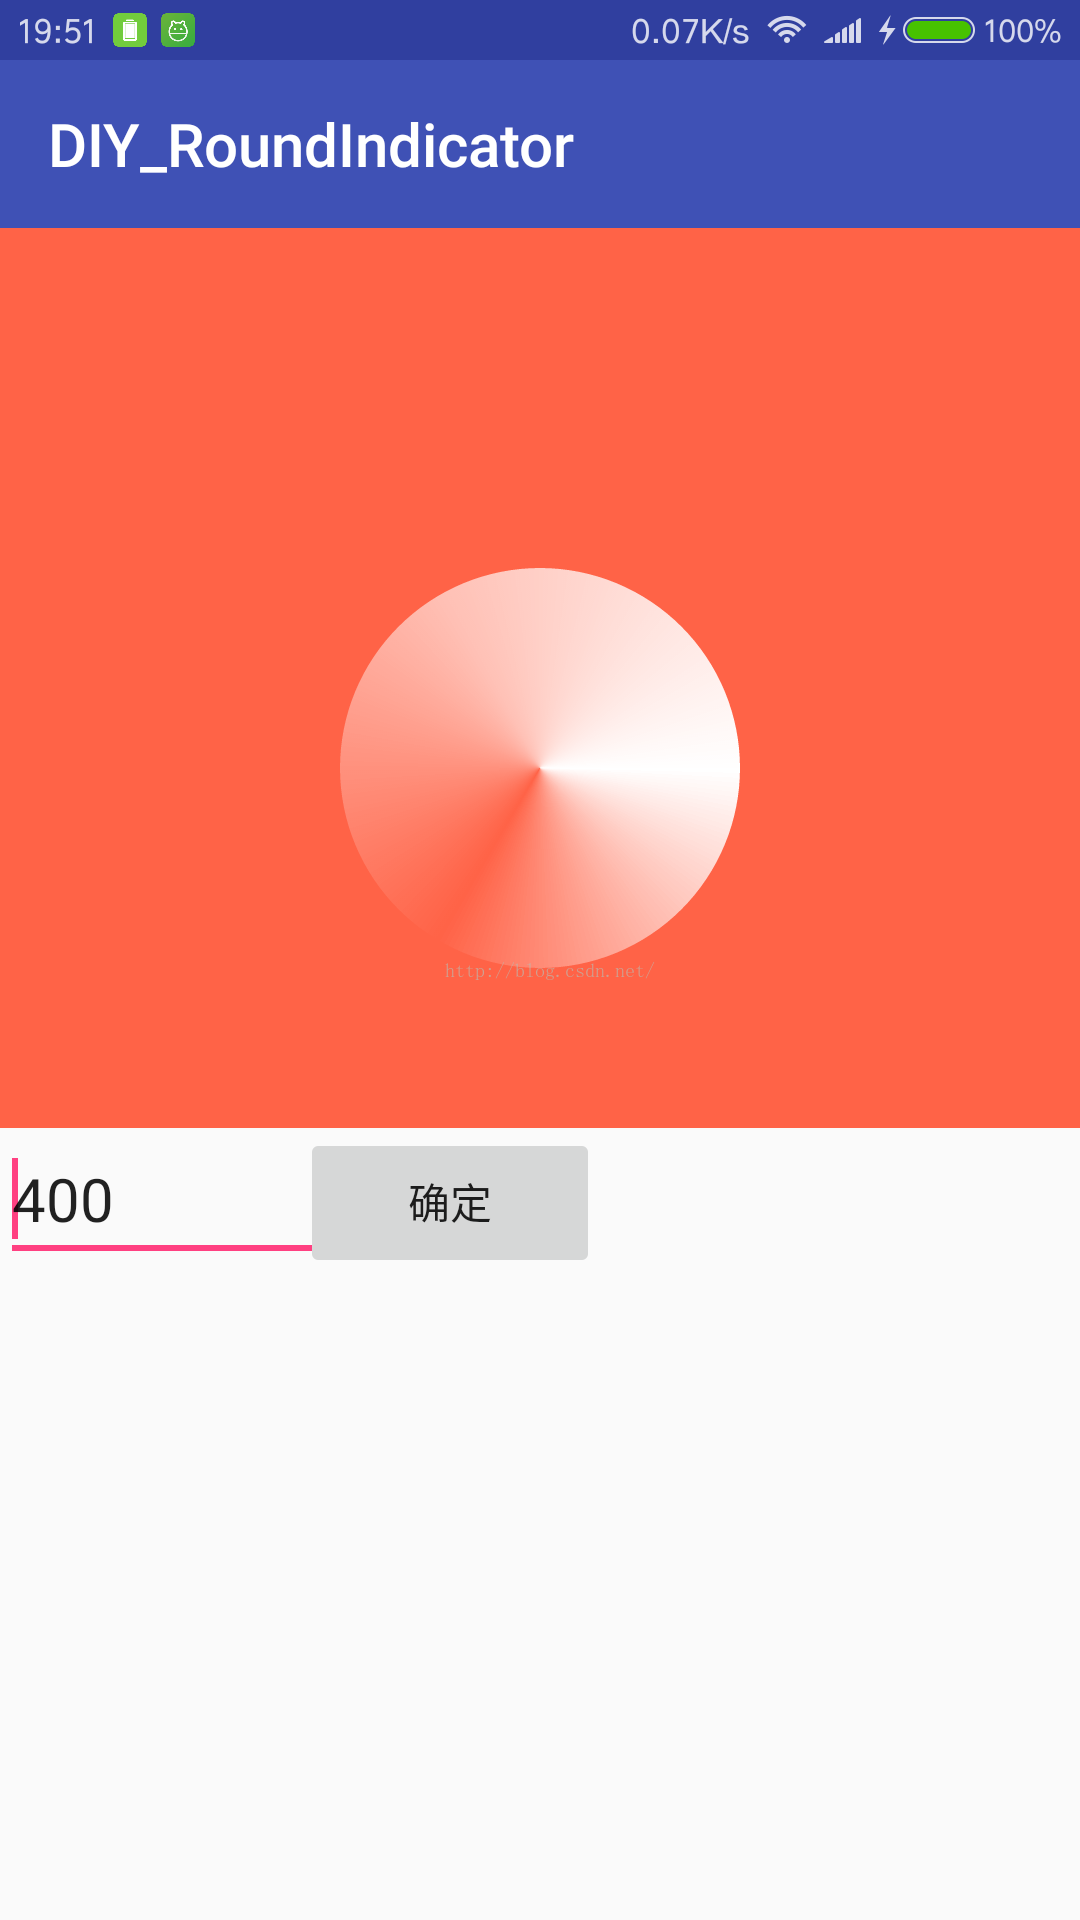
这样至少保证0~20度看起来也是很白的,整个进度条就实现了像从透明到不透明的效果。
其实也不是很优雅。。因为起始角度和扫过的角度是可以自定义更改的。。所以小伙伴们有什么更好的方法么?
PS_1:第一次写博文,特么的CSDN的编辑器也太难写太坑爹了把,写的我快疯了……得赶快学习用MarkDown来写文章了 妈爷
PS_2:特么的不知道怎么缩小图片。。
结束,
欢迎大家来交朋友呀,我是大四学生,自学安卓ing~找工作ing~


 8182
8182

 被折叠的 条评论
为什么被折叠?
被折叠的 条评论
为什么被折叠?
 到【灌水乐园】发言


