


好了,前面三篇文章,已经完成了题目的导入了,接下来要开始进入刷题模式了。
再回顾一下刷题要完成的功能:
-
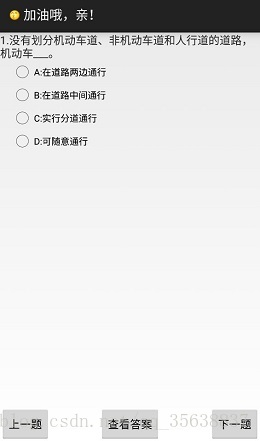
做对当前题,选项变绿并跳到下一题,做错选项变红并显示解析
-
手动跳下一题,上一题
-
查看答案,隐藏答案
在此说明,虽然功能是实现了,但是代码写的比较复杂,自己当初也是改了很久的,后面是想到另外一个办法了,但是自己又懒得改了。(主要是那时写完这段已经头昏脑胀了,自己都乱了)可能之后心情好了就会改了,哈哈哈。
好了,废话不多说,既然代码自己写的有点麻烦,还是先说思路吧。
-
首先进行查询数据库,把数据库的数据全部查询出来,放在数组中(当然是为了之后操作方便些了)
-
因为有单选和多选,所以要有两个layout,一个是单选,一个是多选的,来回切换。应该是还有别的办法的,那时网上找了很多解决单选多选的问题的,有说自己做选择框的,因为自己能力有限,所以用了笨办法实现它。我在activity中显示两个layout,当初可能代码改的有点乱了,没改对,于是笨办法就是首先显示的是单选的layout,多选的layout都是new出来的,代码有点多。(之后会努力改进的)
-
布局解决后就把数据绑定到控件即可
###1.查询数据库
List<QuestionBean> xitiList;
xitiList = new ArrayList<QuestionBean>();
public void chaxun(){
		//把数据库的数据查询出来
        Cursor cursor = db.query("xiti", null, null, null, null, null, null, null);
        while (cursor.moveToNext()) {
        	//对应数据库表格的列,一一对应
			int _id = cursor.getInt(0);
			String title= cursor.getString(1);
			String optionA = cursor.getString(2);
			String optionB = cursor.getString(3);
			String optionC = cursor.getString(4);
			String optionD = cursor.getString(5);
			String answer = cursor.getString(6);
			String jiexi = cursor.getString(7);
		    QuestionBean q = new QuestionBean(_id, title, optionA, optionB, optionC, optionD, answer, jiexi);
		    xitiList.add(q);    //List<QuestionBean> xitiList; 数组
        }
	}
###2.单选设置
####2.1单选布局
<?xml version="1.0" encoding="utf-8"?>
<RelativeLayout xmlns:android="http://schemas.android.com/apk/res/android"
    android:layout_width="match_parent"
    android:layout_height="match_parent"
    android:orientation="vertical" >

    <LinearLayout
        android:id="@+id/linearLayout1"
        android:layout_width="match_parent"
        android:layout_height="wrap_content"
        android:orientation="vertical" >
            <TextView
                android:id="@+id/tv_title"
                android:layout_width="wrap_content"
                android:layout_height="wrap_content"
                android:textSize="18sp"
                android:text="考题"
                 >
                <requestFocus />
            </TextView>
<!--  android:layout_marginTop="2dp" 控件间的距离 -->
         <RadioGroup
        android:id="@+id/rg_base"
        android:layout_width="wrap_content"
        android:layout_height="wrap_content"
        android:layout_marginLeft="15dp" >

        <RadioButton
            android:id="@+id/rb_option_a"
            android:layout_width="wrap_content"
            android:layout_height="wrap_content"
            android:text="选项"
            android:textSize="15sp" />

        <RadioButton
            androi
最低0.47元/天 解锁文章


 4909
4909

 被折叠的 条评论
为什么被折叠?
被折叠的 条评论
为什么被折叠?
 到【灌水乐园】发言


