


一、前言
在QT下使用表格是想当的多,使用C++自定义Mode在TableView中显示方法和ListView操作方式类似,TableView下增加了很多表头等操作方便自定义表格。在此不涉及。
本篇记录TableView显示C++的Model。
二、例子
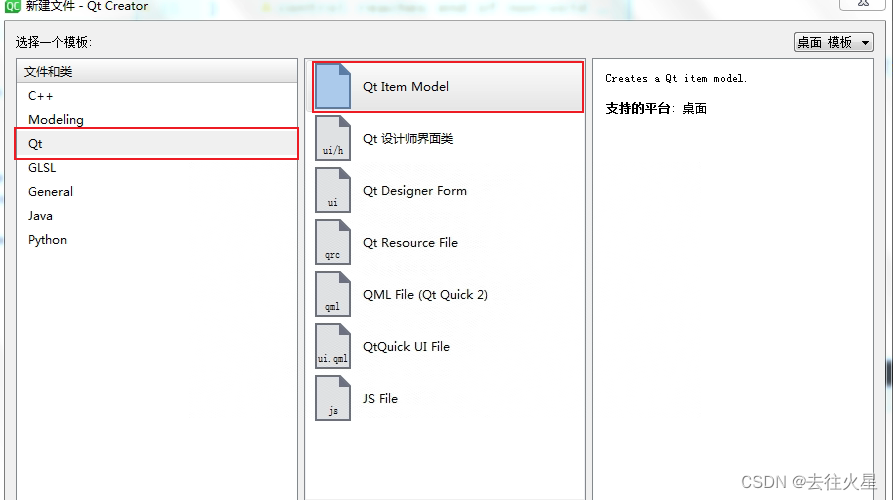
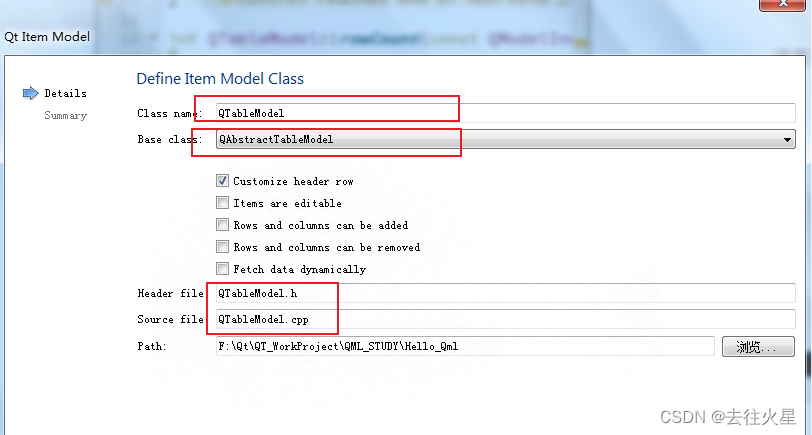
1、创建model文件
2、创建数据

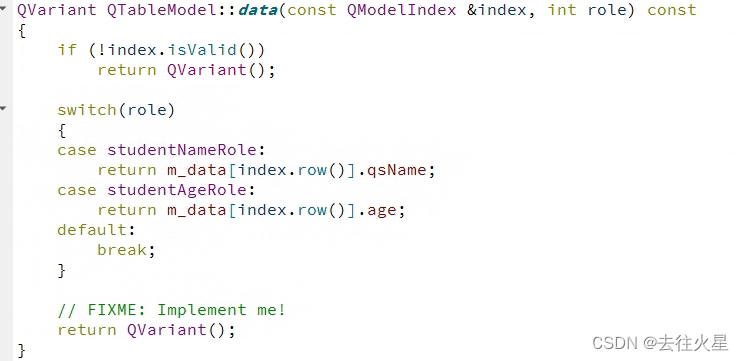
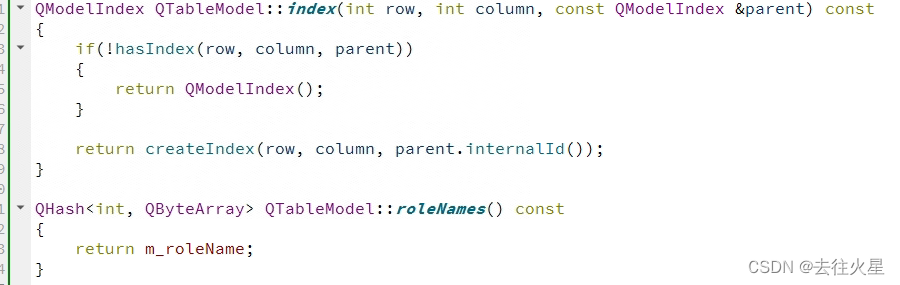
3、重写函数
4、注册C++函数
![]()
5、QML访问

三、完整代码
1、main.cpp
#include <QGuiApplication>
#include <QQmlApplicationEngine>
#include <QQmlContext>
#include "myobject.h"

#include "QTableModel.h"

int main(int argc, char *argv[])
{
    QCoreApplication::setAttribute(Qt::AA_EnableHighDpiScaling);

    QGuiApplication app(argc, argv);

    QQmlApplicationEngine engine;

    QTableModel tableModel;
    engine.rootContext()->setContextProperty("QTableModel", &tableModel);

    engine.load(QUrl(QLatin1String("qrc:/main.qml")));

    return app.exec();
}
2、QTableModel.h
#ifndef QTABLEMODEL_H
#define QTABLEMODEL_H

#include <QAbstractTableModel>
#include <QObject>

struct STUDENT_INFO {
    QString qsName;
    int age;
};

class QTableModel : public QAbstractTableModel
{
    Q_OBJECT

public:
    explicit QTableModel(QObject *parent = nullptr);

    Q_INVOKABLE QAbstractItemModel *model();

public:
    enum TABLE_ITEM_ROLE
    {
        studentNameRole = Qt::DisplayRole+1,
        studentAgeRole,
    };


    // Basic functionality:
    int rowCount(const QModelIndex &parent = QModelIndex()) const override;
    int columnCount(const QModelIndex &parent = QModelIndex()) const override;

    QVariant data(const QModelIndex &index, int role = Qt::DisplayRole) const override;

    QHash <int, QByteArray> roleNames() const override;
    QModelIndex index(int row, int column, const QModelIndex &parent) const override;

private:
    QList <STUDENT_INFO> m_data;
    QHash<int, QByteArray> m_roleName;
};

#endif // QTABLEMODEL_H
3、QTableModel.cpp
#include "QTableModel.h"

QTableModel::QTableModel(QObject *parent)
    : QAbstractTableModel(parent)
{
    m_data = {
        {"XiaoZhao",24},
        {"XiaoFeng",20},
        {"XiaoLi",21},
        {"XiaoLin",22},
        {"XiaoWang",27},
    };

    m_roleName.insert(studentNameRole, "studentName");
    m_roleName.insert(studentAgeRole, "studentAge");
}

QAbstractItemModel *QTableModel::model()
{
    return this;
}


int QTableModel::rowCount(const QModelIndex &parent) const
{
    if (parent.isValid())
        return 0;

    // FIXME: Implement me!
    return m_data.count();
}

int QTableModel::columnCount(const QModelIndex &parent) const
{
    if (parent.isValid())
        return 0;

    // FIXME: Implement me!
    return 2;
}

QVariant QTableModel::data(const QModelIndex &index, int role) const
{
    if (!index.isValid())
        return QVariant();

    switch(role)
    {
    case studentNameRole:
        return m_data[index.row()].qsName;
    case studentAgeRole:
        return m_data[index.row()].age;
    default:
        break;
    }

    // FIXME: Implement me!
    return QVariant();
}

QModelIndex QTableModel::index(int row, int column, const QModelIndex &parent) const
{
    if(!hasIndex(row, column, parent))
    {
        return QModelIndex();
    }

    return createIndex(row, column, parent.internalId());
}

QHash<int, QByteArray> QTableModel::roleNames() const
{
    return m_roleName;
}
4、main.qml
import QtQuick 2.6
import QtQuick.Window 2.2
import QtQuick.Controls 1.4
import QtQuick.Controls.Styles 1.4
import QtQuick.Layouts 1.12

Window {
    id: window
    visible: true
    width: 700
    height: 600
    title: qsTr("QML自定义组件")


    Rectangle {
        id: baseRct

        anchors.fill: parent
        color: "lightblue"

        MyTableView {
            anchors.centerIn: parent
        }
    }
}
5、MyTableView.qml
import QtQuick 2.2
import QtQuick.Controls 1.4
import QtQml.Models 2.2

Rectangle {
    id: tableViewRct

    width: 500
    height: 500

    border.color: "red"
    border.width: 2

    TableView {
        id: tableView

        anchors.fill: parent

        Component.onCompleted: {
            model = QTableModel.model();
        }

        itemDelegate: tableViewDelegate
        headerDelegate: Rectangle {
            height: 35
            Text {
                anchors.centerIn: parent
                text: styleData.value
                color: "#46a4bb"
            }
        }

        TableViewColumn {
            role: "studentName"
            title: "name"
            width: 100
        }

        TableViewColumn {
            role: "studentAge"
            title: "age"
            width: 100
        }
    }

    Component {
        id: tableViewDelegate

        Rectangle {
            height: 50
            width: 100

            Text {
                anchors.centerIn: parent
                color: "red"
                elide: styleData.elideMode
                text: styleData.value
                font.pointSize: 10
                font.bold: true
            }
        }
    }
}
编译结果:


 3579
3579


 被折叠的 条评论
为什么被折叠?
被折叠的 条评论
为什么被折叠?
 到【灌水乐园】发言


