


spring boot发送邮件
文章目录
一.简单文本邮件
1.引入相关jar包
<dependencies>
        <dependency>
            <groupId>org.springframework.boot</groupId>
            <artifactId>spring-boot-starter-web</artifactId>
        </dependency>

        <!--引入spring boot mail的jar包-->
        <dependency>
            <groupId>org.springframework.boot</groupId>
            <artifactId>spring-boot-starter-mail</artifactId>
        </dependency>

        <dependency>
            <groupId>org.springframework.boot</groupId>
            <artifactId>spring-boot-starter-test</artifactId>
            <scope>test</scope>
        </dependency>
    </dependencies>
2.配置邮箱参数
在项目的application.properties配置文件中配置邮箱信息
# 配置邮箱信息
spring.mail.host=smtp.qq.com
spring.mail.username=1260580035@qq.com
# 配置的是授权码,不是登录密码
spring.mail.password=nejvdivlanmobaef
spring.mail.default-encoding=utf-8
3.封装SimpleMailMessage
@Service
public class MailService {

    @Value("${spring.mail.username}")
    private String from;

    public void sayHello() {
        System.out.println("Hello World!");
    }

    /**
     * 发送简单邮件
     * @param to 接收人邮箱地址
     * @param subject 邮件主题
     * @param context 邮件内容
     */
    public void sendSimpleMail(String to, String subject, String context) {
        SimpleMailMessage simpleMailMessage = new SimpleMailMessage();
        simpleMailMessage.setTo(to);
        simpleMailMessage.setSubject(subject);
        simpleMailMessage.setText(context);
        simpleMailMessage.setFrom(from);

    }
}
4.JavaMailSender进行发送
@Service
public class MailService {

    @Value("${spring.mail.username}")
    private String from;

    /**
     * 邮件发送类
     */
    @Resource
    private JavaMailSender javaMailSender;

    public void sayHello() {
        System.out.println("Hello World!");
    }

    /**
     * 发送简单邮件
     * @param to 接收人邮箱地址
     * @param subject 邮件主题
     * @param context 邮件内容
     */
    public void sendSimpleMail(String to, String subject, String context) {
        SimpleMailMessage simpleMailMessage = new SimpleMailMessage();
        simpleMailMessage.setTo(to);
        simpleMailMessage.setSubject(subject);
        simpleMailMessage.setText(context);
        simpleMailMessage.setFrom(from);

        //发送邮件
        javaMailSender.send(simpleMailMessage);
    }
}
5.简单邮件发送测试
@SpringBootTest
class MailServiceTest {
@Resource
MailService mailService;
@Test
void sayHello() {
mailService.sayHello();
}
@Test
void sendSimpleMail() {
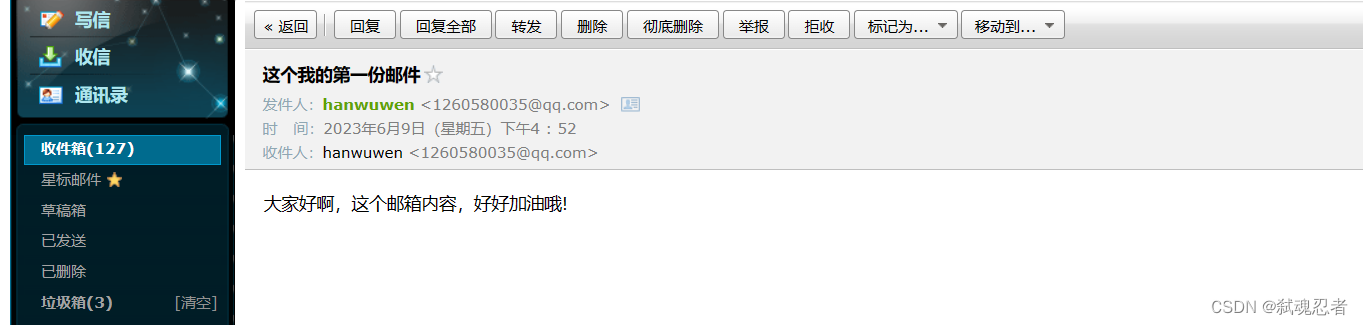
mailService.sendSimpleMail("1260580035@qq.com", "这个我的第一份邮件",
"大家好啊,这个邮箱内容,好好加油哦!");
}
}
发送成功,打开邮箱查看
二.发送HTML邮件
编写
sendHtmlMail方法
/**
     * 发送HTML邮件
     * @param to 接收人邮箱地址
     * @param subject 邮件主题
     * @param context 邮件内容
     */
    public void sendHtmlMail(String to, String subject, String context) throws MessagingException {
        MimeMessage message = mailSender.createMimeMessage();
        MimeMessageHelper helper = new MimeMessageHelper(message, true);
        helper.setFrom(from);
        helper.setTo(to);
        helper.setSubject(subject);
        helper.setText(context, true);

        mailSender.send(message);
    }
编写测试方法
@Test
void sendHtmlMail() throws MessagingException {
String content = "<html>\n" +
"<body>\n" +
"<h3>这是一份html邮件</h3>\n" +
"<a href='http://www.baidu.com'>百度一下</a>\n" +
"</body>\n" +
"</html>";
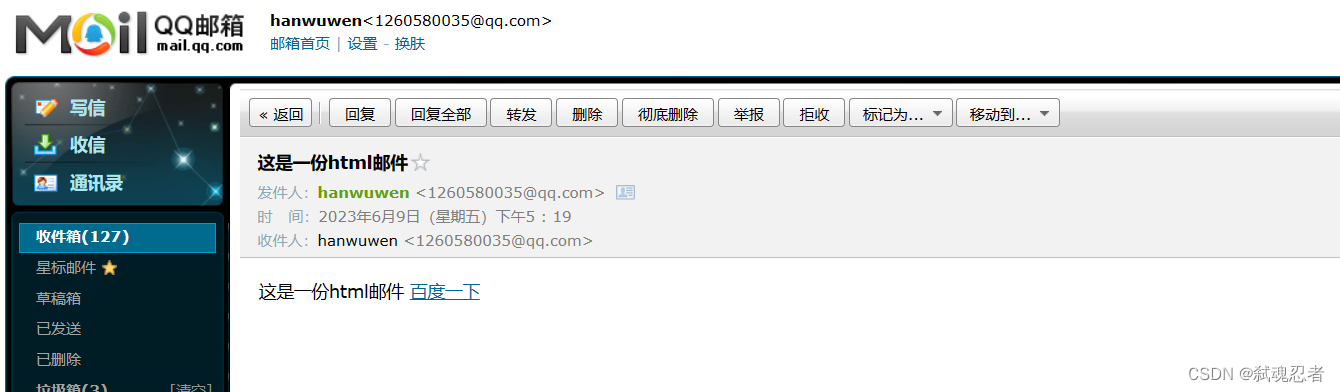
mailService.sendHtmlMail("1260580035@qq.com", "这是一份html邮件", content);
}
发送成功,邮箱查看结果如下
三.发送带有附件邮件
编写sendAttachmentsMail方法
/**
     * 发送附件邮件
     * @param to 接收人邮箱地址
     * @param subject 邮件主题
     * @param context 邮件内容
     * @param filePath 附件文件路径
     */
    public void sendAttachmentsMail(String to, String subject, String context, String filePath) throws MessagingException {
        MimeMessage message = mailSender.createMimeMessage();

        MimeMessageHelper helper = new MimeMessageHelper(message, true);
        helper.setFrom(from);
        helper.setTo(to);
        helper.setSubject(subject);
        helper.setText(context);

        /*
            给发送邮件添加附件
         */
        FileSystemResource file = new FileSystemResource(new File(filePath));
        String filename = file.getFilename();
        helper.addAttachment(filename, file);
        //helper.addAttachment(filename, file);  //如需添加多个附件,可以多次调用addAttachment()

        mailSender.send(message);
    }
编写测试方法
@Test
void sendAttachmentsMail() throws MessagingException {
String filePath = "D:\\01.jpg";
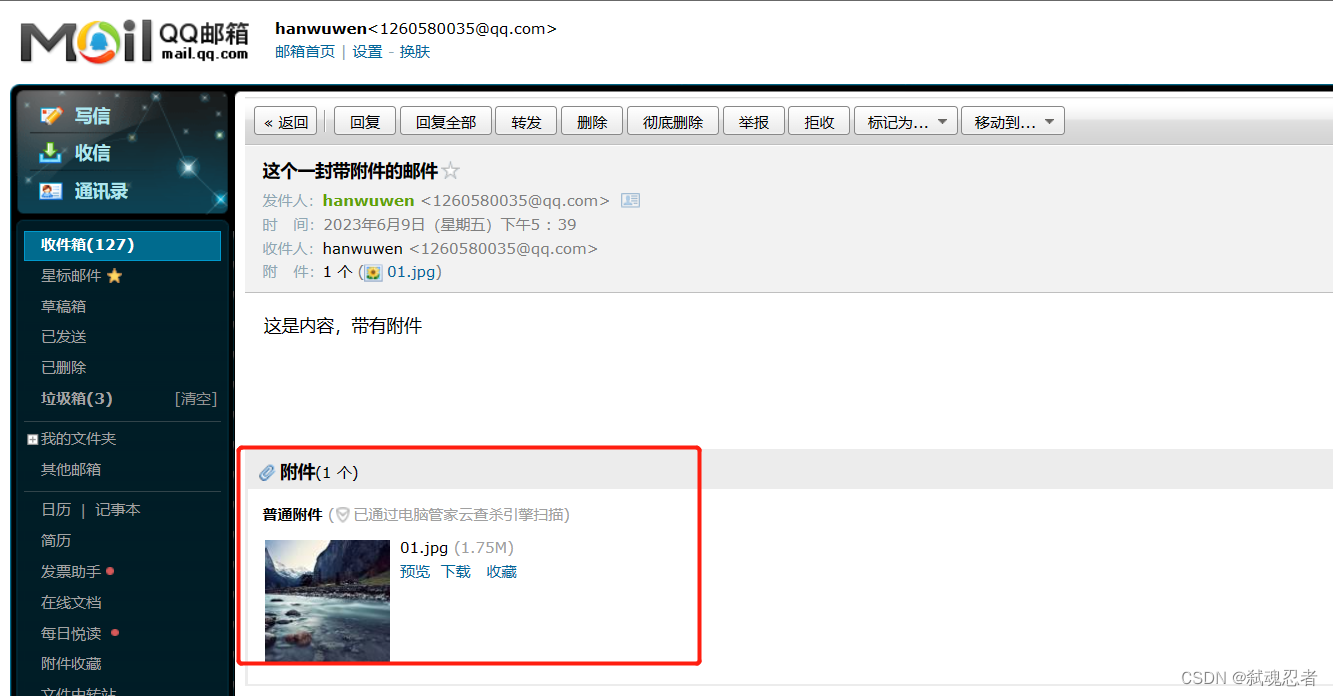
mailService.sendAttachmentsMail("1260580035@qq.com", "这个一封带附件的邮件",
"这是内容,带有附件", filePath);
}
发送成功,查看邮箱如下,带有附件
四.发送内嵌资源(图片)邮件
编写**
sendInlineMail**方法
/**
     * 发送资源邮件
     * @param to 接收人邮箱地址
     * @param subject 邮件主题
     * @param context 邮件内容
     * @param rscPath 资源路径
     * @param rscId 资源id
     * @throws MessagingException
     */
    public void sendInlineMail(String to, String subject, String context, String rscPath, String rscId) throws MessagingException {
        MimeMessage message = mailSender.createMimeMessage();

        MimeMessageHelper helper = new MimeMessageHelper(message, true);
        helper.setFrom(from);
        helper.setTo(to);
        helper.setSubject(subject);
        helper.setText(context, true);

        /*
            给发送邮件添加资源
         */
        FileSystemResource res = new FileSystemResource(new File(rscPath));
        helper.addInline(rscId, res);

        mailSender.send(message);
    }
编写测试方法
@Test
    void sendInlineMail() throws MessagingException {
        String rscPath = "D:\\01.jpg";
        String rscId = "img001";
        String content = "<html><body><img src=\'cid:" + rscId + "\'></img>" + "</body></html>";
        mailService.sendInlineMail("1260580035@qq.com", "这个一封带资源的邮件",
                content, rscPath, rscId);
    }
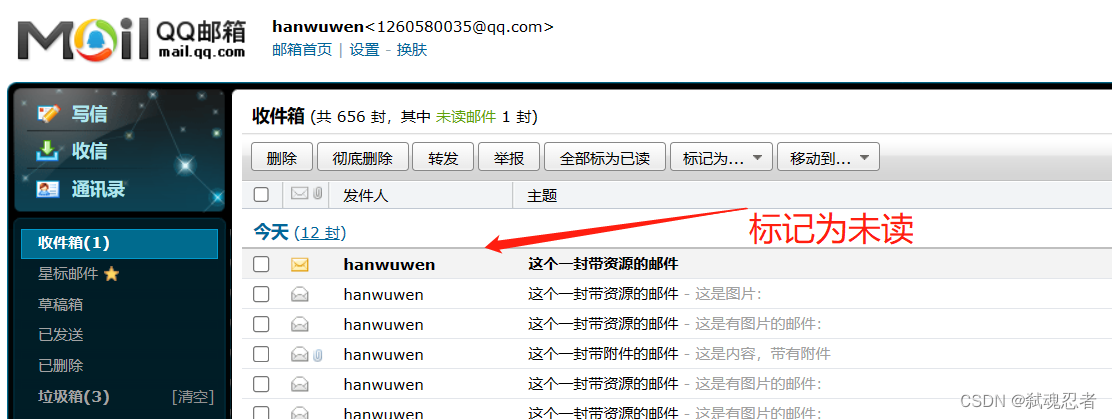
发送成功,查看结果如下
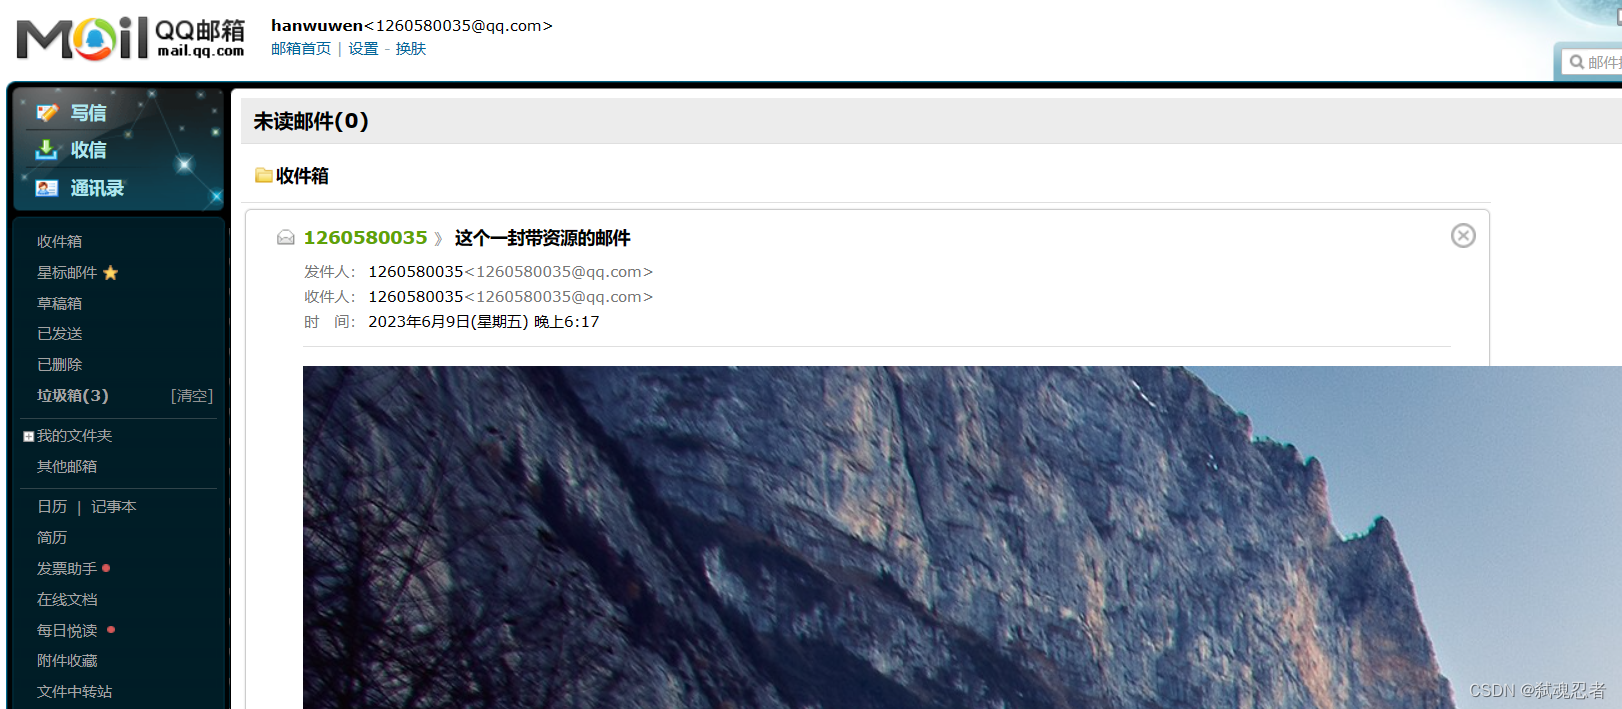
**如果是qq邮箱,图片显示不出来,操作如下:
1,标记邮件为未读
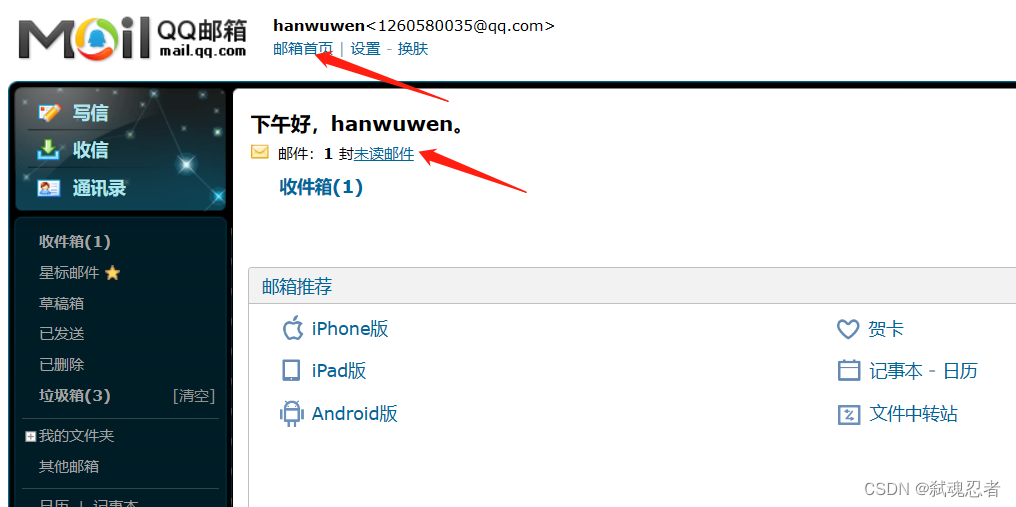
2,点击邮箱首页,打开未读邮件
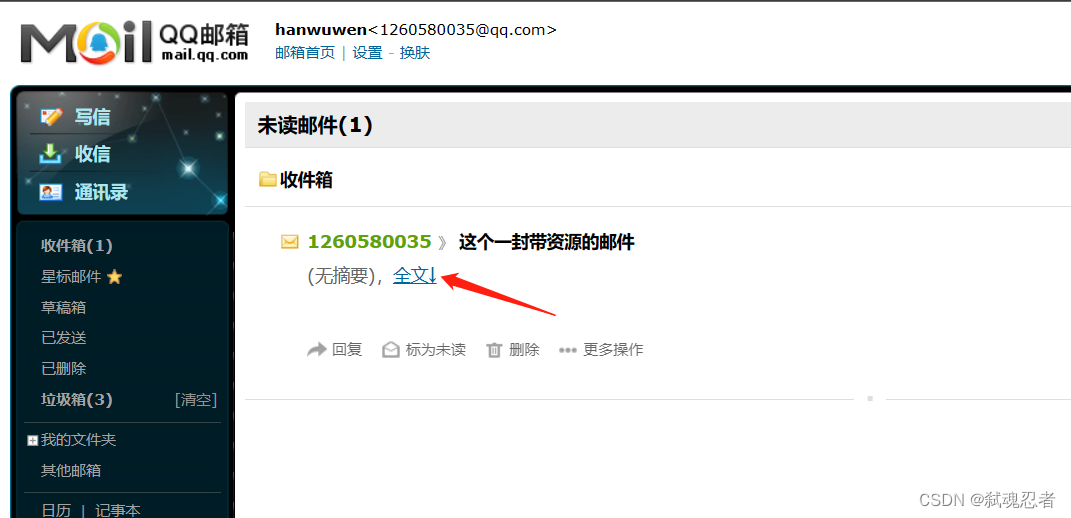
3,点击全文,即可查看
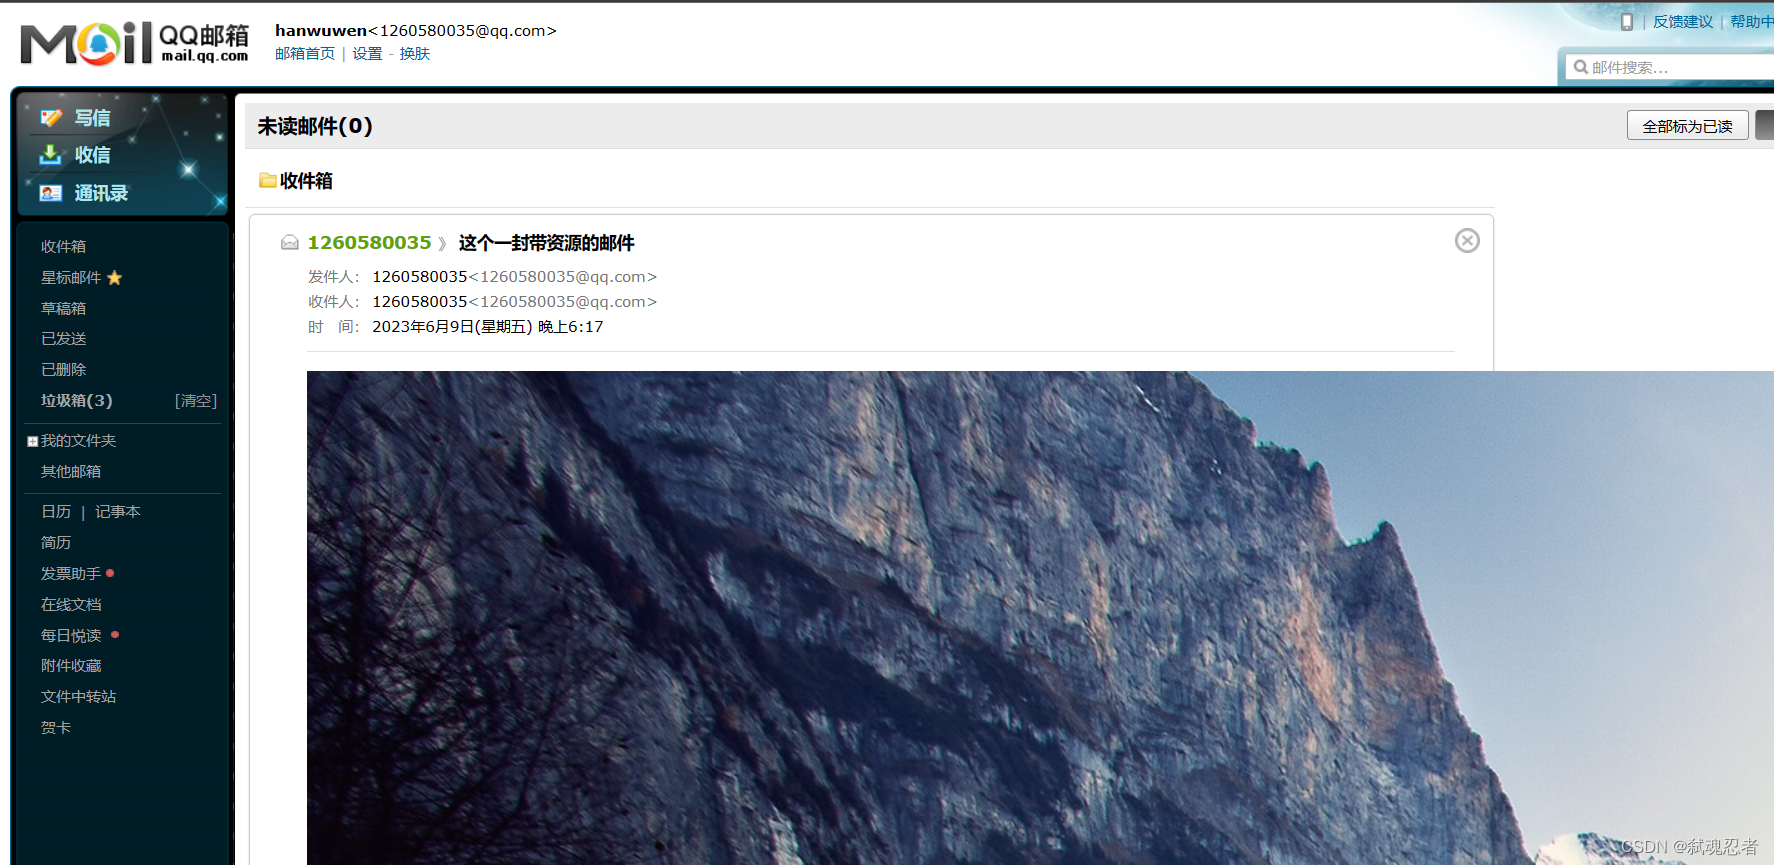
4,查看图片
五.邮件模板
1,引入模板jar包
在pom.xml文件中引入依赖包
<!--引入spring boot邮件模板jar包-->
        <dependency>
            <groupId>org.springframework.boot</groupId>
            <artifactId>spring-boot-starter-thymeleaf</artifactId>
        </dependency>
2,配置html模板
在资源目录下templates下新建邮件模板emailTemplate.html文件
<!DOCTYPE html>
<html lang="en" xmlns:th="http://www.thymeleaf.org">
<head>
<meta charset="UTF-8" />
<title>邮件模板</title>
</head>
<body>
这是一封注册验证邮件,请点击下面的链接完成注册,感谢您的支持!<br/>
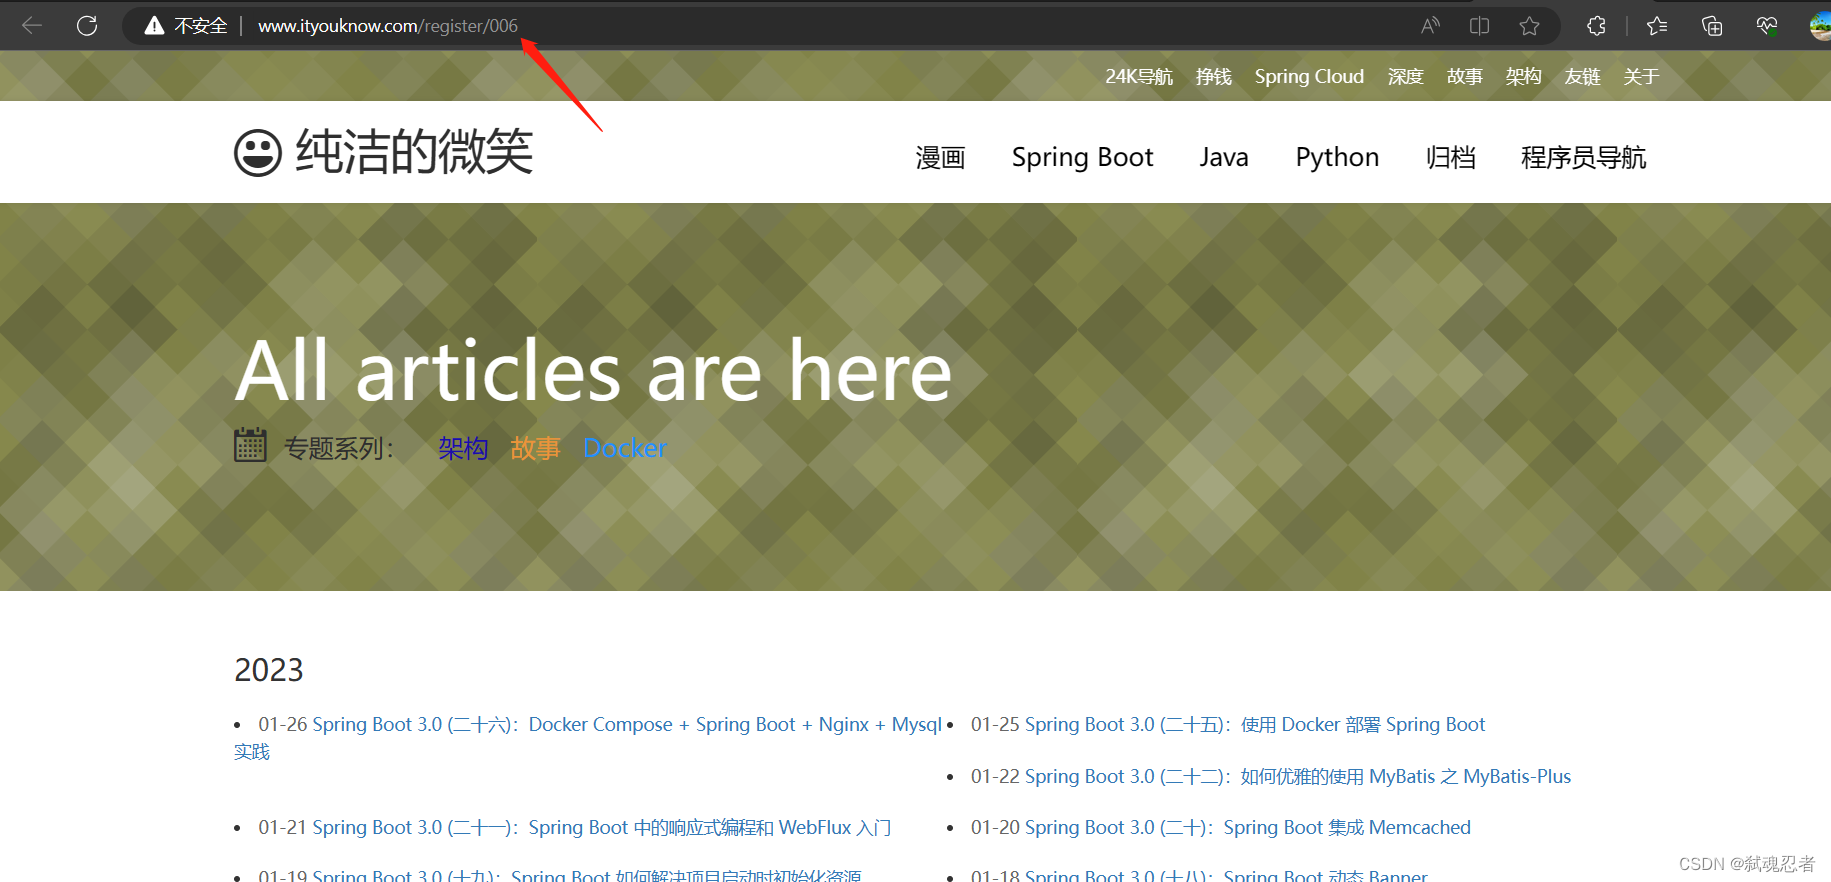
<a href="#" th:href="@{http://www.ityouknow.com/register/{id}(id=${id}})">激活账号</a>
</body>
</html>
3,编写测试方法
	/**
     * 注入邮件模板引擎
     */
    @Resource
    TemplateEngine templateEngine;

	/**
     * 模板邮件测试
     * @throws MessagingException
     */
	@Test
    void sendTemplateMail() throws MessagingException {
        Context context = new Context();
        //属性id对应邮件模板中的属性
        context.setVariable("id", "006");

        String emailContext = templateEngine.process("emailTemplate", context);
        mailService.sendHtmlMail("1260580035@qq.com", "这个一封模板邮件", emailContext);
    }
查看邮箱,
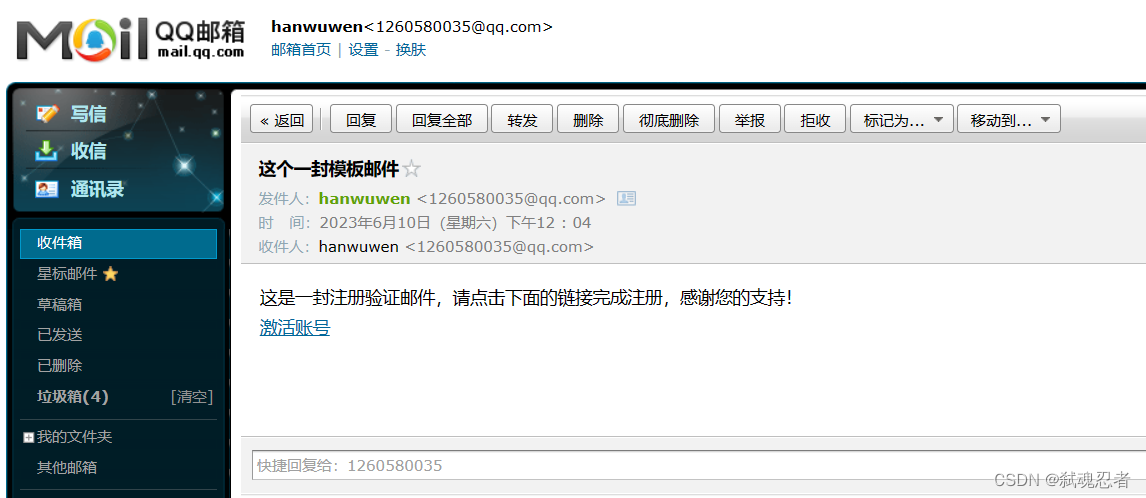
点击激活账号链接,跳转页面,可以看到id属性值已经传过来了
六,代码地址
https://gitee.com/sheng_git/springboot-mail.git


 3841
3841


 被折叠的 条评论
为什么被折叠?
被折叠的 条评论
为什么被折叠?
 到【灌水乐园】发言


