


一 SpringBoot 爱之初体验
1,what is?
Spring Boot makes it easy to create stand-alone, production-grade Spring based Applications that you can "just run".
We take an opinionated view of the Spring platform and third-party libraries so you can get started with minimum fuss. Most Spring Boot applications need minimal Spring configuration.
2,Features
-
Create stand-alone Spring applications
-
Embed Tomcat, Jetty or Undertow directly (no need to deploy WAR files)
-
Provide opinionated 'starter' dependencies to simplify your build configuration
-
Automatically configure Spring and 3rd party libraries whenever possible
-
Provide production-ready features such as metrics, health checks, and externalized configuration
-
Absolutely no code generation and no requirement for XML configuration
总结:1,独立的spring应用 2,集成了Tomcat、Jetty等 3,starter 4,自动装配 5,监控及外部配置 6,非XML配置
下面将根据以上重点特征进行讲述
二 SpringBoot之浓情热恋
1,约定大于配置
SpringBoot框架诞生原因之一就是要对Spring框架进行最小化配置的实现,所以就出现了“约定大于配置"这个解决方案!
约定优于配置的主要体现:
- 1. maven 的目录结构:默认有 resources 文件夹存放配置文件、 默认打包方式为 jar
- 2. spring-boot-starter-web 中默认包含 spring mvc 相关依赖以及内置的 tomcat 容器,使得构建一个 web 应用更加简单
- 3. 默认提供 application.properties/yml 文件
- 4. 默认通过 spring.profiles.active 属性来决定运行环境时读取的配置文件
- 5. EnableAutoConfiguration 默认对于依赖的 starter 进行自动装载
2,@SpringBootApplication解码
@Target(ElementType.TYPE)
@Retention(RetentionPolicy.RUNTIME)
@Documented
@Inherited
@SpringBootConfiguration
@EnableAutoConfiguration
@ComponentScan(excludeFilters = { @Filter(type = FilterType.CUSTOM, classes = TypeExcludeFilter.class),
		@Filter(type = FilterType.CUSTOM, classes = AutoConfigurationExcludeFilter.class) })
public @interface SpringBootApplication {
  ...
}
核心来讲就@SpringBootConfiguration @EnableAutoConfiguration @ComponentScan
@Target(ElementType.TYPE)
@Retention(RetentionPolicy.RUNTIME)
@Documented
@Configuration
public @interface SpringBootConfiguration {
  ...
}
@SpringBootConfiguration 其实就是@Configuration的派生
SpringBootApplication 本质上是由 3 个注解组成,分别是
1. @Configuration
2. @EnableAutoConfiguration
3. @ComponentScan
2.1 简单分析@Configuration
Configuration 这个注解大家应该有用过,它是 JavaConfig形式的基于 Spring IOC 容器的配置类使用的一种注解。因为SpringBoot 本质上就是一个 spring 应用,所以通过这个注解来加载 IOC 容器的配置是很正常的。所以在启动类里面标注了@Configuration,意味着它其实也是一个 IoC容器的配置类。传统意义上的 spring 应用都是基于 xml 形式来配置 bean的依赖关系。然后通过 spring 容器在启动的时候,把 bean进行初始化并且,如果 bean 之间存在依赖关系,则分析这些已经在 IoC 容器中的 bean 根据依赖关系进行组装。
直到 Java5 中,引入了 Annotations 这个特性,Spring 框架也紧随大流并且推出了基于 Java 代码和 Annotation 元信息的依赖关系绑定描述的方式,也就是 JavaConfig。 从 spring3 开始,spring 就支持了两种 bean 的配置方式,一种是基于 xml 文件方式、另一种就是 javaConfig,任何一个标注了@Configuration 的 Java 类定义都是一个JavaConfig 配置类。而在这个配置类中,任何标注了@Bean 的方法,它的返回值都会作为 Bean 定义注册到Spring 的 IOC 容器,方法名默认成为这个 bean 的 id
核心就是IOC支持的三种配置方式:
1.XML
2.@Configuration --> @Bean (JavaConfig)
//该注解表示这个类为javaConfig类
@Configuration
public class MyConfig {
	//该注解表示:向容器中注册一个叫做myCar的对象
	@Bean("myCar")
	public Car getCar() {
		return new Car("保时捷","911",300);
	}
	//该注解表示:向容器中注册一个叫做person的对象
	//并且通过byType的方式注入car
	@Bean(name="person",autowire=Autowire.BY_TYPE)
	public Person getPerson() {
		return new Person(1001,"望穿秋水见伊人");
	}
}
3.Annotation注解
2.2 简单分析 ComponentScan
ComponentScan 这个注解是大家接触得最多的了,相当于 xml 配置文件中的<context:component-scan>。 它的主要作用就是扫描指定路径下的标识了需要装配的类,自动装配到 spring 的 Ioc 容器中。标识需 要装配的类的 形式主要是: @Component 、
@Repository、@Service、@Controller 这类的注解标识的类。ComponentScan 默认会扫描当前 package 下的的所有加
了相关注解标识的类到 IoC 容器中
2.3 重点分析 EnableAutoConfiguration:实现自动装配的核心
在 spring3.1 版本中,提供了一系列的@Enable 开头的注解,Enable 主机应该是在 JavaConfig 框架上更进一步的完善,是的用户在使用 spring 相关的框架是,避免配置大量的代码从而降低使用的难度。
比如说@EnableScheduling,开启计划任务的支持;
import 注解是什么意思呢? 联想到 xml 形式下有一个<import resource/> 形式的注解,就明白它的作用了。
import 就是把多个分来的容器配置合并在一个配置中。在JavaConfig 中所表达的意义是一样的。
@Target(ElementType.TYPE)
@Retention(RetentionPolicy.RUNTIME)
@Documented
@Inherited
@AutoConfigurationPackage
@Import(AutoConfigurationImportSelector.class)
public @interface EnableAutoConfiguration {
 ...
}
2.3.3 AutoConfigurationImportSelector?
Enable注解不仅仅可以像前面演示的案例一样很简单的实现多个 Configuration 的整合,还可以实现一些复杂的场景,比如可以根据上下文来激活不同类型的 bean
@Import 注解可以配置三种不同的 class实现方式
1. 第一种就是基于普通 bean 或者带有@Configuration 的 bean 进行注入
2. 实现 ImportSelector 接口进行动态注入
3. 实现 ImportBeanDefinitionRegistrar 接口进行动态注入
public class AutoConfigurationImportSelector implements DeferredImportSelector, BeanClassLoaderAware,
		ResourceLoaderAware, BeanFactoryAware, EnvironmentAware, Ordered {
 ...
	@Override
	public String[] selectImports(AnnotationMetadata annotationMetadata) {
		if (!isEnabled(annotationMetadata)) {
			return NO_IMPORTS;
		}
		AutoConfigurationEntry autoConfigurationEntry = getAutoConfigurationEntry(annotationMetadata);
		return StringUtils.toStringArray(autoConfigurationEntry.getConfigurations());
}SpringFactoriesLoader
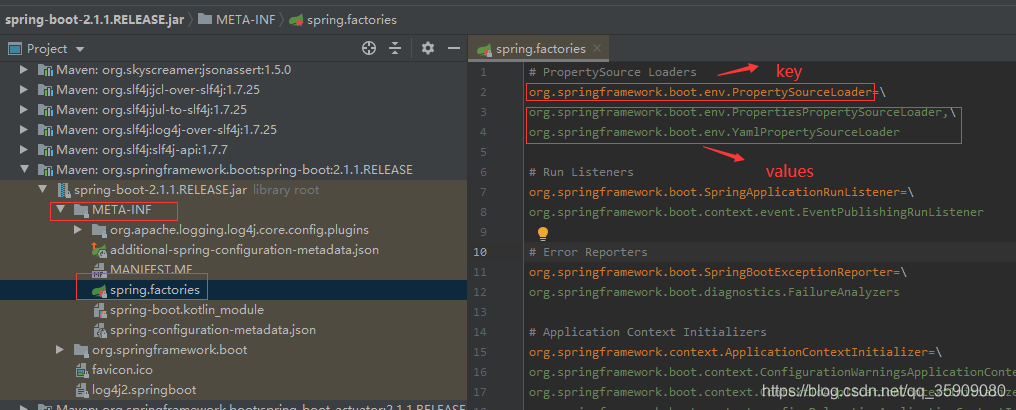
在分析 AutoConfigurationImportSelector 的源码时,会先扫描 spring-autoconfiguration-metadata.properties文件,最后在扫描 spring.factories 对应的类时,会结合前面的元数据进行过滤,为什么要过滤呢? 原因是很多的。@Configuration 其实是依托于其他的框架来加载的,如果当前的 classpath 环境下没有相关联的依赖,则意味着这些类没必要进行加载,所以通过这种条件过滤可以有效的减少@configuration 类的数量从而降低SpringBoot 的启动时间。
@Conditional注解是个什么东西呢,它可以根据代码中设置的条件装载不同的bean,比如说当一个接口有两个实现类时,我们要把这个接口交给Spring管理时通常会只选择实现其中一个实现类,这个时候我们总不能使用if-else吧,所以这个@Conditional的注解就出现了。
//@ConditionalOnBean的示例代码
/*这个方法上加了@ConditionalOnBean注解,注解里的属性是RedisConnectionFactory。它的意思呢,就是说*如果你配置了redis的相关配置信息那么我就实例化RedisTemplate供你进行操作,如果你没有配置redis的相关*配置那么我就不实例化(毕竟没有配置实例化也报错不是)
*/
@Bean
@ConditionalOnBean(RedisConnectionFactory.class)
   public RedisTemplate<Object, Object> redisTemplate(RedisConnectionFactory connectionFactory) {
       RedisTemplate<Object, Object> template = new RedisTemplate<Object, Object>();
       template.setConnectionFactory(connectionFactory);
       template.setKeySerializer(new StringRedisSerializer());
       template.afterPropertiesSet();
       return template;
}@ConditionalOnClass:某个class位于类路径上才会实例化一个Bean
@ConditionalOnExpression:当表达式为true的时候,才会实例化一个Bean
@ConditionalOnMissingBean:仅仅在当前上下文中不存在某个对象时,才会实例化一个Bean
@ConditionalOnMissingClass:某个class不位于类路径上才会实例化一个Bean
@ConditionalOnNotWebApplication:不是web应用
补充:
- src不是classpath,WEB-INF/classes和lib才是classpath,WEB-INF/是资源目录,客户端不能直接访问
- WEB-INF/classes目录存放src目录Java文件编译后的class文件,xml,properties等资源配置文件,这是一个定位资源的入口。
- lib和classes同属classpath,两者的访问优先级是:lib > classes
3 starter
pring-boot 在配置上相比spring要简单许多, 其核心在于spring-boot-starter, 在使用spring-boot来搭建一个项目时, 只需要引入官方提供的starter, 就可以直接使用, 免去了各种配置, 原因在于spring-boot的自动发现,比如当classpath下面有tomcat-embedded.jar 时,对应的bean就会被加载.其核心就是上面讲的自动装配。
下面会介绍如何自己写一个简单的starter,并在自己的工程中使用这个starter
3.1 自定义starter
项目结构:

3.1.1 MyProperties :配置文件读取类
import org.springframework.boot.context.properties.ConfigurationProperties;

@ConfigurationProperties(prefix = "my-properties")
public class MyProperties {
    private String name;
    private String msg;

    public String getName() {
        return name;
    }

    public void setName(String name) {
        this.name = name;
    }

    public String getMsg() {
        return msg;
    }

    public void setMsg(String msg) {
        this.msg = msg;
    }

    @Override
    public String toString() {
        return "MyProperties{" +
                "name='" + name + '\'' +
                ", msg='" + msg + '\'' +
                '}';
    }
}
3.1.2 MyService :自定义功能类
import com.example.properties.MyProperties;

public class MyService {

    private MyProperties myProperties;

    public MyService(MyProperties myProperties) {
        this.myProperties = myProperties;
    }

    public String getMyProperties(){
        return myProperties.toString();
    }
}
3.1.3 MyAutoConfiguration :自动装配类import com.example.properties.MyProperties;
import com.example.service.MyService;
import org.springframework.beans.factory.annotation.Autowired;
import org.springframework.boot.autoconfigure.condition.ConditionalOnClass;
import org.springframework.boot.autoconfigure.condition.ConditionalOnMissingBean;
import org.springframework.boot.context.properties.EnableConfigurationProperties;
import org.springframework.context.annotation.Bean;
import org.springframework.context.annotation.Configuration;
@ConditionalOnClass(MyService.class)
@EnableConfigurationProperties(MyProperties.class)
@Configuration
public class MyAutoConfiguration {
@Autowired
private MyProperties myProperties;
@Bean
@ConditionalOnMissingBean(MyService.class)
public MyService getMyService(){
return new MyService(myProperties);
}
}3.1.4 在resources/META-INF下构建spring.factories文件:
org.springframework.boot.autoconfigure.EnableAutoConfiguration=\
com.example.configuration.MyAutoConfiguration
3.1.4 pom.xml :引入spring-boot-starter
<?xml version="1.0" encoding="UTF-8"?>
<project xmlns="http://maven.apache.org/POM/4.0.0" xmlns:xsi="http://www.w3.org/2001/XMLSchema-instance"
         xsi:schemaLocation="http://maven.apache.org/POM/4.0.0 https://maven.apache.org/xsd/maven-4.0.0.xsd">
    <modelVersion>4.0.0</modelVersion>

    <groupId>com.example</groupId>
    <artifactId>starter-my</artifactId>
    <version>0.0.1-SNAPSHOT</version>
    <name>starter-my</name>

    <dependencies>
        <dependency>
            <groupId>org.springframework.boot</groupId>
            <artifactId>spring-boot-starter</artifactId>
            <version>2.3.0.RELEASE</version>
        </dependency>

    </dependencies>

</project>
3.1.5 打成jar包供其它地方使用
3.1.6 测试该starter
测试项目
首先在测试项目中引入该jar包
        <dependency>
            <groupId>com.example</groupId>
            <artifactId>starter-my</artifactId>
            <version>0.0.1-SNAPSHOT</version>
        </dependency>
在项目目录resources/application.properties下写入测试数据,注意前缀要与MyProperties标注的前缀保持一致。
my-properties.name=jack
my-properties.msg=this is my autoConfiguration
测试类
import com.example.service.MyService;
import org.springframework.beans.factory.annotation.Autowired;
import org.springframework.boot.CommandLineRunner;
import org.springframework.boot.SpringApplication;
import org.springframework.boot.autoconfigure.SpringBootApplication;

@SpringBootApplication
public class TestApplication implements CommandLineRunner {
    @Autowired
    private MyService service;

    public static void main(String[] args) {
        SpringApplication.run(TestApplication.class, args);
    }

    @Override
    public void run(String... args) throws Exception {
        System.out.println(service.getMyProperties());
    }
}
结果:

4 Actuator
SpringBoot自带监控功能Actuator,可以帮助实现对程序内部运行情况监控,比如监控状况、Bean加载情况、环境变量、日志信息、线程信息等
4.1 实践
pom.xml
<dependency>
    <groupId>org.springframework.boot</groupId>
    <artifactId>spring-boot-starter-actuator</artifactId>
</dependency>- 浏览器打开链接http://localhost:8080/actuator/ 可以看到所有支持的连接,默认只有:
/actuator
/actuator/health
/actuator/health/{component}
/actuator/health/{component}/{instance}
/actuator/info
如果要查看其它状态就得设置相应权限:
- 如果要看到所有支持的状态查询,需要配置
management.endpoints.web.exposure.include=*- 显示所有健康状态,需要加配置
management.endpoint.health.show-details=always{
"_links": {
"self": {
"href": "http://localhost:8080/actuator",
"templated": false
},
"beans": {
"href": "http://localhost:8080/actuator/beans",
"templated": false
},
"caches-cache": {
"href": "http://localhost:8080/actuator/caches/{cache}",
"templated": true
},
"caches": {
"href": "http://localhost:8080/actuator/caches",
"templated": false
},
"health": {
"href": "http://localhost:8080/actuator/health",
"templated": false
},
"health-path": {
"href": "http://localhost:8080/actuator/health/{*path}",
"templated": true
},
"info": {
"href": "http://localhost:8080/actuator/info",
"templated": false
},
"conditions": {
"href": "http://localhost:8080/actuator/conditions",
"templated": false
},
"configprops": {
"href": "http://localhost:8080/actuator/configprops",
"templated": false
},
"env": {
"href": "http://localhost:8080/actuator/env",
"templated": false
},
"env-toMatch": {
"href": "http://localhost:8080/actuator/env/{toMatch}",
"templated": true
},
"loggers": {
"href": "http://localhost:8080/actuator/loggers",
"templated": false
},
"loggers-name": {
"href": "http://localhost:8080/actuator/loggers/{name}",
"templated": true
},
"heapdump": {
"href": "http://localhost:8080/actuator/heapdump",
"templated": false
},
"threaddump": {
"href": "http://localhost:8080/actuator/threaddump",
"templated": false
},
"metrics-requiredMetricName": {
"href": "http://localhost:8080/actuator/metrics/{requiredMetricName}",
"templated": true
},
"metrics": {
"href": "http://localhost:8080/actuator/metrics",
"templated": false
},
"scheduledtasks": {
"href": "http://localhost:8080/actuator/scheduledtasks",
"templated": false
},
"mappings": {
"href": "http://localhost:8080/actuator/mappings",
"templated": false
}
}
}Loggers
显示当前 spring-boot 应用中的日志配置信息,针对每个package 对应的日志级别
beans
获取当前 spring-boot 应用中 IoC 容器中所有的 bean
Dump
获取活动线程的快照
Mappings
返回全部的 uri 路径,以及和控制器的映射关系
conditions
显示当前所有的条件注解,提供一份自动配置生效的条件情况,记录哪些自动配置条件通过了,哪些没通过
{
    "contexts":{
        "application":{
            "beans":{
                "endpointCachingOperationInvokerAdvisor":{
                    "aliases":[

                    ],
                    "scope":"singleton",
                    "type":"org.springframework.boot.actuate.endpoint.invoker.cache.CachingOperationInvokerAdvisor",
                    "resource":"class path resource [org/springframework/boot/actuate/autoconfigure/endpoint/EndpointAutoConfiguration.class]",
                    "dependencies":[
                        "environment"
                    ]
                }
            }
        }
    }
}
{
    "activeProfiles":[

    ],
    "propertySources":[
        {
            "name":"server.ports",
            "properties":{
                "local.server.port":{
                    "value":8080
                }
            }
        },
        {
            "name":"servletContextInitParams",
            "properties":{

            }
        },
        {
            "name":"systemProperties",
            "properties":{
                "java.vendor":{
                    "value":"Oracle Corporation"
                },
                "sun.java.launcher":{
                    "value":"SUN_STANDARD"
                },
                "catalina.base":{
                    "value":"C:%users\timxia\AppData\Local\Temp\tomcat.2979281870254394426.8080"
                }
            }
        }
    ]
}
4.2 端点(endpoint)的启用和暴露
启用端点
默认情况下,除shutdown以外的所有端点均已启用。要配置单个端点的启用,请使用management.endpoint.<id>.enabled属性。以下示例启用shutdown端点:
management.endpoint.shutdown.enabled=true另外可以通过management.endpoints.enabled-by-default来修改全局端口默认配置,以下示例启用info端点并禁用所有其他端点:
management.endpoints.enabled-by-default=false
management.endpoint.info.enabled=true
注意:禁用的端点将从应用程序上下文中完全删除。如果您只想更改端点公开(对外暴露)的技术,请改为使用include和exclude属性,详情见下文
暴露端点
要更改公开哪些端点,请使用以下技术特定的include和exclude属性:
| Property | Default |
|---|---|
| management.endpoints.jmx.exposure.exclude | * |
| management.endpoints.jmx.exposure.include | * |
| management.endpoints.web.exposure.exclude | * |
| management.endpoints.web.exposure.include | info, health |
include属性列出了公开的端点的ID,exclude属性列出了不应该公开的端点的ID
exclude属性优先于include属性。包含和排除属性都可以使用端点ID列表进行配置。
注意:这里的优先级是指同一端点ID,同时出现在include属性表和exclude属性表里,exclude属性优先于include属性,即此端点没有暴露
- 例如,要停止通过JMX公开所有端点并仅公开
health和info端点,请使用以下属性:
management.endpoints.jmx.exposure.include=health,info
*可以用来选择所有端点。例如,要通过HTTP公开除env和beans端点之外的所有内容,请使用以下属性:
management.endpoints.web.exposure.include=*
management.endpoints.web.exposure.exclude=env,beans
4.3 拓展点:health原理
应用健康状态的检查应该是监控系统中最基本的需求,所以我们基于 health 来分析一下它是如何实现的。SpringBoot 预先通过
org.springframework.boot.actuate.autoconfigure.health.HealthEndpointAutoConfiguration,这个就是基于 spring-boot 的自动装配来载入的。所以,我们可以在 actuator-autoconfigure 这个包下找到spring.factories。

其核心还是运用了spring boot的自动装配原理。
@Configuration(
    proxyBeanMethods = false
)
@ConditionalOnAvailableEndpoint(
    endpoint = HealthEndpoint.class
)
@EnableConfigurationProperties
@Import({LegacyHealthEndpointAdaptersConfiguration.class, LegacyHealthEndpointCompatibilityConfiguration.class, HealthEndpointConfiguration.class, ReactiveHealthEndpointConfiguration.class, HealthEndpointWebExtensionConfiguration.class, HealthEndpointReactiveWebExtensionConfiguration.class})
public class HealthEndpointAutoConfiguration {
    public HealthEndpointAutoConfiguration() {
    }

    @Bean
    HealthEndpointProperties healthEndpointProperties(HealthIndicatorProperties healthIndicatorProperties) {
        HealthEndpointProperties healthEndpointProperties = new HealthEndpointProperties();
        healthEndpointProperties.getStatus().getOrder().addAll(healthIndicatorProperties.getOrder());
        healthEndpointProperties.getStatus().getHttpMapping().putAll(healthIndicatorProperties.getHttpMapping());
        return healthEndpointProperties;
    }
}


 被折叠的 条评论
为什么被折叠?
被折叠的 条评论
为什么被折叠?
 到【灌水乐园】发言


