


NodeRed 修改主题(详细教程)
默认的NodeRed的编辑器主题是白色和红色,UI中的图片也是白色和红色,个人不喜欢这种风格,所以研究一下怎么给Node-Red换皮,同时初步熟悉一下NodeRed源码
1 修改主题配色
1 .1 直接修改color.scss
color.scss文件位于packages\node_modules\@node-red\editor-client\src\sass目录下,修改完成后重新启动NodeRed即可
不推荐使用该方法直接修改样式,
Node-Red有官方推荐的theme仓库 theme-collection,可以通过使用该仓库修改配置文件方法更改配色,请看下文
1.2 使用build-custom-theme.js创建样式
官方做法是使用build-custom-theme.js脚本编译color.scss的副本,并且在setting.js配置文件中通过设置editorTheme.page.css指定编译好的css文件来修改editor配色.
具体方法参考官方文档,或者.\scripts\build-custom-theme.js脚本的文件头注释.
#!/usr/bin/env node

// This script can be used to build custom colour-scheme css files.
//
// 1. Create a copy of packages/node_modules/@node-red/editor-client/src/sass/colors.scss
//    and change the values to the desired colours.
//
// 2. Run this script, providing the path to the custom file using the --in option
//
// 3. Save the output of the script to a file - either redirect its output,
//    or use the --out option.
//
// 4. Edit your settings file to set the theme:
//       editorTheme: {
//           page: {
//               css: "/path/to/file/generated/by/this/script"
//           }
//       }
//
// 5. Restart Node-RED
//
这里简单介绍下我的配置方法示例用于参考:
-
在
Node-Red目录下创建packages/node_modules/@node-red/editor-client/src/sass/colors.scss文件的副本.mkdir ./redevelop/theme cp ./packages/node_modules/@node-red/editor-client/src/sass/colors.scss ./redevelop/theme/myCustom.scss -
修改改
scss文件设置不同部件的样式后,运行build-custom-theme脚本编译.scss文件–in 和 --out 参数分别制定输入的
scss文件和输出的css文件node ./scripts/build-custom-theme.js --in ./redevelop/theme/myCustom.scss --out ./redevelop/theme/myCustom.css -
在
settings.js文件中配置editorTheme.page.css指定css文件路径editorTheme: { page:{ // This must be the *absolute* path to the style.css file css: "E:/.Nodejs/node-red/redevelop/theme/myCustom.css" }, ... }注意:
-
此处指定的文件路径必须为绝对路径( This must be the absolute path to the style.css file),如果使用相对路径会不生效且报错
TypeError: path must be absolute or specify root to res.sendFile
        at ServerResponse.sendFile (E:\.Nodejs\node-red\node_modules\express\lib\response.js:441:11)
这一点在生产环境中配置使用的时候没有关系,毕竟主题的目录在创建好之后一般不会改变,但是在开发环境中就比较别扭,因为协作开发时每个人
clone的代码位置都不同,创建的用于存放css文件的目录也不同,就没办法保证每个人使用的相同主题,不过这一点还是得看不通项目的使用场景.好在Node-Red提供了更为灵活的更换配色的方法–创建自定义主题插件. -
开发环境中,如果使用
yarn run dev脚本启动工程,会执行grunt dev脚本,启动项目后,red.js会加载settings.js配置文件,加载的优先级为-s参数指定的配置文件-u参数指定的工作目录下的settings.js- 设置
UserDir,依次是HOMEUSERPROFILEHOMEPATH三个环境变量,然后加载UserDir目录中的settting.js - 如果
UserDir目录没有,则会复制__dirname目录(源码目录)下的setting.js到UserDir目录
至于
settings.js文件的加载过程,请见另一篇文章 《Node-Red 源码分析》
-
1.3 创建自定义主题插件
1.3.1 创建主题步骤
编辑器的外观主题可以使用主题自定义,主题可以打包注册成Node-Red插件,在setting.js配置文件的editorTheme.theme属性中指定使用. 参考官方文档
该方式与Node-Red的Nodes扩展开发方式一样,需要一个js文件向Node-Red注册主题.具体步骤如下:
-
创建文件夹用于存放主题文件和注册脚本
mkdir ./redevelop/custom-theme -
创建
.scss样式文件,可以直接从NodeRed中复制,修改完成后使用build-custom-theme脚本编译,方法参考1.2中 示例,以下是我编译好的例子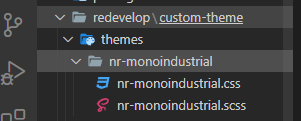
-
进入文件夹下并初始化工程
cd custom-theme yarn init //或者 npm init -
增加
themes.js脚本,并且编写注册主题插件的代码module.exports = function(RED) { RED.plugins.registerPlugin("nr-monoindustrial", { // Tells Node-RED this is a theme plugin type: "node-red-theme", // List the CSS files the theme provides. If there are // more than one, this should be an array of filenames css: "themes/nr-monoindustrial/nr-monoindustrial.css" }) } -
在
package.json文件中增加node-red配置项,并配置theme.js文件"node-red": { "version": ">=3.0", "plugins": { "custom-themes": "themes.js" } } -
本地安装
npm包yarn add ./redevelop/custom-theme' -
在
setting.js文件中修改主题,重启node-rededitorTheme: { theme: "nr-monoindustrial", ... }
可以在注册主题时设置
monacoOptions修改monaco editor主题,具体方法可以参考官方文档 Theming the Monaco Editor, 本文不再赘述
1.3.2 修改monaco编辑器样式
关于什么是Monaco,可以参考Monaco Editor,或者自行百度,这里只讲怎么修改Node-Red的Monaco样式.
上述步骤4在注册插件时,在指定注册的对象时,增加一个配置项,格式如下所示
themeOption = {
   type: "node-red-theme",
   css: "style.css",
   monacoOptions: {
     theme: "vs-dark", // Monaco theme name
     fontSize: 14,
     fontLigatures: true,
     fontFamily: "Cascadia Code, Fira Code, Consolas, 'Courier New', monospace",
     minimap: { enabled: false }
   }
 }
可以通过设置monacoOptions.theme来指定NodeRed中预制的主题,Node-Red预制的主题源码在packages\node_modules\@node-red\editor-client\src\vendor\monaco\dist\theme中
只是…怎么看这些文件都跟开源项目monaco-themes中的主题很像,不知道是不是
NodeRed的开发者从这里引用的
也可以直接在theme配置项下,写自己的主题样式,格式可以参考上图的json文件
theme: {
        "base": "vs-dark",
        "inherit": true,
        "colors": {
          "editor.foreground": "#CCC",
          "editor.background": "#434954",
          "editor.selectionBackground": "#80000080",
          "editor.lineHighlightBackground": "#80000040",
          "editorCursor.foreground": "#7070FF",
          "editorWhitespace.foreground": "#BFBFBF"
        },
       ...
}
详细的monaco配置项可以参考Monaco Editor API
1.4 使用theme-collection中提供的主题包
该方式需要借助thme-collection仓库,首先install 这个包,参考theme-colleciton
yarn add @node-red-contrib-themes/theme-collection //或者
npm install @node-red-contrib-themes/theme-collection
该包提供了开发者预制的多个主题
| Name | Description |
|---|---|
aurora | Inspired by the Aurora Theme for Sublime Text by Palmer Oliveira |
cobalt2 | Based on the Cobalt2 Theme for VS Code by Wes Bos |
dark | A dark theme for Node-RED |
dracula | Based on the Dracula theme by Zeno Rocha |
espresso-libre | Inspired by the [Espresso Libre theme for Monaco Editor](https://github.com/brijeshb42/monaco-themes/blob/master/themes/Espresso Libre.json) |
midnight-red | Based on the Midnight theme for Home Assistant |
monoindustrial | Based on the monoindustrial theme for Monaco Editor |
monokai | Based on the Monokai theme for Monaco Editor |
oceanic-next | Based on the Oceanic Next Color Scheme by Dmitri Voronianski |
oled | A Node-RED dark theme for OLED displays |
solarized-dark | Based on the Solarized color palette by Ethan Schoonover |
solarized-light | Based on the Solarized color palette by Ethan Schoonover |
tokyo-night | Based on the Tokyo Night theme for VS Code by enkia |
zenburn | Inspired by the Zenburn color scheme for Vim |
修改setting.js配置文件的editorTheme.theme属性(xxx换成上表中的主题)
editorTheme: {
        /** The following property can be used to set a custom theme for the editor.
         * See https://github.com/node-red-contrib-themes/theme-collection for
         * a collection of themes to chose from.
         */
        theme: "xxx",
            ...
        }
如果需要修改滚动条,在主题名称后加-scroll例如
editorTheme: {
        theme: "monoindustrial-scroll",
            ...
}
修改后的效果如下:
1.5 结合theme-collection 创建自定义主题
theme-collection插件有开发者文档 ,可以根据开发者文档配置主题插件的开发环境,开发自己的主题.
1.5.1 theme-collection源码
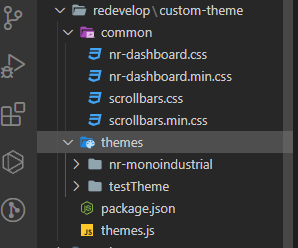
文件结构
common/: 存放通用的样式文件(dashboard和scroll)
scripts: 工程核心脚本源码
template: 主题样式模板
themes 主题文件夹
package.json
themes.js 注册插件脚本
核心脚本
theme-collection项目中有四个核心脚本,功能分别如下:
init.js:clone并installNode-Red源码dev.js: 使用nodemon在41880端口上启动Node-Red工程,并watchcommon/和themes/文件夹create-theme.js创建主题文件夹,并copy模板文件到新主题文件夹中build-theme.js编译主题生成.css文件
1.5.2 开发流程
开发流程简述如下,具体可以参考官方的开发者文档:
-
创建新主题
yarn run create-theme <theme-name> -
启动开发环境
yarn run dev <theme-name> -
访问
http://localhost:41880并修改主题文件 -
编译css
yarn run build-theme <theme-name> -
在开发环境下的
node-red中看到修改效果
1.5.3 自定义主题使用
在介绍该方法前,我们先看下theme-collection的theme.js源码
const { existsSync, readdirSync } = require('fs')
const path = require('path')

module.exports = function (RED) {
    const themesPath = path.join(__dirname, 'themes')
    const themes = readdirSync(themesPath)

    themes.forEach(themeName => {
        const themePath = path.join(themesPath, themeName)
        const themeRelativePath = path.join(path.basename(themesPath), themeName)

        if (readdirSync(themePath).length == 0) {
            console.warn('')
            console.warn(`Theme '${themeName}' not loaded. Empty directory`)
            console.warn('')
            return
        } else {
            const type = { type: 'node-red-theme' }
            const cssArray = []
            const css = { css: cssArray }
            const themeCSS = themeName + '.min.css'
            const themeCustomCSS = themeName + '-custom.min.css'
            const nrDashboard = 'common/nr-dashboard.min.css'
            const scrollbarsCSS = 'common/scrollbars.min.css'

            if (!existsSync(path.join(themePath, themeCSS))) {
                console.warn('')
                console.warn(`Theme '${themeName}' not loaded. CSS file is missing`)
                console.warn('')
                return
            }
            else {
                cssArray.push(path.join(themeRelativePath, themeCSS))

                if (existsSync(path.join(themePath, themeCustomCSS))) {
                    cssArray.push(path.join(themeRelativePath, themeCustomCSS))
                }

                cssArray.push(nrDashboard)

                const cssScrollArray = cssArray.slice()
                cssScrollArray.push(scrollbarsCSS)
                const cssScroll = { css: cssScrollArray }

                const monacoFile = path.join(themePath, themeName + '-monaco.json')
                const monacoOptions = existsSync(monacoFile) ? require(monacoFile) : {}

                RED.plugins.registerPlugin(themeName, Object.assign({}, type, css, monacoOptions))

                RED.plugins.registerPlugin(themeName + '-scroll', Object.assign({}, type, cssScroll, monacoOptions))

            }
        }
    })
}
通过源码我们知道,theme.js会将themes文件夹下的每个主题文件夹注册两个主题插件,一个是<theme-name>(包含 <theme-name>.min.css,<theme-name>-custom.min.css,common/nr-dashboard.min.css三个文件),一个是<theme-name>-scroll (上述三个文件之外附加common/scrollbars.min.css)表明带滚动条样式修改.
结合[1.3 创建自定义主题插件](#1.3 创建自定义主题插件)中的流程和theme-collection,我们可以得知,theme-collection在新建主题时会clone Node-Red源码,而这部分源码以及theme-collection的脚本文件在实际使用主题时是用不到的,只需要common和themes文件夹以及package.json和themes.js文件.
所以我们可以在新目录使用theme-collection创建主题,并且复制themes.js到node-red工程下,参考[1.3 创建自定义主题插件](#1.3 创建自定义主题插件)直接注册主题包到node-red
具体步骤:
- 使用
theme-collection创建主题,当然也可以不使用theme-collection,直接创建 - 复制
theme.js到node-red/redevelop/custom-theme下 - 创建
node-red/redevelop/custom-theme/package.json内容参考1.3 创建主题 步骤5
提取后的代码结构,这样,在node-red项目安装依赖时,会默认安装注册所有主题
在具体使用该方法时,发现
npm run dev <theme-name>没反应,不知道什么原因,github上提问,答非所问,也不知道这开发者什么鬼(我承认我菜了点 🙂)
2 修改主题图片
2.1 修改editorTheme配置项
Node-Red 编辑器的图片可以在setting.js文件的editorTheme配置项修改,但是只能指定绝对路径,所以果断放弃这种方式,配置文件如下:
editorTheme: {
    page: {
        title: "Node-RED",
        favicon: "/absolute/path/to/theme/icon",
        css: "/absolute/path/to/custom/css/file",
        scripts: [ "/absolute/path/to/custom/script/file", "/another/script/file"]
    },
    header: {
        title: "Node-RED",
        image: "/absolute/path/to/header/image", // or null to remove image
        url: "http://nodered.org" // optional url to make the header text/image a link to this url
    },
    deployButton: {
        type:"simple",
        label:"Save",
        icon: "/absolute/path/to/deploy/button/image" // or null to remove image
    },
    menu: { // Hide unwanted menu items by id. see packages/node_modules/@node-red/editor-client/src/js/red.js:loadEditor for complete list
        "menu-item-import-library": false,
        "menu-item-export-library": false,
        "menu-item-keyboard-shortcuts": false,
        "menu-item-help": {
            label: "Alternative Help Link Text",
            url: "http://example.com"
        }
    },
    tours: false, // disable the Welcome Tour for new users
    userMenu: false, // Hide the user-menu even if adminAuth is enabled
    login: {
        image: "/absolute/path/to/login/page/big/image" // a 256x256 image
    },
    logout: {
        redirect: "http://example.com"
    },
    palette: {
        editable: true, // *Deprecated* - use externalModules.palette.allowInstall instead
        catalogues: [   // Alternative palette manager catalogues
            'https://catalogue.nodered.org/catalogue.json'
        ],
        theme: [ // Override node colours - rules test against category/type by RegExp.
            { category: ".*", type: ".*", color: "#f0f" }
        ]
    },
    projects: {
        enabled: false // Enable the projects feature
    },
    theme: "", // Select a color theme for the editor. See https://github.com/node-red-contrib-themes/theme-collection for a collection of themes to choose from
    codeEditor: {
        lib: "ace", // Select the text editor component used by the editor. Defaults to "ace", but can be set to "ace" or "monaco"
        options: {
            // The following only apply if the editor is set to "monaco"
            theme: "vs", // Select a color theme for the text editor component. Must match the file name of a theme in packages/node_modules/@node-red/editor-client/src/vendor/monaco/dist/theme
        }
    }
},
2.2 直接修改源文件
Node-Red的编辑器图片位置在packages/node_modules/@node-red/editor-client/src/images/下
注意:
在
packages/node_modules/@node-red/editor-client/public/images下也有相同的图片public文件夹是编译后生成的,不要修改该文件夹,直接修改src下图片
-
创建备份
cd packages/node_modules/@node-red/editor-client/src cp images images-node-red -
修改图片,可以找美工做好了,同名替换,对于简单的修改,我是直接修改的svg代码,比如改个配色之类的.复杂的是用
illustrator切的图.


 1万+
1万+

 被折叠的 条评论
为什么被折叠?
被折叠的 条评论
为什么被折叠?
 到【灌水乐园】发言


