图像处理:
一般来说,图像处理算子是带有一幅或多幅输入图像、产生一幅输出图像的函数。
图像变换可分为以下两种:
点算子(像素变换)
邻域(基于区域的)算子
像素变换:
在这一类图像处理变换中,仅仅根据输入像素值(有时可加上某些全局信息或参数)计算相应的输出像素值。
这类算子包括 亮度 和 对比度 调整,以及颜色校正和变换。
亮度和对比度调整:
两种常用的点过程(即点算子),是用常数对点进行 乘法 和 加法 运算:
两个参数 α>0和β 一般称作 增益 和 偏置 参数。我们往往用这两个参数来分别控制 对比度 和 亮度 。
用到的函数:
void Mat::convertTo(OutputArray m, int rtype, double alpha=1, double beta=0 ) const
| Parameters: |
- m – Destination matrix. If it does not have a proper size or type before the operation, it is reallocated.
- rtype – Desired destination matrix type or, rather, the depth since the number of channels are the same as the source has. If rtype is negative, the destination matrix will have the same type as the source.
- alpha – Optional scale factor.
- beta – Optional delta added to the scaled values.
|
|---|
| Parameters: |
- m – Destination matrix. If it does not have a proper size or type before the operation, it is reallocated.
- rtype – Desired destination matrix type or, rather, the depth since the number of channels are the same as the source has. If rtype is negative, the destination matrix will have the same type as the source.
- alpha – Optional scale factor.
- beta – Optional delta added to the scaled values.
|
|---|
The method converts source pixel values to the target datatype. saturate_cast<> is applied at the end to avoid possible overflows:
代码及注释:
// 027 对比度和亮度调整.cpp : 定义控制台应用程序的入口点。
//
#include "stdafx.h"
//以下三种头文件方式都是可以的
//#include <opencv2/core/core.hpp>
//#include <opencv2/highgui/highgui.hpp>
//#include<cv.h>
//#include<highgui.h>
#include<opencv2/opencv.hpp>
#include <iostream>
using namespace std;
using namespace cv;
double alpha;
int beta;
int _tmain(int argc, _TCHAR* argv[])
{
/// 读入用户提供的图像
Mat image=imread("Lena.jpg");
//新的Mat对象,以存储变换后的图像
Mat new_image = Mat::zeros( image.size(), image.type() );// Mat::zeros 采用Matlab风格的初始化方式,用 image.size() 和 image.type() 来对Mat对象进行0初始化。
/// 初始化
cout << " Basic Linear Transforms " << endl;
cout << "-------------------------" << endl;
cout << "* Enter the alpha value [1.0-3.0]: ";
cin >> alpha;
cout << "* Enter the beta value [0-100]: ";
cin >> beta;
/// 执行运算 new_image(i,j) = alpha*image(i,j) + beta
//访问图像的每一个像素
for( int y = 0; y < image.rows; y++ )
{
for( int x = 0; x < image.cols; x++ )
{
for( int c = 0; c < 3; c++ )
{
//image.at<Vec3b>(y,x)[c] 其中, y 是像素所在的行, x 是像素所在的列, c 是R、G、B(0、1、2)之一。
//运算结果可能超出像素取值范围,还可能是非整数,所以我们要用 saturate_cast 对结果进行转换,以确保它为有效值。
new_image.at<Vec3b>(y,x)[c] = saturate_cast<uchar>( alpha*( image.at<Vec3b>(y,x)[c] ) + beta );
}
}
}
//不访问每个像素,运用系统函数的做法
//image.convertTo(new_image, -1, alpha, beta);
/// 创建窗口
namedWindow("Original Image", 1);
namedWindow("New Image", 1);
/// 显示图像
imshow("Original Image", image);
imshow("New Image", new_image);
/// 等待用户按键
waitKey();
return 0;
}
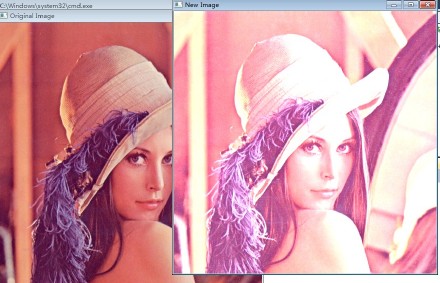
运行结果:
![]()


 被折叠的 条评论
为什么被折叠?


