


继续跟着上一节的节奏走,简单快速的集成JDBC
首先的导入JDBC和mySQL的SpringBoot Jar文件
        <!--mysql-->
        <dependency>
            <groupId>mysql</groupId>
            <artifactId>mysql-connector-java</artifactId>
        </dependency>

        <!--jdbc-->
        <dependency>
            <groupId>org.springframework.boot</groupId>
            <artifactId>spring-boot-starter-jdbc</artifactId>
        </dependency>
还需要在application.properties中配置如下代码:
//数据库连接地址,端口号,连接名,设置编码格式
spring.datasource.url=jdbc:mysql://localhost:3306/test?autoReconnect=true&useUnicode=true&characterEncoding=utf-8
//用户名
spring.datasource.username=root
//密码
spring.datasource.password=root
//数据库驱动
spring.datasource.driver-class-name=com.mysql.jdbc.Driver
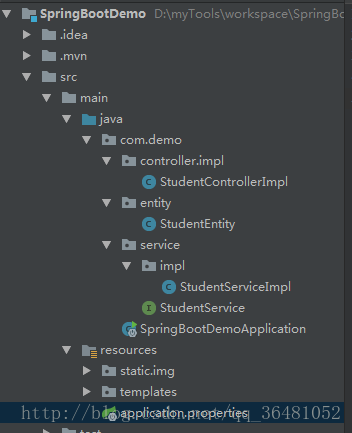
这是我的文件位置,名称截图:
在新建entity文件,在其里面建个StudentEntity测试实体类:
public class StudentEntity {

    //id
    private Integer id;
    //姓名
    private String name;
    //年龄
    private Integer age;
    //性别
    private String sex;
    //住址
    private String address;
    //是否逻辑删除(0:未删除,1:已删除)
    private Integer isDelete;

    public Integer getId() {
        return id;
    }

    public void setId(Integer id) {
        this.id = id;
    }

    public String getName() {
        return name;
    }

    public void setName(String name) {
        this.name = name;
    }

    public Integer getAge() {
        return age;
    }

    public void setAge(Integer age) {
        this.age = age;
    }

    public String getSex() {
        return sex;
    }

    public void setSex(String sex) {
        this.sex = sex;
    }

    public String getAddress() {
        return address;
    }

    public void setAddress(String address) {
        this.address = address;
    }

    public Integer getIsDelete() {
        return isDelete;
    }

    public void setIsDelete(Integer isDelete) {
        this.isDelete = isDelete;
    }
}
下来就直接到service了,创建StudentService接口代码如下:
public interface StudentService {

    //写入数据
    int saveStudent();

    //查询数据
    List<StudentEntity> queryAllStudent();

    //更新数据
    int updateStudent(StudentEntity StudentEntity);

    //删除数据
    int deleteStudent(Integer id);

}
还要创建impl文件,StudentServiceImpl类,代码如下:
import com.demo.entity.StudentEntity;
import com.demo.mapper.StudentMapper;
import com.demo.service.StudentService;
import org.springframework.beans.factory.annotation.Autowired;
import org.springframework.jdbc.core.JdbcTemplate;
import org.springframework.jdbc.core.PreparedStatementSetter;
import org.springframework.jdbc.core.RowMapper;
import org.springframework.stereotype.Service;

import javax.annotation.Resource;
import java.sql.PreparedStatement;
import java.sql.ResultSet;
import java.sql.SQLException;
import java.util.List;

@Service("studentServices")//别名
public class StudentServiceImpl implements StudentService {


    @Resource
    private JdbcTemplate jdbcTemplate;


    //JDBC 写入数据
    @Override
    public int saveStudent() {
        //初始化属性参数
        String name = "张三";
        Integer age = 12;
        //执行写入
        int row = jdbcTemplate.update("INSERT INTO student (name,age)VALUES (?,?);", "李四", 12);
       //返回结果
       return row;
    }


    //JDBC 查询数据
    @Override
    public List<StudentEntity> queryAllStudent() {
        //SQL
        String sql = "SELECT *  FROM student WHERE is_delete=0";
        //结果
        List<StudentEntity> list = jdbcTemplate.query(sql, new RowMapper<StudentEntity>() {
            //映射每行数据
            @Override
            public StudentEntity mapRow(ResultSet rs, int rowNum) throws SQLException {
                StudentEntity stu = new StudentEntity();
                stu.setId(rs.getInt("ID"));
                stu.setAge(rs.getInt("AGE"));
                stu.setName(rs.getString("NAME"));
                stu.setAddress(rs.getString("ADDRESS"));
                return stu;
            }

        });
        //返回结果
        return list;
    }

    //JDBC 更新数据
    @Override
    public int updateStudent(StudentEntity studentEntity) {
        //SQL
        String sql = "update tudent set name=?,address=? where id=?";
        //结果
        int row = jdbcTemplate.update(sql, new PreparedStatementSetter() {
            //映射数据
            @Override
            public void setValues(PreparedStatement preparedStatement) throws SQLException {
                preparedStatement.setString(1, studentEntity.getName());
                preparedStatement.setString(2, studentEntity.getAddress());
                preparedStatement.setInt(3, studentEntity.getId());
            }
        });
        //反悔结果
        return row;
    }

    //删除数据
    @Override
    public int deleteStudent(Integer id) {
        //SQL+结果
        int resRow = jdbcTemplate.update("UPDATE student SET is_delete=1 WHERE id=?", new PreparedStatementSetter() {
            //映射数据
            @Override
            public void setValues(PreparedStatement ps) throws SQLException {
                ps.setInt(1, id);
            }
        });
        //返回结果
        return resRow;
    }
}
最后就剩controller,创建StudentControllerImpl:代码如下
import com.demo.entity.StudentEntity;
import com.demo.service.StudentService;
import org.springframework.beans.factory.annotation.Autowired;
import org.springframework.web.bind.annotation.RequestMapping;
import org.springframework.web.bind.annotation.RestController;

import javax.annotation.Resource;
import java.util.ArrayList;
import java.util.Iterator;
import java.util.List;

@RestController
public class StudentControllerImpl {

    @Autowired
    private StudentService studentServices;

    /**
     *新增数据
     * */
    @RequestMapping("/save")
    public String save() {

       int row = studentServices.saveStudent();
       //判断结果
       if(row==-1){
            return "新增失败";
        }else{
            return "新增成功";
        }
    }

    /**
     * 查询数据
     * */
    @RequestMapping("/query")
    public String query(){
        //查寻数据
        List list = studentServices.queryAllStudent();
        //组装数据
        List newlist = new ArrayList();
        //循环取出结果
        for (int i = 0; i <list.size() ; i++) {
            //新建学生对象
            StudentEntity stu = (StudentEntity) list.get(i);
            //填充数据
            newlist.add(stu.getId());
            newlist.add(stu.getName());
            newlist.add(stu.getAge());
            newlist.add(stu.getSex());
            newlist.add(stu.getAddress());
        }
        //返回数据
        return newlist.toString();
    }


    /**
     * 更新数据
     * */
    @RequestMapping("/update")
    public String update(){
        //新建对象传递数据
        StudentEntity stu = new StudentEntity();
        stu.setId(2);
        stu.setName("尼古拉斯");
        stu.setAddress("东北");
        //执行更新操作
        int row = studentServices.updateStudent(stu);
        //判断结果
        if(row==-1){
            return "更新失败";
        }else {
            return "更新成功";
        }
    }

    /**
     * 删除数据
     * */
    @RequestMapping("/delete")
    public String delete(){
        //初始化数据
        Integer id = 3;
        //执行删除
        int row = studentServices.deleteStudent(id);
        //判断结果
        if(row==-1){
            return "删除失败";
        }else{
            return "删除成功";
        }
    }
}
这就完事了,启动运行我的URL:localhost:8080/save, 请各位路过的大神多多指教,如有问题或者疑问请留言,


 6057
6057

 被折叠的 条评论
为什么被折叠?
被折叠的 条评论
为什么被折叠?
 到【灌水乐园】发言


