


本文主要介绍如何使用maven发布和使用dependence
文章目录
nexus下载安装
nexus下载地址:官网
nexus安装教程:官网
注意:nexus依赖于JDK1.8环境,安装前请确保已经配置了 JAVA_HOME 环境变量。
其他注意事项:
- 配置nexus相关端口号(可以不改,默认为8081):
- 进入etc目录:
$ pwd /opt/nexus/nexus-3.63.0-01/etc - 编辑
nexus-default.properties:$ vim nexus-default.properties application-port=18081 - 则web访问地址则变为:
http://localhost:18081
- 进入etc目录:
- nexus默认账号:
2.x 版本安装后,默认用户名密码:admin/admin123。
3.x 版本安装后,默认用户名是admin,密码则在指定文件下:/opt/nexus/sonatype-work/nexus/admin.password。
deploy本地类库到nexus
-
修改Maven的
settings.xml文件,添加相关认证信息:<servers> <!--release group认证信息--> <server> <!--自定义,唯一即可--> <id>releases</id> <!--nexus账号:修改为自己的--> <username>admin</username> <!--nexus密码:修改为自己的--> <password>admin123</password> </server> <!--snapshots group认证信息--> <server> <id>snapshots</id> <username>admin</username> <password>admin123</password> </server> </servers>注意,settings文件中已经包含了servers标签,所以添加时只需要在该标签下追加server相关标签即可。
-
创建一个Maven项目(
maven-deploy),pom.xml内容修改如下:<project xmlns="http://maven.apache.org/POM/4.0.0" xmlns:xsi="http://www.w3.org/2001/XMLSchema-instance" xsi:schemaLocation="http://maven.apache.org/POM/4.0.0 http://maven.apache.org/maven-v4_0_0.xsd"> <modelVersion>4.0.0</modelVersion> <groupId>com.len.maven</groupId> <artifactId>maven-deploy</artifactId> <version>1.0-SNAPSHOT</version> <name>Archetype - maven-deploy</name> <url>http://maven.apache.org</url> <!-- 配置deploy私服地址,根据version的后缀决定deploy位置 --> <distributionManagement> <!-- 开发版本发布地址 --> <snapshotRepository> <!--注意:这里的id需要跟settings.xml配置的server的id一致--> <id>snapshots</id> <name>Snapshot Repository</name> <url>http://localhost:18081/repository/maven-snapshots/</url> </snapshotRepository> <!-- 正式版本发布地址 --> <repository> <!--注意:这里的id需要跟settings.xml配置的server的id一致--> <id>releases</id> <name>Release Repository</name> <url>http://localhost:18081/repository/maven-releases/</url> </repository> </distributionManagement> <build> <plugins> <plugin> <groupId>org.apache.maven.plugins</groupId> <artifactId>maven-surefire-plugin</artifactId> <version>3.2.2</version> </plugin> </plugins> </build> </project>- 项目中version信息决定deploy的位置,如
1.0-SNAPSHOT将会deploy到snapshot组下;而1.0-RELEASE将会deploy到release组下。 - 配置的id将会关联到上一步在
settings.xml文件配置的server信息。 - url配置的私服的地址,可以在nexus页面直接复制:

- 项目中version信息决定deploy的位置,如
-
发布应用:
$ pwd /IdeaProjects/tuoxin/maven/maven-deploy $ mvn clean deploy .....省略具体过程日志信息 [INFO] ------------------------------------------------------------------------ [INFO] BUILD SUCCESS [INFO] ------------------------------------------------------------------------ [INFO] Total time: 13.457 s [INFO] Finished at: 2024-01-07T15:05:47+08:00 [INFO] ------------------------------------------------------------------------ -
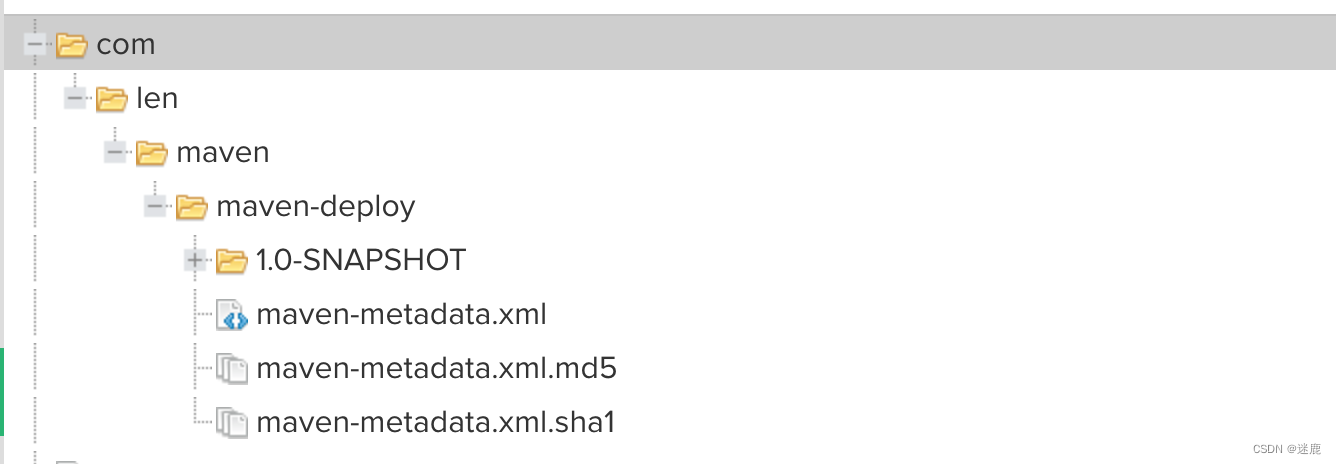
页面查看dependence信息:
deploy第三方类库到nexus
对于需要引用的第三方类库,但还没有具体的pom坐标信息,此时,由于项目是第三方的,无法直接修改项目 pom.xml 来实现 deploy。这时可以使用 cmd 的方式来 deploy,下面以达梦数据库的驱动为例演示如何 deploy 第三方类库到nexus:
$ ls
DmJdbcDriver18.jar

$ mvn deploy:deploy-file -DgroupId=com.dameng -DartifactId=DmJdbcDriver -Dversion=1.18 -Dpackaging=jar -Dfile=DmJdbcDriver18.jar -Durl=http://localhost:18081/repository/maven-releases/ -DrepositoryId=releases
......此处省略具体的打包过程
[INFO] ------------------------------------------------------------------------
[INFO] BUILD SUCCESS
[INFO] ------------------------------------------------------------------------
[INFO] Total time:  1.015 s
[INFO] Finished at: 2024-01-07T15:51:41+08:00
[INFO] ------------------------------------------------------------------------
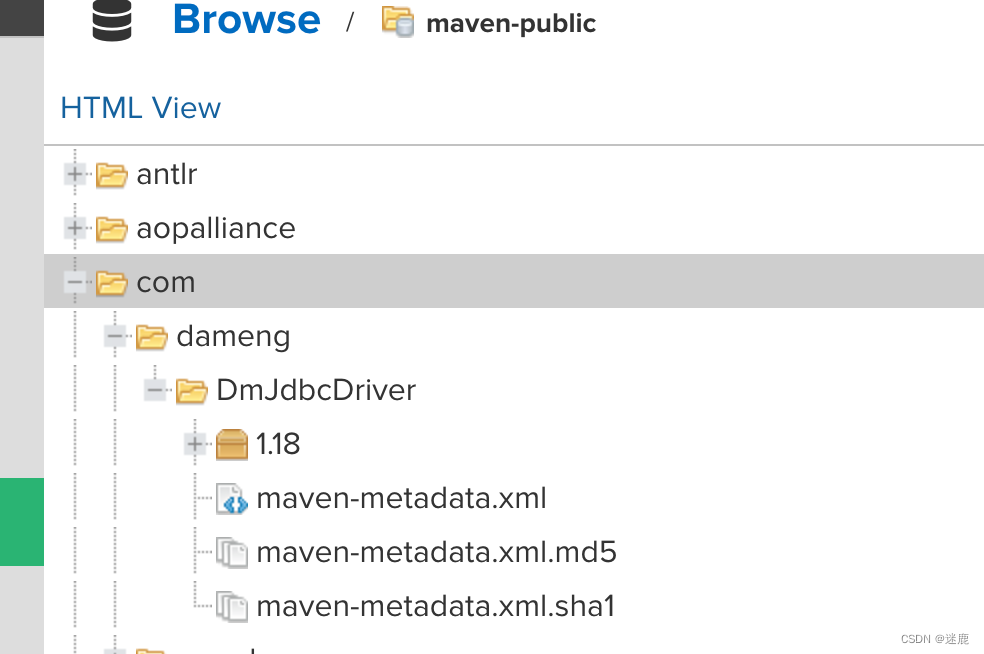
接着,访问 http://localhost:18081/#browse/browse:maven-public:com,就可以看到对应的库已经在仓库中。
引入nexus依赖
类库上传到nexus后,其他项目就可以从nexus下载这些依赖并使用。此时可以使用3种方式配置具体的私服地址,具体使用时只需要配置其中一种方式即可。
settings.xml 配置 mirror
直接修改 settings.xml,这种方式会对全局 maven 起作用,即本地上的所有maven项目都将从 nexus 下载依赖。具体配置如下:
<mirrors>
	<!--nexus私有仓库-->
    <mirror>
      <id>nexusmaven</id>
      <mirrorOf>*</mirrorOf>
      <name>nexus私有仓库</name>
      <url>http://localhost:18081/repository/maven-public</url>
    </mirror>
<mirrors>
settings.xml 配置 profile
直接修改 settings.xml,这种方式会对全局 maven 起作用,即本地上的所有maven项目都将从 nexus 下载依赖。这种方式相比较于mirror,好处是可以同时配置多个profile,并同时启用多个profile。具体配置如下:
<profiles>
    <profile>
      <id>dev</id>
      <!-- 自定义私有仓库地址 -->
      <repositories>
        <repository>
            <id>nexus</id>
            <name>Nexus Repository</name>
            <url>http://localhost:18081/repository/maven-public/</url>
            <releases>
                <enabled>true</enabled>
            </releases>
            <snapshots>
                <enabled>true</enabled>
            </snapshots>
        </repository>
      </repositories>
      <!--插件nexu私服地址-->
      <pluginRepositories>
        <pluginRepository>
            <id>public</id>
            <name>Public Repository</name>
            <url>http://localhost:18081/repository/maven-public/</url>
        </pluginRepository>
      </pluginRepositories>
    </profile>
<profiles>

<activeProfiles>
    <activeProfile>dev</activeProfile>
    <!--多个profile可以继续追加激活-->
</activeProfiles>
项目中配置repositories
这种方式相对于修改 settings.xml的好处是该配置只会影响本项目的maven依赖下载,而不会对本地的其他项目造成影响。只需要在 pom.xml 添加如下配置:
  <!-- 自定义私有仓库地址 -->
  <repositories>
    <repository>
        <id>nexus</id>
        <name>Nexus Repository</name>
        <url>http://localhost:18081/repository/maven-public/</url>
        <releases>
            <enabled>true</enabled>
        </releases>
        <snapshots>
            <enabled>true</enabled>
        </snapshots>
    </repository>
  </repositories>
  <!-- 自定义插件私有仓库地址 -->
  <pluginRepositories>
    <pluginRepository>
        <id>public</id>
        <name>Public Repository</name>
        <url>http://localhost:18081/repository/maven-public/</url>
    </pluginRepository>
  </pluginRepositories>


 364
364


 被折叠的 条评论
为什么被折叠?
被折叠的 条评论
为什么被折叠?
 到【灌水乐园】发言


