


JavaFX笔记-Eclipse和Maven创建及打包JavaFX 21项目
一、在Eclipse中用Maven创建JavaFX项目
首先需要安装及配置Java17以上版本,并且在Eclipse中配置好Maven插件
1.1 新建Maven项目
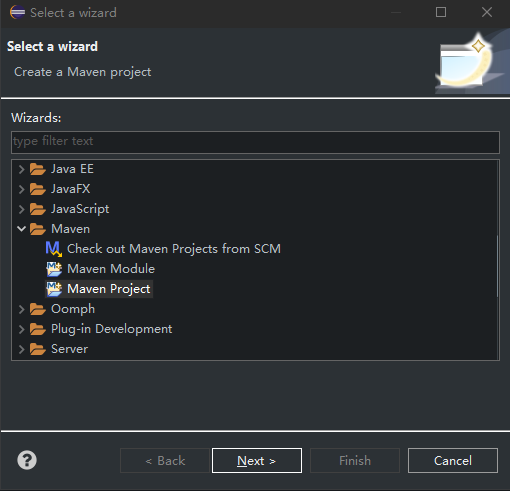
在Eclipse中点击File-> New -> Others -> Maven,选择Maven Project,点击Next
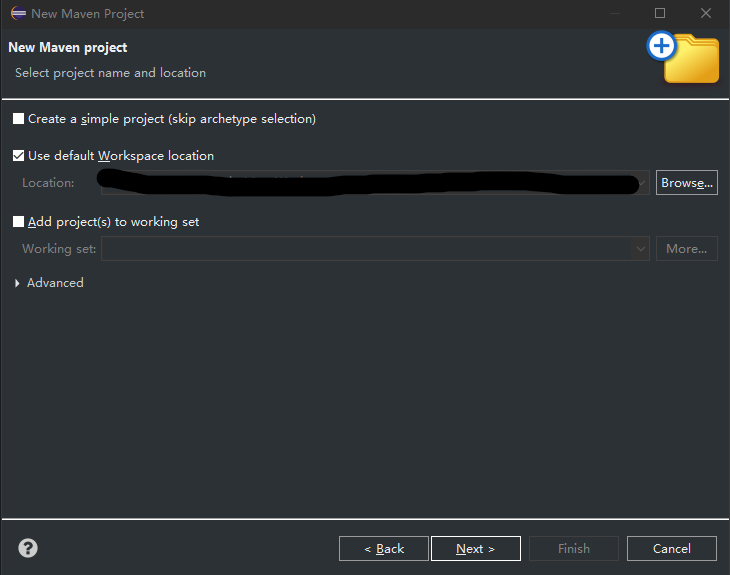
然后下一个页面中不要勾选Create a simple project,否则会跳过原型项目选择对话框。我们一半会直接使用JavaFX官方的原型来创建新项目以简化流程。确认取消勾选后,点击Next
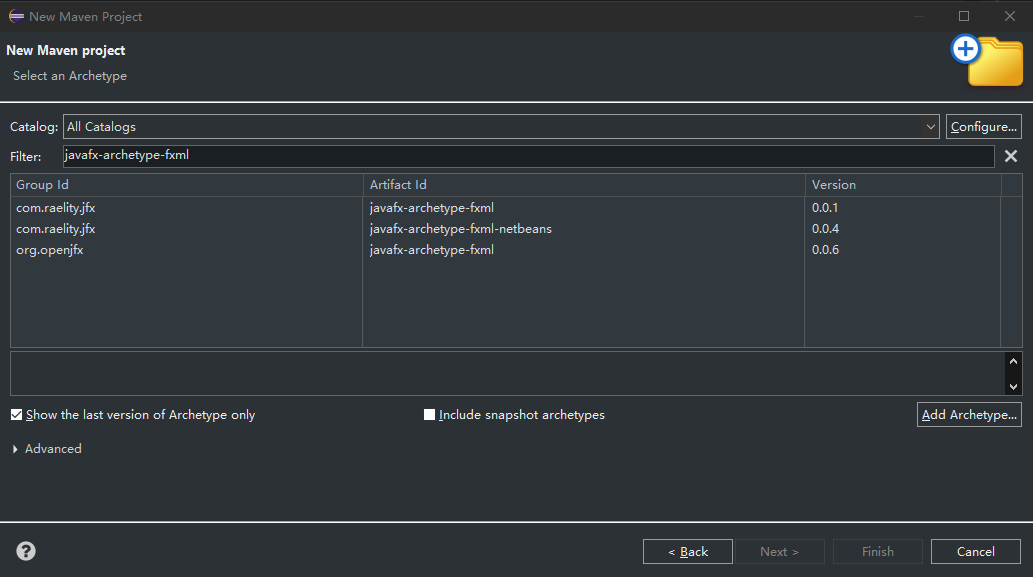
在下一个页面中,在Filter中输入javafx-zrchetype-fxml,等待下方的列表刷新出搜索结果后,选择Group Id为org.openjfx的这一项,点击Next
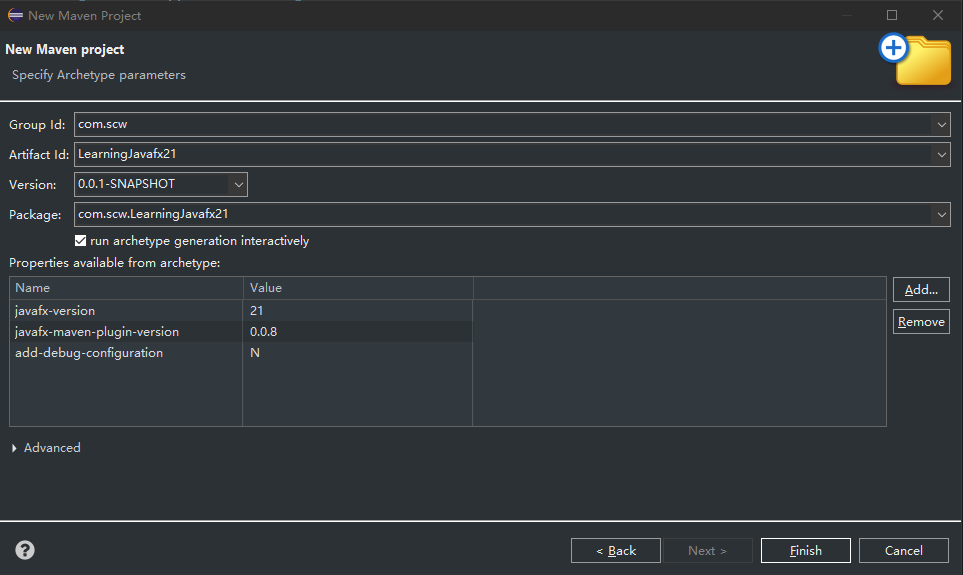
在下一页中,输入Group Id及Artifact Id,将javafx-version改为21,javafx-maven-plugin-version改为0.0.8,然后点击Finish
需要注意的是,首次创建项目时Maven会下载相关文件并构建项目,在Eclipse下方的Console中需要手动输入Y(大小写均可)来确认,否则会卡在这里
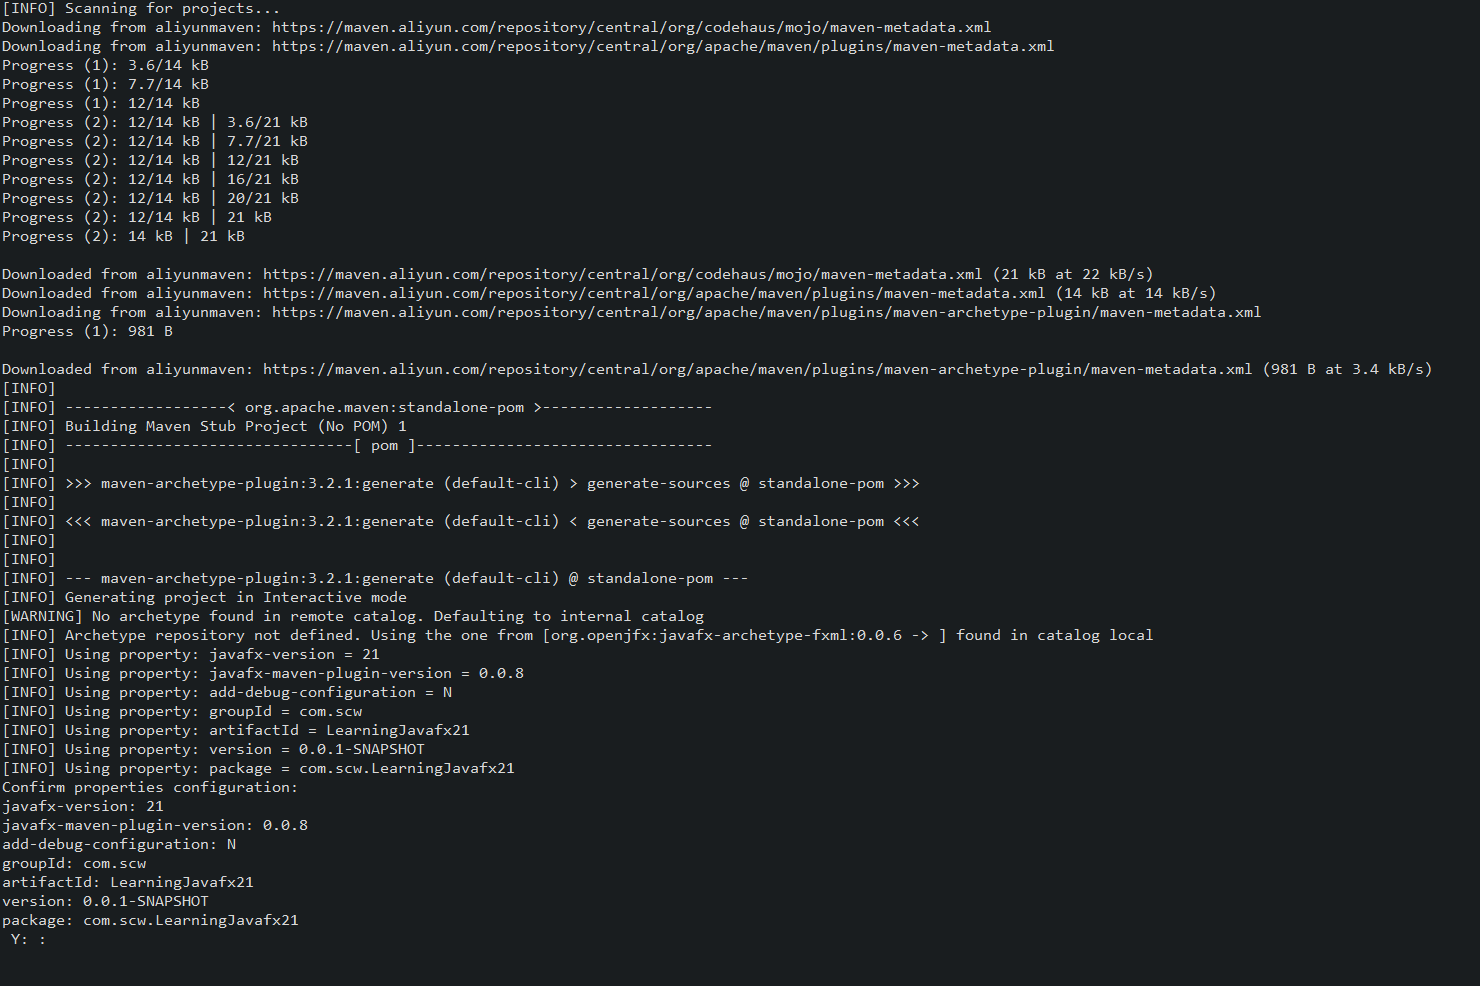
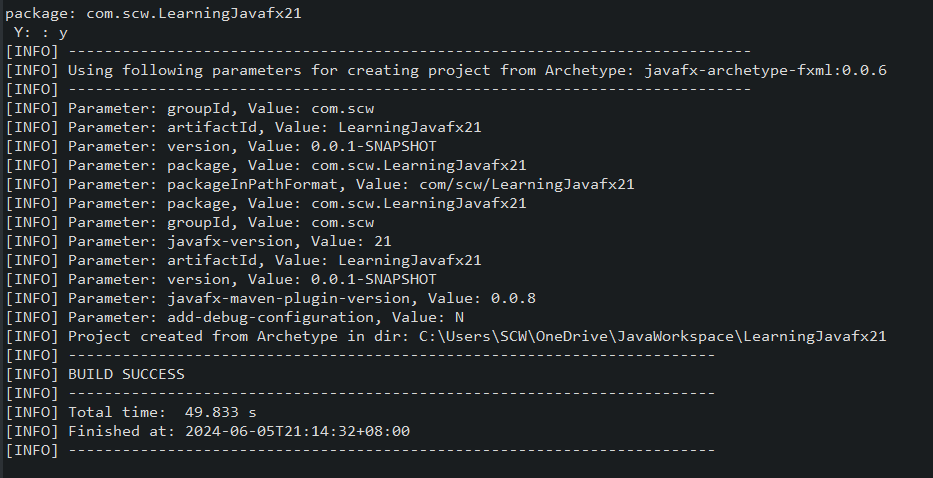
输入Y后,等待项目构建完成。当下方出现BUILD SUCCESS时表明项目已经成功创建
1.2 修改POM文件
修改POM文件中的配置以方便后续使用。主要的修改项包括:
- 在
properties项中添加maven.compiler.release,该项为项目使用的Java版本 - 在
properties中添加javafx.version,后续的JavaFX版本将引用该值 - 修改
maven.compiler.source和maven.compiler.target,将其值改为17,表示项目使用Java17版本 - 将
dependencies中javafx-contros和javafx-fxml中的version属性改为${javafx.version},引用上述的JavaFX版本,方便后续统一修改版本 - 将
build-plugins中maven-compiler-plugin的configuration-release项改为${maven.compiler.release},引用上述的Java版本
修改后的pom文件如下:
<project xmlns="http://maven.apache.org/POM/4.0.0" xmlns:xsi="http://www.w3.org/2001/XMLSchema-instance"
  xsi:schemaLocation="http://maven.apache.org/POM/4.0.0 http://maven.apache.org/maven-v4_0_0.xsd">
    <modelVersion>4.0.0</modelVersion>
    <groupId>com.scw</groupId>
    <artifactId>LearningJavafx21</artifactId>
    <version>0.0.1-SNAPSHOT</version>
    <properties>
        <project.build.sourceEncoding>UTF-8</project.build.sourceEncoding>
        <maven.compiler.source>17</maven.compiler.source>
        <maven.compiler.target>17</maven.compiler.target>

        <maven.compiler.release>17</maven.compiler.release>
        <javafx.version>21</javafx.version>
    </properties>
    <dependencies>
        <dependency>
            <groupId>org.openjfx</groupId>
            <artifactId>javafx-controls</artifactId>
            <version>${javafx.version}</version>
        </dependency>
        <dependency>
            <groupId>org.openjfx</groupId>
            <artifactId>javafx-fxml</artifactId>
            <version>${javafx.version}</version>
        </dependency>
    </dependencies>
    <build>
        <plugins>
            <plugin>
                <groupId>org.apache.maven.plugins</groupId>
                <artifactId>maven-compiler-plugin</artifactId>
                <version>3.8.0</version>
                <configuration>
                    <release>${maven.compiler.release}</release>
                </configuration>
            </plugin>
            <plugin>
                <groupId>org.openjfx</groupId>
                <artifactId>javafx-maven-plugin</artifactId>
                <version>0.0.8</version>
                <executions>
                    <execution>
                        <!-- Default configuration for running -->
                        <!-- Usage: mvn clean javafx:run -->
                        <id>default-cli</id>
                        <configuration>
                            <mainClass>com.scw.LearningJavafx21.App</mainClass>
                        </configuration>
                    </execution>
                </executions>
            </plugin>
        </plugins>
    </build>
</project>
1.3 运行项目
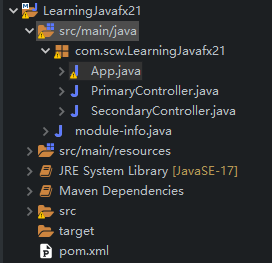
打开项目目录下的src/main/java - com.scw.LearningJavafx21,其中App.java就是主程序。但是直接运行该程序会报错
Error occurred during initialization of boot layer
java.lang.module.FindException: Module javafx.controls not found, required by com.scw.LearningJavafx21
这是因为该项目必须通过Maven来运行。右键点击项目,选择Run As -> Maven Build
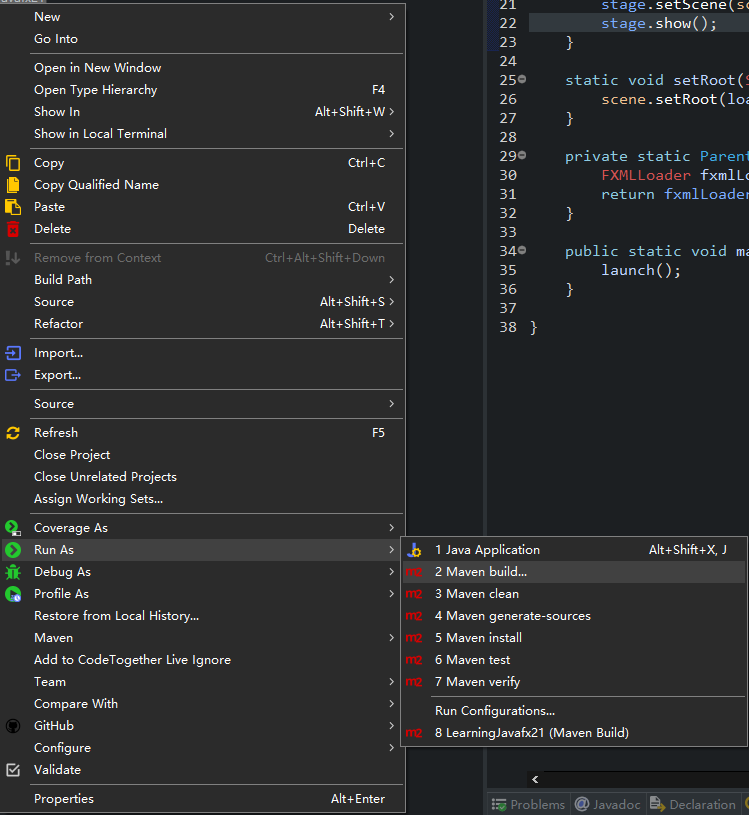
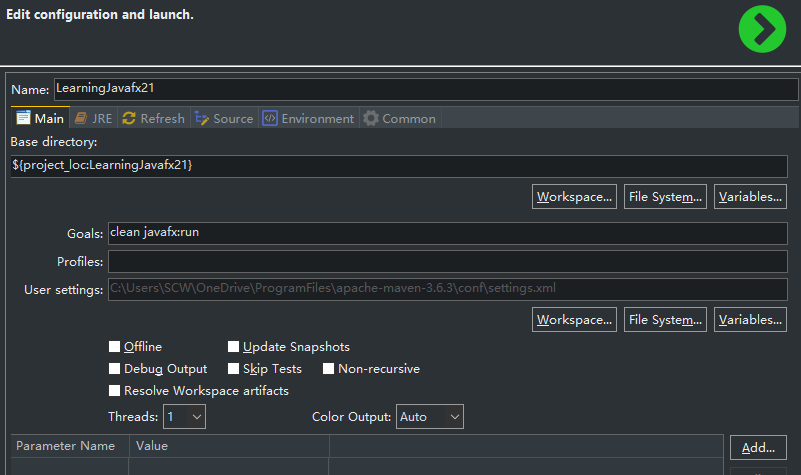
在配置页面中的Goals中输入clean javafx:run,然后点击右下方的Apply,再点击下方的Run
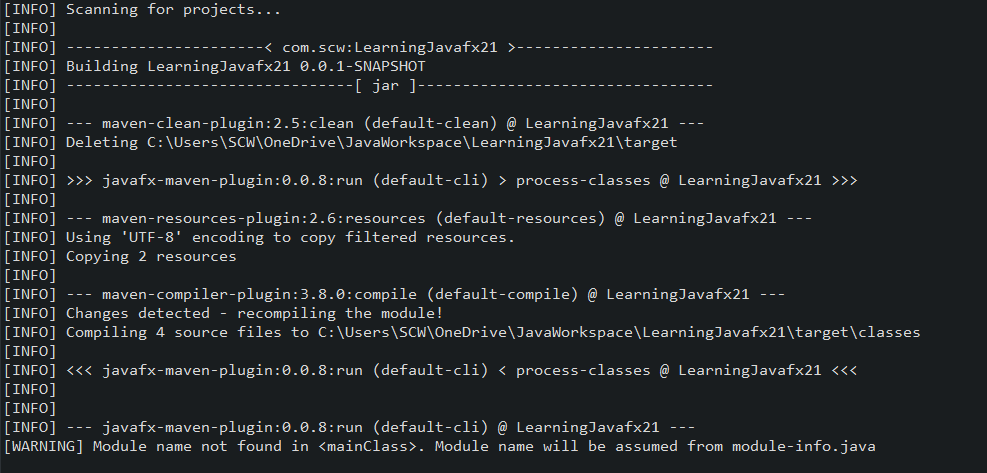
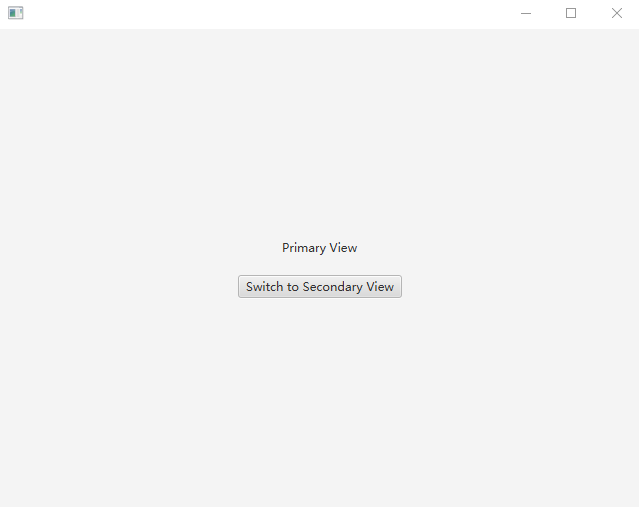
可以看到控制台输出如下信息,并且项目成功运行起来,显示出第一个窗口
二、打包项目
2.1 使用maven命令行来构建和运行项目
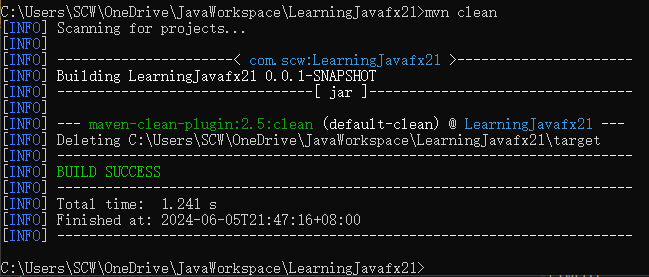
打开CMD控制界面,定位到pom文件所在的目录下,然后输入mvn clean。如果显示BUILD SUCCESS,则项目构建成功。此时也可以通过mvn javafx:run来运行项目
2.2 使用maven的默认打包方式打包为jar
再次输入mvn package来进行默认打包,如果显示BUILD SUCCESS,则会在项目的target目录下生成一个jar格式的文件
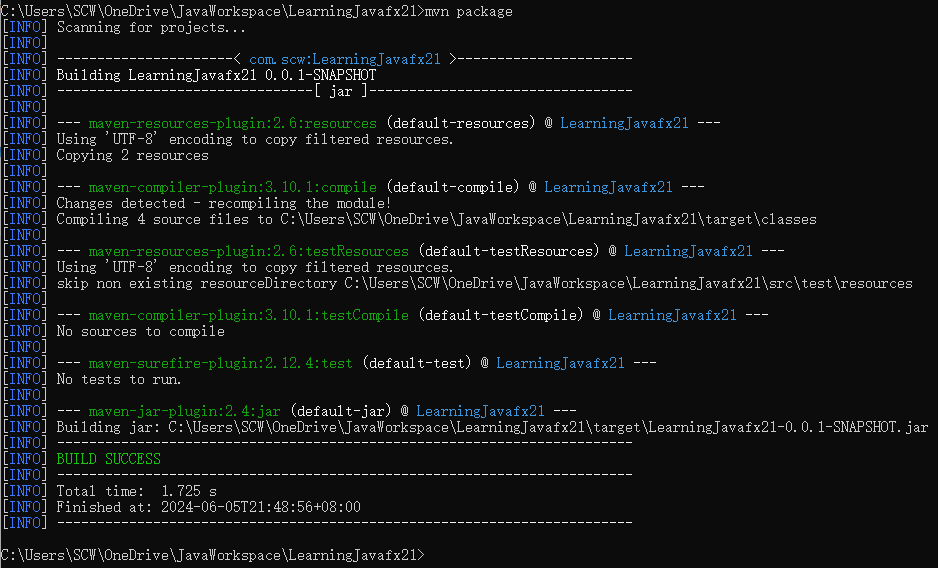
尝试用Java命令来运行该文件会显示没有主清单属性,无法运行,需要做进一步处理

2.3 使用JavaFX的jlink打包为可执行文件
在POM文件的plugins下添加一个插件,该插件用于将依赖项复制到target目录下的alternateLocation文件夹中
			<plugin>
                <groupId>org.apache.maven.plugins</groupId>
                <artifactId>maven-dependency-plugin</artifactId>
                <version>3.1.2</version>
                <executions>
                    <execution>
                        <id>copy-dependencies</id>
                        <phase>package</phase>
                        <goals>
                            <goal>copy-dependencies</goal>
                        </goals>
                        <configuration>
							<!-- 复制的依赖项的目录-->
                            <outputDirectory>${project.build.directory}/alternateLocation</outputDirectory>
                            <overWriteReleases>false</overWriteReleases>
                            <overWriteSnapshots>false</overWriteSnapshots>
                            <overWriteIfNewer>true</overWriteIfNewer>
                        </configuration>
                    </execution>
                </executions>
            </plugin>
修改javafx-maven-plugin插件的配置,并把主程序名和主程序完整路径改为自己项目的配置
           <plugin>
                <groupId>org.openjfx</groupId>
                <artifactId>javafx-maven-plugin</artifactId>
                <version>0.0.8</version>
                <configuration>
                    <stripDebug>true</stripDebug>
                    <compress>2</compress>
                    <noHeaderFiles>true</noHeaderFiles>
                    <noManPages>true</noManPages>
                    <!-- 主程序名-->
                    <launcher>App</launcher>
                    <!-- Jlink打包后的程序保存目录-->
                    <jlinkImageName>build-link</jlinkImageName>
                    <!-- Jlink打包后的程序压缩文件名称-->
                    <jlinkZipName>sample-zip</jlinkZipName>
                    <!-- 主程序完整路径-->
                    <mainClass>com.scw.LearningJavafx21.App</mainClass>
                </configuration>
                <executions>
                    <execution>
                        <!-- Default configuration for running -->
                        <!-- Usage: mvn clean javafx:run -->
                        <id>default-cli</id>
                        <configuration>
                            <mainClass>com.scw.LearningJavafx21.App</mainClass>
                        </configuration>
                    </execution>
                </executions>
            </plugin>
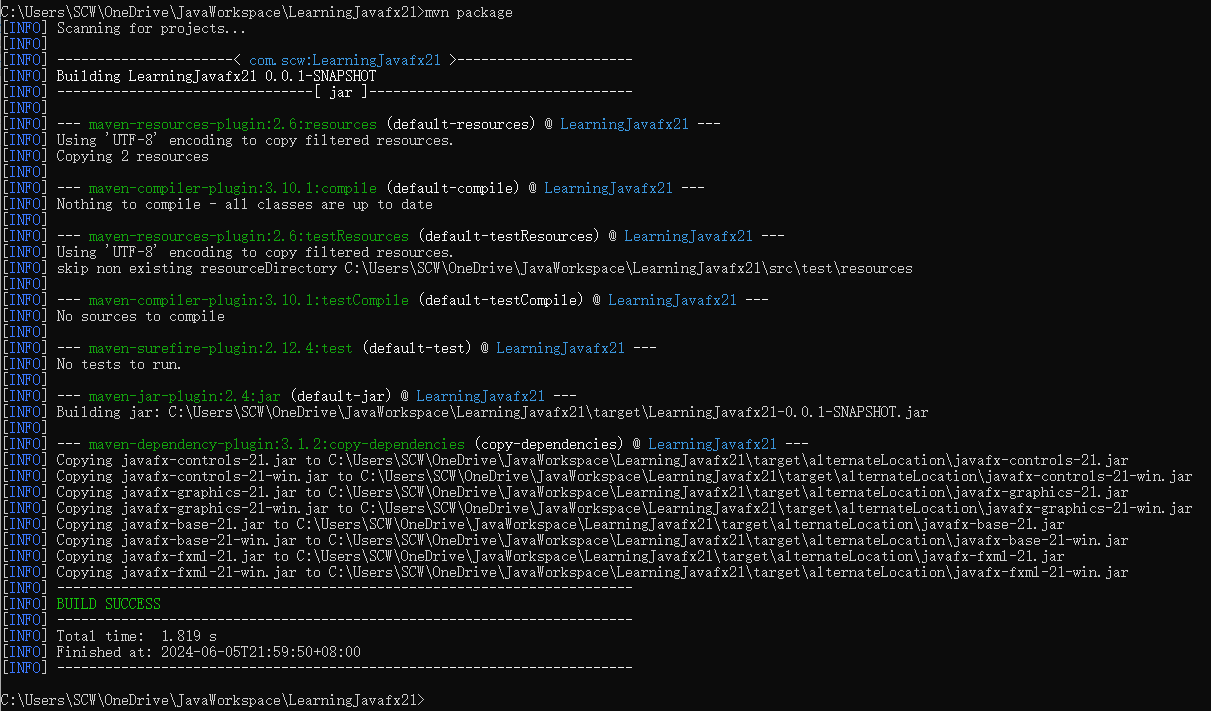
再次运行mvn package,可以看到所有的依赖项都被复制到了指定文件夹下
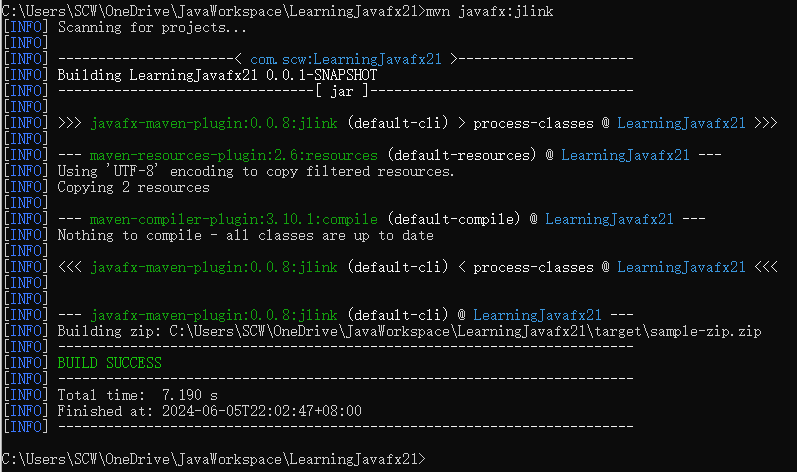
运行mvn javafx:jlink,可以生成一个.bat格式的可执行文件,位于target->build-link->bin->App.bat,双击该文件即可直接运行程序。同时在target目录下也会生成一个sample-zip.zip压缩包,实际上就是把build-link中的文件打包了一下。
此时将整个文件夹发送给任意一台电脑都可以运行该软件
2.4 使用exec插件打包为exe文件
在pom的plugins中添加一个插件,配置如下
<plugin>
				<groupId>org.codehaus.mojo</groupId>
				<artifactId>exec-maven-plugin</artifactId>
				<version>3.0.0</version>
				<executions>
					<!-- 打包为exe文件的配置项-->
					<execution>
						<id>image</id>
						<goals>
							<goal>exec</goal>
						</goals>
						<configuration>
							<executable>jpackage</executable>
							<workingDirectory>${project.basedir}</workingDirectory>
							<arguments>
								<!-- 打包后的文件名-->
								<argument>-n</argument>
                                <argument>JavaFXBuildTest</argument>
                                <!-- 打包类型-->
                                <argument>-t</argument>
                                <argument>app-image</argument>
                                <!-- 依赖项所在目录-->
                                <argument>-p</argument>
                                <argument>
                                    ${project.build.directory}/alternateLocation${path.separator}${project.build.directory}/${project.artifactId}-${project.version}.jar
                                </argument>
                                <!-- 打包后的exe文件放置目录-->
                                <argument>-d</argument>
                                <argument>${project.build.directory}</argument>
                                <!-- 完整的主程序目录-->
                                <argument>-m</argument>
                                <argument>com.scw.JavaFXBuildTest/com.scw.JavaFXBuildTest.App</argument>
                                <!-- 程序图标所在目录-->
                                <argument>--icon</argument>
                                <argument>
                                    ${project.basedir}/src/main/resources/application.ico
                                </argument>
                                <!-- 程序版本-->
                                <argument>--app-version</argument>
                                <argument>1.0.0</argument>
							</arguments>
						</configuration>
					</execution>
				</executions>
			</plugin>
配置完成后,重新在命令行依次输入
mvn clean
mvn javafx:jlink
mvn package
mvn exec:exec@image
该命令会在target->{程序名}目录下生成一个exe程序,将该程序所在的目录发送到任意相同系统的电脑下均可运行
参考:
全面详细的JavaFX国语核心教程(持续更新)-CSDN博客
JavaFX-Starter/JavaFX-Package-Sample: JavaFX17 打包示例 (github.com)


 2378
2378

 被折叠的 条评论
为什么被折叠?
被折叠的 条评论
为什么被折叠?
 到【灌水乐园】发言


