


1环境说明
os:centos7
weblogic:fmw_12.2.1.3.0_wls.jar
jdk:1.8.0_181
2创建weblogic的centos账号
| group add weblogic mkdir /home/weblogic useradd -g weblogic -m -d /home/weblogic weblogic passwd weblogic /* weblogic的home目录里面.bash_profil添加你的javaPath #java_home */ |
3配置安装文件
cd /home/weblogic
| touch oraInst.loc
inventory_loc=/home/weblogic/oraInventory inst_group=weblogic |
| touch wls.rsp
[ENGINE] #DO NOT CHANGE THIS. Response File Version=1.0.0.0.0 [GENERIC] #The oracle home location. This can be an existing Oracle Home or a new Oracle Home ORACLE_HOME=/expand/weblogic #weblogic的安装目录 #Set this variable value to the Installation Type selected. e.g. WebLogic Server, Coherence, Complete with Examples. INSTALL_TYPE=WebLogic Server #Provide the My Oracle Support Username. If you wish to ignore Oracle Configuration Manager configuration provide empty string for user name. MYORACLESUPPORT_USERNAME= #Provide the My Oracle Support Password MYORACLESUPPORT_PASSWORD=<SECURE VALUE> #Set this to true if you wish to decline the security updates. Setting this to true and providing empty string for My Oracle Support username will ignore the Oracle Configuration Manager configuration DECLINE_SECURITY_UPDATES=true #Set this to true if My Oracle Support Password is specified SECURITY_UPDATES_VIA_MYORACLESUPPORT=false #Provide the Proxy Host PROXY_HOST= #Provide the Proxy Port PROXY_PORT= #Provide the Proxy Username PROXY_USER= #Provide the Proxy Password PROXY_PWD=<SECURE VALUE> #Type String (URL format) Indicates the OCM Repeater URL which should be of the format [scheme[Http/Https]]://[repeater host]:[repeater port] COLLECTOR_SUPPORTHUB_URL= |
4安装weblogic
java -jar fmw_12.2.1.3.0_wls.jar -silent -responseFile /home/weblogic/wls.rsp -invPtrLoc /home/weblogic/oraInst.loc


5配置domain
| 进入weblogic安装目录 cd /expand/weblogic/wlserver/common/bin ./wlst.sh #启动domain配置工具
readTemplateForUpdate ('/expand/weblogic/wlserver/common/templates/wls/wls.jar') #获取一个domain模板
cd('Servers/AdminServer')#切换控制台
set('ListenAddress','')#设置监听地址 set('ListenPort', 7001)
cd('/')#切换到根目录 cd('Security/base_domain/User/weblogic')#切换到安全目录
cmo.setPassword('weblogic123456')#设置密码
setOption('OverwriteDomain', 'true')#设置option writeDomain('/expand/weblogic/wlserver/myWebLogicDomain')#设置domain的安装位置
closeTemplate()#关闭模板 exit()#退出
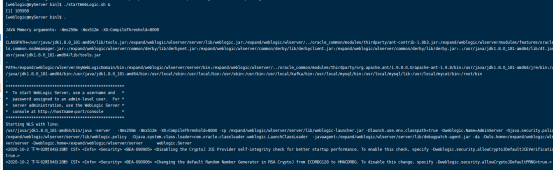
/expand/weblogic/wlserver/myWebLogicDomain/bin/startWebLogic.sh & #后台运行domain
http://myserver:7001/console/login/LoginForm.jsp
账号:weblogic pd:weblogic123456
|


 1万+
1万+


 被折叠的 条评论
为什么被折叠?
被折叠的 条评论
为什么被折叠?
 到【灌水乐园】发言


