


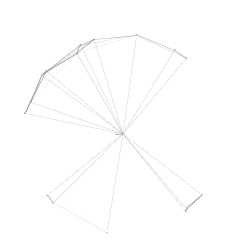
1、跟随鼠标移动的线条:
<script>
   !function(){
      function n(n,e,t){
        return n.getAttribute(e)||t
         }
      function e(n){
        return document.getElementsByTagName(n)
         }
      function t(){
        var t=e("script"),o=t.length,i=t[o-1];
        return{
                    l:o,z:n(i,"zIndex",-1),o:n(i,"opacity",.5),c:n(i,"color","0,0,0"),n:n(i,"count",99)
                }
            }
      function o(){
         a=m.width=window.innerWidth||document.documentElement.clientWidth||document.body.clientWidth,
         c=m.height=window.innerHeight||document.documentElement.clientHeight||document.body.clientHeight
            }
      function i(){
         r.clearRect(0,0,a,c);
         var n,e,t,o,m,l;
         s.forEach(function(i,x){
             for(i.x+=i.xa,i.y+=i.ya,i.xa*=i.x>a||i.x<0?-1:1,i.ya*=i.y>c||i.y<0?-1:1,r.fillRect(i.x-.5,i.y-.5,1,1),e=x+1;e<u.length;e++)n=u[e],
                        null!==n.x&&null!==n.y&&(o=i.x-n.x,m=i.y-n.y,
                        l=o*o+m*m,l<n.max&&(n===y&&l>=n.max/2&&(i.x-=.03*o,i.y-=.03*m),
                        t=(n.max-l)/n.max,r.beginPath(),r.lineWidth=t/2,r.strokeStyle="rgba("+d.c+","+(t+.2)+")",r.moveTo(i.x,i.y),r.lineTo(n.x,n.y),r.stroke()))
                }),x(i)
            }
       var a,c,u,m=document.createElement("canvas"),
           d=t(),l="c_n"+d.l,r=m.getContext("2d"),
           x=window.requestAnimationFrame||window.webkitRequestAnimationFrame||window.mozRequestAnimationFrame||window.oRequestAnimationFrame||window.msRequestAnimationFrame||
           function(n){
                   window.setTimeout(n,1e3/45)
                    },
           w=Math.random,y={x:null,y:null,max:2e4};m.id=l,m.style.cssText="position:fixed;top:0;left:0;z-index:"+d.z+";opacity:"+d.o,e("body")[0].appendChild(m),o(),window.onresize=o,
           window.onmousemove=function(n){
                  n=n||window.event,y.x=n.clientX,y.y=n.clientY
                },
           window.onmouseout=function(){
                  y.x=null,y.y=null
                };
           for(var s=[],f=0;d.n>f;f++){
                var h=w()*a,g=w()*c,v=2*w()-1,p=2*w()-1;s.push({x:h,y:g,xa:v,ya:p,max:6e3})
            }
            u=s.concat([y]),setTimeout(function(){i()},100)
        }();
</script>
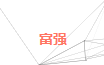
2、鼠标点击特效:
(1)富强民主和谐:
<script src="https://cdn.bootcss.com/jquery/3.3.1/jquery.min.js"></script>
<script>
var a_idx = 0;jQuery(document).ready(function($) {$("body").click(function(e) {var a = new Array("富强", "民主", "文明", "和谐", "自由", "平等", "公正" ,"法治", "爱国", "敬业", "诚信", "友善");var $i = $("<span/>").text(a[a_idx]);
    a_idx = (a_idx + 1) % a.length;var x = e.pageX,y = e.pageY;$i.css({"z-index": 100000000,"top": y - 20,"left": x,"position": "absolute","font-weight": "bold","color": "#ff6651"});$("body").append($i);$i.animate({"top": y - 180,"opacity": 0},1500,function() {$i.remove();});});});
</script>
(2)菱形:
<script>
        !function(e,t,a){function n(){c(".heart{width: 10px;height: 10px;position: fixed;background: #f00;transform: rotate(45deg);-webkit-transform: rotate(45deg);-moz-transform: rotate(45deg);}.heart:after,.heart:before{content: '';width: inherit;height: inherit;background: inherit;border-radius: 50%;-webkit-border-radius: 50%;-moz-border-radius: 50%;position: fixed;}.heart:after{top: -5px;}.heart:before{left: -5px;}"),o(),r()}function r(){for(var e=0;e<d.length;e++)d[e].alpha<=0?(t.body.removeChild(d[e].el),d.splice(e,1)):(d[e].y--,d[e].scale+=.004,d[e].alpha-=.013,d[e].el.style.cssText="left:"+d[e].x+"px;top:"+d[e].y+"px;opacity:"+d[e].alpha+";transform:scale("+d[e].scale+","+d[e].scale+") rotate(45deg);background:"+d[e].color+";z-index:99999");requestAnimationFrame(r)}function o(){var t="function"==typeof e.onclick&&e.onclick;e.onclick=function(e){t&&t(),i(e)}}function i(e){var a=t.createElement("div");a.className="heart",d.push({el:a,x:e.clientX-5,y:e.clientY-5,scale:1,alpha:1,color:s()}),t.body.appendChild(a)}function c(e){var a=t.createElement("style");a.type="text/css";try{a.appendChild(t.createTextNode(e))}catch(t){a.styleSheet.cssText=e}t.getElementsByTagName("head")[0].appendChild(a)}function s(){return"rgb("+~~(255*Math.random())+","+~~(255*Math.random())+","+~~(255*Math.random())+")"}var d=[];e.requestAnimationFrame=function(){return e.requestAnimationFrame||e.webkitRequestAnimationFrame||e.mozRequestAnimationFrame||e.oRequestAnimationFrame||e.msRequestAnimationFrame||function(e){setTimeout(e,1e3/60)}}(),n()}(window,document);
</script>

(3)爱心:
<script src="https://cdn.jsdelivr.net/gh/SGYZ0910/CDN@1.0.5/js/love.js"></script>

3、页面动画特效:
(1)樱花特效:
<script src="https://cdn.jsdelivr.net/gh/TaylorLottner/Fork/sakura.js"></script>

(2)雪花特效:
<script src="https://cdn.jsdelivr.net/gh/TRHX/CDN-for-itrhx.com@3.0.6/js/snow3.js"></script>

4、L2Dwidget使用:
参考自:https://blog.csdn.net/lvyiwuhen/article/details/105656536
引入L2Dwidget:
<script src="https://eqcn.ajz.miesnfu.com/wp-content/plugins/wp-3d-pony/live2dw/lib/L2Dwidget.min.js"></script>
<script src="https://eqcn.ajz.miesnfu.com/wp-content/plugins/wp-3d-pony/live2dw/lib/L2Dwidget.0.min.js"></script>
显示人物模型,在jsonPath中添加动画人物json的地址:
<script>
  L2Dwidget.init({
  "model": {jsonPath:"https://unpkg.com/live2d-widget-model-shizuku@1.0.5/assets/shizuku.model.json","scale": 1 },
  "display": { "position": "left", "width": 150, "height": 300,"hOffset": 0, "vOffset": -20 },
  "mobile": { "show": true, "scale": 0.5 },
  "react": { "opacityDefault": 0.7, "opacityOnHover": 0.2 } });
</script>
常用人物预览可以看:https://blog.csdn.net/u012931864/article/details/83054822
教程:https://www.jianshu.com/p/3a6342e16e57
人物模型下载地址:https://github.com/xiazeyu/live2d-widget-models/tree/master/packages
5、设置文字大小导致文字不居中对齐:
使用:
style="font-size:20px;line-height: 20px;"
来调整位置。
div中设置的文字竖直方向不居中时,可以通过外面再嵌套一层div,然后用margin-top来调整竖直方向的位置。水平居中使用:text-align: center;
6、固定背景图像:
在style中添加:
        body {background-image: url(/static/icon/2.jpg);
        background-repeat:no-repeat;
        background-attachment:fixed;
        background-position:center top;
        }
top加不加无所谓,最好还是加一下吧。通过360浏览器截图就能看到效果,不加top,图片会显示在网页的水平垂直居中的地方,加了top,会显示在水平局中居上的地方。
7、bootstrap固定div到顶部或底部:
本来使用:
position:fixed;top:0px; right:0px;
将div固定到顶部,但是发现滚动条下移时,bootstrap的一些控件会显示在div的上层,即使置顶div也无济于事,后来发现bootstrap自带了置顶和置底,使用bootstrap提供的class时下拉滚动条,就不会被控件遮住了。
<div class="navbar navbar-inverse navbar-fixed-bottom"></div>   <!--底部-->
<div class="navbar navbar-inverse navbar-fixed-top"></div>      <!--顶部-->
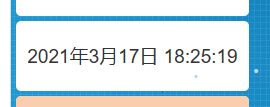
8、显示系统时间:
参考自:https://blog.csdn.net/qq_35394434/article/details/83747008
<div id="datetime"></div>
<script>
        setInterval("document.getElementById('datetime').innerHTML=new Date().toLocaleString();", 1000);
</script>


 3116
3116


 被折叠的 条评论
为什么被折叠?
被折叠的 条评论
为什么被折叠?
 到【灌水乐园】发言


