


文章目录
十、Hystrix断路器


简介

功能:服务降级,服务熔断,接近实时的监控,限流,隔离等。
Hystrix重要概念
服务降级(fallback)
提供者和消费者都可以进行服务降级。(一般都是放在客户端(消费者))


服务熔断(break)


服务限流(flowlimit)

Hystrix案例
构建
把7001改为单机版,方便后面进行案例测试。
-
新建项目cloud-provider-hystrix-payment8001
-
pom
<dependencies> <!-- hystrix--> <dependency> <groupId>org.springframework.cloud</groupId> <artifactId>spring-cloud-starter-netflix-hystrix</artifactId> </dependency> <!-- 引用自己定义的api通用包,可以使用Payment支付Entity --> <dependency> <groupId>com.angenin.springcloud</groupId> <artifactId>cloud-api-commons</artifactId> <version>${project.version}</version> </dependency> <dependency> <groupId>org.springframework.boot</groupId> <artifactId>spring-boot-starter-web</artifactId> </dependency> <!--监控--> <dependency> <groupId>org.springframework.boot</groupId> <artifactId>spring-boot-starter-actuator</artifactId> </dependency> <!--eureka client--> <dependency> <groupId>org.springframework.cloud</groupId> <artifactId>spring-cloud-starter-netflix-eureka-client</artifactId> </dependency> <!--热部署--> <dependency> <groupId>org.springframework.boot</groupId> <artifactId>spring-boot-devtools</artifactId> <scope>runtime</scope> <optional>true</optional> </dependency> <!-- 一个Java工具包 --> <dependency> <groupId>cn.hutool</groupId> <artifactId>hutool-all</artifactId> <version>5.1.0</version> </dependency> <dependency> <groupId>org.projectlombok</groupId> <artifactId>lombok</artifactId> <optional>true</optional> </dependency> <dependency> <groupId>org.springframework.boot</groupId> <artifactId>spring-boot-starter-test</artifactId> <scope>test</scope> </dependency> </dependencies> -
yml
server: port: 8001 spring: application: name: cloud-provider-hystrix-payment eureka: client: register-with-eureka: true fetch-registry: true service-url: #单机版 defaultZone: http://localhost:7001/eureka #集群版 # defaultZone: http://eureka7001.com:7001/eureka,http://eureka7002.com:7002/eureka,http://eureka7003.com:7003/eureka -
主启动类
@EnableEurekaClient @SpringBootApplication public class PaymentHystrixMain8001 { public static void main(String[] args) { SpringApplication.run(PaymentHystrixMain8001.class, args); } } -
service
@Service public class PaymentService { //正常访问方法 public String paymentInfo_OK(Integer id){ return "线程池:" + Thread.currentThread().getName() + "\tpaymentInfo_OK,id:" + id; } //超时访问方法 public String paymentInfo_TimeOut(Integer id){ int timeNumber = 3; try { TimeUnit.SECONDS.sleep(timeNumber); } catch (InterruptedException e) { e.printStackTrace(); } return "线程池:" + Thread.currentThread().getName() + "\tpaymentInfo_TimeOut,id:" + id + ",耗时:" + timeNumber + "秒"; } } -
controller
@Slf4j @RestController public class PaymentController { @Resource PaymentService paymentService; @Value("${server.port}") //spring的@Value注解 private String ServerPort; @GetMapping("/payment/hystrix/ok/{id}") public String paymentInfo_OK(@PathVariable("id") Integer id){ String result = paymentService.paymentInfo_OK(id); log.info("******result:" + result); return result; } @GetMapping("/payment/hystrix/timeout/{id}") public String paymentInfo_TimeOut(Integer id){ String result = paymentService.paymentInfo_OK(id); log.info("******result:" + result); return result; } } -
启动7001和8001
http://localhost:8001/payment/hystrix/ok/1

http://localhost:8001/payment/hystrix/timeout/1


高并发测试

安装JMeter
JMeter下载地址:http://jmeter.apache.org/download_jmeter.cgi
下载tgz和zip都可以:

进入解压后的目录的bin目录,找到jmeter.properties文件,修改语言zh_CN。

从终端进入bin目录,输入./jmeter运行jmeter,修改成中文版。


进行高并发测试
测试http://localhost:8001/payment/hystrix/timeout/1


然后去访问http://localhost:8001/payment/hystrix/ok/1,访问速度变慢了。

新建80
-
新建cloud-consumer-feign-hystrix-order80
-
pom
<dependencies> <!-- openfeign --> <dependency> <groupId>org.springframework.cloud</groupId> <artifactId>spring-cloud-starter-openfeign</artifactId> </dependency> <!-- hystrix --> <dependency> <groupId>org.springframework.cloud</groupId> <artifactId>spring-cloud-starter-netflix-hystrix</artifactId> </dependency> <!--eureka client--> <dependency> <groupId>org.springframework.cloud</groupId> <artifactId>spring-cloud-starter-netflix-eureka-client</artifactId> </dependency> <!-- 引用自己定义的api通用包,可以使用Payment支付Entity --> <dependency> <groupId>com.angenin.springcloud</groupId> <artifactId>cloud-api-commons</artifactId> <version>${project.version}</version> </dependency> <dependency> <groupId>org.springframework.boot</groupId> <artifactId>spring-boot-starter-web</artifactId> </dependency> <dependency> <groupId>org.springframework.boot</groupId> <artifactId>spring-boot-starter-actuator</artifactId> </dependency> <!--热部署--> <dependency> <groupId>org.springframework.boot</groupId> <artifactId>spring-boot-devtools</artifactId> <scope>runtime</scope> <optional>true</optional> </dependency> <dependency> <groupId>org.projectlombok</groupId> <artifactId>lombok</artifactId> <optional>true</optional> </dependency> <dependency> <groupId>org.springframework.boot</groupId> <artifactId>spring-boot-starter-test</artifactId> <scope>test</scope> </dependency> </dependencies> -
yml
server: port: 80 eureka: client: register-with-eureka: false service-url: defaultZone: http://localhost:7001/eureka #需要加上,否则会报错 ribbon: ReadTimeout: 4000 ConnectTimeout: 4000 -
主启动类
@EnableEurekaClient @EnableFeignClients @SpringBootApplication public class OrderHystrixMain80 { public static void main(String[] args) { SpringApplication.run(OrderHystrixMain80.class, args); } } -
service
@Component @FeignClient(value = "CLOUD-PROVIDER-HYSTRIX-PAYMENT") public interface PaymentHystrixService { @GetMapping("/payment/hystrix/ok/{id}") public String paymentInfo_OK(@PathVariable("id") Integer id); @GetMapping("/payment/hystrix/timeout/{id}") public String paymentInfo_TimeOut(@PathVariable("id") Integer id); } -
controller
@Slf4j @RestController public class OrderHystrixController { @Resource private PaymentHystrixService paymentHystrixService; @GetMapping("/consumer/payment/hystrix/ok/{id}") public String paymentInfo_OK(@PathVariable("id") Integer id){ String result = paymentHystrixService.paymentInfo_OK(id); return result; } @GetMapping("/consumer/payment/hystrix/timeout/{id}") public String paymentInfo_TimeOut(@PathVariable("id") Integer id){ String result = paymentHystrixService.paymentInfo_TimeOut(id); return result; } } -
启动80,进行测试
http://localhost/consumer/payment/hystrix/ok/1

http://localhost/consumer/payment/hystrix/timeout/1

-
启动jmeter,然后再进行测试

故障现象、导致原因以及解决
现象:


解决:


服务降级


提供者
-
修改8001中PaymentService的paymentInfo_TimeOut方法,并添加paymentInfo_TimeOutHandler方法:
@HystrixCommand(fallbackMethod = "paymentInfo_TimeOutHandler", commandProperties = { //设置自身超时调用时间的峰值为3秒,峰值内可以正常运行,超过了需要有兜底的方法处理,服务降级fallback @HystrixProperty(name = "execution.isolation.thread.timeoutInMilliseconds", value = "3000") }) public String paymentInfo_TimeOut(Integer id){ int timeNumber = 5; //int i = 1 / 0; try { TimeUnit.SECONDS.sleep(timeNumber); } catch (InterruptedException e) { e.printStackTrace(); } return "线程池:" + Thread.currentThread().getName() + "\tpaymentInfo_TimeOut,id:" + id + ",耗时:" + timeNumber + "秒"; } public String paymentInfo_TimeOutHandler(Integer id){ return "8001提供者,线程池:" + Thread.currentThread().getName() + "\tpaymentInfo_TimeOutHandler系统繁忙,请稍后再试,id:" + id; } -
然后在8001的主启动类上添加
@EnableCircuitBreaker注解,启用断路器。 -
启动7001和8001,测试8001的fallback,
http://localhost:8001/payment/hystrix/timeout/1成功进入fallback方法。(并且fallback方法是用Hystrix的线程池)

-
去掉sleep,改为 1 / 0,测试方法运行异常,
http://localhost:8001/payment/hystrix/timeout/1,也可以进入fallback方法。


消费者

-
在80的yml中添加:
feign: hystrix: enabled: true -
在主启动类添加
@EnableHystrix注解。 -
修改OrderHystrixController的paymentInfo_TimeOut方法,并添加paymentTimeOutFallbackMethod方法:
@HystrixCommand(fallbackMethod = "paymentTimeOutFallbackMethod", commandProperties = { @HystrixProperty(name = "execution.isolation.thread.timeoutInMilliseconds", value = "1500") }) @GetMapping("/consumer/payment/hystrix/timeout/{id}") public String paymentInfo_TimeOut(@PathVariable("id") Integer id){ String result = paymentHystrixService.paymentInfo_TimeOut(id); return result; } public String paymentTimeOutFallbackMethod(@PathVariable("id") Integer id){ return "消费者80,支付系统繁忙"; } -
启动7001,8001,80,
http://localhost/consumer/payment/hystrix/timeout/1(如果是提供者那边出问题,并且消费者设置了fallback,会优先进入消费者的fallback)

-
在中添加
int i = 1 / 0;,运行异常也会进入80的fallback方法。

目前的问题和解决办法

代码膨胀的解决办法
解决办法:设置全局fallback方法。


- 在80的OrderHystrixController中添加全局fallback方法:
    //全局fallback方法,不能有传参
    public String payment_Global_FallbackMethod(){
        return "Global异常处理信息,请稍后再试!";
    }
-
并在OrderHystrixController类上加上
@DefaultProperties(defaultFallback = "payment_Global_FallbackMethod"),设置全局fallback方法。 -
把paymentInfo_TimeOut方法的@HystrixCommand
// @HystrixCommand(fallbackMethod = "paymentTimeOutFallbackMethod", commandProperties = { // @HystrixProperty(name = "execution.isolation.thread.timeoutInMilliseconds", value = "1500") // }) @HystrixCommand -
进行测试,
http://localhost/consumer/payment/hystrix/timeout/1

混乱的解决办法


模拟宕机场景
-
在80的service包下新建PaymentFallbackService类,实现PaymentHystrixService接口
//统一为接口里面的方法进行异常处理 @Component public class PaymentFallbackService implements PaymentHystrixService { @Override public String paymentInfo_OK(Integer id) { return "----PaymentFallbackService\t fallback-paymentInfo_OK----"; } @Override public String paymentInfo_TimeOut(Integer id) { return "----PaymentFallbackService\t fallback-paymentInfo_TimeOut----"; } } -
要在yml中加上:(我们在之前就加上了)
feign: hystrix: enabled: true -
然后给PaymentHystrixService接口的@FeignClient注解加上
fallback = PaymentFallbackService.class属性,用于出错进行fallback处理。

-
启动7001,8001,80,然后先访问``,成功访问

-
然后关掉8001,模拟提供者宕机,刷新页面


服务熔断

实操

-
在8001的PaymentService中添加
@HystrixCommand(fallbackMethod = "paymentCircuitBreaker_fallback",commandProperties = { @HystrixProperty(name = "circuitBreaker.enabled", value = "true"), //开启断路器 @HystrixProperty(name = "circuitBreaker.requestVolumeThreshold", value = "10"), //请求总数阈值(默认20) @HystrixProperty(name = "circuitBreaker.sleepWindowInMilliseconds", value = "10000"), //休眠时间窗口期(休眠多久进入半开模式(单位毫秒,默认5秒)) @HystrixProperty(name = "circuitBreaker.errorThresholdPercentage", value = "60"), //请求次数的错误率达到多少跳闸(百分率%,默认50%) }) public String paymentCircuitBreaker(@PathVariable("id") Integer id) { if(id < 0){ throw new RuntimeException("****id 不能为负数"); } String serialNumber = IdUtil.simpleUUID(); return Thread.currentThread().getName() + "\t" + "调用成功,流水号:" + serialNumber; } public String paymentCircuitBreaker_fallback(@PathVariable("id") Integer id){ return "id 不能为负数,请稍后再试, id: " + id; } -
在8001的PaymentController中添加
@GetMapping("/payment/circuit/{id}") public String paymentCircuitBreaker(@PathVariable("id") Integer id){ String result = paymentService.paymentCircuitBreaker(id); log.info("******result:" + result); return result; } -
启动7001和8001
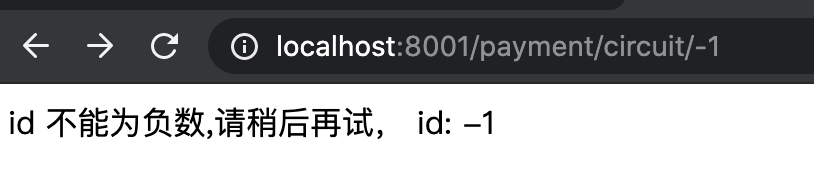
http://localhost:8001/payment/circuit/-1(输入超过6次进入熔断)
熔断10秒内就算是正确的请求也返回错误信息。

10秒后进入半开模式,对请求进行处理,此时如果是正确的请求,那么就关闭熔断,否则再次进入熔断,10秒后再次开启半开模式,对请求进行处理,直到半开模式处理到正确请求。

总结
https://martinfowler.com/bliki/CircuitBreaker.html

我的总结:如果请求次数的错误率超过指定值,开启熔断,经过一段时间后,变为半开模式,然后放进一个请求进行处理,如果请求处理成功,关闭熔断;如果还是报错,继续进入熔断,再经过一段时间后,变为半开模式,再进行对下一个请求进行处理,一直在熔断,半开模式来回切换,直到请求成功,关闭熔断。


官网步骤:

断路器在什么情况下开始起作用:
https://github.com/Netflix/Hystrix/wiki/How-it-Works


断路器开启或关闭的条件:

断路器打开之后:

服务限流
会在后面高级篇alibaba的Sentinel讲解。
Hystrix工作流程
https://github.com/Netflix/Hystrix/wiki/How-it-Works

官方图例:

服务监控HystrixDashboard
简介

仪表盘9001

-
新建模块cloud-consumer-hystrix-dashboard9001
-
pom
<dependencies> <!-- hystrix仪表盘图形化 --> <dependency> <groupId>org.springframework.cloud</groupId> <artifactId>spring-cloud-starter-netflix-hystrix-dashboard</artifactId> </dependency> <dependency> <groupId>com.angenin.springcloud</groupId> <artifactId>cloud-api-commons</artifactId> <version>${project.version}</version> </dependency> <dependency> <groupId>org.springframework.boot</groupId> <artifactId>spring-boot-starter-web</artifactId> </dependency> <dependency> <groupId>org.springframework.boot</groupId> <artifactId>spring-boot-starter-actuator</artifactId> </dependency> <!--热部署--> <dependency> <groupId>org.springframework.boot</groupId> <artifactId>spring-boot-devtools</artifactId> <scope>runtime</scope> <optional>true</optional> </dependency> <dependency> <groupId>org.projectlombok</groupId> <artifactId>lombok</artifactId> <optional>true</optional> </dependency> <dependency> <groupId>org.springframework.boot</groupId> <artifactId>spring-boot-starter-test</artifactId> <scope>test</scope> </dependency> </dependencies> -
yml
server: port: 9001 -
主启动类
@EnableHystrixDashboard //启用Hystrix仪表板 @SpringBootApplication public class HystrixDashboard9001 { public static void main(String[] args) { SpringApplication.run(HystrixDashboard9001.class, args); } } -
启动9001,在浏览器中输入
http://localhost:9001/hystrix

断路器演示(服务监控hystrixDashboard)
注意:所有微服务提供者都需要在pom中引入监控依赖。
<dependency>
    <groupId>org.springframework.boot</groupId>
    <artifactId>spring-boot-starter-actuator</artifactId>
</dependency>
修改8001

在8001的主启动类中添加:
   /**
    * 此配置是为了服务监控而配置,与服务容错本身无关,springcloud升级后的坑
    * ServletRegistrationBean因为SpringBoot的默认路径不是 “/hystrix.stream"
    * 只要在自己的项目里配置上下的servlet就可以了
    */
   @Bean
   public ServletRegistrationBean getServlet() {
       HystrixMetricsStreamServlet streamServlet = new HystrixMetricsStreamServlet() ;
       ServletRegistrationBean registrationBean = new ServletRegistrationBean(streamServlet);
       registrationBean.setLoadOnStartup(1);
       registrationBean.addUrlMappings("/hystrix.stream");
       registrationBean.setName("HystrixMetricsStreamServlet");
       return  registrationBean;
   }

监控测试
启动9001,7001,8001
-
9001监控8001


-
在浏览器输入
http://localhost:8001/payment/circuit/1和http://localhost:8001/payment/circuit/-1

多次输入http://localhost:8001/payment/circuit/-1错误的访问。

稍微等一会,然后输入正确的访问http://localhost:8001/payment/circuit/1,就会熔断就会关闭。


7色:

1圈:

1线:

整图说明:


整图说明2:


下一篇笔记:最新的SpringCloud(H版&Alibaba)技术(12初级部分,网关【Gateway】)
学习视频(p47-p64):https://www.bilibili.com/video/BV18E411x7eT?p=47


 1754
1754


 被折叠的 条评论
为什么被折叠?
被折叠的 条评论
为什么被折叠?
 到【灌水乐园】发言


