


文章目录
一、Volatile关键字
代码功能:当 flag 被新线程置为 true 后,主线程就可以进入 if 语句,打印横线
1. 不使用任何同步手段
public class volatileTest {
    public static void main(String[] args) {
        // 创建的新线程
        ThreadDemo00 td = new ThreadDemo00();
        new Thread(td).start();

        // 主线程
        while (true) {
            System.out.println(td.isFlag());
            if (td.isFlag()) {
                System.out.println("---------------");
                break;
            }
        }
    }
}

class ThreadDemo00 implements Runnable {
    //            private volatile boolean flag = true;
    private boolean flag = false;

    @Override
    public void run() {
        try {
            Thread.sleep(20);
        } catch (InterruptedException e) {
            e.printStackTrace();
        }
        flag = true;
        System.out.println("flag=" + flag);
    }
    public boolean isFlag() {
        return flag;
    }
    public void setFlag(boolean flag) {
        this.flag = flag;
    }
}
输出
flag=true
然而这段代码实际上并没有打印出横线,因为存在内存可见性的问题
每个线程有自己的内存空间,所需的值都是从主存中取的
新线程更新完flag的值后,刷新回了主存中,但是主线程已经读取过了flag的值,然而又没有读新值,导致自己内存空间中flag的值没有更新,所以没有打印出横线
2. 使用synchronized
将主线程的功能使用 synchronized 代码块包起来,使主线程每次能够读取主内存中的最新值
public class volatileTest {
    public static void main(String[] args) {
		//。。。

        // 主线程
        while (true) {
            synchronized (td) {
                System.out.println(td.isFlag());
                if (td.isFlag()) {
                    System.out.println("---------------");
                    break;
                }
            }
        }
    }
}

class ThreadDemo00 implements Runnable {
	//同上。。。
}
输出
---------------
flag=true
这个虽然解决了问题,但是如果有多个线程同时访问这段代码,效率会非常低
3. 使用 volatile 关键字
/**
 * volatile关键字:当多个线程操作共享数据时,可以保证内存中的数据可见。
 * 相较于 synchronized 是一种较为轻量级的同步策略
 * 注意:
 * 1. volatile 不具备“互斥性”
 * 2. volatile 不能保证变量的“原子性”
 *
 * @author QY
 * @date 2020/3/12 - 20:12
 */
public class TestVolatile00 {
    public static void main(String[] args) {
        ThreadDemo00 td = new ThreadDemo00();
        new Thread(td).start();
        while (true) {
            if (td.isFlag()) {
                System.out.println("---------------");
            }
        }
    }
}

class ThreadDemo00 implements Runnable {
    private volatile boolean flag = true;	//volatile关键字
	//。。。
}
输出
---------------
flag=true
volatile可以解决内存可见性问题
4. 总结
volatile关键字- 当多个线程进行操作共享数据时,可以保证内存中的数据可见
- 相较于
synchronized是一种较为轻量级的同步策略
- 注意
volatile不具备“互斥性”volatile不能保证变量的“原子性”
二、原子类
1. 常规
i++ 的原子性问题:i++ 的操作实际上分为三个步骤“读-改-写”
- int temp = i;
- temp = i+1;
- i = temp;

若有多个线程同时同时读取主内存中的值,处理完之后写回主内存中,回出现多个相同值
public class AtomicClassTest {
    public static void main(String[] args) {
        AtomicDemo atomicDemo = new AtomicDemo();
        for (int i = 0; i < 10; i++) {
            new Thread(atomicDemo).start();
        }
    }
}

class AtomicDemo implements Runnable {
    private int serialNumber = 0;

    @Override
    public void run() {
        try {
            Thread.sleep(200);
        } catch (InterruptedException e) {
            e.printStackTrace();
        }
        System.out.println(getSerialNumber());
    }

    public int getSerialNumber() {
        return serialNumber++;
    }
}
输出结果
2 1 0 7 3 0 4 5 8 6
可以看见,结果中出现了2个 0
2. 代码二,使用 volatile 关键字
volatile关键字只能解决“内存可见性”问题,无法解决“原子性”问题
public class AtomicClassTest {
    public static void main(String[] args) {
        AtomicDemo atomicDemo = new AtomicDemo();
        for (int i = 0; i < 10; i++) {
            new Thread(atomicDemo).start();
        }
    }
}

class AtomicDemo implements Runnable {
    private volatile int serialNumber = 0;	//使用volatile关键字
	//。。。
}
结果:
0 8 6 7 0 2 3 1 5 4
出现了2个 0 ,仍然没有解决我们的问题
3. 代码三:使用原子类
- 原子变量:在 java.util.concurrent.atomic 包下提供了一些原子变量
- volatile 保证内存可见性
- CAS(Compare-And-Swap) 算法保证数据的原子性
- CAS 算法时硬件对于并发操作的支持
CAS 包含了三个操作值
① 内存值 V
② 预估值 A
③ 更新值 B
当且仅当 V == A 时,V = B;否则,不会执行任何操作
public class TestAtomicDemo00 {
    public static void main(String[] args) {
        AtomicDemo atomicDemo = new AtomicDemo();
        for (int i = 0; i < 20; i++) {
            new Thread(atomicDemo).start();
        }
    }
}

class AtomicDemo implements Runnable {
    // 使用原子变量
    private AtomicInteger serialNumber = new AtomicInteger();

    @Override
    public void run() {
        try {
            Thread.sleep(200);
        } catch (InterruptedException e) {
            e.printStackTrace();
        }
        System.out.println(getSerialNumber());
    }

    // 使用原子类的方法
    public int getSerialNumber() {
        return serialNumber.getAndIncrement();
    }
}
三、模拟CAS算法
public class CompareAndSwapTest {

    public static void main(String[] args) {
        final CompareAndSwap cas = new CompareAndSwap();
        for (int i = 0; i < 10; i++) {
            new Thread(new Runnable() {
                @Override
                public void run() {
                    int expectedValue = cas.get();
                    boolean b = cas.compareAndSet(expectedValue, (int) (Math.random() * 101));
                    System.out.println(b);
                }
            }).start();

        }
    }
}

class CompareAndSwap {
    private int value;

    // 获取内存值
    public synchronized int get() {
        return value;
    }

    // 比较并交换
    public synchronized int compareAndSwap(int expectedValue, int newValue) {
        // 取值
        int oldValue = value;
        // 比较
        if (oldValue == expectedValue) {
            value = newValue;
        }
        return oldValue;
    }

    // 设置
    public synchronized boolean compareAndSet(int expectedValue, int newValue) {
        return expectedValue == compareAndSwap(expectedValue, newValue);
    }
}
四、CopyOnWriteArrayList
- CopyOnWriteArrayList/CopyOnWriteArraySet : “写入并复制”
- 注意:添加操作多时,效率低,因为每次添加时都会进行复制,开销非常的大。
- 并发迭代操作多时可以选择。
1. 代码一:使用普通的ArrayList
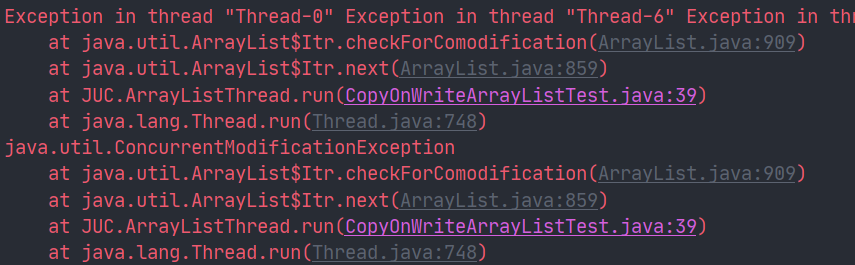
多个线程使用迭代器进行迭代的同时添加元素,会发生“并发修改异常”
public class CopyOnWriteArrayListTest {
    public static void main(String[] args) {
        ArrayListThread alt = new ArrayListThread();
        for (int i = 0; i < 10; i++) {
            new Thread(alt).start();
        }
    }
}

class ArrayListThread implements Runnable {
    // List<String>
    private static List<String> list = Collections.synchronizedList(new ArrayList<String>());

    // init
    static {
        list.add("AA");
        list.add("BB");
        list.add("CC");
    }

    @Override
    public void run() {
        // 遍历 并 添加
        Iterator<String> iterator = list.iterator();
        while (iterator.hasNext()) {
            System.out.println(iterator.next());
            list.add("AA");
        }
    }
}
2.代码二:使用CopyOnWriteArrayList
public class CopyOnWriteArrayListTest {
	// 同上。。。
}

class ArrayListThread implements Runnable {
    // List<String>
//    private static List<String> list = Collections.synchronizedList(new ArrayList<String>());
    private static CopyOnWriteArrayList<String> list = new CopyOnWriteArrayList<>();

    // 同上。。。
}
可以正常输出,没有出现异常。
3.总结
CopyOnWriteArrayList :写时复制。
当有写入操作时,会复制一份副本。
注意:修改操作多时,效率低,因为每次添加时都会进行复制,开销大;所以并发迭代多时可以选择这种方式。
五、CountDownLatch
闭锁:在完成某些运算时,只有其它所有线程的运算全部完成,才会执行当前运算
- countDown() 数量-1
- await() 等待
public class CountLatchTest {
    public static void main(String[] args) {
        // new CountLatch
        CountDownLatch latch = new CountDownLatch(5);
        // new 任务
        latchDemo latchDemo = new latchDemo(latch);
        // 开始时间
        long start = System.currentTimeMillis();
        // 创建线程执行
        for (int i = 0; i < 5; i++) {
            new Thread(latchDemo).start();
        }
        // 等待(捕捉异常)
        try {
            latch.await();
        } catch (InterruptedException e) {
            System.out.println("闭锁异常");
            e.printStackTrace();
        }
        // 结束时间
        long end = System.currentTimeMillis();
        System.out.println("消耗时间:" + (end - start));
    }
}

class latchDemo implements Runnable {
    // 声明 CountLatch
    private CountDownLatch latch;

    // 构造函数,初始化 CountLatch
    public latchDemo(CountDownLatch latch) {
        this.latch = latch;
    }

    // 重写方法
    @Override
    public void run() {
        synchronized (this) {
            try {
                // 主体逻辑
                for (int i = 0; i < 50000; i++) {
                    if (i % 2 == 0) System.out.println(i);
                }
            } finally {
                // 闭锁-1
                latch.countDown();
            }
        }
    }
}
六、Callable创建线程
1、创建执行线程方式之一:实现 Callable 接口。 相较于实现 Runnable 接口的方式,方法可以有返回值,并且可以抛出异常。
2、执行 Callable 方式,需要 FutureTask 实现类的支持,用于接收运算结果。 FutureTask 是 Future 接口的实现类
public class CallableTest {
    public static void main(String[] args) {
        // new 任务对象
        CallableDemo cd = new CallableDemo();
        // 创建FutureTask实现类
        FutureTask<Integer> futureTask = new FutureTask<Integer>(cd);
        // 执行线程
        new Thread(futureTask).start();
        // 接收结果(相当于闭锁,等待线程执行完才取结果)
        try {
            Integer sum = futureTask.get();
            System.out.println(sum);
            System.out.println("---------");
        } catch (InterruptedException e) {
            e.printStackTrace();
        } catch (ExecutionException e) {
            e.printStackTrace();
        }
    }
}

class CallableDemo implements Callable<Integer> {

    @Override
    public Integer call() throws Exception {
        int sum = 0;
        for (int i = 0; i < 100000; i++) {
            sum += i;
        }
        return sum;
    }
}
七、Lock锁
1、用于解决多线程安全问题的方式:
- synchronized:隐式锁
- 同步代码块
- 同步方法
- jdk 1.5 后:
- 同步锁 Lock
2、注意:Lock 是一个显示锁,需要通过 lock() 方法上锁,必须通过 unlock() 方法进行释放锁
public class LockTest {
    public static void main(String[] args) {
        Ticket ticket = new Ticket();

        new Thread(ticket, "1号窗口").start();
        new Thread(ticket, "2号窗口").start();
        new Thread(ticket, "3号窗口").start();
    }
}

class Ticket implements Runnable {
    private int tick = 100;
    // 定义锁
    private Lock lock = new ReentrantLock();

    @Override
    public void run() {
        while (true) {
            // 加锁
            lock.lock();
            try {
                if (tick > 0) {
                    try {
                        Thread.sleep(10);
                    } catch (InterruptedException e) {
                        e.printStackTrace();
                    }
                    System.out.println(Thread.currentThread().getName() + "售票完毕,剩余票数:" + (--tick));
                } else {
                    System.out.println(Thread.currentThread().getName() + "售票完毕,下班!!!");
                    break;
                }
            } finally {
                // 释放锁
                lock.unlock();
            }
        }
    }
}
八、生产者—消费者模型
public class TestProductorAndConsumerTest {
    private static int productsNum = 0;

    public static void main(String[] args) {
        Producter producter = new Producter();
        Consumer consumer = new Consumer();
        new Thread(producter).start();
        new Thread(consumer).start();
    }

    //生产者
    public static class Producter implements Runnable {

        @Override
        public void run() {
            while (true) {
                synchronized (TestProductorAndConsumerTest.class) {
                    //1. 若缓存满,等待
                    if (productsNum == 10) {
                        try {
                            System.out.println("缓冲区满,等待。。。");
                            TestProductorAndConsumerTest.class.wait();
                        } catch (InterruptedException e) {
                            e.printStackTrace();
                        }
                    }
                    //2. 缓存不满,放产品
                    productsNum++;
                    System.out.println("生产产品,产品数量:" + productsNum);
                    //3. 唤醒消费者
                    TestProductorAndConsumerTest.class.notify();

                    //减缓速递
                    try {
                        Thread.sleep(200);
                    } catch (InterruptedException e) {
                        e.printStackTrace();
                    }
                }
            }
        }
    }

    //消费者
    public static class Consumer implements Runnable {

        @Override
        public void run() {
            while (true) {
                synchronized (TestProductorAndConsumerTest.class) {
                    //1. 若缓冲区为空,则等待
                    if (productsNum == 0) {
                        try {
                            System.out.println("缓冲区为空,等待。。。。");
                            TestProductorAndConsumerTest.class.wait();
                        } catch (InterruptedException e) {
                            e.printStackTrace();
                        }
                    }
                    //2. 否则,进行消费
                    productsNum--;
                    System.out.println("消费产品,产品数量:" + productsNum);
                    //3. 唤醒生产者
                    TestProductorAndConsumerTest.class.notify();

                    //减缓速度
                    try {
                        Thread.sleep(200);
                    } catch (InterruptedException e) {
                        e.printStackTrace();
                    }
                }
            }
        }
    }
}
九、交替打印ABC
- 编写一个程序,开启 3 个线程,这三个线程的 ID 分别为 A、B、C,每个线程将自己的 ID 在屏幕上打印 10 遍,要求输出的结果必须按顺序显示。
- 如:ABCABCABC…… 依次递归
public class TestABCAlternate {

    public static void main(String[] args) {
        AlternateDemo ad = new AlternateDemo();

        new Thread(new Runnable() {
            @Override
            public void run() {

                for (int i = 1; i <= 20; i++) {
                    ad.loopA(i);
                }

            }
        }, "A").start();

        new Thread(new Runnable() {
            @Override
            public void run() {

                for (int i = 1; i <= 20; i++) {
                    ad.loopB(i);
                }

            }
        }, "B").start();

        new Thread(new Runnable() {
            @Override
            public void run() {

                for (int i = 1; i <= 20; i++) {
                    ad.loopC(i);

                    System.out.println("-----------------------------------");
                }

            }
        }, "C").start();
    }

}

class AlternateDemo {

    private int number = 1; //当前正在执行线程的标记

    private Lock lock = new ReentrantLock();
    private Condition condition1 = lock.newCondition();
    private Condition condition2 = lock.newCondition();
    private Condition condition3 = lock.newCondition();

    /**
     * @param totalLoop : 循环第几轮
     */
    public void loopA(int totalLoop) {
        lock.lock();

        try {
            //1. 判断
            if (number != 1) {
                condition1.await();
            }

            //2. 打印
            for (int i = 1; i <= 1; i++) {
                System.out.println(Thread.currentThread().getName() + "\t" + i + "\t" + totalLoop);
            }

            //3. 唤醒
            number = 2;
            condition2.signal();
        } catch (Exception e) {
            e.printStackTrace();
        } finally {
            lock.unlock();
        }
    }

    public void loopB(int totalLoop) {
        lock.lock();

        try {
            //1. 判断
            if (number != 2) {
                condition2.await();
            }

            //2. 打印
            for (int i = 1; i <= 1; i++) {
                System.out.println(Thread.currentThread().getName() + "\t" + i + "\t" + totalLoop);
            }

            //3. 唤醒
            number = 3;
            condition3.signal();
        } catch (Exception e) {
            e.printStackTrace();
        } finally {
            lock.unlock();
        }
    }

    public void loopC(int totalLoop) {
        lock.lock();

        try {
            //1. 判断
            if (number != 3) {
                condition3.await();
            }

            //2. 打印
            for (int i = 1; i <= 1; i++) {
                System.out.println(Thread.currentThread().getName() + "\t" + i + "\t" + totalLoop);
            }

            //3. 唤醒
            number = 1;
            condition1.signal();
        } catch (Exception e) {
            e.printStackTrace();
        } finally {
            lock.unlock();
        }
    }
十、ReadWriteLock
- 写写/读写 之间需要"互斥"进行
- 读读 不需要"互斥"
public class ReadWriteLockTest {
    public static void main(String[] args) {
        ReadWriteLockDemo rd = new ReadWriteLockDemo();
        // 创建线程进行写
        new Thread(new Runnable() {
            @Override
            public void run() {
                rd.setNumber((int) (Math.random() * 101));
            }
        }).start();
        // 创建线程进行读取
        for (int i = 0; i < 100; i++) {
            new Thread(new Runnable() {
                @Override
                public void run() {
                    rd.getNumber();
                }
            }).start();
        }
    }
}

class ReadWriteLockDemo {
    private int number = 0;
    // 定义读写锁
    private ReadWriteLock lock = new ReentrantReadWriteLock();

    // 获取数据
    public void getNumber() {
        // 读锁加锁
        lock.readLock().lock();
        try {
            System.out.println(Thread.currentThread().getName() + " : " + number);
        } finally {
            // 读锁释放
            lock.readLock().unlock();
        }
    }

    // 写入数据
    public void setNumber(int number) {
        // 写锁加锁
        lock.writeLock().lock();
        try {
            this.number = number;
            System.out.println("Write : " + this.number);
        } finally|{
            // 写锁释放
            lock.writeLock().unlock();
        }
    }
}
十一、线程池
1、线程池:提供了一个线程队列,队列中保存着所有等待状态的线程。避免了创建与销毁额外开销,提高了响应的速度。
2、线程池的体系结构:
java.util.concurrent.Executor : 负责线程的使用与调度的根接口
----|–ExecutorService 子接口: 线程池的主要接口
--------|–ThreadPoolExecutor 线程池的实现类
--------|–ScheduledExecutorService 子接口:负责线程的调度
------------|–ScheduledThreadPoolExecutor :继承 ThreadPoolExecutor, 实现 ScheduledExecutorService
3、工具类 : Executors
- ExecutorService newFixedThreadPool() : 创建固定大小的线程池
- ExecutorService newCachedThreadPool() : 缓存线程池,线程池的数量不固定,可以根据需求自动的更改数量。
- ExecutorService newSingleThreadExecutor() : 创建单个线程池。线程池中只有一个线程
- ScheduledExecutorService newScheduledThreadPool() : 创建固定大小的线程,可以延迟或定时的执行任务。
(1)不含返回值
/**
 * 不含返回值
 */
public class ThreadPoolTest01 {
    public static void main(String[] args) {
        // 1.创建线程池
        ExecutorService pool = Executors.newFixedThreadPool(5);
        // 2.为线程池中的线程分配任务
        ThreadPoolDemo tp = new ThreadPoolDemo();
        for (int i = 0; i < 5; i++) {
            pool.submit(tp);
        }
        // 3.关闭线程
        pool.shutdown();
    }
}

class ThreadPoolDemo implements Runnable {
    private int i = 0;
    private ReentrantLock lock = new ReentrantLock();

    @Override
    public void run() {
        while (i < 100) {
            lock.lock();
            try {
                if (i >= 100) break;
                System.out.println(Thread.currentThread().getName() + " : " + i++);
            } finally {
                lock.unlock();
            }
        }
    }
}
(2)含有返回值
/**
 * 含有返回值
 */
public class ThreadPoolTest02 {
    public static void main(String[] args) throws ExecutionException, InterruptedException {
        // 1.创建线程池
        ExecutorService pool = Executors.newFixedThreadPool(5);
        // 创建一个List接收结果
        ArrayList<Future<Integer>> list = new ArrayList<>();
        // 2.给线程提交任务
        for (int i = 0; i < 10; i++) {
            Future<Integer> future = pool.submit(new Callable<Integer>() {
                @Override
                public Integer call() throws Exception {
                    int i = 0;
                    for (int j = 0; j < 101; j++) {
                        i += j;
                    }
                    return i;
                }
            });
            list.add(future);
        }
        // 循环打印结果
        for (Future<Integer> future : list) {
            System.out.println(future.get());
        }
        // 3.关闭线程池
        pool.shutdown();
    }
}
(3)延迟执行
public class ScheduledThreadPoolTest {
    public static void main(String[] args) throws ExecutionException, InterruptedException {
        // 1.创建线程池
        ScheduledExecutorService pool = Executors.newScheduledThreadPool(5);
        // 2.提交任务
        for (int i = 0; i < 10; i++) {
            ScheduledFuture<Integer> future = pool.schedule(new Callable<Integer>() {
                @Override
                public Integer call() throws Exception {
                    int i1 = new Random().nextInt(100);
                    System.out.println(Thread.currentThread().getName() + " : ");
                    return i1;
                }
            }, 1, TimeUnit.SECONDS);    // 设置延迟的单位以及数值
            System.out.println(future.get());
        }
        // 3.关闭线程池
        pool.shutdown();
    }
}
十二、ForkJoinPool
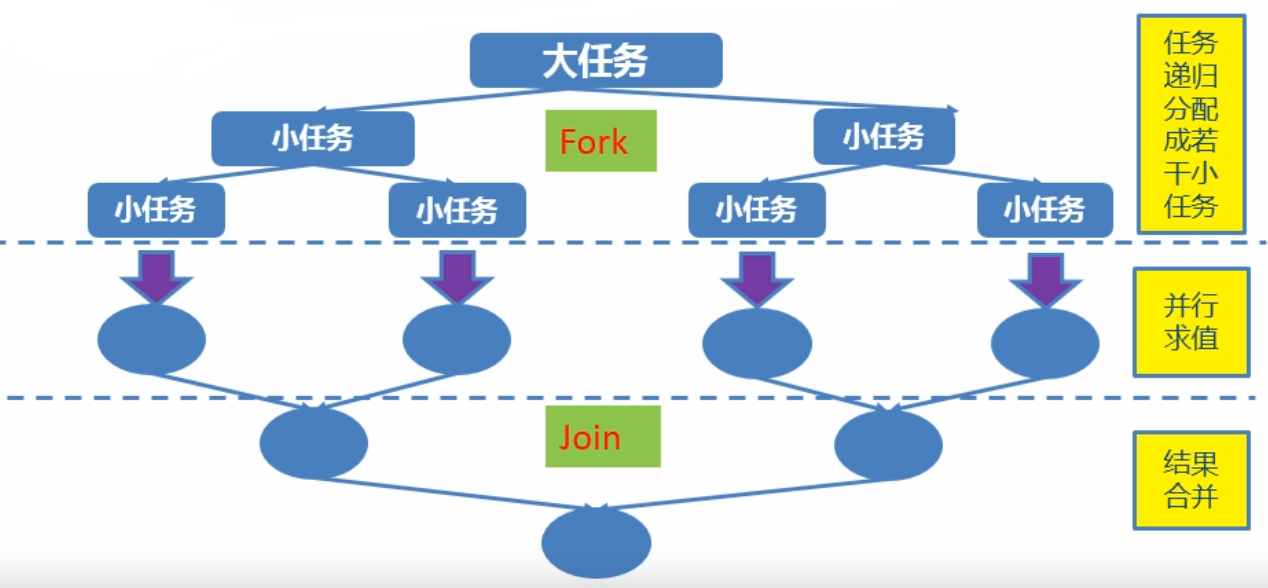
- Fork/Join 框架
在必要的情况下,将一个大任务拆分(fork)成若干个小任务,再将一个个的小任务运算的结果进行汇总(join)
- 采用“工作窃取”模式
当执行新任务时,可以将其拆分成更小的任务执行,并将小任务加到线程队列中,然后再从随机线程的队列中偷一个放在自己的队列中
- 相对于一般的线程池实现,fork/join 框架的优势体现在对其中包含的任务的处理方式上。
- 在一般的线程池中,如果一个线程正在执行的任务由于某些原因无法继续执行,那么该线程会处于等待状态。
- 在fork/join框架中,如果某个子问题由于等待另外一个子问题的完成而无法继续运行,那么处理该子问题的线程会主动寻找其它尚未运行的子问题来执行。这种方式减少了线程的等待时间,提高了性能。
- 代码:从一加到一亿
public class ForkJoinPoolTest {
    public static void main(String[] args) {
        // 创建forkJoin
        ForkJoinPool forkJoinPool = new ForkJoinPool();
        // 创建任务
        ForkJoinTask<Long> task = new ForkJoinSumCalculate(0L, 100000000L);
        // 提交任务
        Long sum = forkJoinPool.invoke(task);
        // 输出
        System.out.println(sum);
    }
}

class ForkJoinSumCalculate extends RecursiveTask<Long> {
    private static final long THURSHOLD = 10000L; // 临界值
    private long start;
    private long end;

    public ForkJoinSumCalculate(long start, long end) {
        this.start = start;
        this.end = end;
    }

    @Override
    protected Long compute() {
        // 临界值
        long length = start - end;
        // 不拆
        if (length <= THURSHOLD) {
            long sum = 0L;
            for (long i = start; i < end; i++) {
                sum += i;
            }
            return sum;
        } else {
            // 拆
            long middle = (start + end) / 2;
            ForkJoinSumCalculate left = new ForkJoinSumCalculate(start, middle);
            left.fork();

            ForkJoinSumCalculate right = new ForkJoinSumCalculate(middle, end);
            right.fork();
            // 合并返回
            return left.join() + right.join();
        }
    }
}


 5169
5169

 被折叠的 条评论
为什么被折叠?
被折叠的 条评论
为什么被折叠?
 到【灌水乐园】发言


