


- mac 安装brew (建议使用VPN,网速更快)
/bin/bash -c “$(curl -fsSL https://raw.githubusercontent.com/Homebrew/install/master/install.sh)”
2.使用brew安装npm
brew install node
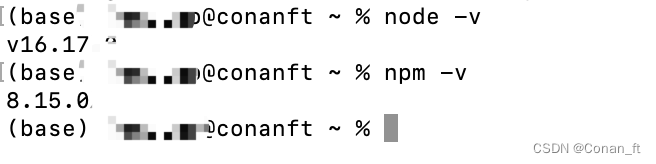
确认node及npm版本
3. 查询并配置npm 源
npm config get registry
###临时源
npm --registry https://registry.npm.taobao.org install cluster
4.安装 vue
npm install vue -g
npm install webpack -g
npm install vue-cli -g
- 确认vue版本
npm info vue

- 使用vscode 创建vue项目(yy项目)
vue create yy
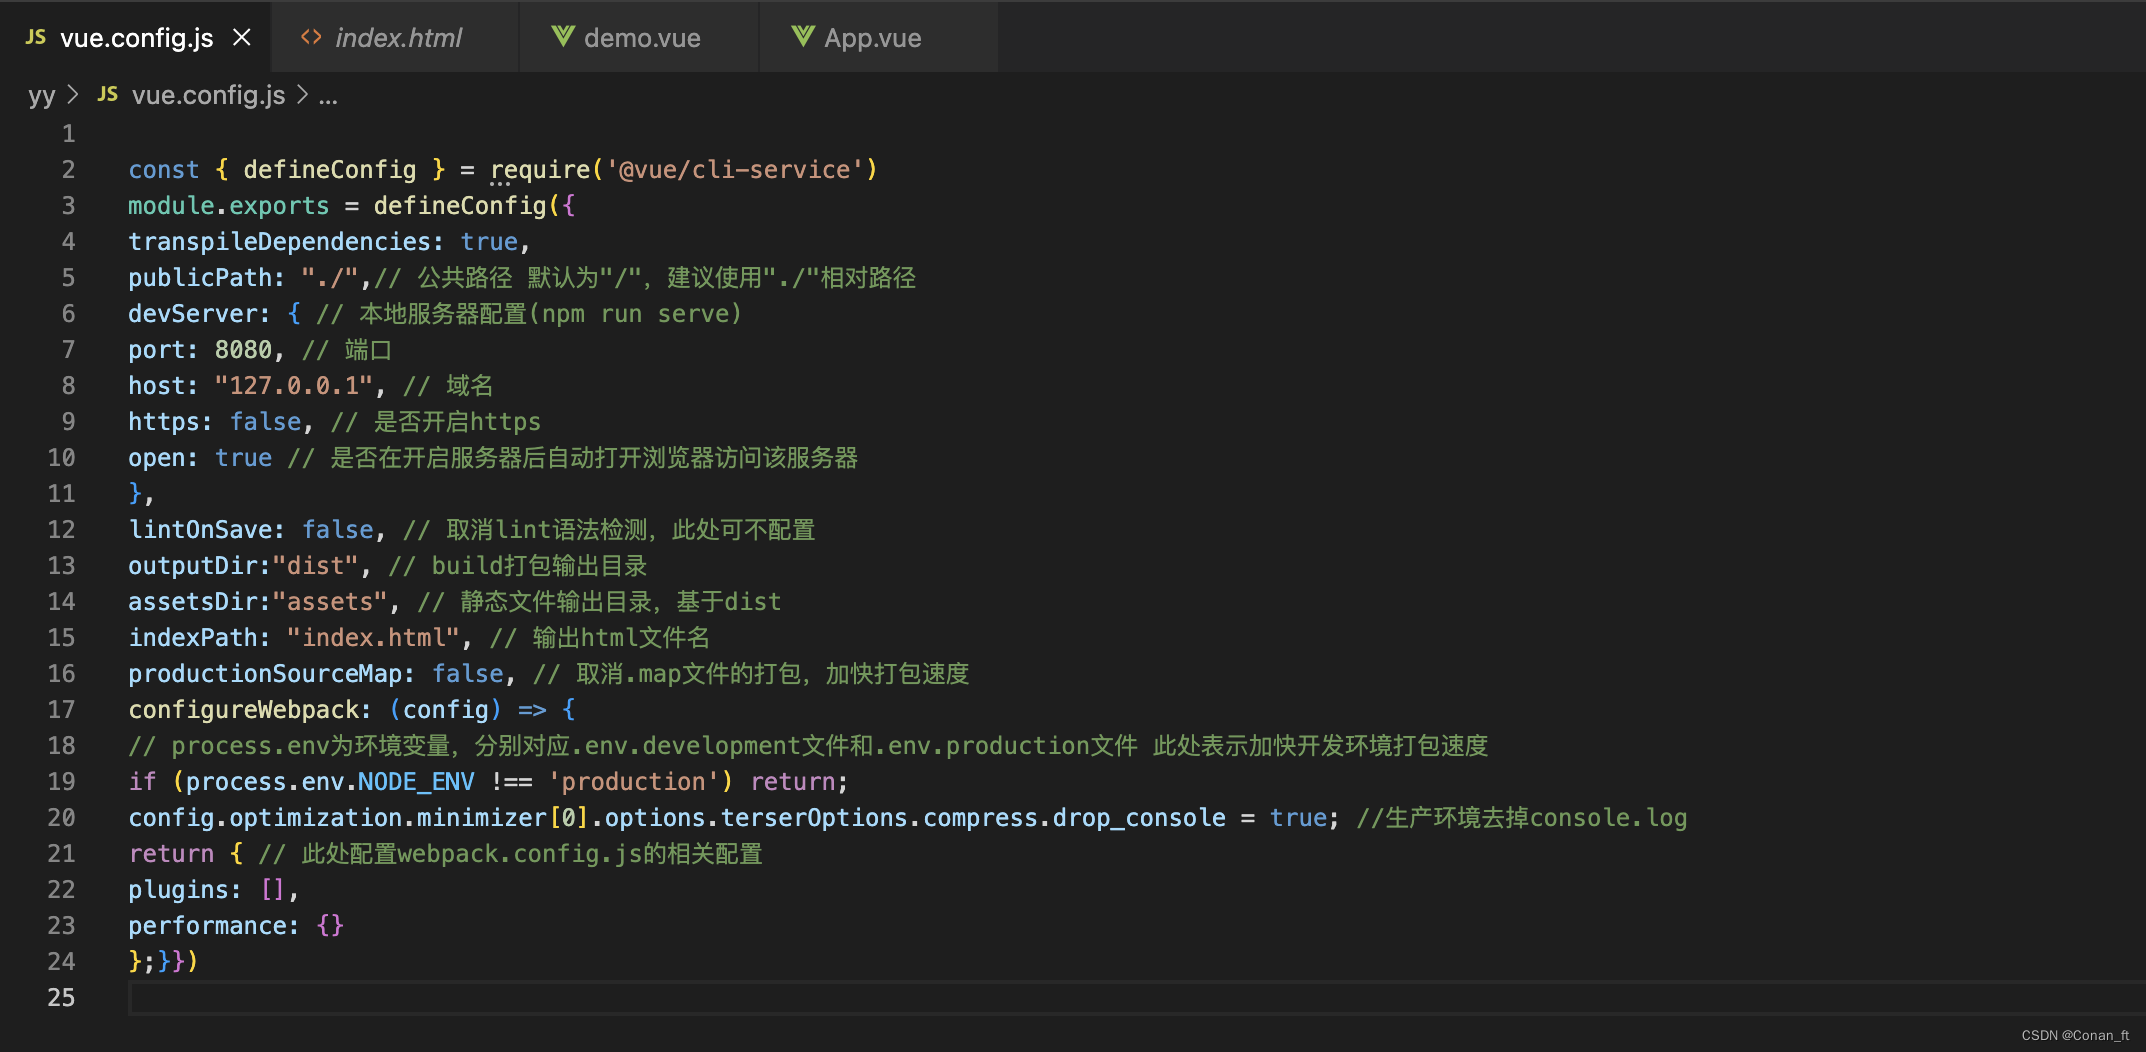
7.配置 vue.config.js
###################
const { defineConfig } = require(‘@vue/cli-service’)
module.exports = defineConfig({
transpileDependencies: true,
publicPath: “./”,// 公共路径 默认为"/“,建议使用”./"相对路径
devServer: { // 本地服务器配置(npm run serve)
port: 8080, // 端口
host: “127.0.0.1”, // 域名
https: false, // 是否开启https
open: true // 是否在开启服务器后自动打开浏览器访问该服务器
},
lintOnSave: false, // 取消lint语法检测,此处可不配置
outputDir:“dist”, // build打包输出目录
assetsDir:“assets”, // 静态文件输出目录,基于dist
indexPath: “index.html”, // 输出html文件名
productionSourceMap: false, // 取消.map文件的打包,加快打包速度
configureWebpack: (config) => {
// process.env为环境变量,分别对应.env.development文件和.env.production文件 此处表示加快开发环境打包速度
if (process.env.NODE_ENV !== ‘production’) return;
config.optimization.minimizer[0].options.terserOptions.compress.drop_console = true; //生产环境去掉console.log
return { // 此处配置webpack.config.js的相关配置
plugins: [],
performance: {}
};}})
##################
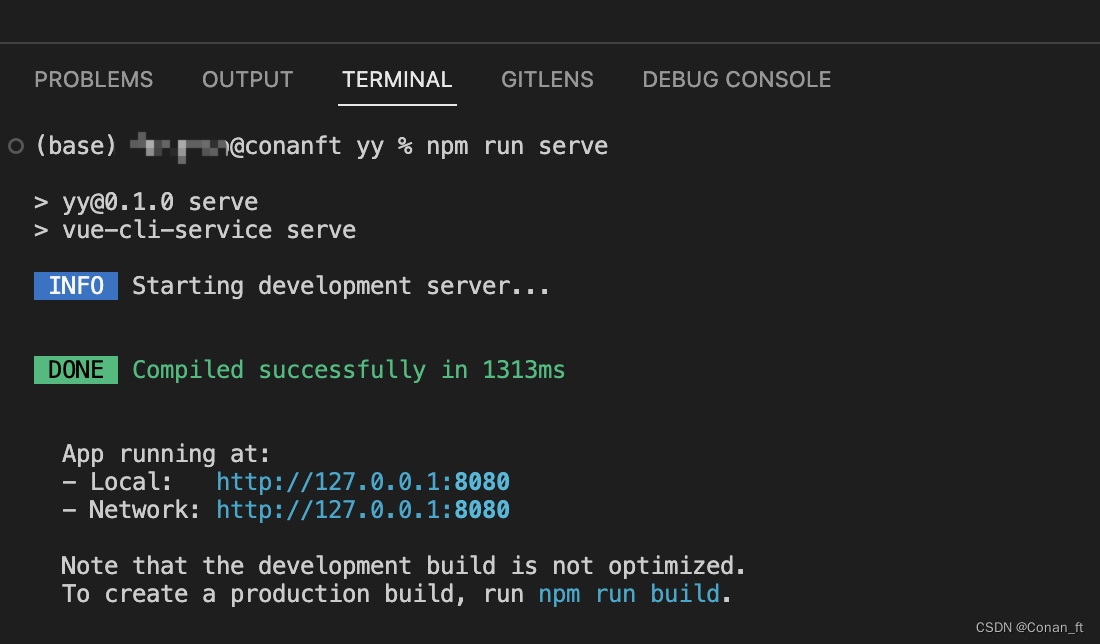
8.启动 yy项目
cd yy
npm run serve


 328
328


 被折叠的 条评论
为什么被折叠?
被折叠的 条评论
为什么被折叠?
 到【灌水乐园】发言


