


学习了上一篇博客关于QLineEdit的一些重要的成员函数和信号的用法之后,我们写一个小程序来熟练下这些函数.
这里是程序完成后的图片.

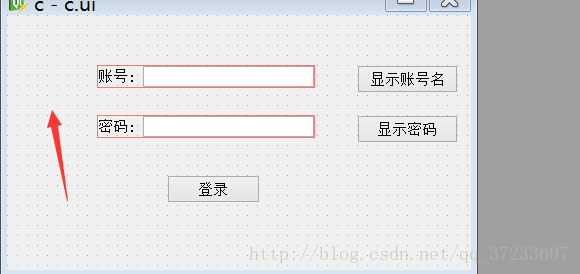
首先,我们现在ui设计师里拖拽出以下的布局:
注意箭头处还有个QLabel部件.
以下是”c.cpp”下的代码:
#include "c.h"

c::c(QWidget *parent)
: QWidget(parent)
{
    ui.setupUi(this);
    //设置标题为"QLineEdit"
    this->setWindowTitle("QQ");
    //设置图标.
    this->setWindowIcon(QIcon("pixmap.jpg"));
    //设置为伙伴.
    ui.accountLabel->setBuddy(ui.accountLineEdit);
    ui.passwordLabel->setBuddy(ui.passwordLineEdit);
    //设置头像.
    ui.pixmapLabel->setPixmap(QPixmap("pixmap.jpg"));
    //让label完整的放下图片.根据比例缩减.
    ui.pixmapLabel->setScaledContents(true);
    //设置密码输入框的显示模式为:密码显示模式.
    ui.passwordLineEdit->setEchoMode(QLineEdit::Password);
    //设置激活两个输入框的清空按钮.
    ui.accountLineEdit->setClearButtonEnabled(true);
    ui.passwordLineEdit->setClearButtonEnabled(true);
    //设置两个输入框的最大长度
    ui.accountLineEdit->setMaxLength(10);
    ui.passwordLineEdit->setMaxLength(10);
    //设置账号输入框允许拖拽.
    ui.accountLineEdit->setDragEnabled(true);
    //设置密码输入框不接受拖拽的文本.
    ui.passwordLineEdit->setAcceptDrops(false);

    //设置两个输入框的占位符.
    ui.accountLineEdit->setPlaceholderText(QString::fromLocal8Bit("必须为纯数字"));
    ui.passwordLineEdit->setPlaceholderText(QString::fromLocal8Bit("两位字母+纯数字"));

    //设置账号输入框的整数验证器,并且设定输入的范围.
    QIntValidator *account = new QIntValidator;
    account->setBottom(0);
    ui.accountLineEdit->setValidator(account);

    //设置密码输入框的验证器,用了正则表达式来规定:前面1-2个必须是字母,后面8-9个必须是0-9内的数字.
    QRegExp password("[A-Za-z]{2}[0-9]{8,9}");
    ui.passwordLineEdit->setValidator(new QRegExpValidator(password, this));

    //设置密码输入框中,按鼠标右键无菜单显示.和QQ一样.有心的小伙伴可以去试一下.
    ui.passwordLineEdit->setContextMenuPolicy(Qt::NoContextMenu);
    //但是对于Ctrl+V粘贴的快捷操作还没有屏蔽.有兴趣的可以去自己试试.这里不展开了.

    //连接信号与槽.
    connect(ui.showAccountButton, SIGNAL(clicked()), this, SLOT(showAccountNameSlot()));
    connect(ui.showPasswordButton, SIGNAL(clicked()), this, SLOT(showPasswordSlot()));
    connect(ui.pushButton, SIGNAL(clicked()), this, SLOT(showEntryDialogSlot()));
    connect(ui.passwordLineEdit, SIGNAL(returnPressed()), ui.pushButton, SIGNAL(clicked()));
}

c::~c()
{

}
void c::showAccountNameSlot()
{
    QMessageBox::information(this, QString::fromLocal8Bit("账号:"), ui.accountLineEdit->text());
}
void c::showPasswordSlot()
{
    //注意text()返回的是本身的文本,而displayText()返回的是显示的文本.
    QMessageBox::information(this, QString::fromLocal8Bit("密码:"), ui.passwordLineEdit->text());
}
void c::showEntryDialogSlot()
{
    //这里只是为了演示QLineEdit的用法,就没有实现注册,登录等功能.所以这是简单的登陆下.
    if ((ui.accountLineEdit->text() == "123456") && (ui.passwordLineEdit->text() == "qw123456"))
    {
        QMessageBox::information(this, QString::fromLocal8Bit("登录"), QString::fromLocal8Bit("登录成功"));
    }
    else
    {
        QMessageBox::warning(this, QString::fromLocal8Bit("登录"), QString::fromLocal8Bit("登录失败"));
    }
}
以下是”c.h”内的代码:
#ifndef C_H
#define C_H

#include <QtWidgets/QWidget>
#include "ui_c.h"
#include <QMessageBox>
#include <QLineEdit>
#include <QLabel>
#include <QPushButton>
#include <QValidator>
#include <QRegExp>
#include <QMessageBox>
#include <QPixmap>

class c : public QWidget
{
    Q_OBJECT

public:
    c(QWidget *parent = 0);
    ~c();
private slots:
    void showAccountNameSlot();
    void showPasswordSlot();
    void showEntryDialogSlot();

private:
    Ui::cClass ui;
};

#endif // C_H
最后是”main.cpp”内的代码:
#include "c.h"
#include <QtWidgets/QApplication>

int main(int argc, char *argv[])
{
    QApplication a(argc, argv);
    c w;
    w.show();
    return a.exec();
}


 2140
2140

 被折叠的 条评论
为什么被折叠?
被折叠的 条评论
为什么被折叠?
 到【灌水乐园】发言


