


重要函数:
1.bool isNull(); //判断图片是否为空白.
2.bool save(QString); //图片保存到参数的路径.
3.QPixmap grabWidget(WId,x=0,y=0,w=-1,h=-1); //截取图片.
4.QPixmap scaled(QSize); //把图片按比例缩放.图片本身并没有缩放,缩放后的图片作为返回值了.
下面是一个简单的截图器的示例代码:
首先从Qt设计师拖拽出如下界面,并且进行布局.
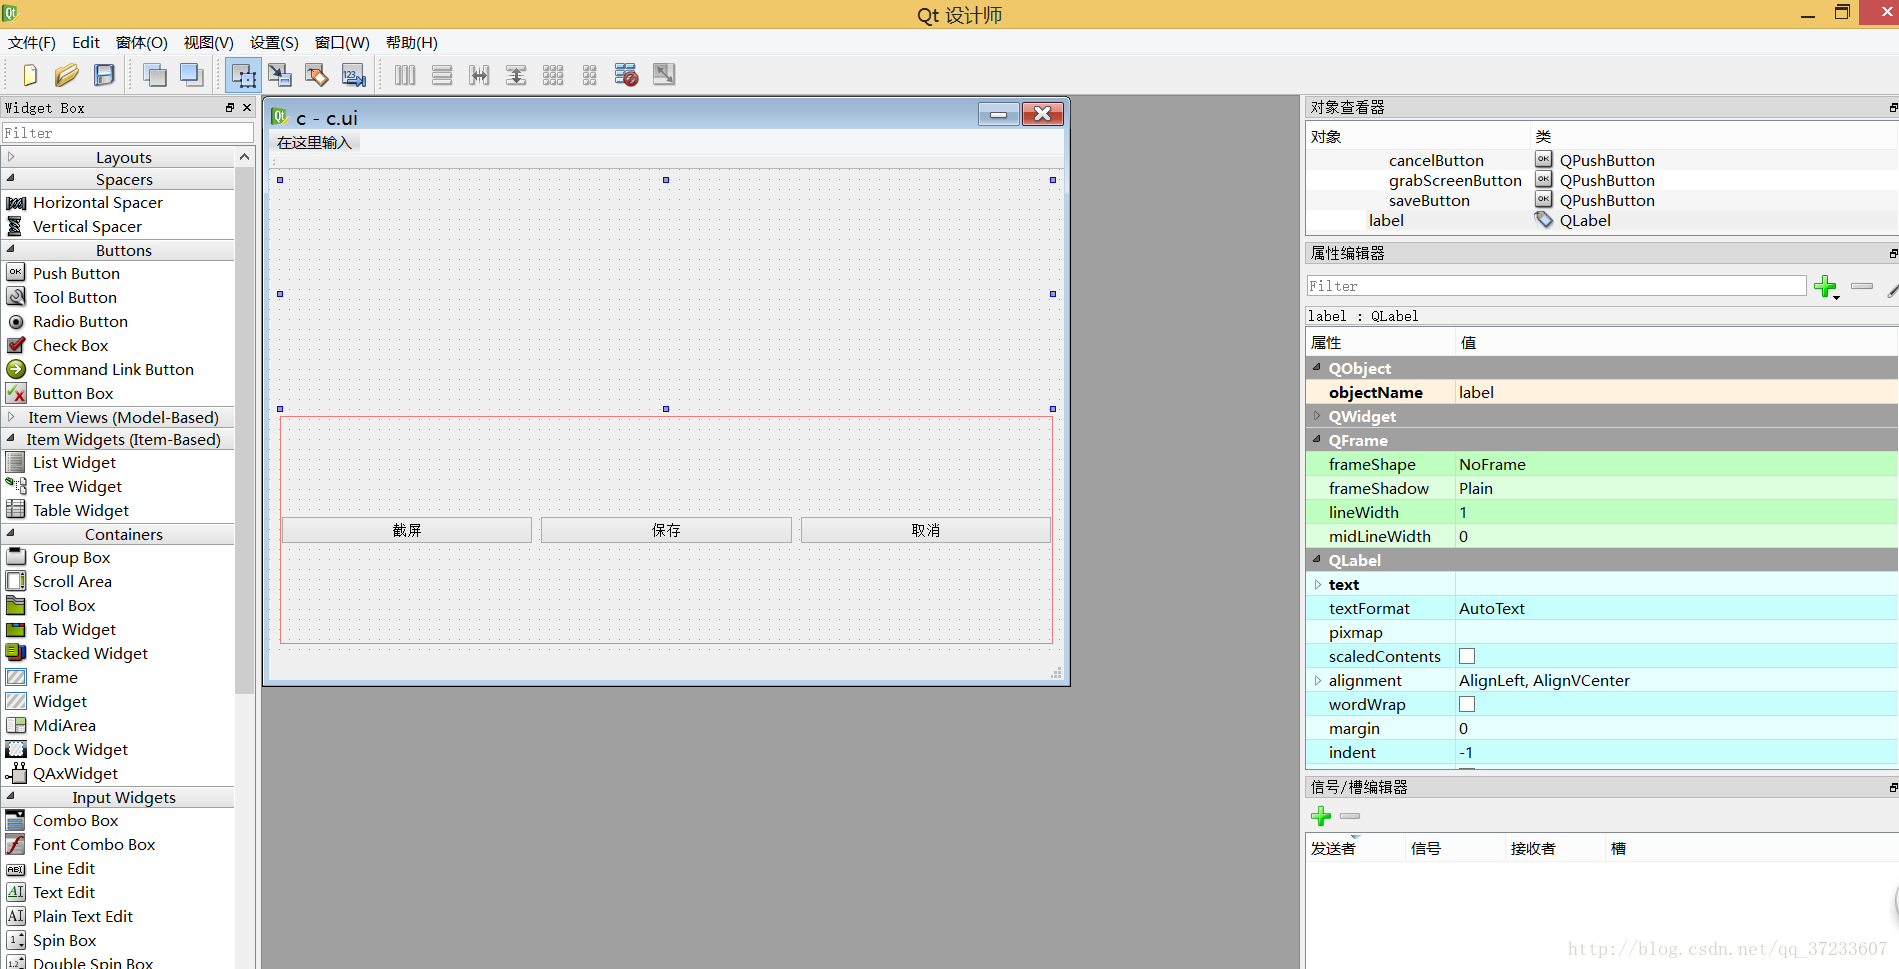
以下是”c.cpp下的代码:”
#include "c.h"

c::c(QWidget *parent)
    : QMainWindow(parent)
{
    ui.setupUi(this);

    //设置按钮的图标.可不设置.只是为了好看.
    ui.grabScreenButton->setIcon(QIcon("Icons/cut.png"));
    ui.saveButton->setIcon(QIcon("Icons/save.png"));

    //设置按钮的快捷键.
    ui.grabScreenButton->setShortcut(tr("Ctrl+G"));
    ui.saveButton->setShortcut(tr("Ctrl+S"));
    ui.cancelButton->setShortcut(tr("Ctrl+Q"));

    //连接信号与槽.
    connect(ui.grabScreenButton, SIGNAL(clicked()), this, SLOT(cutScreenSlot()));
    connect(ui.saveButton, SIGNAL(clicked()), this, SLOT(savePictureSlot()));
    connect(ui.cancelButton, SIGNAL(clicked()), this, SLOT(closeSlot()));
}

c::~c()
{

}
//保存图片的槽.
void c::savePictureSlot()
{
    if (this->isSaved)
        QMessageBox::information(this, "warning!", QString::fromLocal8Bit("没有可以被保存的图片!"));
    else
    {
        this->savePicture();
    }
}
void c::cutScreenSlot()
{
    //先隐藏窗口.
    this->hide();
    //延迟3秒钟.
    Sleep(3000);

    //截取当前屏幕的图片.
    pixmap = QPixmap::grabWindow(QApplication::desktop()->winId());
    //让label框自动填满内容.
    ui.label->setScaledContents(true);
    //让label框应用图片,并且自动缩放像素.
    ui.label->setPixmap(pixmap.scaled(ui.label->size()));
    this->isSaved = false;
    //显示窗口.
    this->show();
}
void c::closeSlot()
{
    if (this->isSaved)
    {
        this->close();
    }
    else
    {
        //设置退出提示框.
        QMessageBox temp(QMessageBox::NoIcon, QString::fromLocal8Bit("是否要退出"), QString::fromLocal8Bit("你的图片尚未保存,是否要保存?"));
        temp.setStandardButtons(QMessageBox::Yes | QMessageBox::No);
        temp.setButtonText(QMessageBox::Yes, QString::fromLocal8Bit("保存"));
        temp.setButtonText(QMessageBox::No, QString::fromLocal8Bit("退出"));
        int status = temp.exec();
        if (status == QMessageBox::Yes)
        {
            this->savePicture();
        }
        else if (status == QMessageBox::No)
        {
            this->close();
        }
    }
}
void c::closeEvent(QCloseEvent*event)
{
    closeSlot();
}

void c::savePicture()
{
    //调用文件的类.设置了标题和路径.
    QFileDialog temp(this, "Save Picture", "c:/users/administrator/desktop");
    //修改模式为保存模式.
    temp.setAcceptMode(QFileDialog::AcceptSave);
    //自动添加后缀为"jpg".
    temp.setDefaultSuffix("jpg");
    int status = temp.exec();
    if (status == QDialog::Accepted)
    {
        QString path = temp.selectedFiles()[0];
        //图片保存到这个路径里去.
        bool ok = pixmap.save(path);
        if (ok)
            QMessageBox::information(this, QString::fromLocal8Bit("保存成功"), QString::fromLocal8Bit("图片已成功保存!"));
        this->isSaved = true;
    }
}
以下是”c.h下的代码:”
#ifndef C_H
#define C_H

#include <QtWidgets/QMainWindow>
#include "ui_c.h"
#include <QDesktopWidget>
#include <QPixmap>
#include <QLabel>
#include <QPushButton>
#include <QIcon>
#include <windows.h>
#include <QMessageBox>
#include <QFileDialog>
#include <QCloseEvent>

class c : public QMainWindow
{
    Q_OBJECT

public:
    c(QWidget *parent = 0);
    ~c();
    void savePicture();
private slots:
    void cutScreenSlot();
    void savePictureSlot();
    void closeSlot();
protected:
    void closeEvent(QCloseEvent*event);
private:
    Ui::cClass ui;
    QPixmap pixmap;
    bool isSaved = true;
};

#endif // C_H
最后是”main.cpp下的代码:”
#include "c.h"
#include <QtWidgets/QApplication>

int main(int argc, char *argv[])
{
    QApplication a(argc, argv);
    c w;
    w.show();
    return a.exec();
}


 5277
5277

 被折叠的 条评论
为什么被折叠?
被折叠的 条评论
为什么被折叠?
 到【灌水乐园】发言


