


一、创建项目
用eclipse或myeclipse创建项目MySpringConfig自动生成web.xml
<?xml version="1.0" encoding="UTF-8"?>
<web-app xmlns:xsi="http://www.w3.org/2001/XMLSchema-instance"
	xmlns="http://java.sun.com/xml/ns/javaee"
	xsi:schemaLocation="http://java.sun.com/xml/ns/javaee http://java.sun.com/xml/ns/javaee/web-app_3_0.xsd"
	id="WebApp_ID"
	version="3.0">
  <display-name>MySpringConfig</display-name>
  <welcome-file-list>
    <welcome-file>index.html</welcome-file>
    <welcome-file>index.htm</welcome-file>
    <welcome-file>index.jsp</welcome-file>
    <welcome-file>default.html</welcome-file>
    <welcome-file>default.htm</welcome-file>
    <welcome-file>default.jsp</welcome-file>
  </welcome-file-list>
</web-app>
二、导入Jar包
先导入springMVC有关的Jar包,Jar包如下所示:
- Spring-beans-XXXX.RELEASE.jar(xxxx为版本号)
- Spring-aop-XXXX.RELEASE.jar
- Spring-context-XXXX.RELEASE.jar
- Spring-core-XXXX.RELEASE.jar
- Spring-expression-XXXX.RELEASE.jar
- Spring-web-XXX.RELEASE.jar
- Spring-webmvc-XXXX.RELEASE.jar
- commons-logging-XXXX.jar(必须要这个jar包)

三、配置springMVC
在web,xml进行springMVC的配置
   <!-- springMVC的配置 -->
   <servlet>
    <servlet-name>springMVC</servlet-name>
    <servlet-class>org.springframework.web.servlet.DispatcherServlet</servlet-class>
    <init-param>
      <param-name>contextConfigLocation</param-name>
      <param-value>classpath:config/spring-mvc.xml</param-value>
    </init-param>
    <load-on-startup>1</load-on-startup>
  </servlet>
  <servlet-mapping>
    <servlet-name>springMVC</servlet-name>
    <url-pattern>/</url-pattern>
  </servlet-mapping>
在src下创建config包和spring-mvc.xml文件

在spring-mvc.xml里面进行配置
<?xml version="1.0" encoding="UTF-8"?>
<beans xmlns="http://www.springframework.org/schema/beans"
	xmlns:xsi="http://www.w3.org/2001/XMLSchema-instance"
	xmlns:context="http://www.springframework.org/schema/context"
	xmlns:mvc="http://www.springframework.org/schema/mvc"
	xmlns:aop="http://www.springframework.org/schema/aop"
	xsi:schemaLocation="
		http://www.springframework.org/schema/beans
		http://www.springframework.org/schema/beans/spring-beans-3.2.xsd
		http://www.springframework.org/schema/context
		http://www.springframework.org/schema/context/spring-context-3.2.xsd
		http://www.springframework.org/schema/mvc
	    http://www.springframework.org/schema/mvc/spring-mvc-3.2.xsd">

	<!-- 注解扫描包 -->
	<context:component-scan base-package="com.my" />

	<!-- 打开Spring的Annotation的支持 -->
	<context:annotation-config />

	<!-- 定义跳转的文件的前后缀 ,视图模式配置-->
    <bean id="viewResolver"
		class="org.springframework.web.servlet.view.InternalResourceViewResolver">
		<!-- 自动给后面action的方法return的字符串加上前缀和后缀,变成一个可用的url地址 -->
		<property name="prefix" value="/my/" />
		<property name="suffix" value=".jsp" />
	</bean>

</beans>
四、测试执行
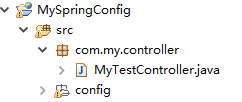
在src下建立一个com.my.controller包和MyTestController类
在MyTestController里面写测试代码
package com.my.controller;

import org.springframework.stereotype.Controller;
import org.springframework.web.bind.annotation.RequestMapping;

@Controller
@RequestMapping("MyTestController")
public class MyTestController {

	@RequestMapping("mytest")
	public void mytest(){
		System.out.println("这是MyTestController的mytest()");
	}
}
将项目保存后部署到tomcat上执行,在浏览器中输入测试链接
http://localhost:8080/MySpringConfig/MyTestController/mytest
可以看到,控制台成功打印出输出样例

到这里,简单的springMVC的框架就搭建成功了,后续我将加入更多的功能,搭建出一个完整的SSM框架


 1424
1424


 被折叠的 条评论
为什么被折叠?
被折叠的 条评论
为什么被折叠?
 到【灌水乐园】发言


