


#前言
在任何一个系统中验证码都是很重要的一个环节,kaptcha是一个验证码生成工具,丰富的个性化设置。下面使用springboot集成kaptcha完成验证码功能。
# pom依赖
       <dependency>
            <groupId>com.github.penggle</groupId>
            <artifactId>kaptcha</artifactId>
            <version>2.3.2</version>
        </dependency>
#配置kaptcha的配置类
package com.springboot3.epp.config;

import com.google.code.kaptcha.impl.DefaultKaptcha;
import com.google.code.kaptcha.util.Config;
import org.springframework.context.annotation.Bean;
import org.springframework.context.annotation.Configuration;

import java.util.Properties;

/**
 * @author
 * @date 2019/12/21
 **/
@Configuration
public class KaptchaConfig {
    @Bean
    public DefaultKaptcha getDefaultKaptcha() {
        com.google.code.kaptcha.impl.DefaultKaptcha defaultKaptcha = new com.google.code.kaptcha.impl.DefaultKaptcha();
        Properties properties = new Properties();
        // 图片边框
        properties.setProperty("kaptcha.border", "no");
        // 边框颜色
        properties.setProperty("kaptcha.border.color", "105,179,90");
        // 字体颜色
        properties.setProperty("kaptcha.textproducer.font.color", "blue");
        // 图片宽
        properties.setProperty("kaptcha.image.width", "120");
        // 图片高
        properties.setProperty("kaptcha.image.height", "45");
        // 字体大小
        properties.setProperty("kaptcha.textproducer.font.size", "32");
        // session key
        properties.setProperty("kaptcha.session.key", "code");
        // 验证码长度
        properties.setProperty("kaptcha.textproducer.char.length", "4");
        // 字体
        properties.setProperty("kaptcha.textproducer.font.names", "宋体,楷体,微软雅黑");

        properties.setProperty("kaptcha.noise.color", "35,37,38");

        Config config = new Config(properties);
        defaultKaptcha.setConfig(config);

        return defaultKaptcha;
    }
}
注意:有的包别导入错了
#生成验证码图片Controller层
package com.springboot3.epp.controller;

import com.baomidou.mybatisplus.core.toolkit.StringUtils;
import com.google.code.kaptcha.impl.DefaultKaptcha;
import org.springframework.beans.factory.annotation.Autowired;
import org.springframework.web.bind.annotation.*;

import javax.imageio.ImageIO;
import javax.servlet.ServletOutputStream;
import javax.servlet.http.HttpServletRequest;
import javax.servlet.http.HttpServletResponse;
import javax.xml.transform.Result;
import java.awt.image.BufferedImage;
import java.io.ByteArrayOutputStream;

/**
 * 图片验证码
 * @author
 * @date 2019/12/21
 **/
@RestController
@RequestMapping("/kaptcha")
public class KaptchaController {

    @Autowired
    DefaultKaptcha defaultKaptcha;

    /**
     * 生成验证码
     * @param request
     * @param response
     * @throws Exception
     */
    @GetMapping("/defaultKaptcha")
    public void defaultKaptcha(HttpServletRequest request, HttpServletResponse response)
            throws Exception {
        byte[] captchaChallengeAsJpeg = null;
        ByteArrayOutputStream jpegOutputStream = new ByteArrayOutputStream();
        try {
            // 生产验证码字符串并保存到session中
            String createText = defaultKaptcha.createText();
            request.getSession().setAttribute("verificationCode", createText);
            // 使用生成的验证码字符串返回一个BufferedImage对象并转为byte写入到byte数组中
            BufferedImage challenge = defaultKaptcha.createImage(createText);
            ImageIO.write(challenge, "jpg", jpegOutputStream);
        } catch (IllegalArgumentException e) {
            response.sendError(HttpServletResponse.SC_NOT_FOUND);
            return;
        }

        // 输出流输出类型为图片图片字节数组
        captchaChallengeAsJpeg = jpegOutputStream.toByteArray();
        response.setHeader("Cache-Control", "no-store");
        response.setHeader("Pragma", "no-cache");
        response.setDateHeader("Expires", 0);
        response.setContentType("image/jpeg");
        ServletOutputStream responseOutputStream = response.getOutputStream();
        responseOutputStream.write(captchaChallengeAsJpeg);
        responseOutputStream.flush();
        responseOutputStream.close();
    }

}
**注意:**配置拦截器或安全框架的时候别把验证码请求路径给拦截了
登陆的时候从session中获取验证码验证一下就好,这里就不给出代码了
#前端显示验证码
 <div class="col-xs-5">
            <img src="/kaptcha/defaultKaptcha" class="pull-right" id="captcha" style="cursor: pointer;" onclick="this.src=this.src+'?d='+Math.random();" title="点击刷新" alt="captcha">
          </div>
src="/kaptcha/defaultKaptcha":这是我图片的请求接口,如果是前后端分离的项目,带上域名即可
οnclick=“this.src=this.src+’?d=’+Math.random();”:点击刷新,一个src它就是一次请求
#效果
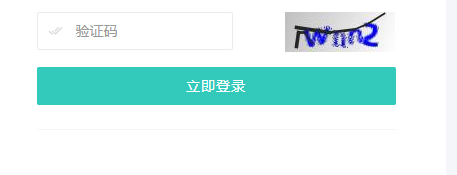
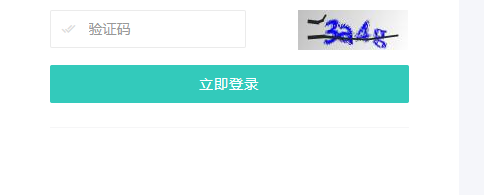


 829
829


 被折叠的 条评论
为什么被折叠?
被折叠的 条评论
为什么被折叠?
 到【灌水乐园】发言


