


阅读本文前,请看下我写的Nginx安装部署(三步走)
了解下目录位置,1分钟就能看懂看完
一:开启SSL模式
1、查看目前nginx是否开启SSL
/usr/local/nginx/sbin/nginx -V

configure arguments:后面没有配置参数,未开启ssl
2、到nginx源码包配置
cd /usr/local/src/nginx-1.10.2/
./configure --prefix=/usr/local/nginx --with-http_stub_status_module --with-http_ssl_module
发现报错如下图
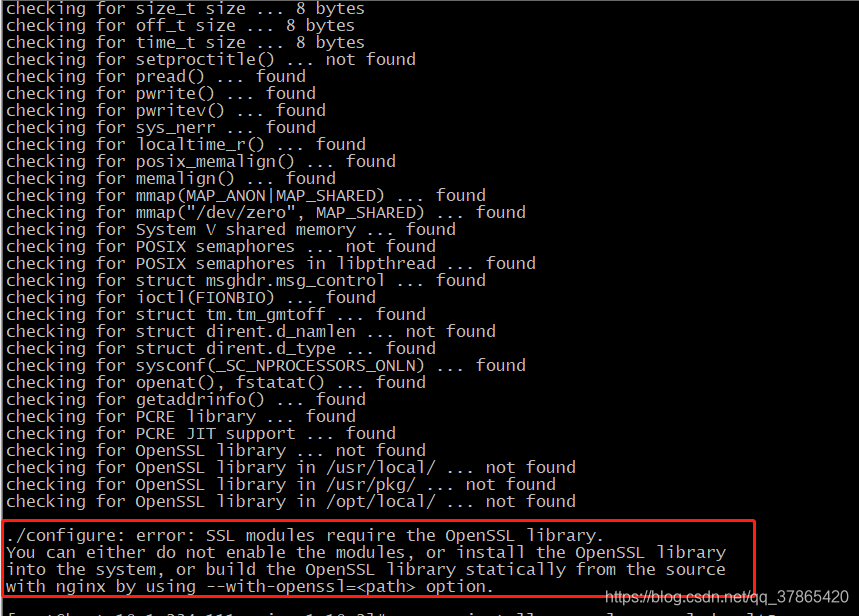
报错内容
./configure: error: SSL modules require the OpenSSL library.
You can either do not enable the modules, or install the OpenSSL library
into the system, or build the OpenSSL library statically from the source
with nginx by using --with-openssl=<path> option.
由此可知,该主机未安装OpenSSL
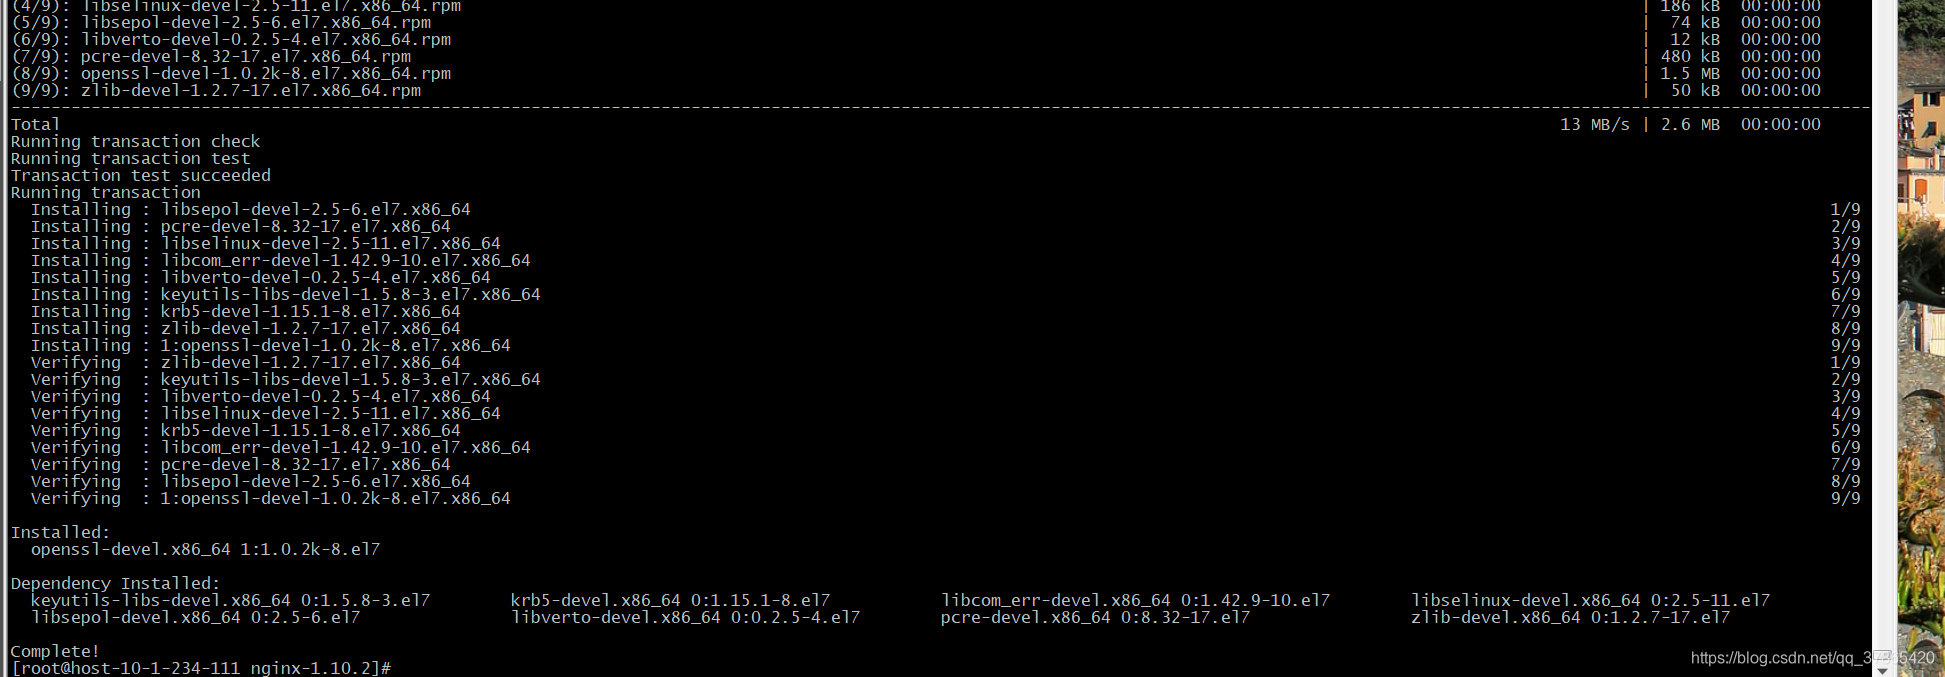
安装OpenSSL
yum -y install openssl openssl-devel
再次执行
./configure --prefix=/usr/local/nginx --with-http_stub_status_module --with-http_ssl_module
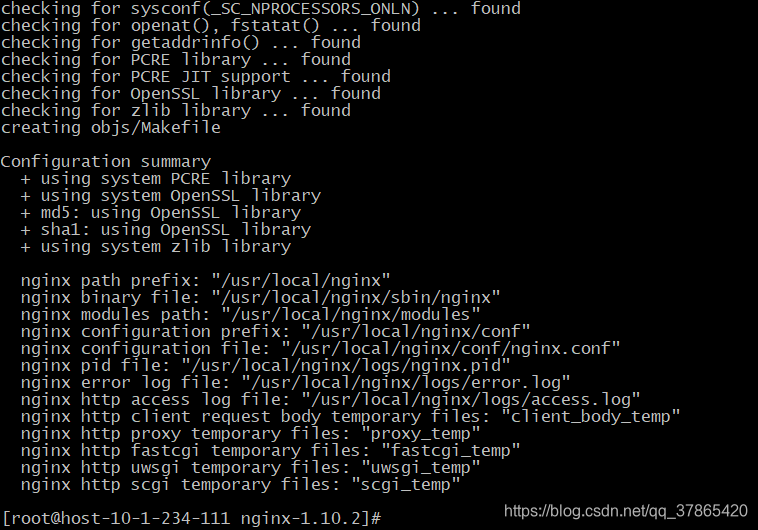
不报错了,问题迎刃而解
配置完成后,执行make命令
make
注意:make执行完了之后先别 make install,否则就是覆盖安装
3、备份之前sbin下的脚本
cp /usr/local/nginx/sbin/nginx /usr/local/nginx/sbin/nginx.bak
4、先停止nginx
/usr/local/nginx/sbin/nginx -s stop
5、覆盖原有nginx脚本
进入nginx源码包
cd /usr/local/src/nginx-1.10.2
覆盖
cp ./objs/nginx /usr/local/nginx/sbin/
6、安装部署
cd /usr/local/src/nginx-1.10.2
make install

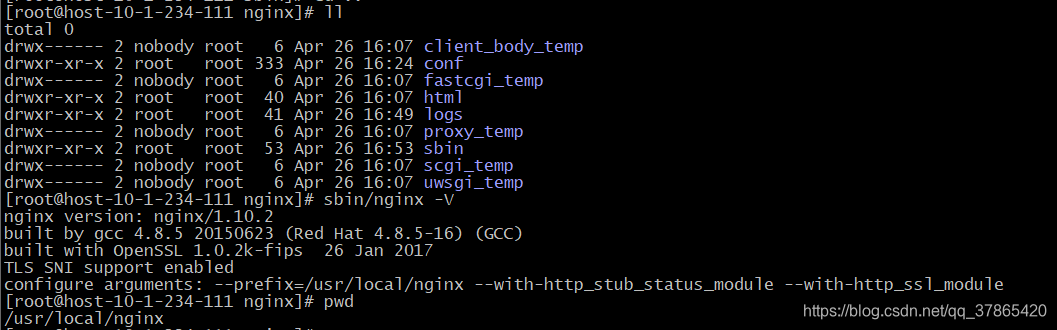
configure arguments中也有ssl的配置了,至此,ssl开启完毕
启动nginx即可
/usr/local/nginx/sbin/nginx
二:创建SSL证书
在第一步中开启了ssl模式后进行操作
cd /usr/local/nginx
mkdir ssl
cd ssl/
1、使用openssl生成证书
创建根证书CA
(1)生成CA私钥
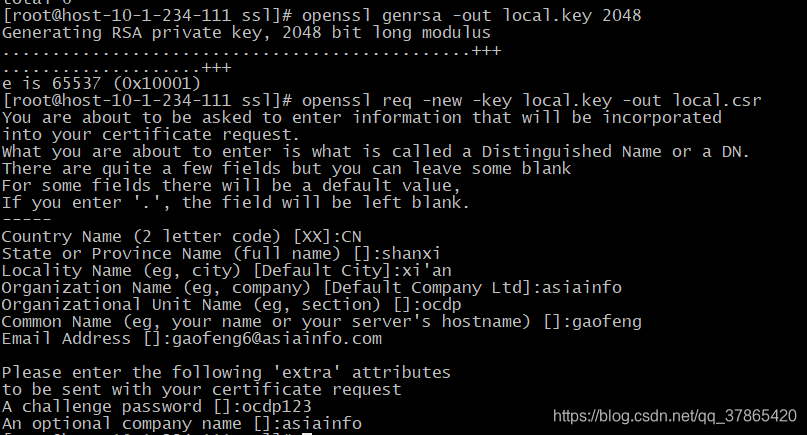
openssl genrsa -out local.key 2048
执行如下图

(2)生成CA证书请求
openssl req -new -key local.key -out local.csr
执行如下图
(3)生成CA根证书
openssl x509 -req -in local.csr -extensions v3_ca -signkey local.key -out local.crt
执行如下图

2、根据CA证书创建Server端证书
(1)生成Server私钥
openssl genrsa -out my_server.key 2048
执行如下图

(2)生成Server证书请求
openssl req -new -key my_server.key -out my_server.csr
执行如下图

(3)生成Server证书
openssl x509 -days 365 -req -in my_server.csr -extensions v3_req -CAkey local.key -CA local.crt -CAcreateserial -out my_server.crt
执行如下图
三:nginx.conf Demo
第二步在配置了ssl证书之后进行如下操作
1、编写一个配置文件demo
vi /usr/local/nginx/conf/nginx.conf
user  root;
worker_processes  1;

#error_log  logs/error.log;
#error_log  logs/error.log  notice;
#error_log  logs/error.log  info;

#pid        logs/nginx.pid;


events {
    worker_connections  1024;
}


http {
    include       mime.types;
    default_type  application/octet-stream;

    #log_format  main  '$remote_addr - $remote_user [$time_local] "$request" '
    #                  '$status $body_bytes_sent "$http_referer" '
    #                  '"$http_user_agent" "$http_x_forwarded_for"';

    #access_log  logs/access.log  main;

    sendfile        on;
    #tcp_nopush     on;

    #keepalive_timeout  0;
    keepalive_timeout  65;

    #gzip  on;

    #upstream yarn.local {
    #    server 10.1.236.145:8443/gateway/ocdp/yarn;
    #}

    server {
        listen       443 ssl;
        server_name  ocdp_host-10-1-236-52;

        ssl_certificate      /usr/local/nginx/ssl/local.crt;
        ssl_certificate_key  /usr/local/nginx/ssl/local.key;
        location / {
            proxy_set_header Host $host;
            proxy_set_header X-Real-IP $remote_addr;
            proxy_set_header X-Forward-For $remote_addr;
            proxy_pass https://10.1.236.52:8443;
        }
    }


}
注意上述文件中的两个ssl配置
ssl_certificate /usr/local/nginx/ssl/local.crt;
ssl_certificate_key /usr/local/nginx/ssl/local.key;
指定好路径(第二步生成的)
2、重启nginx
/usr/local/nginx/sbin/nginx -s reload
一键三连(〃‘▽’〃)
更多关于大数据(Hadoop、HBASE、Hive、Flink、Doris、Pulsar、Kafka、ClickHouse)学习干货资料
识别下方二维码,回复“资料全集”,即可获得下载地址。


 3189
3189

 被折叠的 条评论
为什么被折叠?
被折叠的 条评论
为什么被折叠?
 到【灌水乐园】发言


