一整体布局

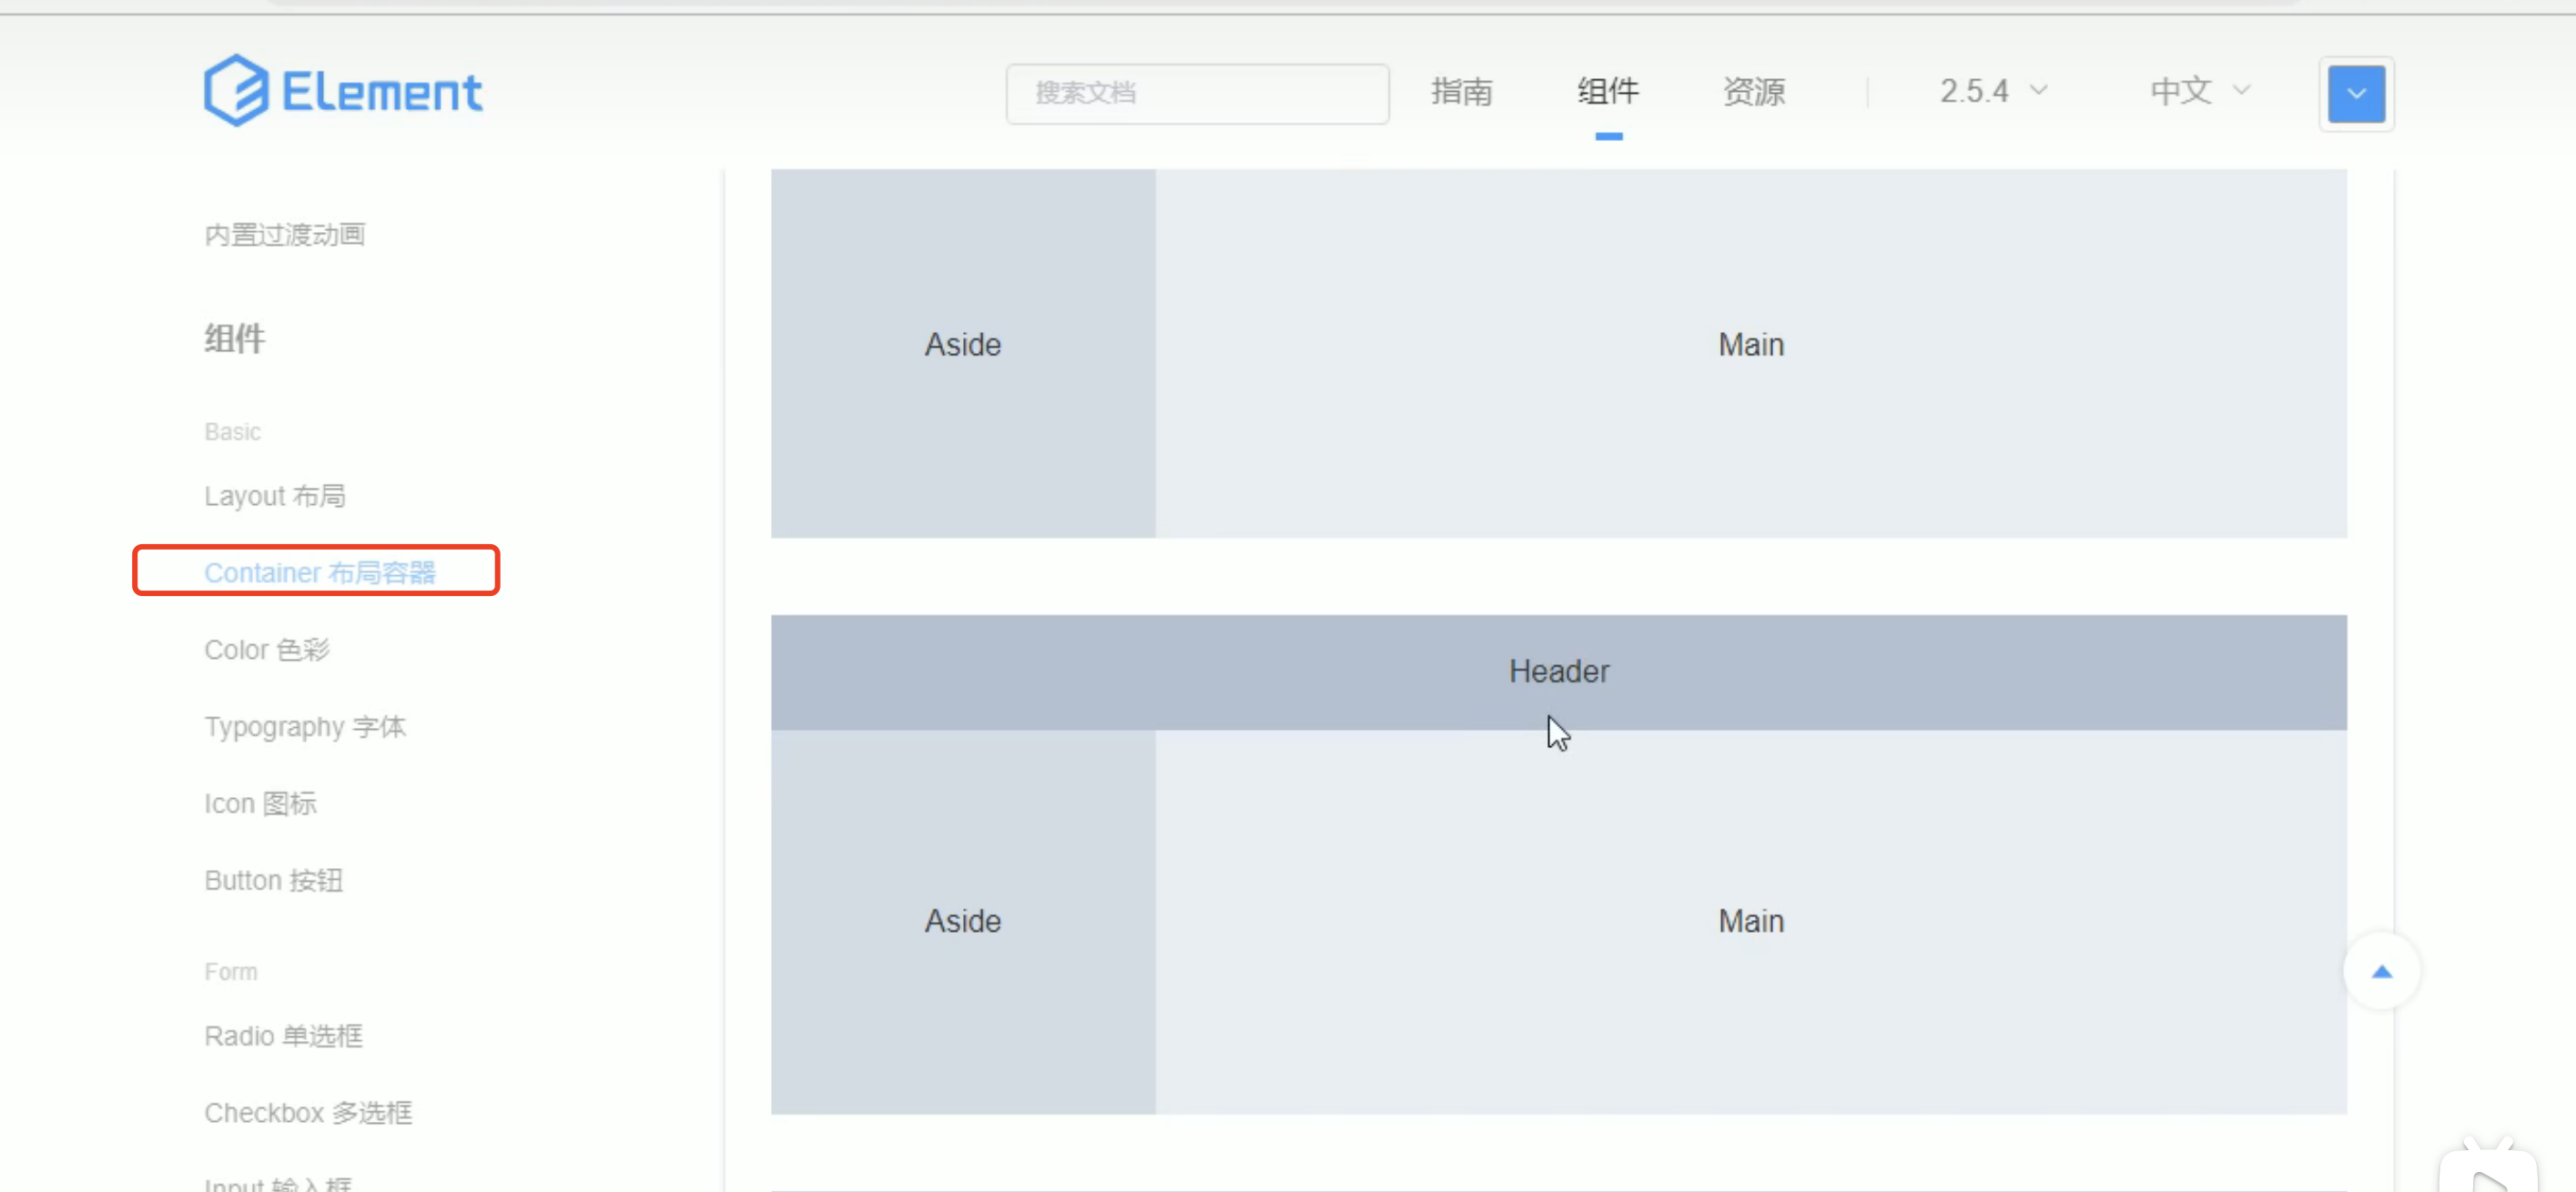
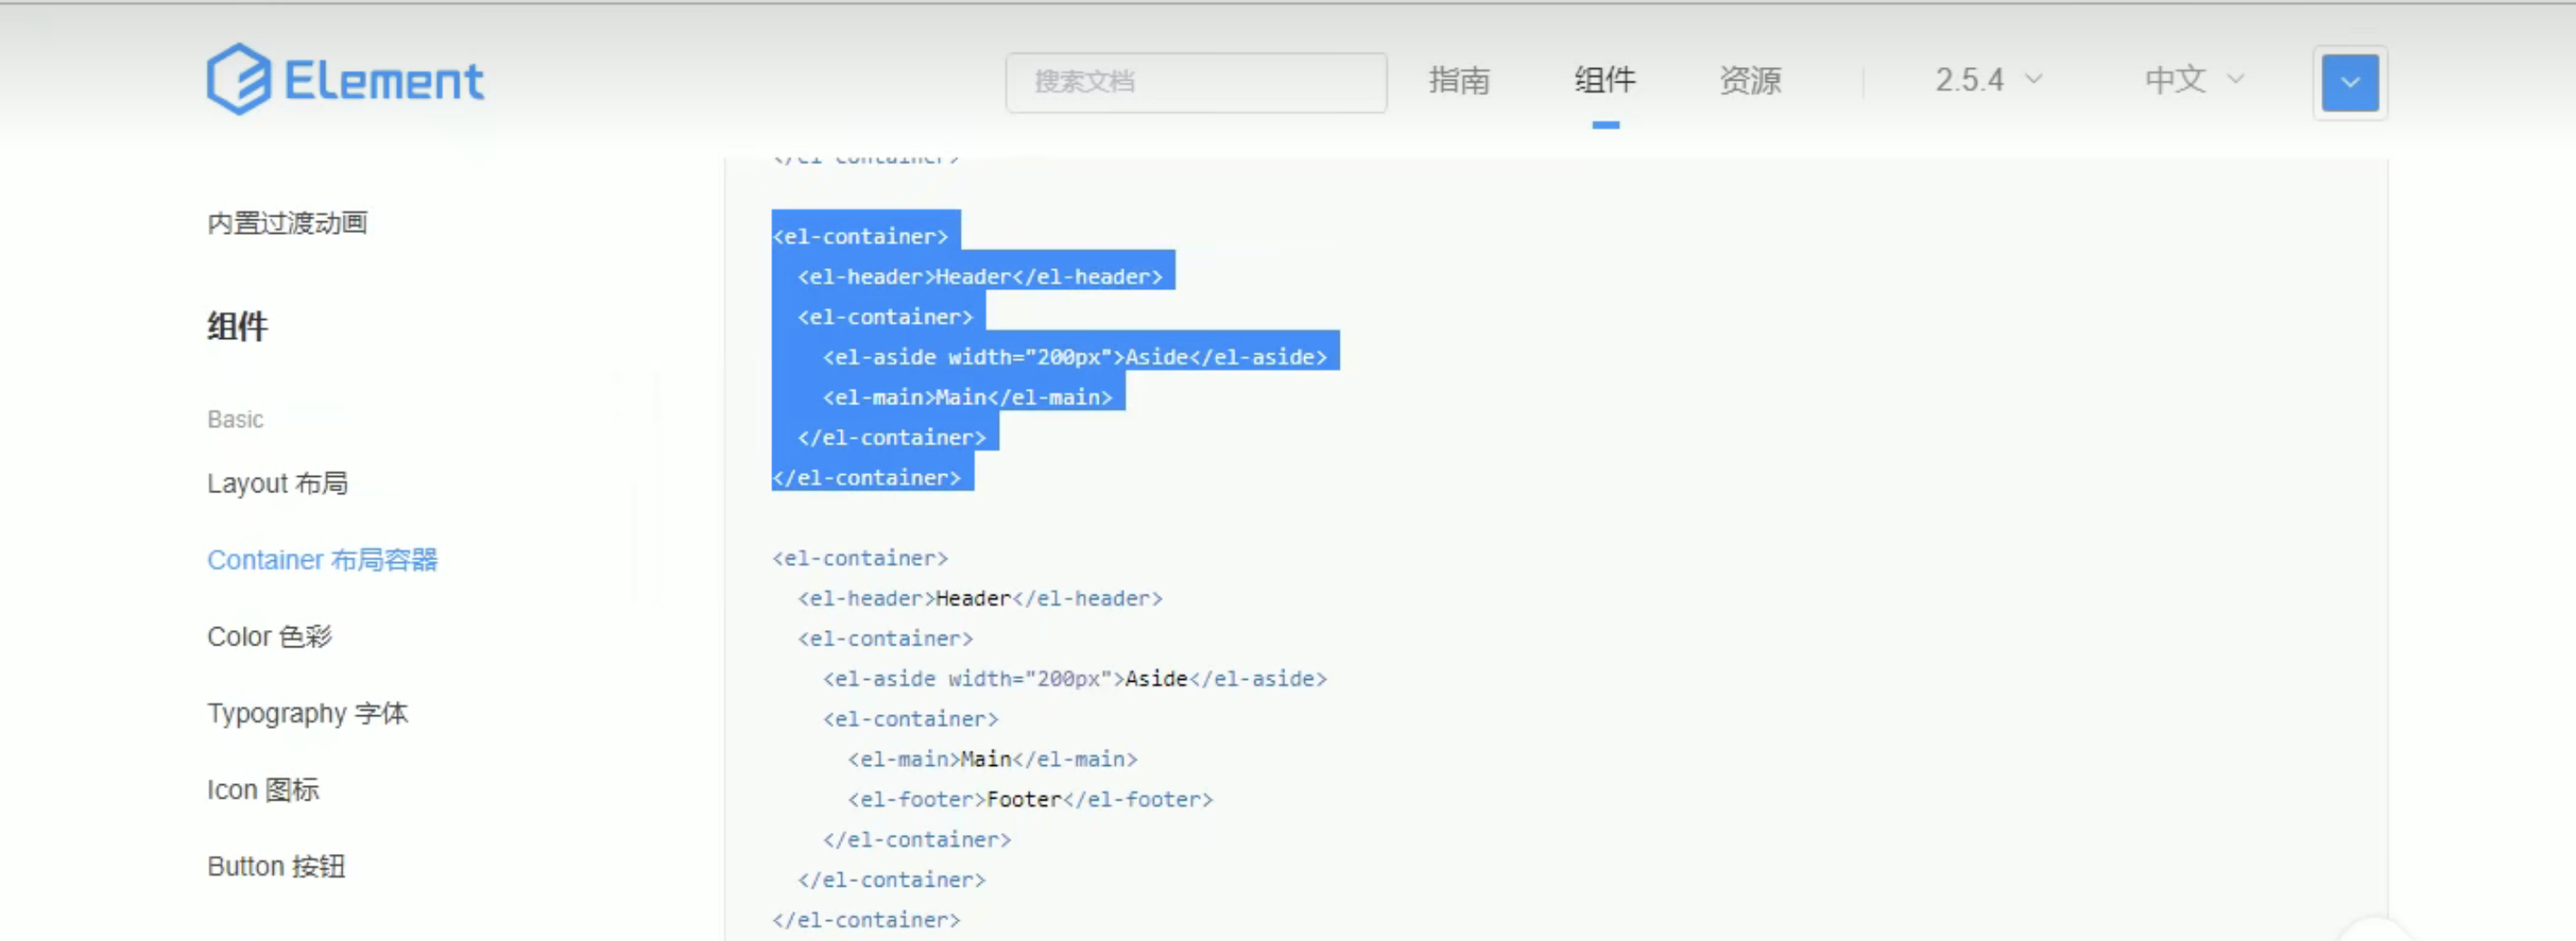
<el-container>
  <el-header>Header</el-header>
  <el-container>
    <el-aside width="200px">Aside</el-aside>
    <el-main>Main</el-main>
  </el-container>
</el-container>
1.1 整体布局
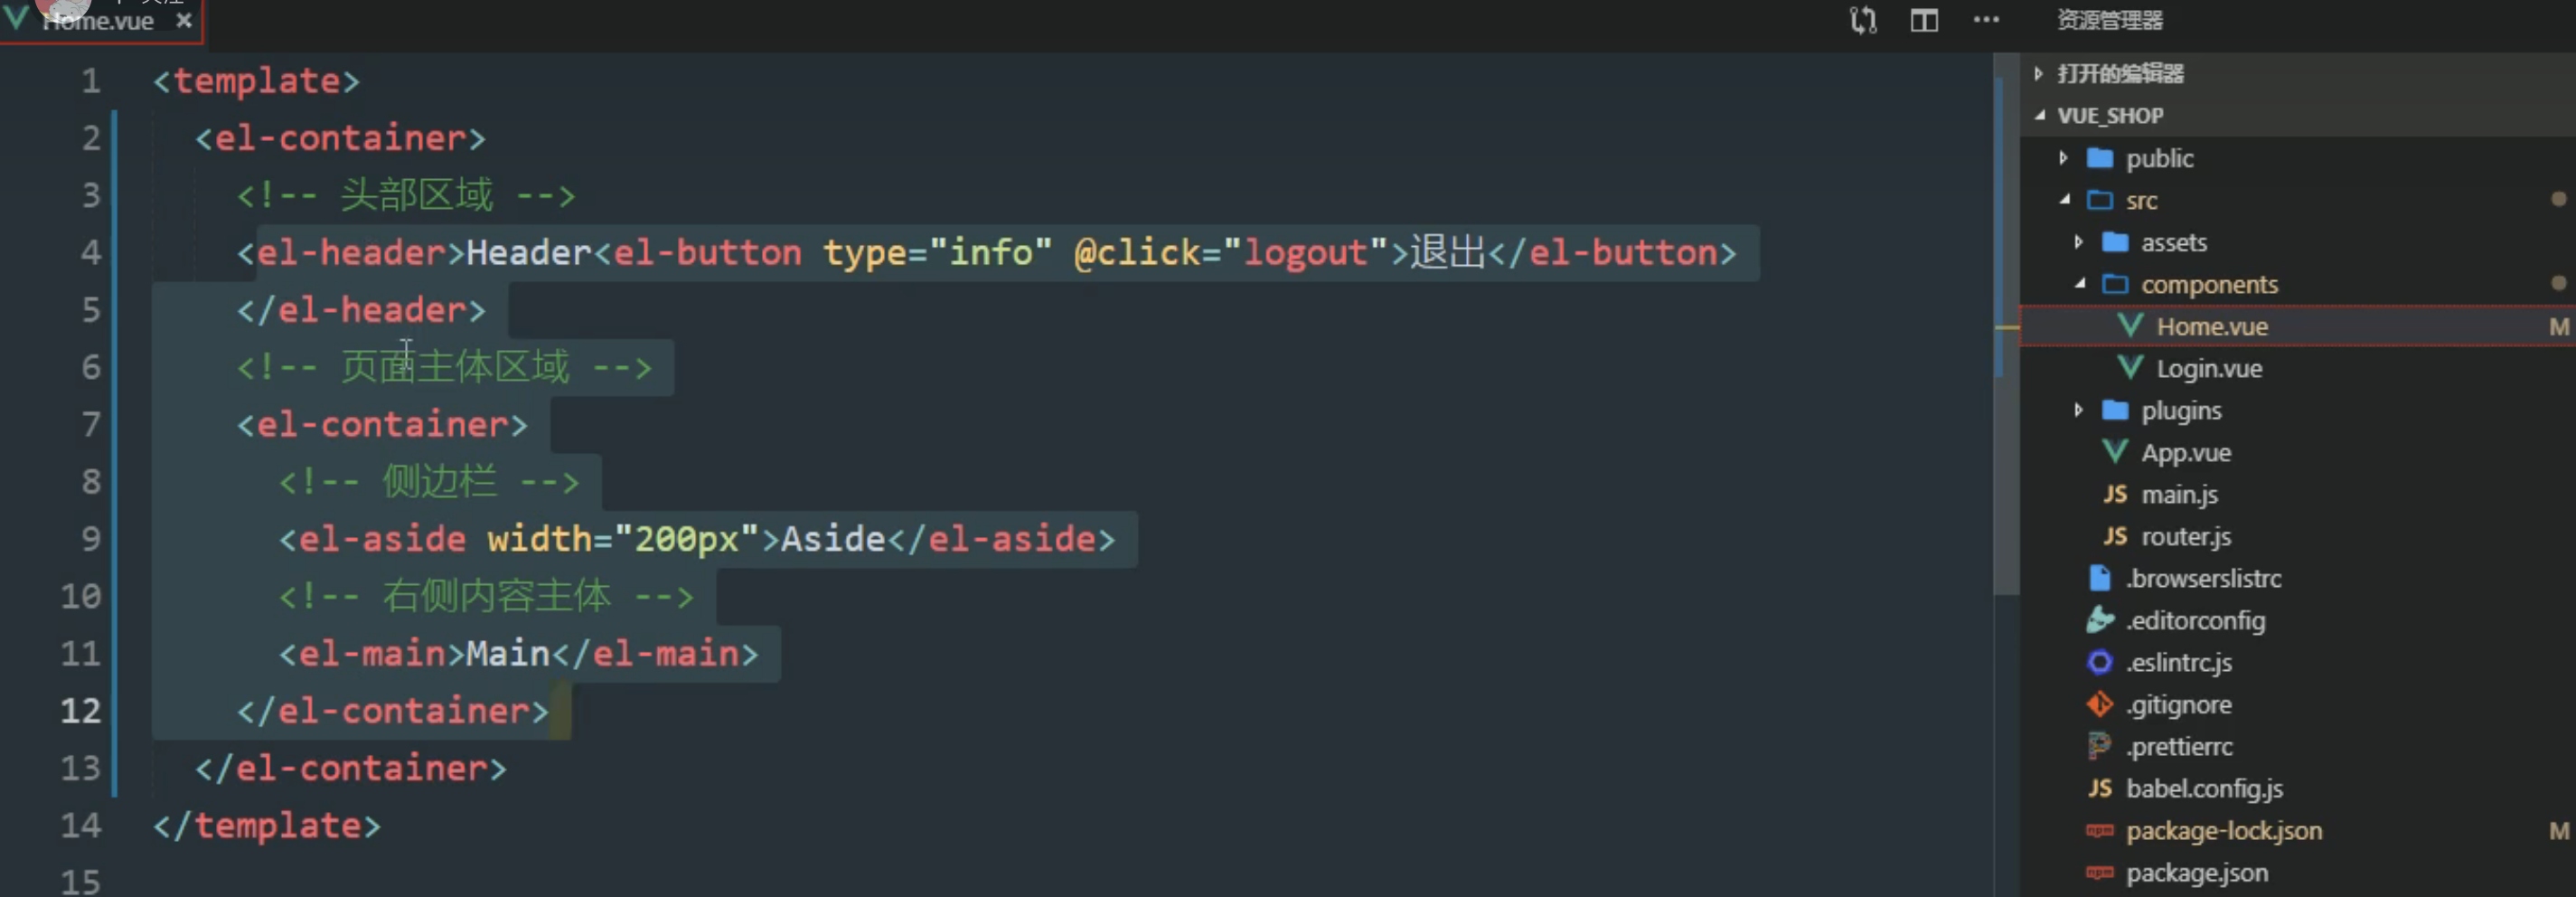
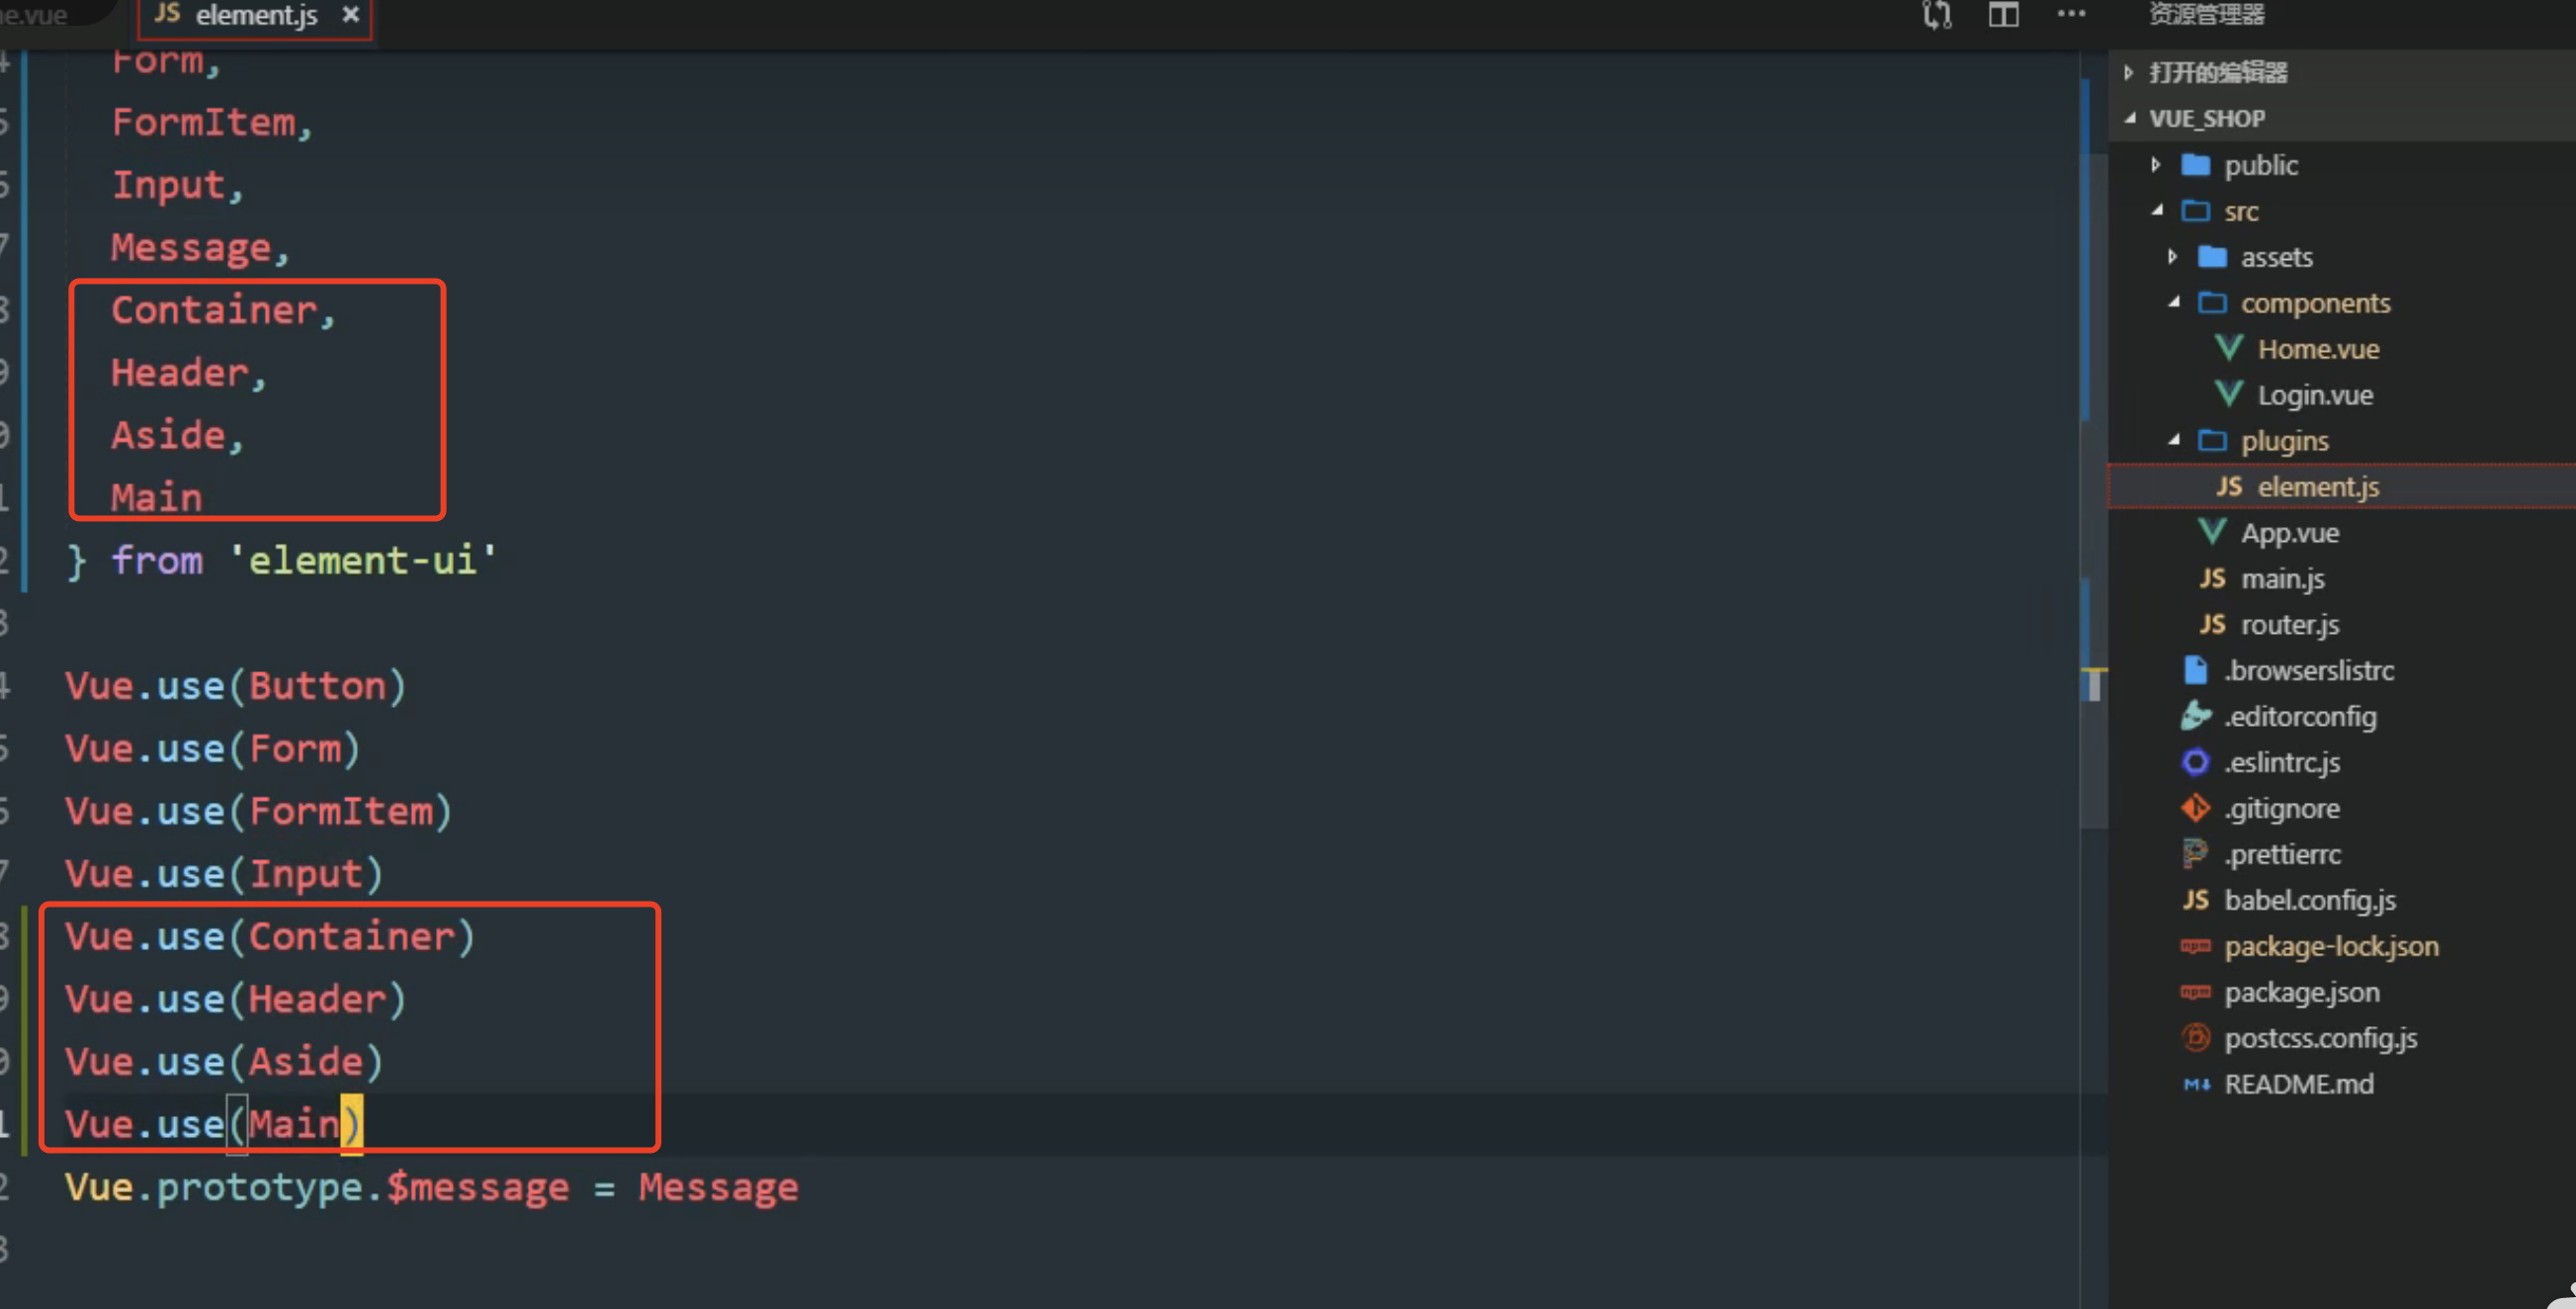

1.2 添加样式
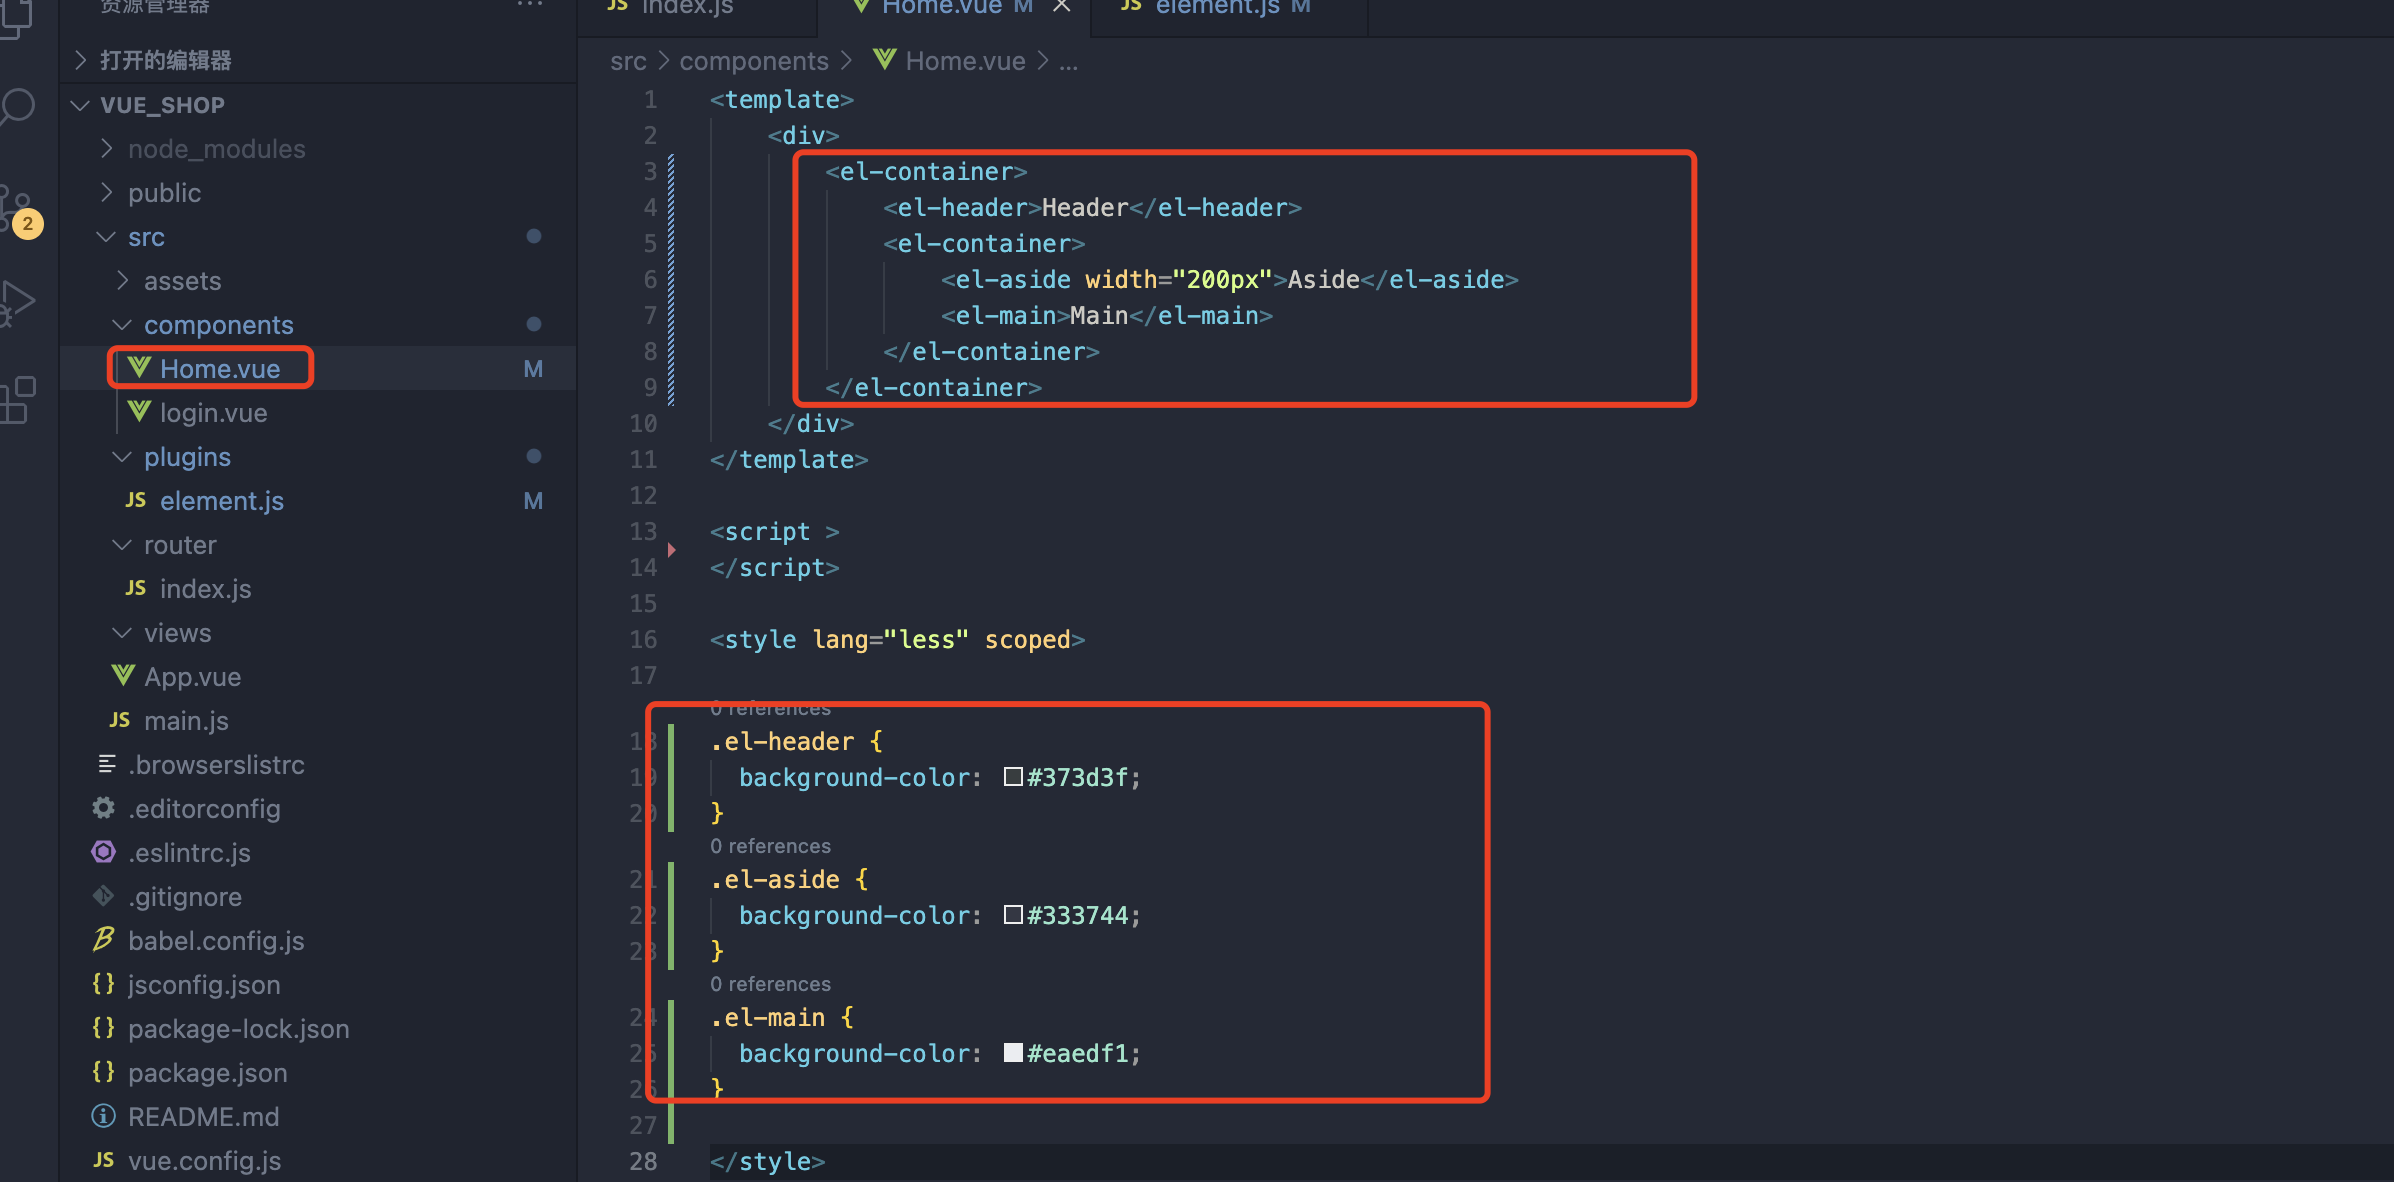

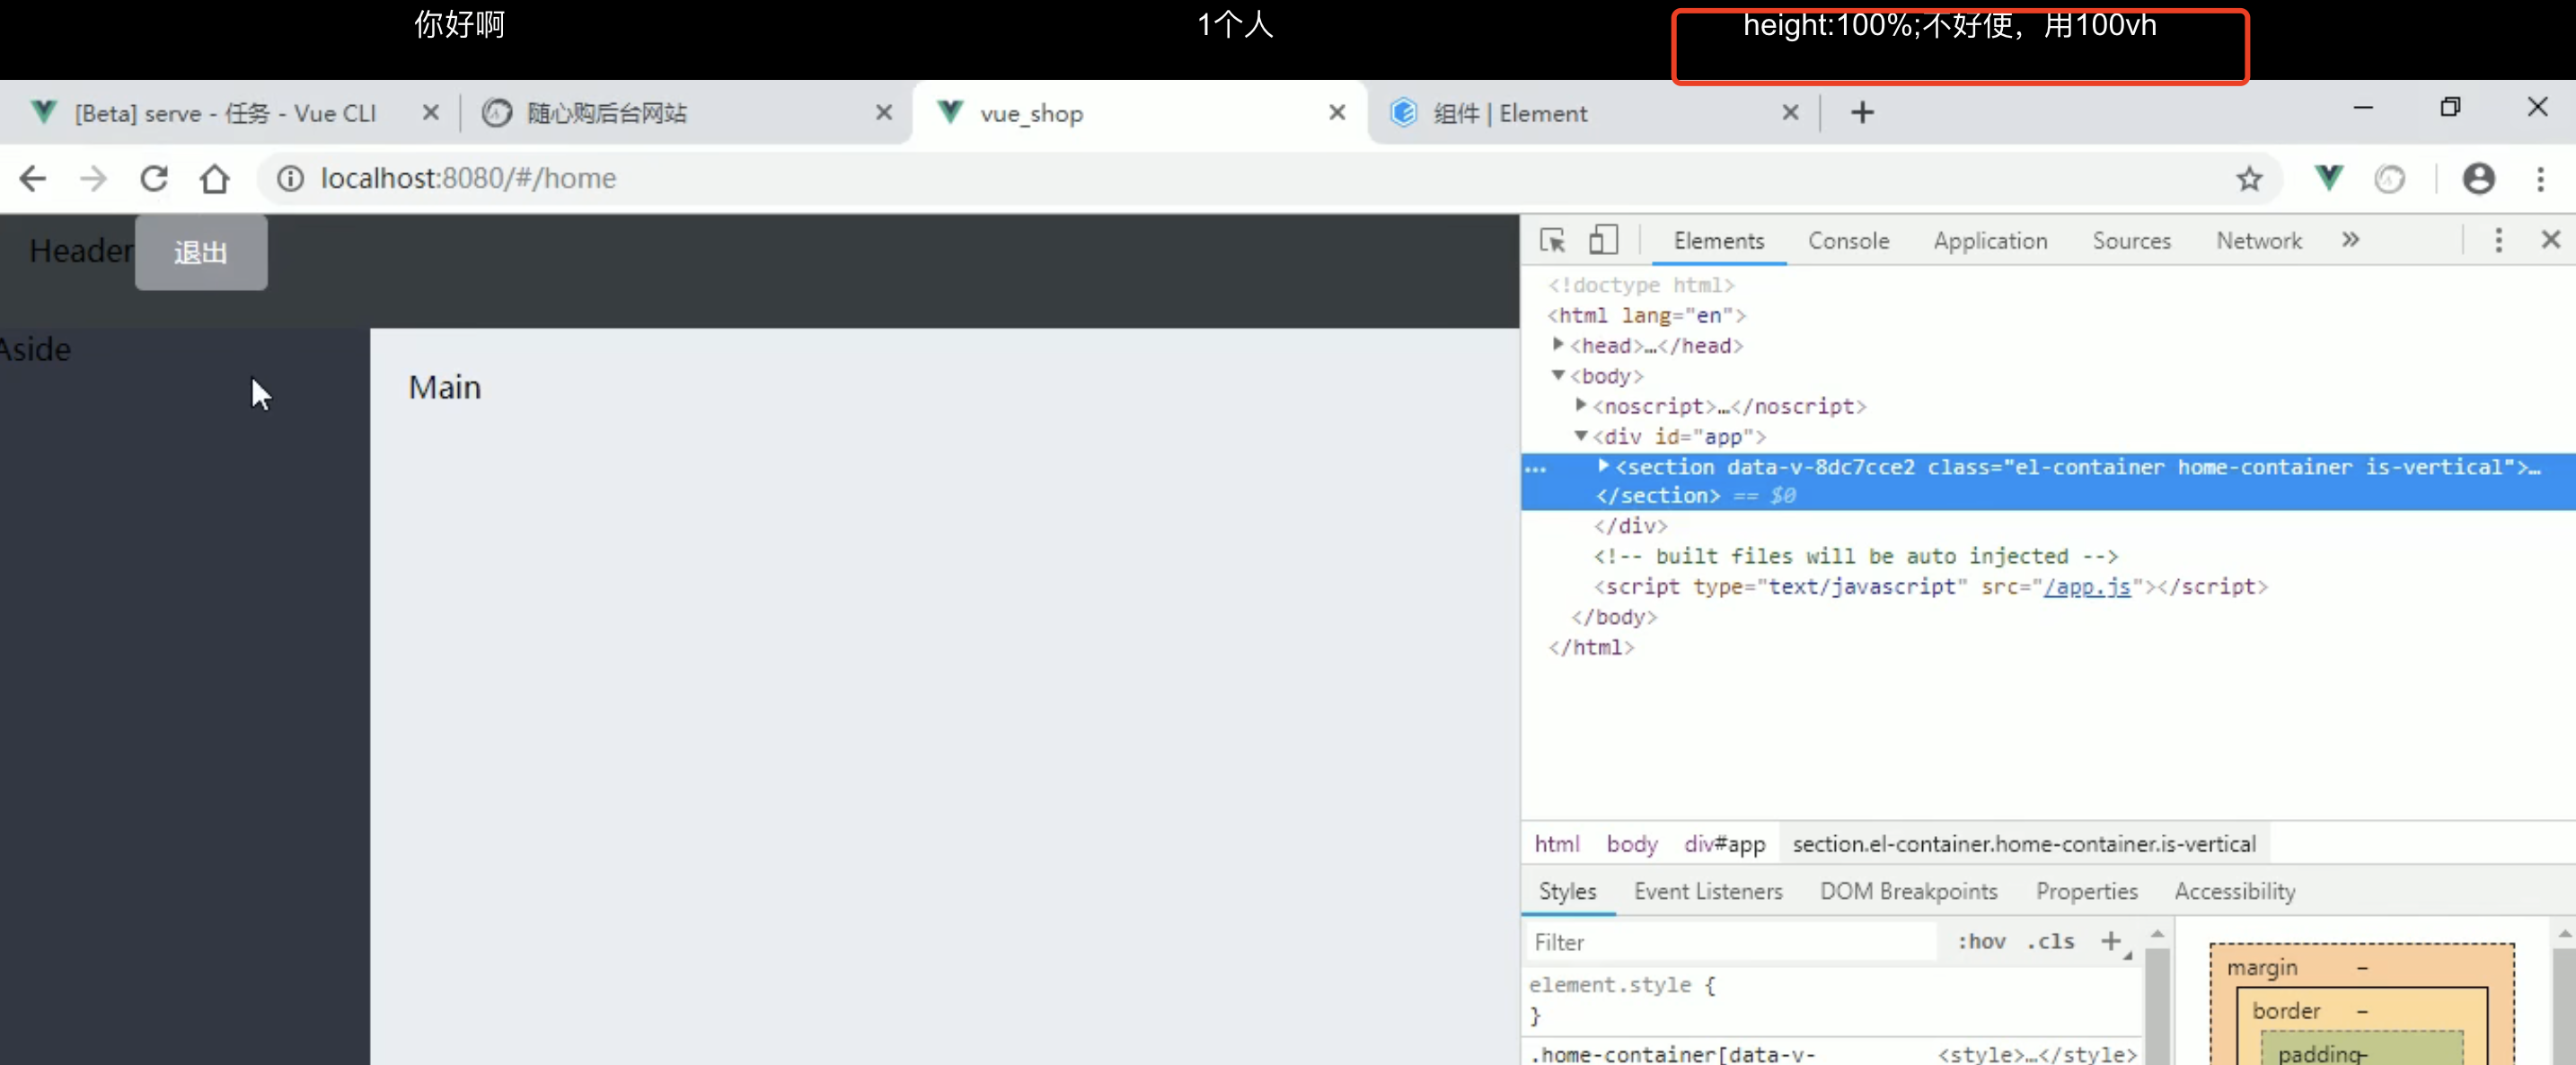
发现下边并没有撑满整个盒子,先检查元素

解决:
添加一个class, 在外围添加样式
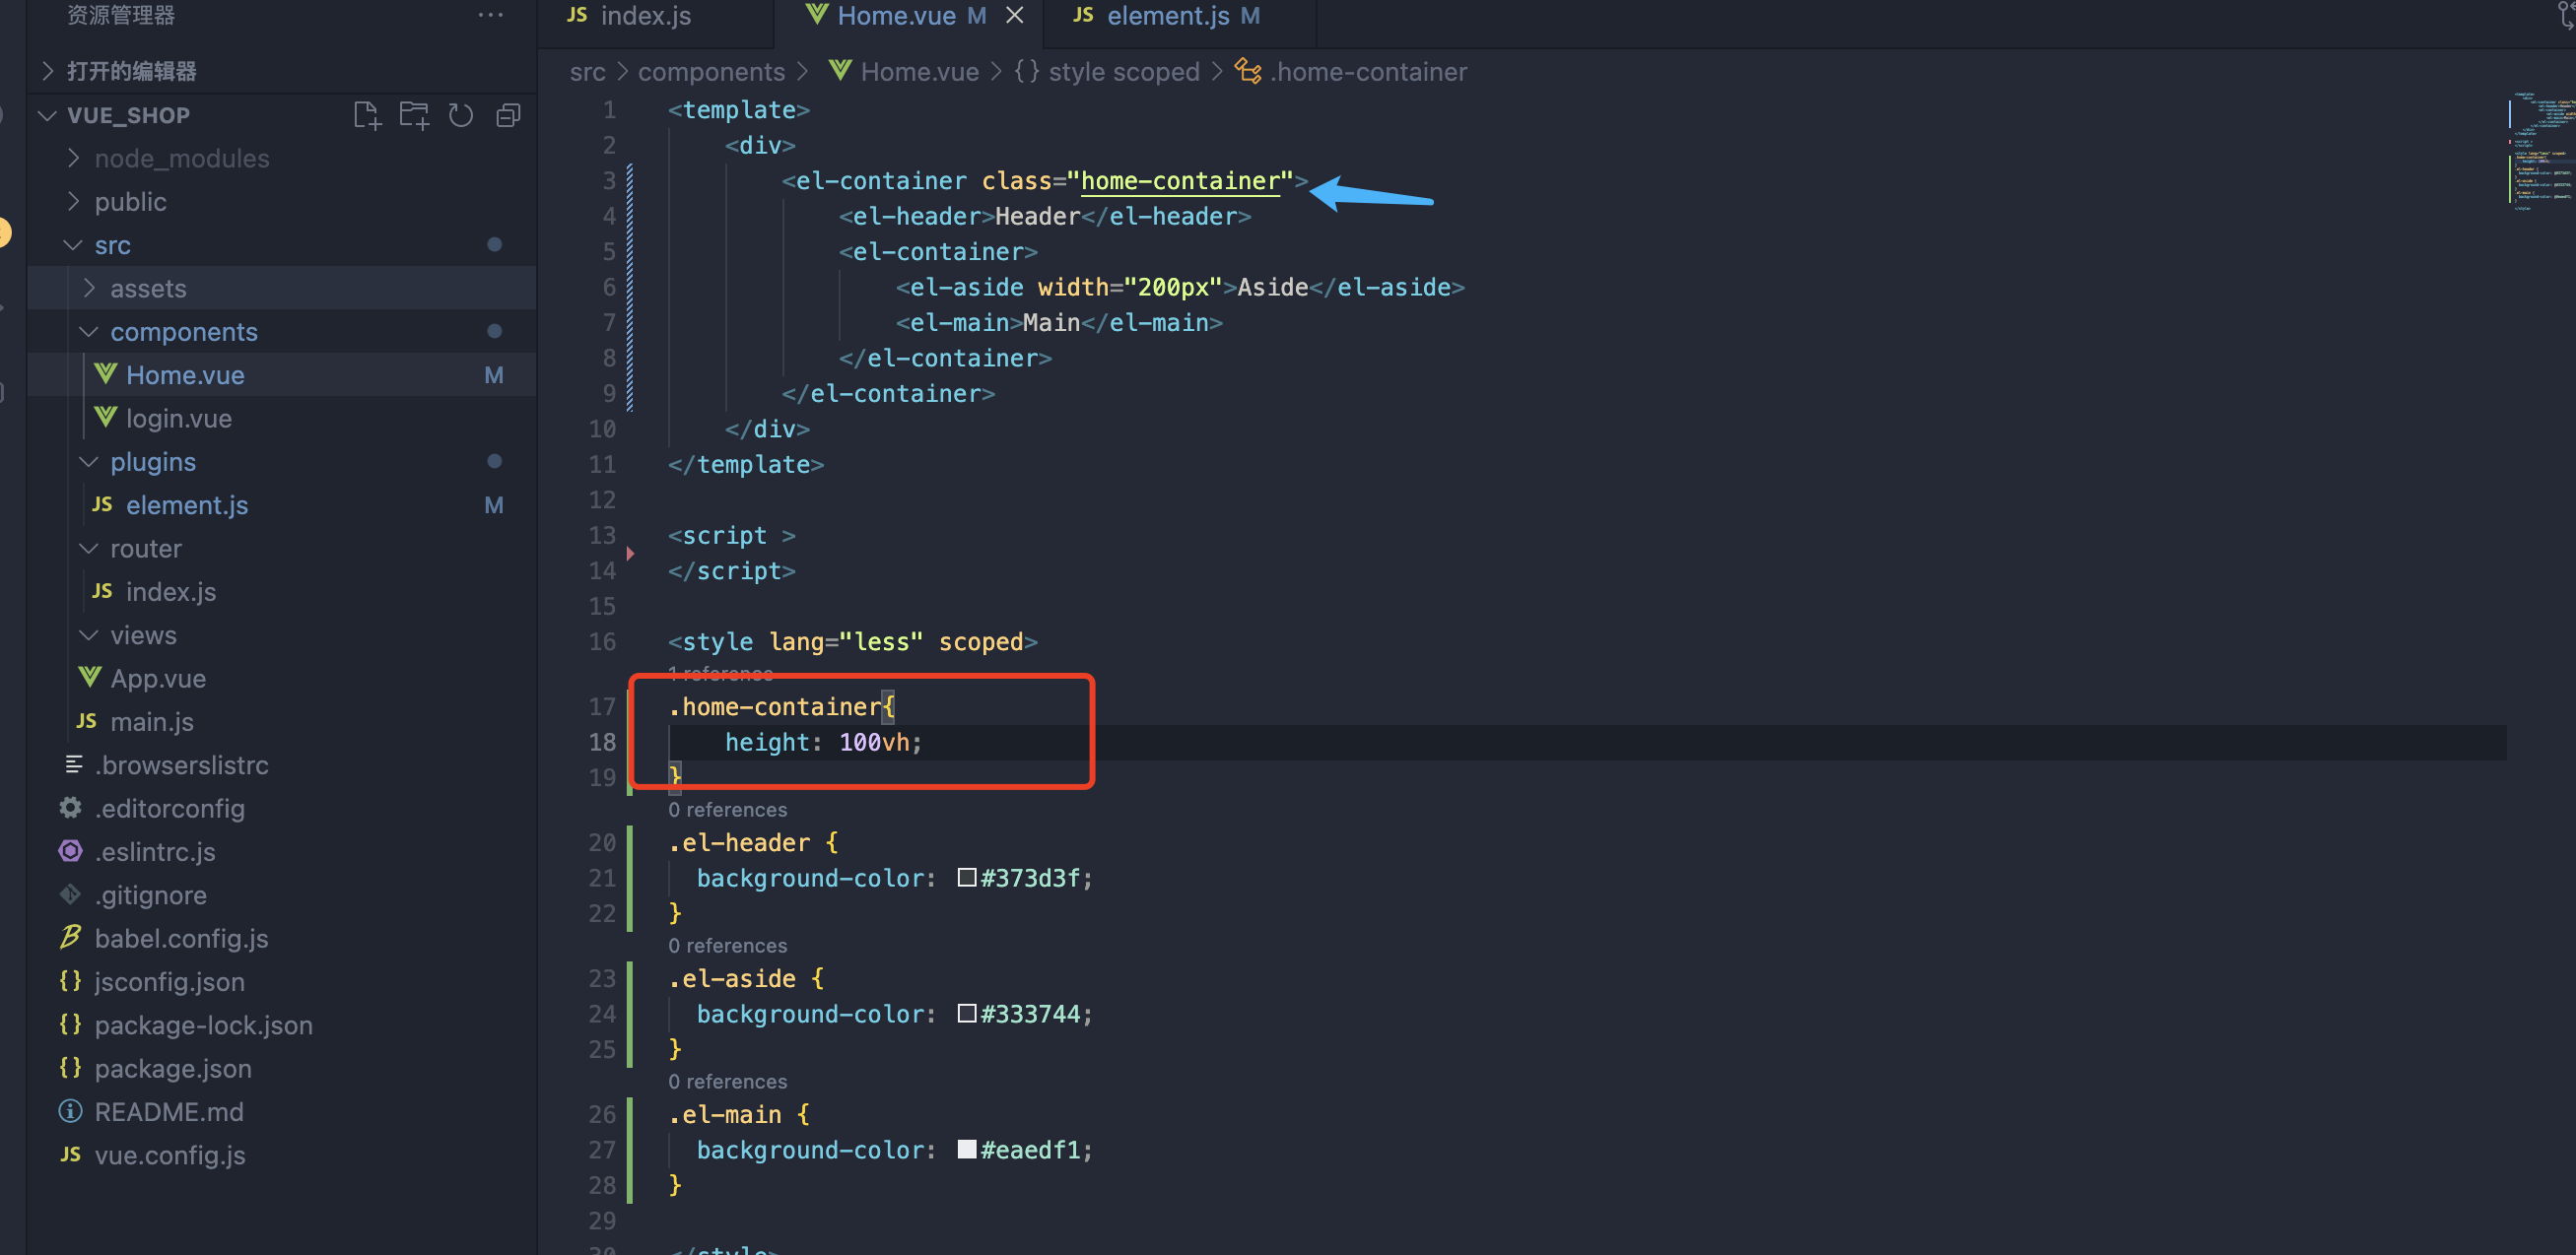
.el-header {
  background-color: #373d3f;
}
.el-aside {
  background-color: #333744;
  height: 100vh;
}
.el-main {
  background-color: #eaedf1;
}
二 header的布局
最简单的是使用flex布局

2
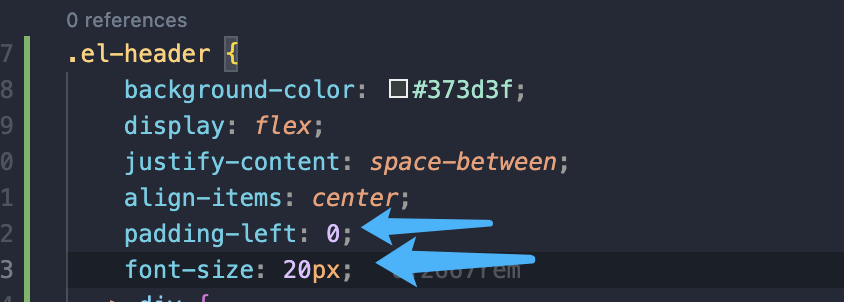

3 文件居中对齐
对父盒子设置 flex 对齐方式
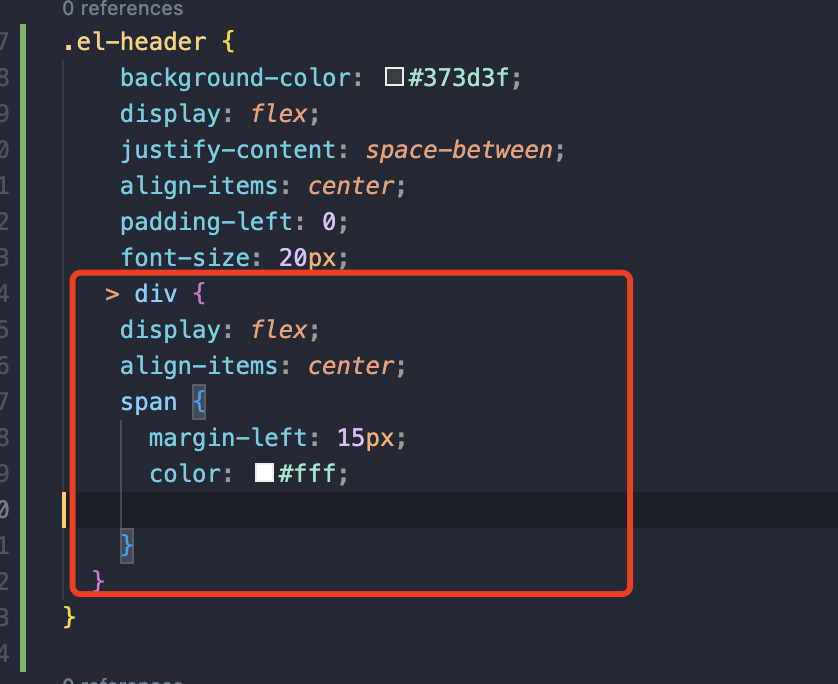

element-ui设置按钮大小
<el-button type="info" size="mini" style="height:40px;margin-top:10px"> 退出</el-button>设置宽高需要把尺寸改为最小给el-button加size=“mini” 就可以设置宽高了width height
或者使用button,不用element-ul
参考:
三 左侧菜单布局
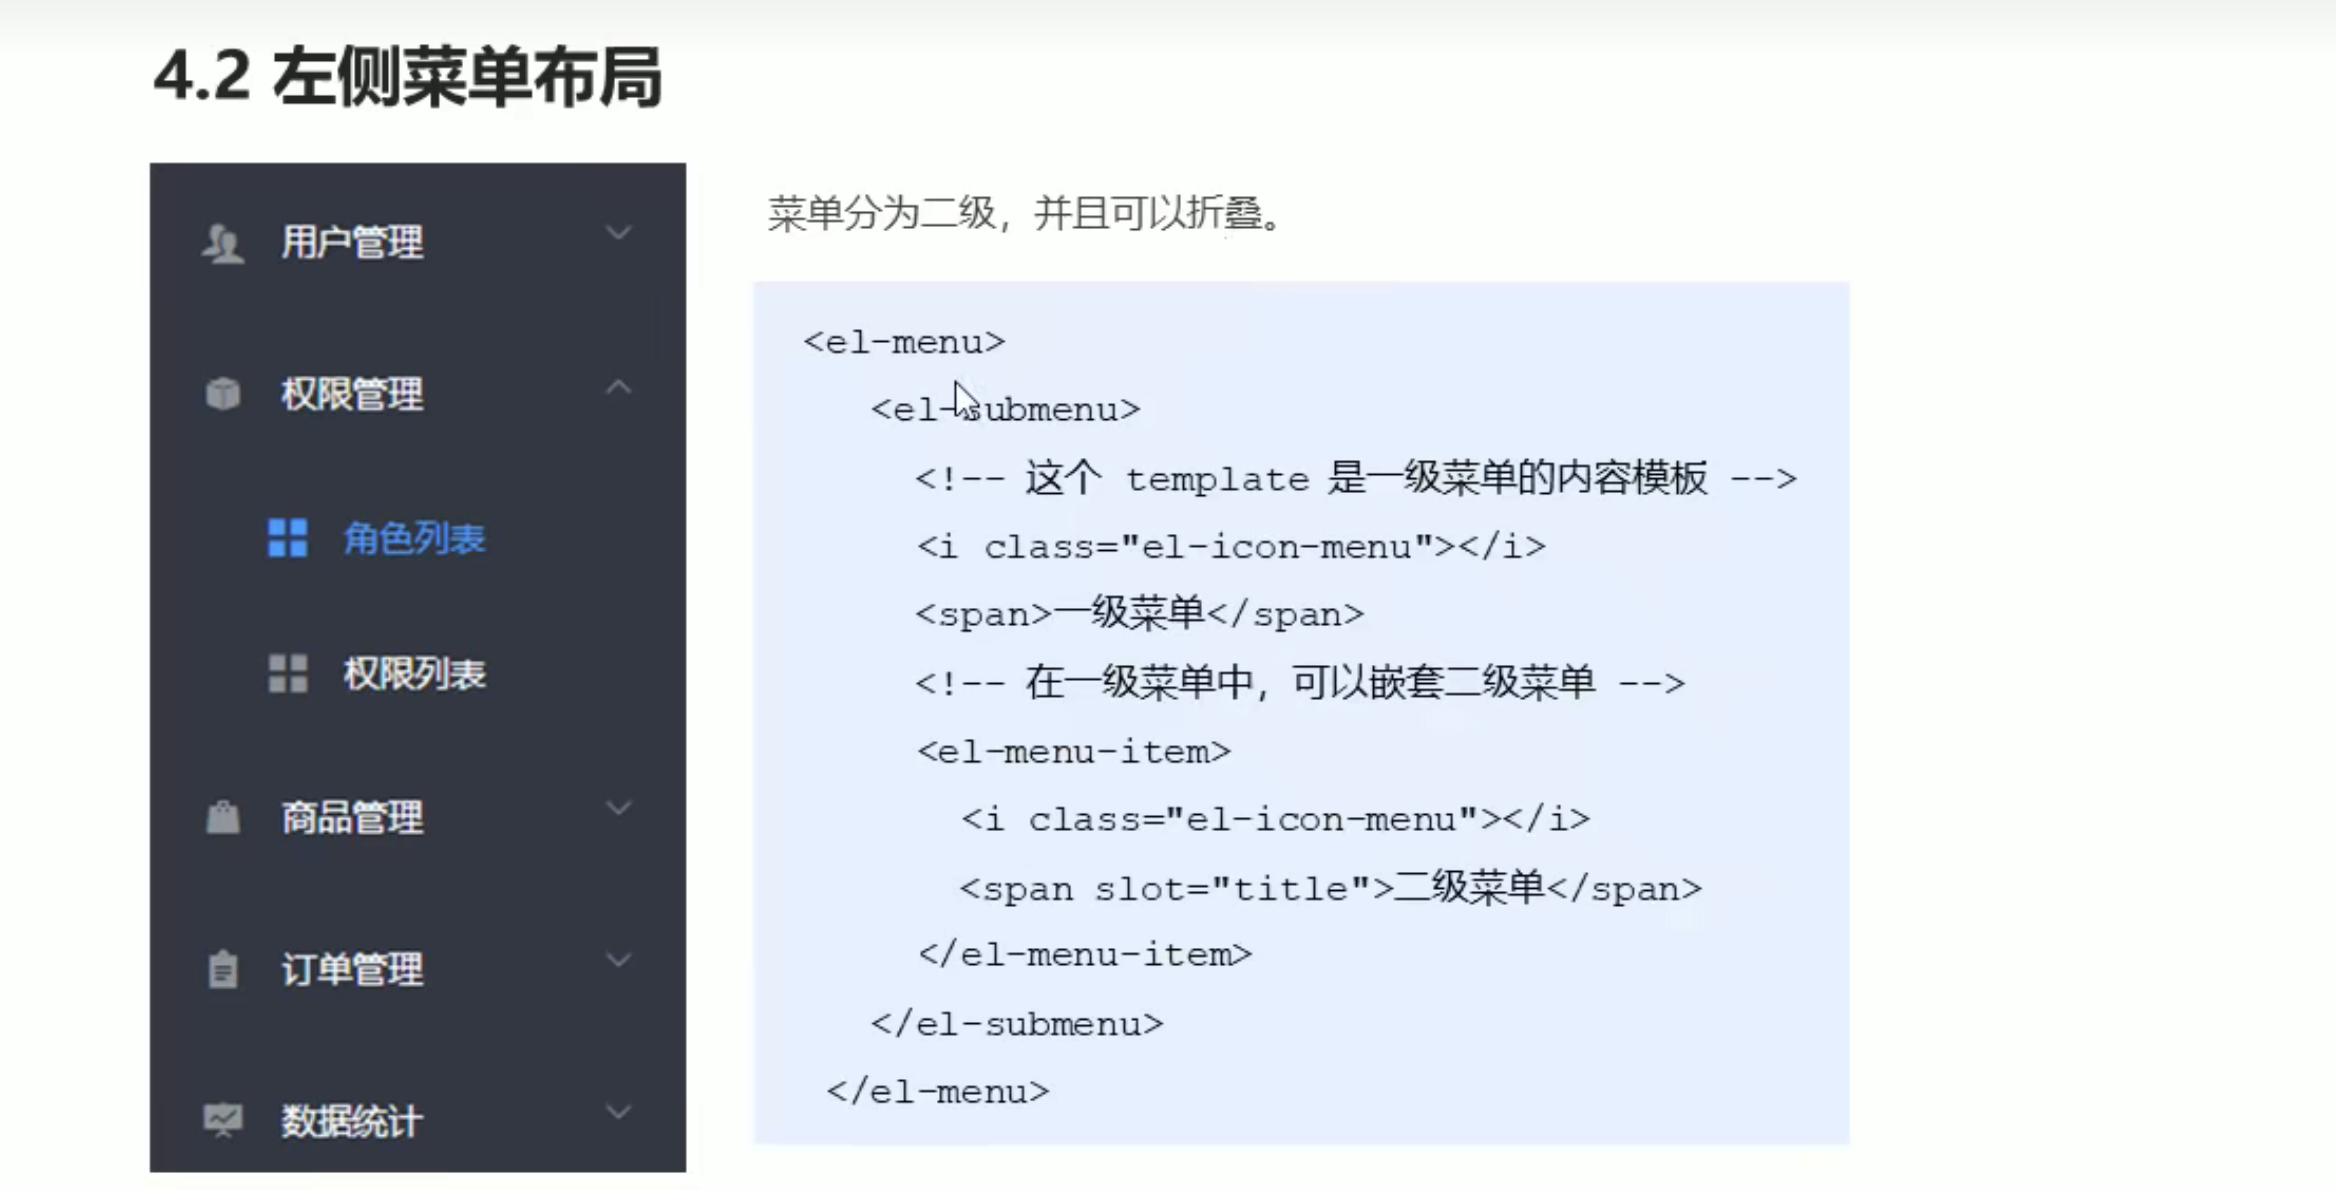
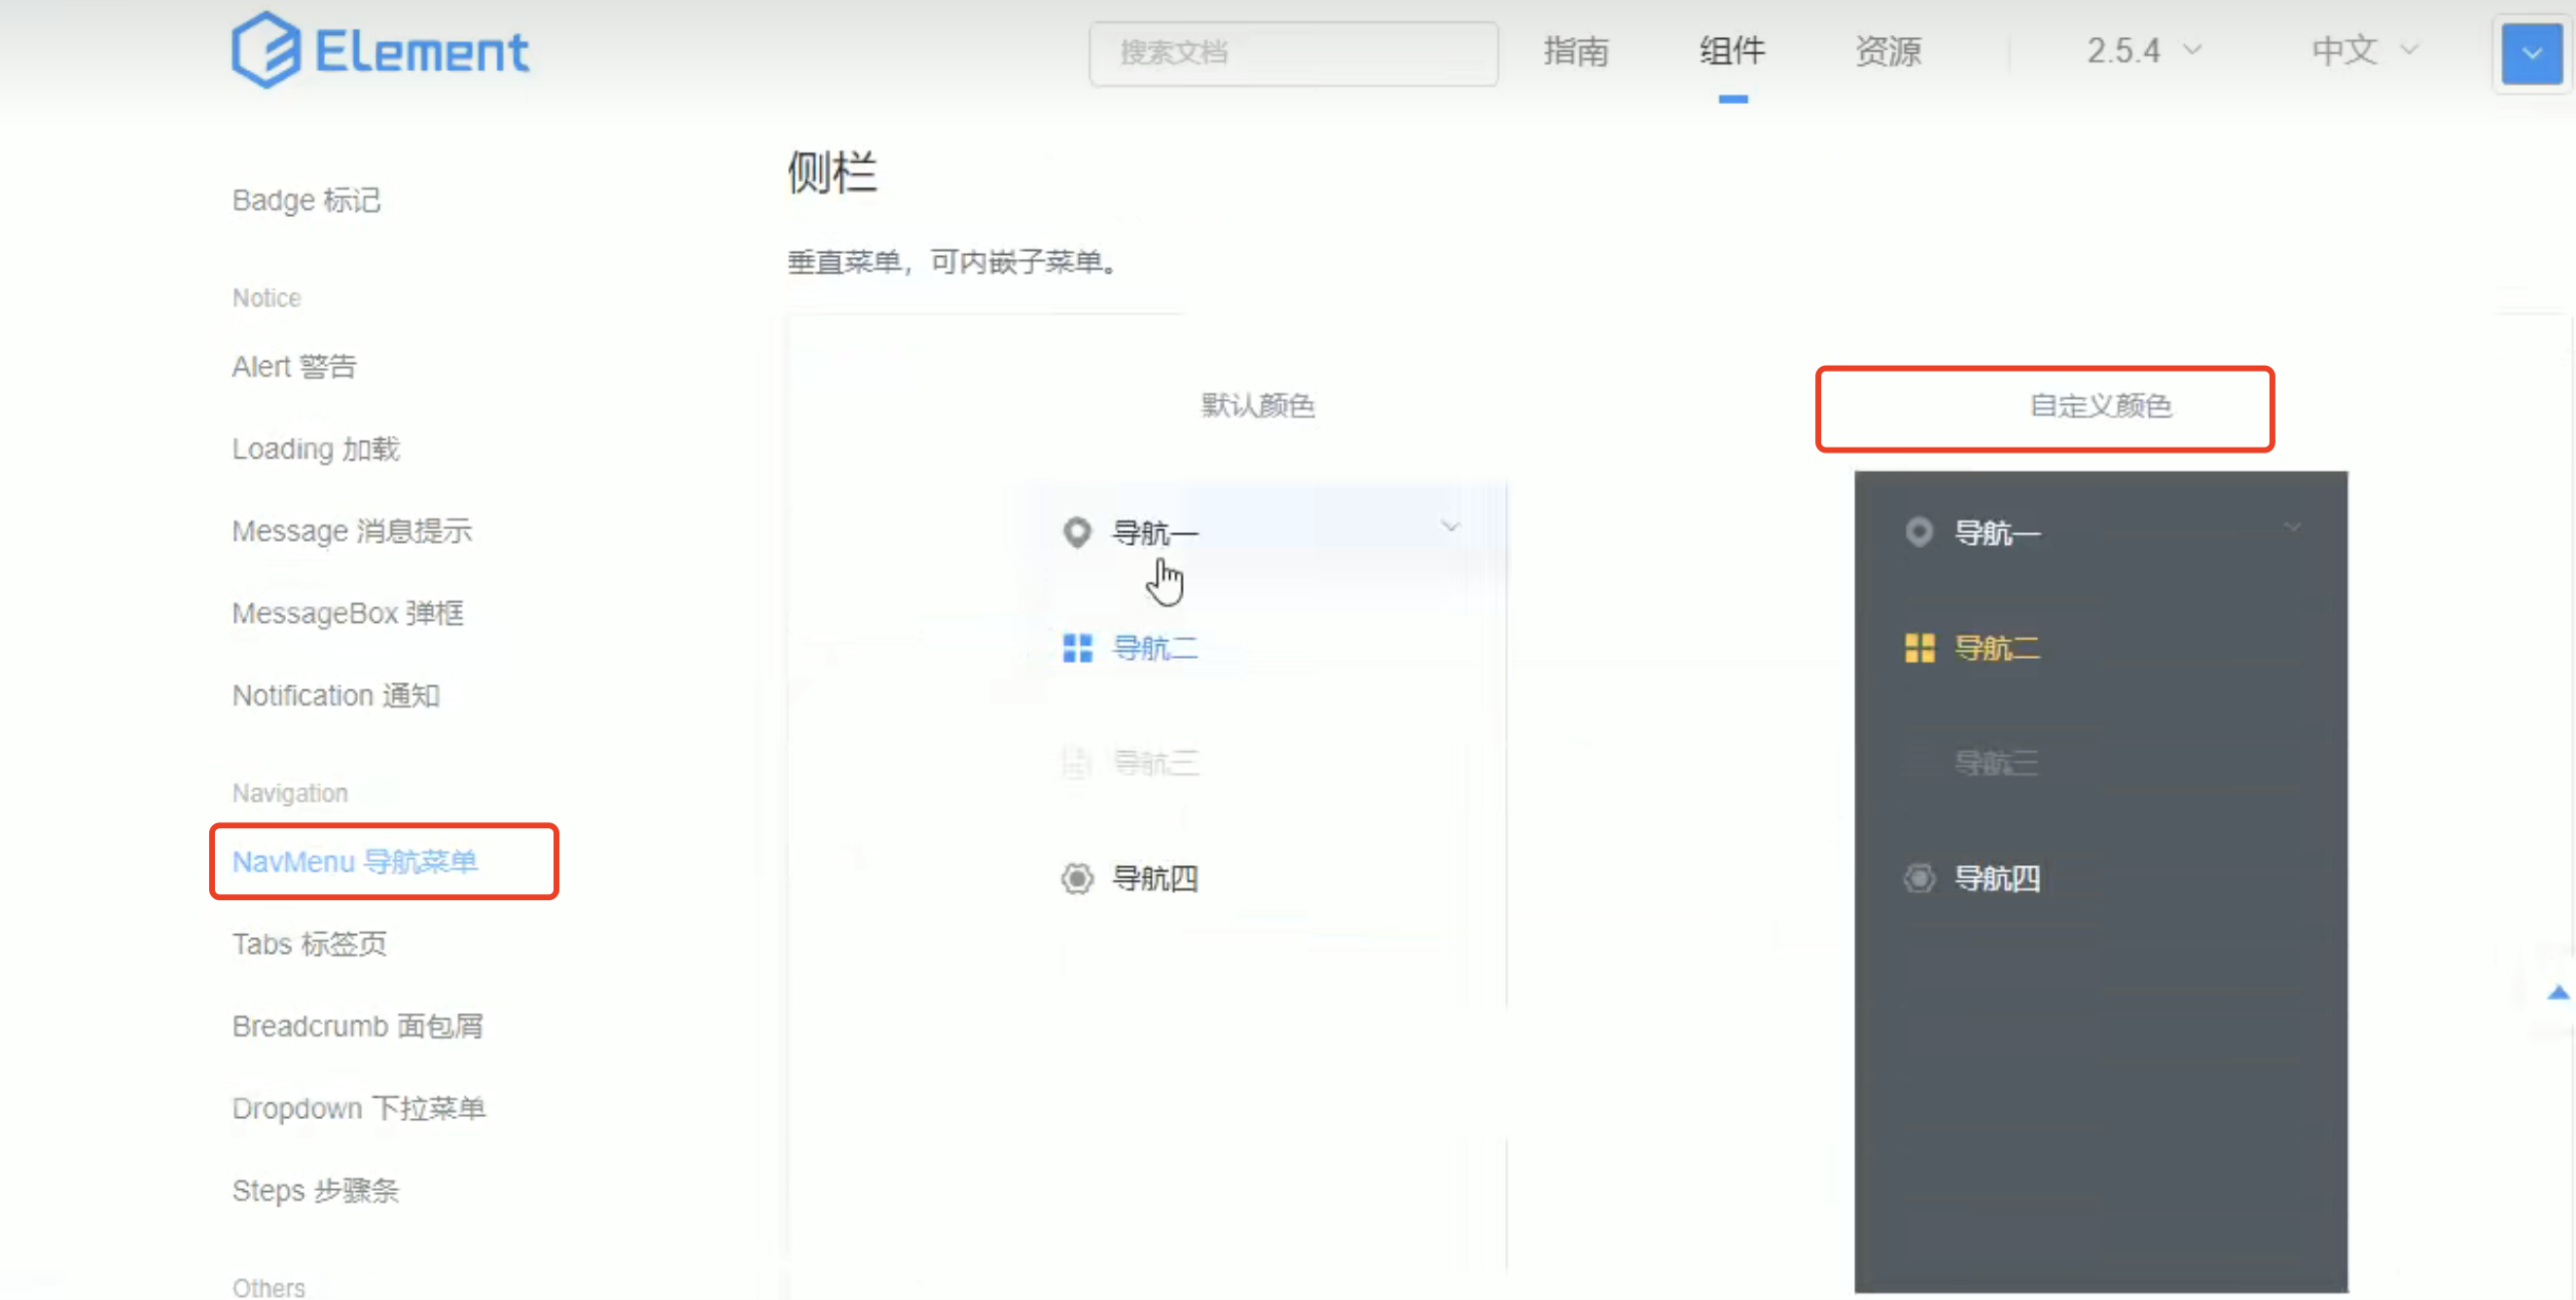
3.1 导入代码
 <el-menu
      default-active="2"
      class="el-menu-vertical-demo"
      @open="handleOpen"
      @close="handleClose"
      background-color="#545c64"
      text-color="#fff"
      active-text-color="#ffd04b">
      <el-submenu index="1">
        <template slot="title">
          <i class="el-icon-location"></i>
          <span>导航一</span>
        </template>
        <el-menu-item-group>
          <template slot="title">分组一</template>
          <el-menu-item index="1-1">选项1</el-menu-item>
          <el-menu-item index="1-2">选项2</el-menu-item>
        </el-menu-item-group>
        <el-menu-item-group title="分组2">
          <el-menu-item index="1-3">选项3</el-menu-item>
        </el-menu-item-group>
        <el-submenu index="1-4">
          <template slot="title">选项4</template>
          <el-menu-item index="1-4-1">选项1</el-menu-item>
        </el-submenu>
      </el-submenu>
      <el-menu-item index="2">
        <i class="el-icon-menu"></i>
        <span slot="title">导航二</span>
      </el-menu-item>
      <el-menu-item index="3" disabled>
        <i class="el-icon-document"></i>
        <span slot="title">导航三</span>
      </el-menu-item>
      <el-menu-item index="4">
        <i class="el-icon-setting"></i>
        <span slot="title">导航四</span>
      </el-menu-item>
    </el-menu>
1.1 修改背景
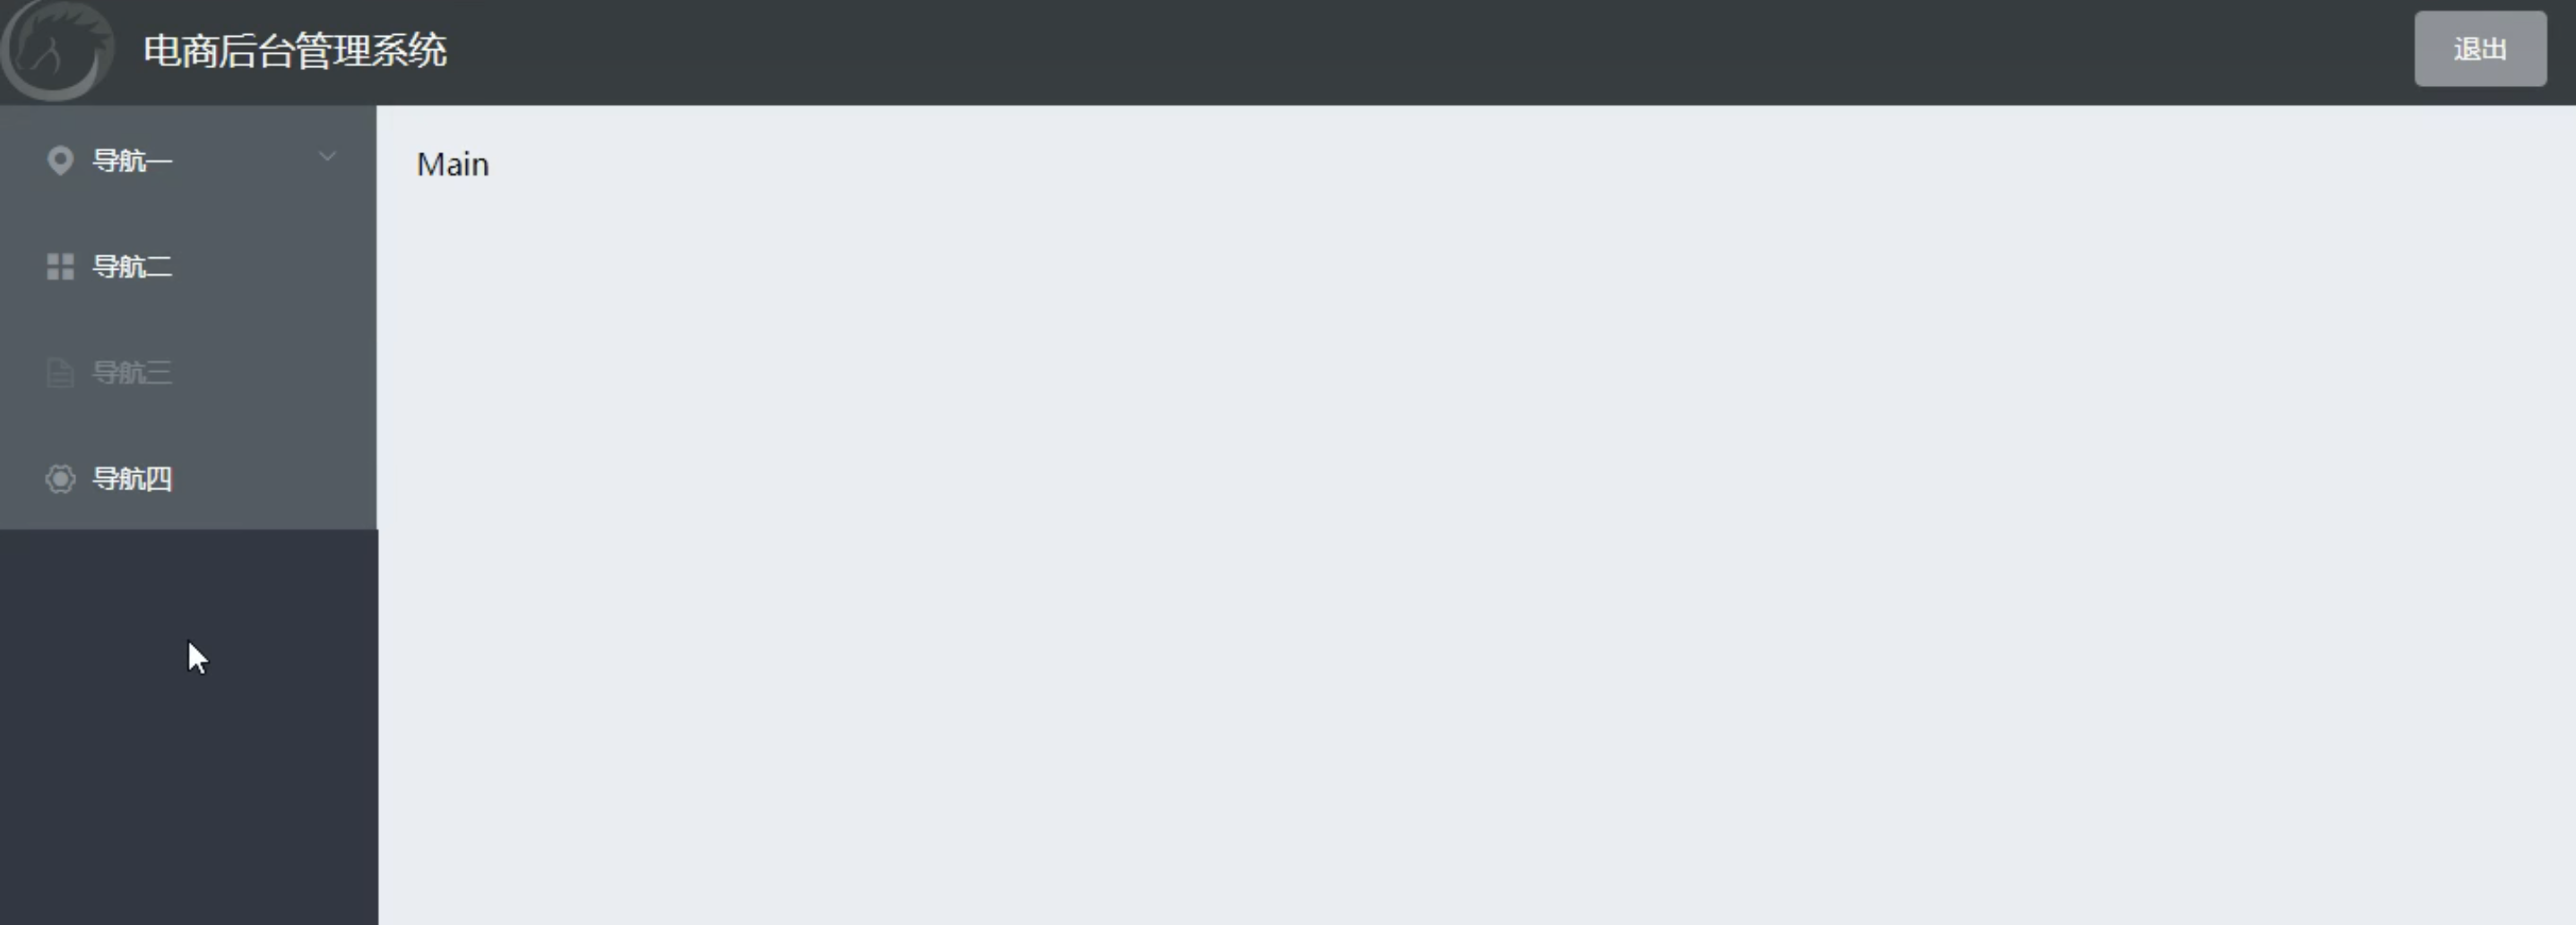

1.2 设置两个菜单,将没用的删除
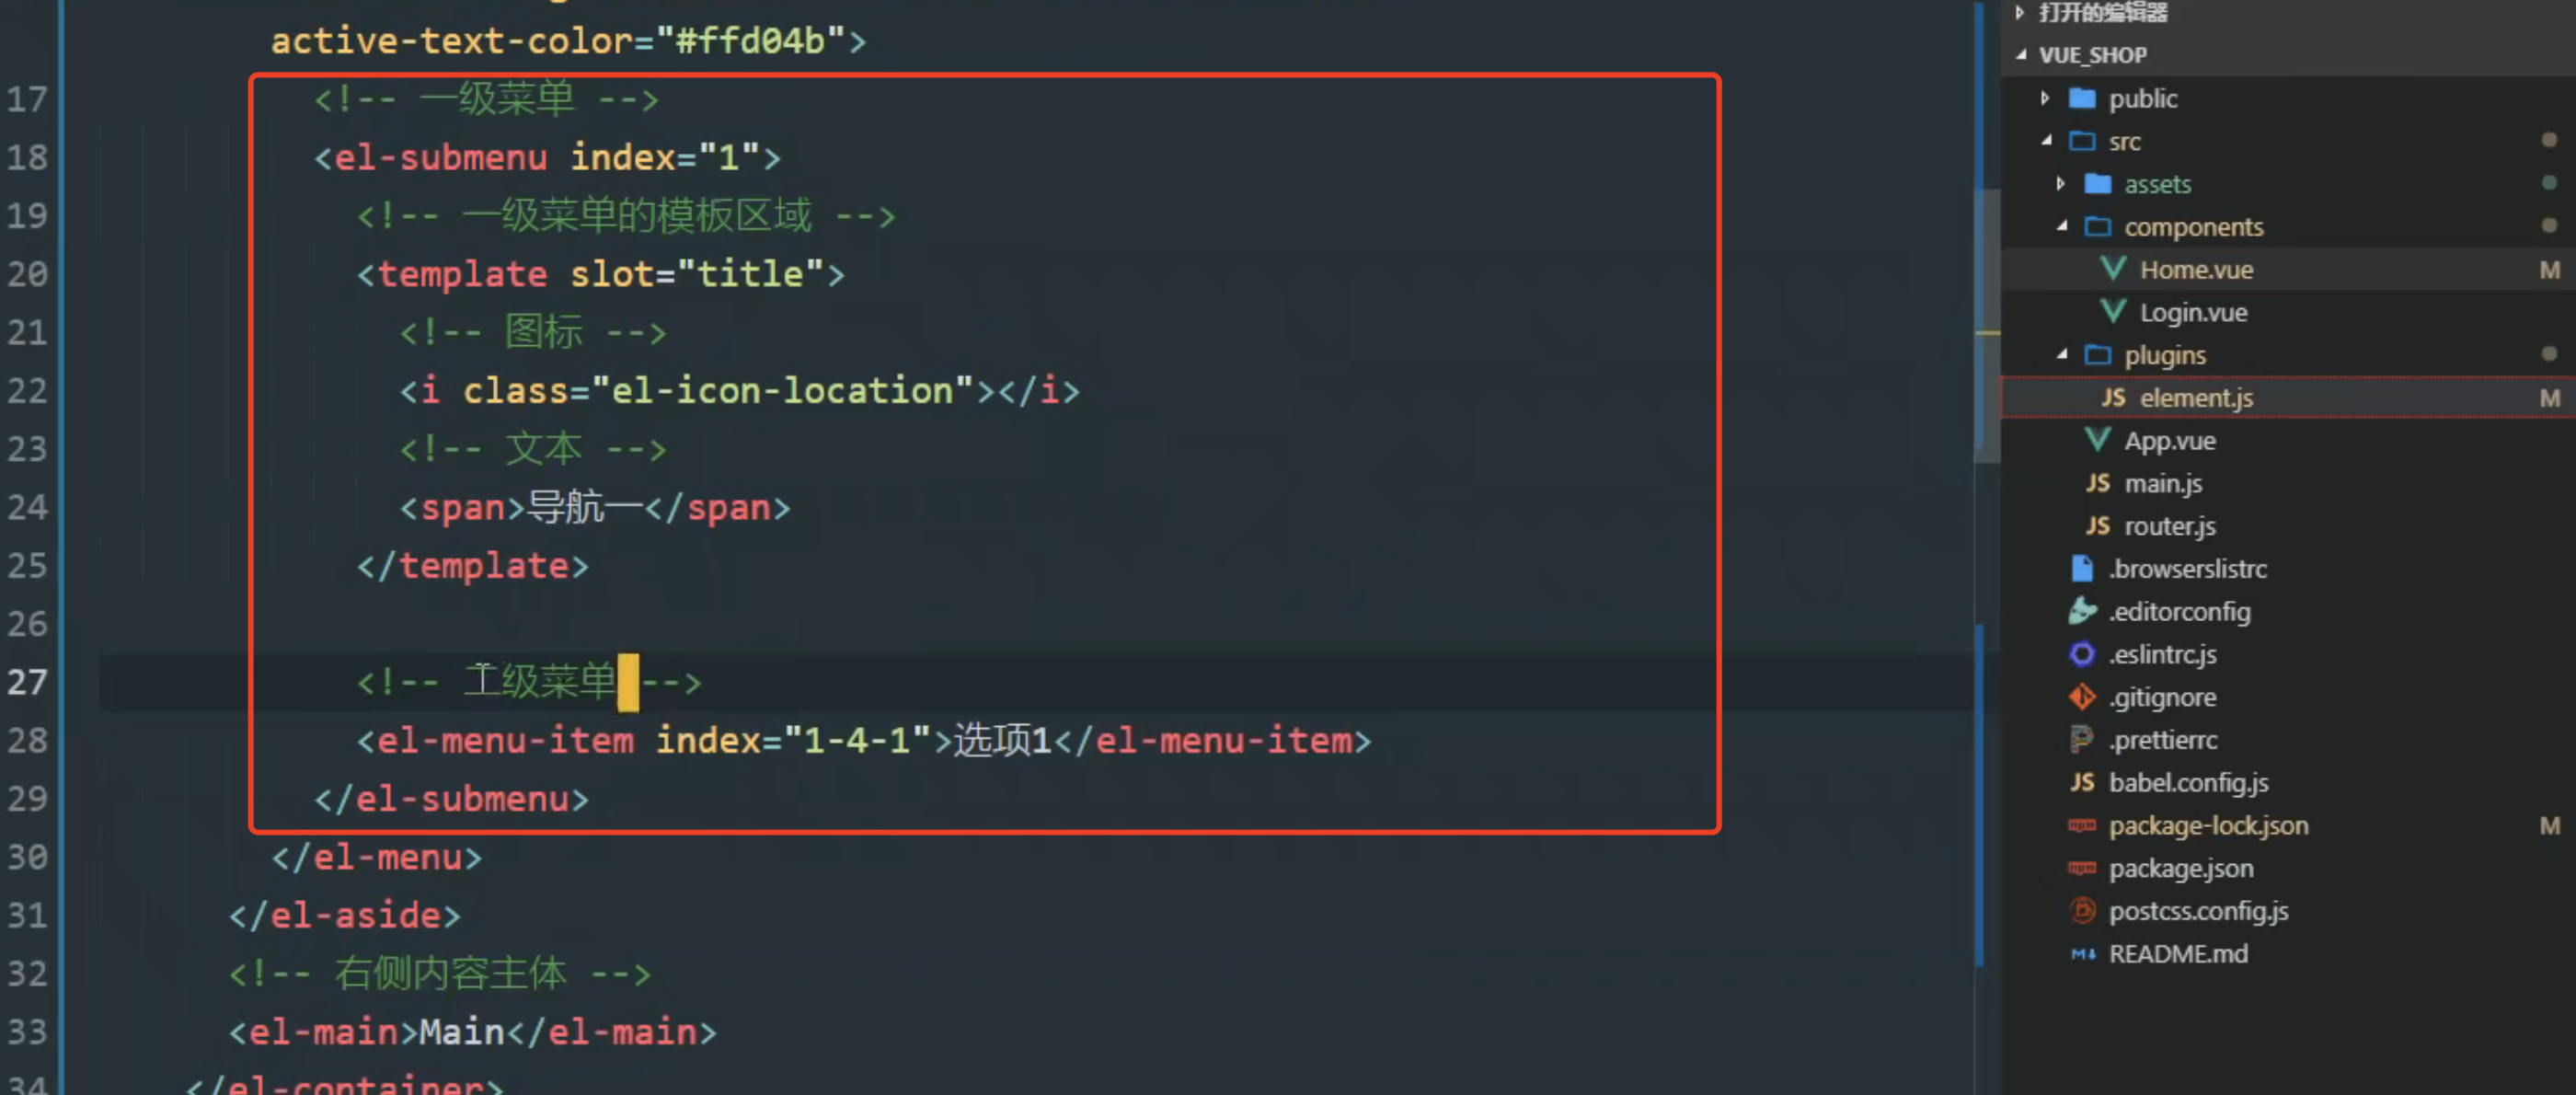
这样二级菜单并没有图标: 将template 放入二级菜单(el-menu-item )这就有了
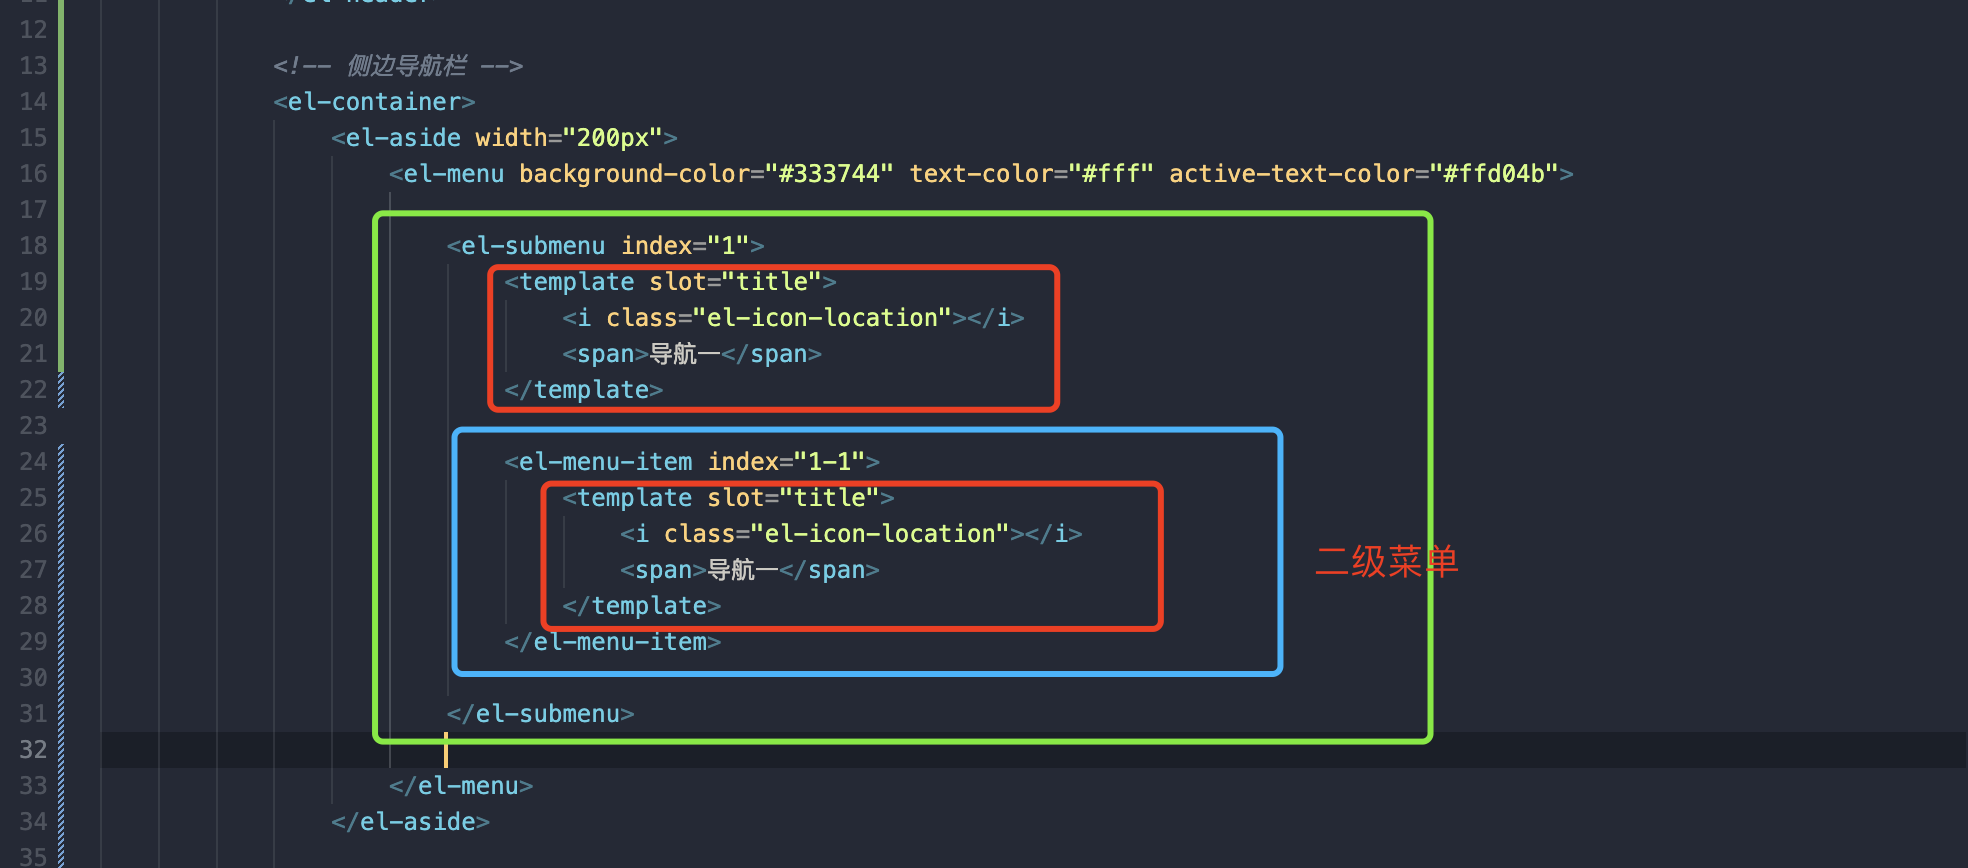

  <el-menu background-color="#333744" text-color="#fff" active-text-color="#ffd04b">
                        <!-- 一级菜单 -->
                        <el-submenu :index="1">
                            <!-- 一级菜单模板 -->
                            <template slot="title">
                                <!-- 图标 -->
                                <i class="el-icon-location"></i>
                                <!-- 文本 -->
                                <span>导航1</span>
                            </template>
                            <!-- 二级子菜单 -->
                            <el-menu-item :index="1-1">
                                <!-- 二级菜单模板 -->
                                <template slot="title">
                                    <!-- 图标 -->
                                    <i class="el-icon-location"></i>
                                    <!-- 文本 -->
                                    <span>导航2</span>
                                </template>
                            </el-menu-item>
                        </el-submenu>
                    </el-menu>
3.2通过接口获取菜单数据
3.2.1 拦截器
往其余接口的请求头上添加一个token ,用拦截器去做

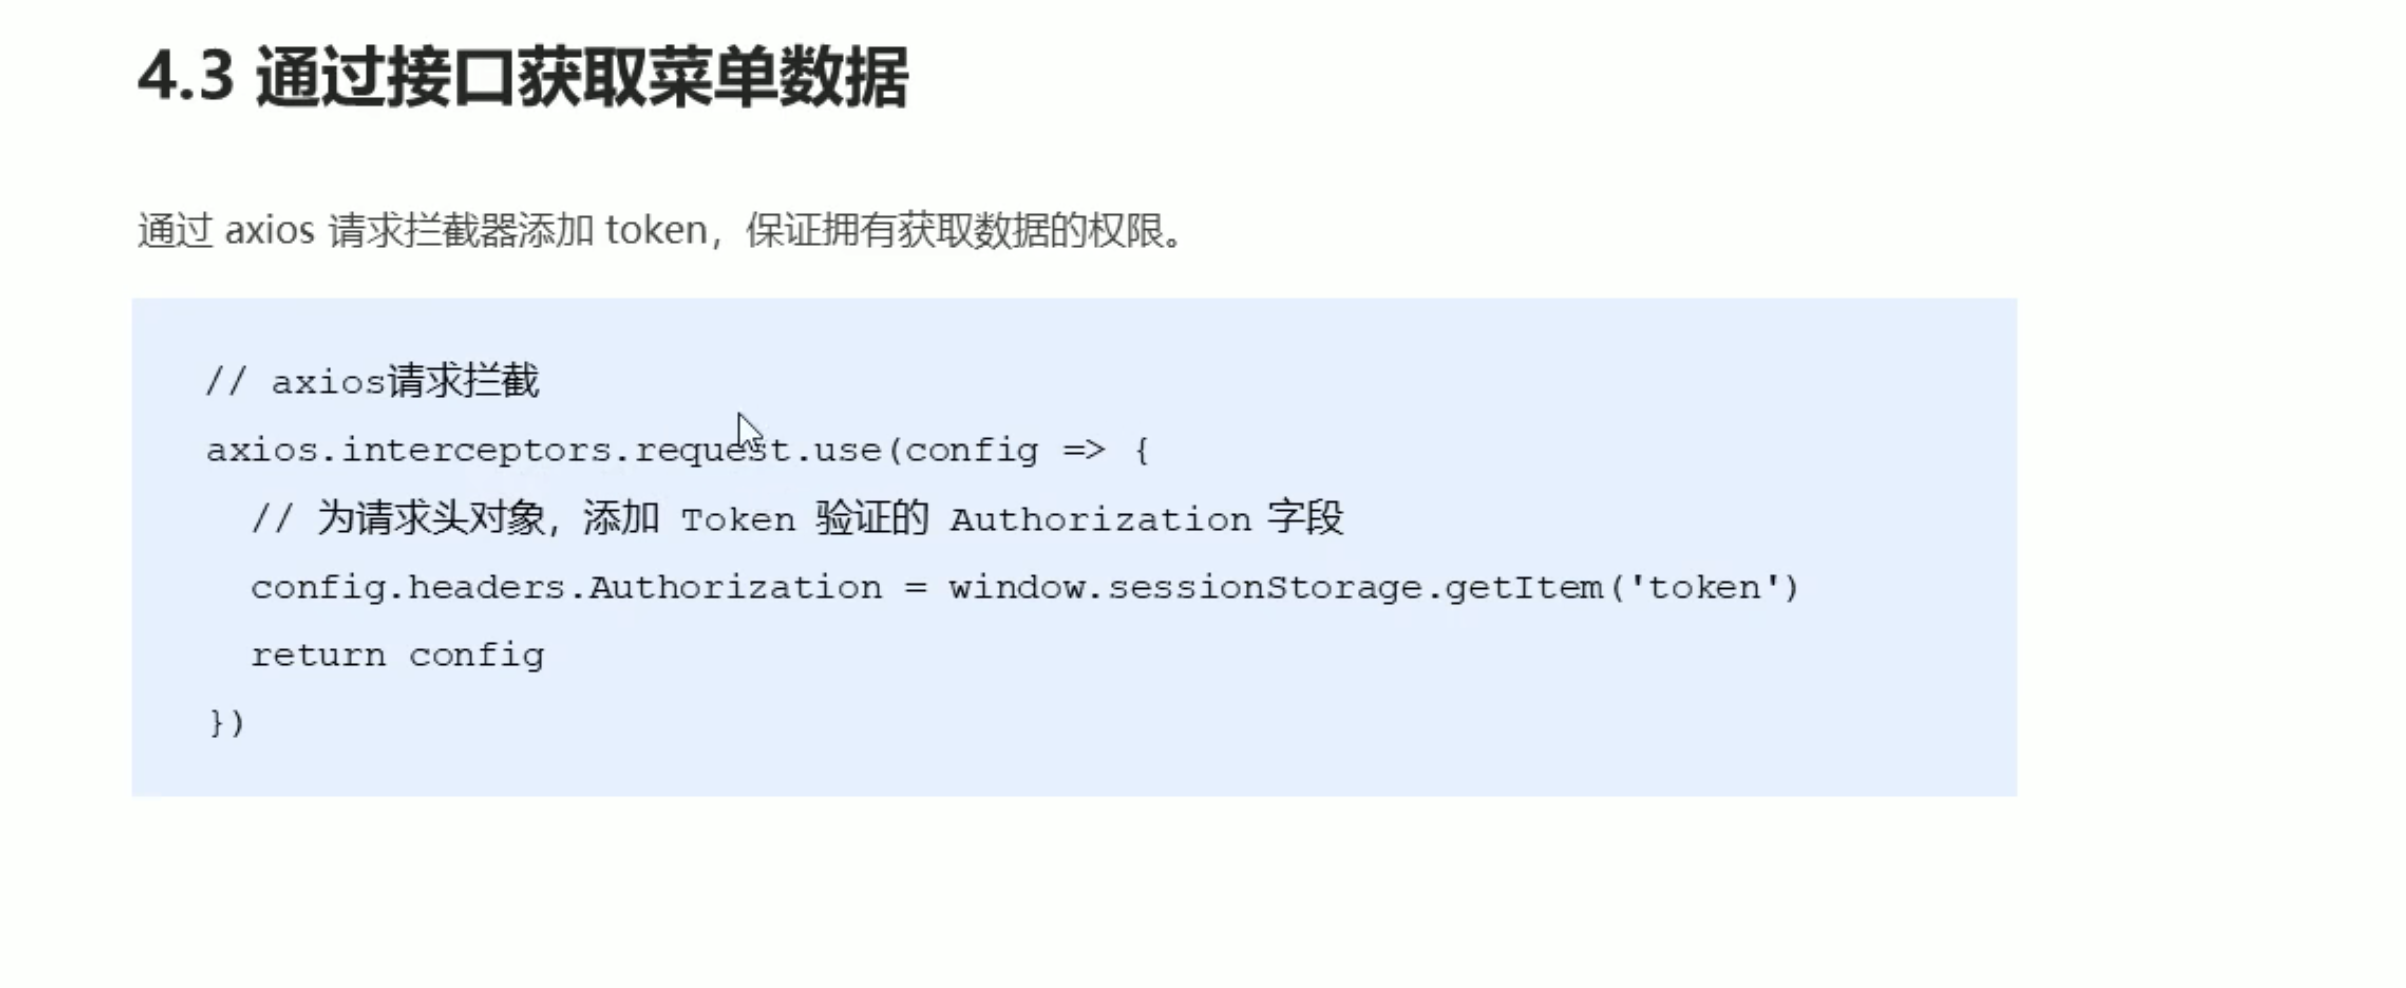
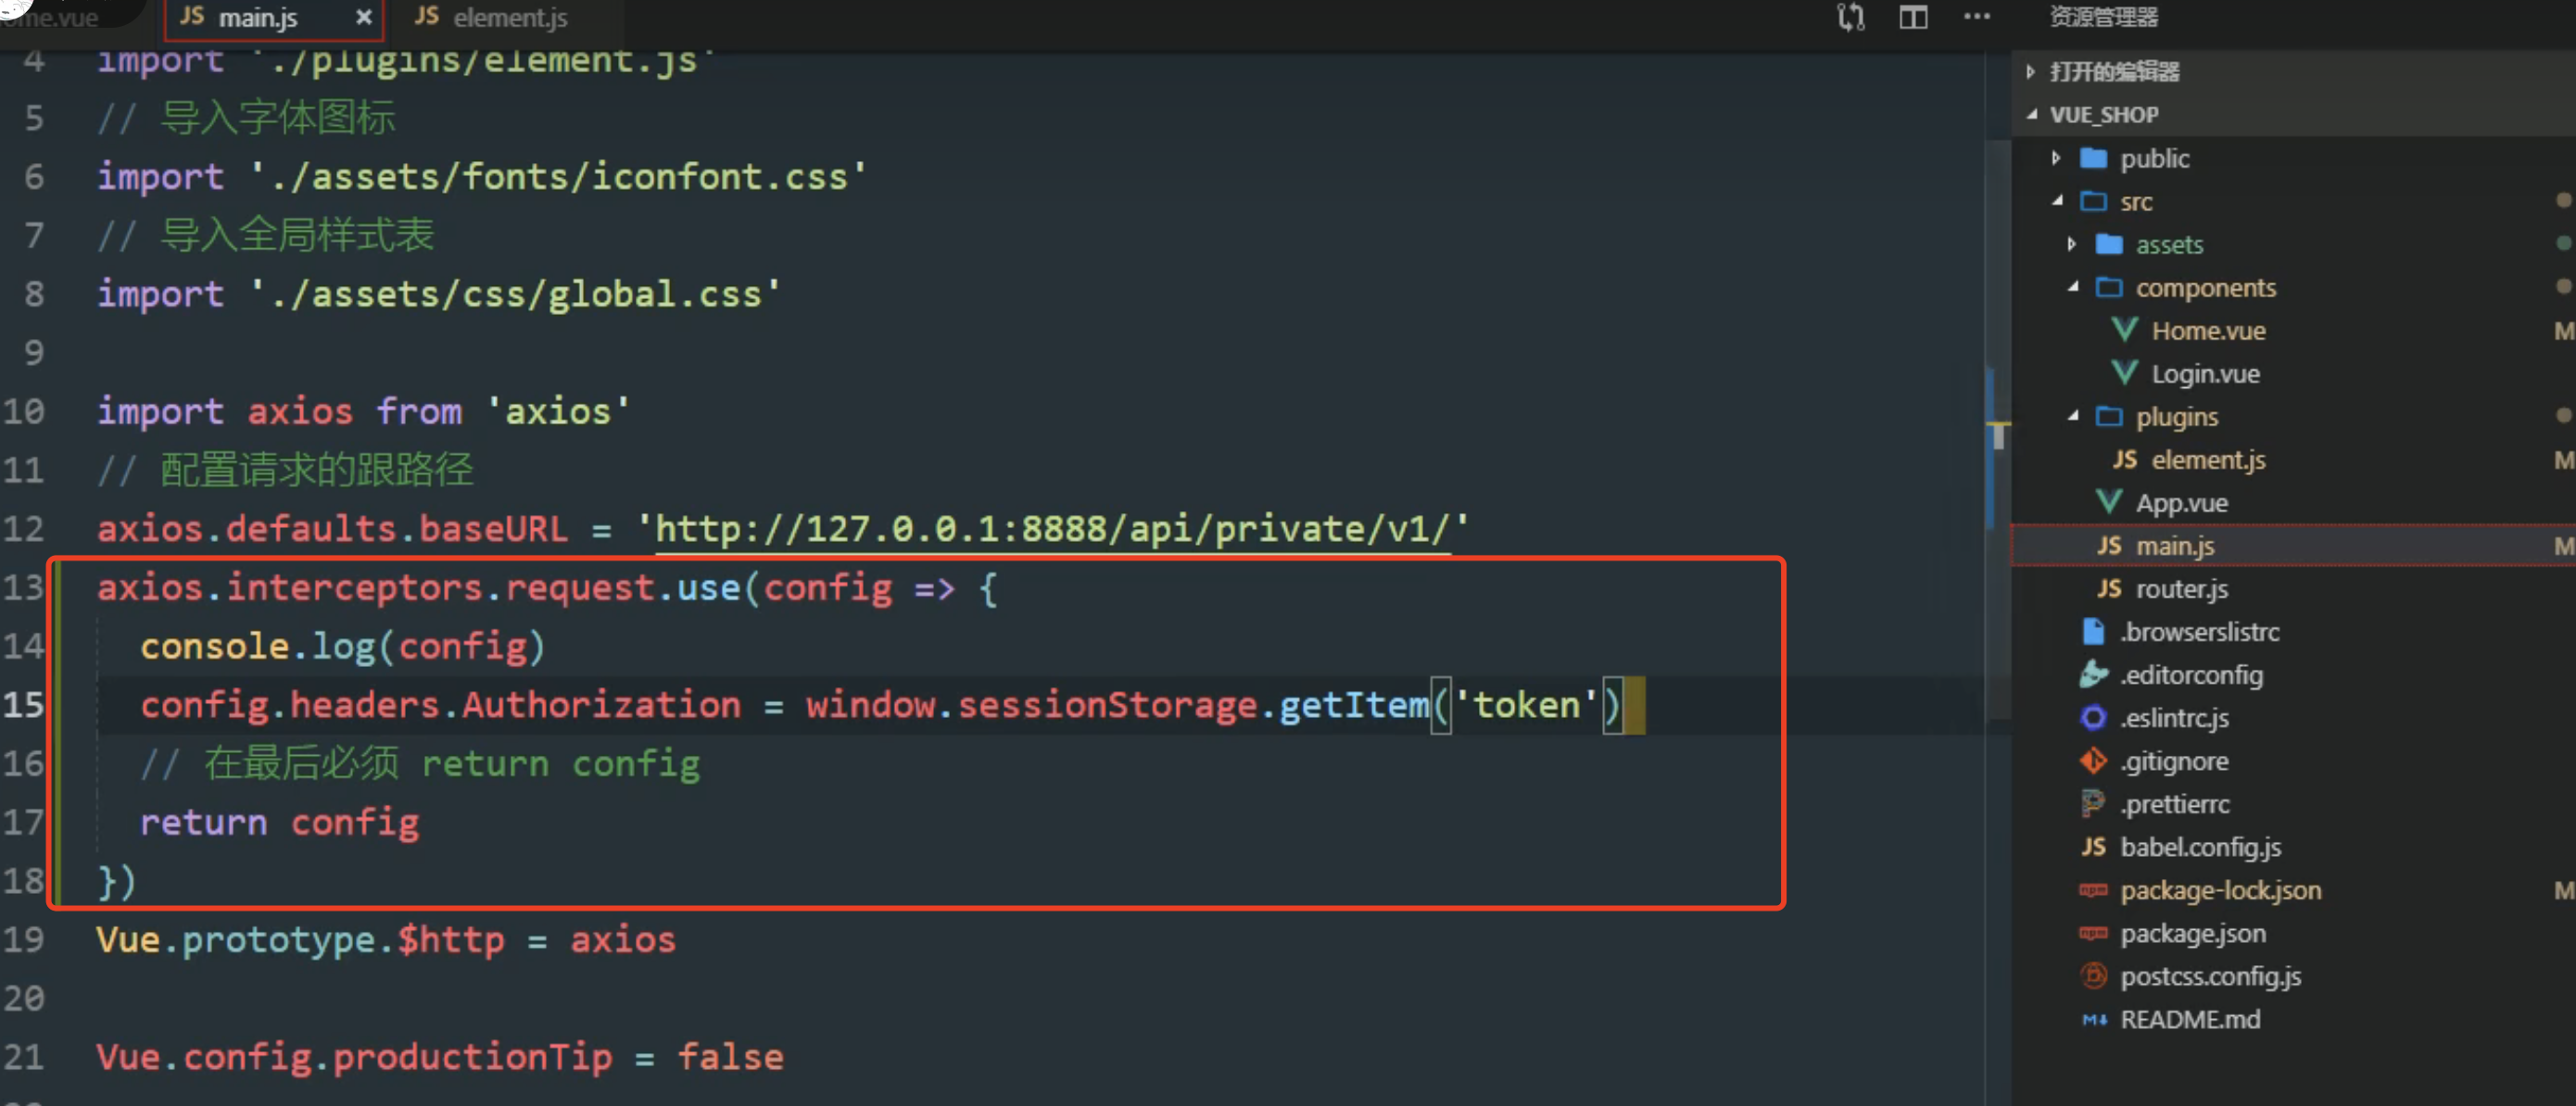
headers 不是header
3.2.2 获取左侧菜单数据
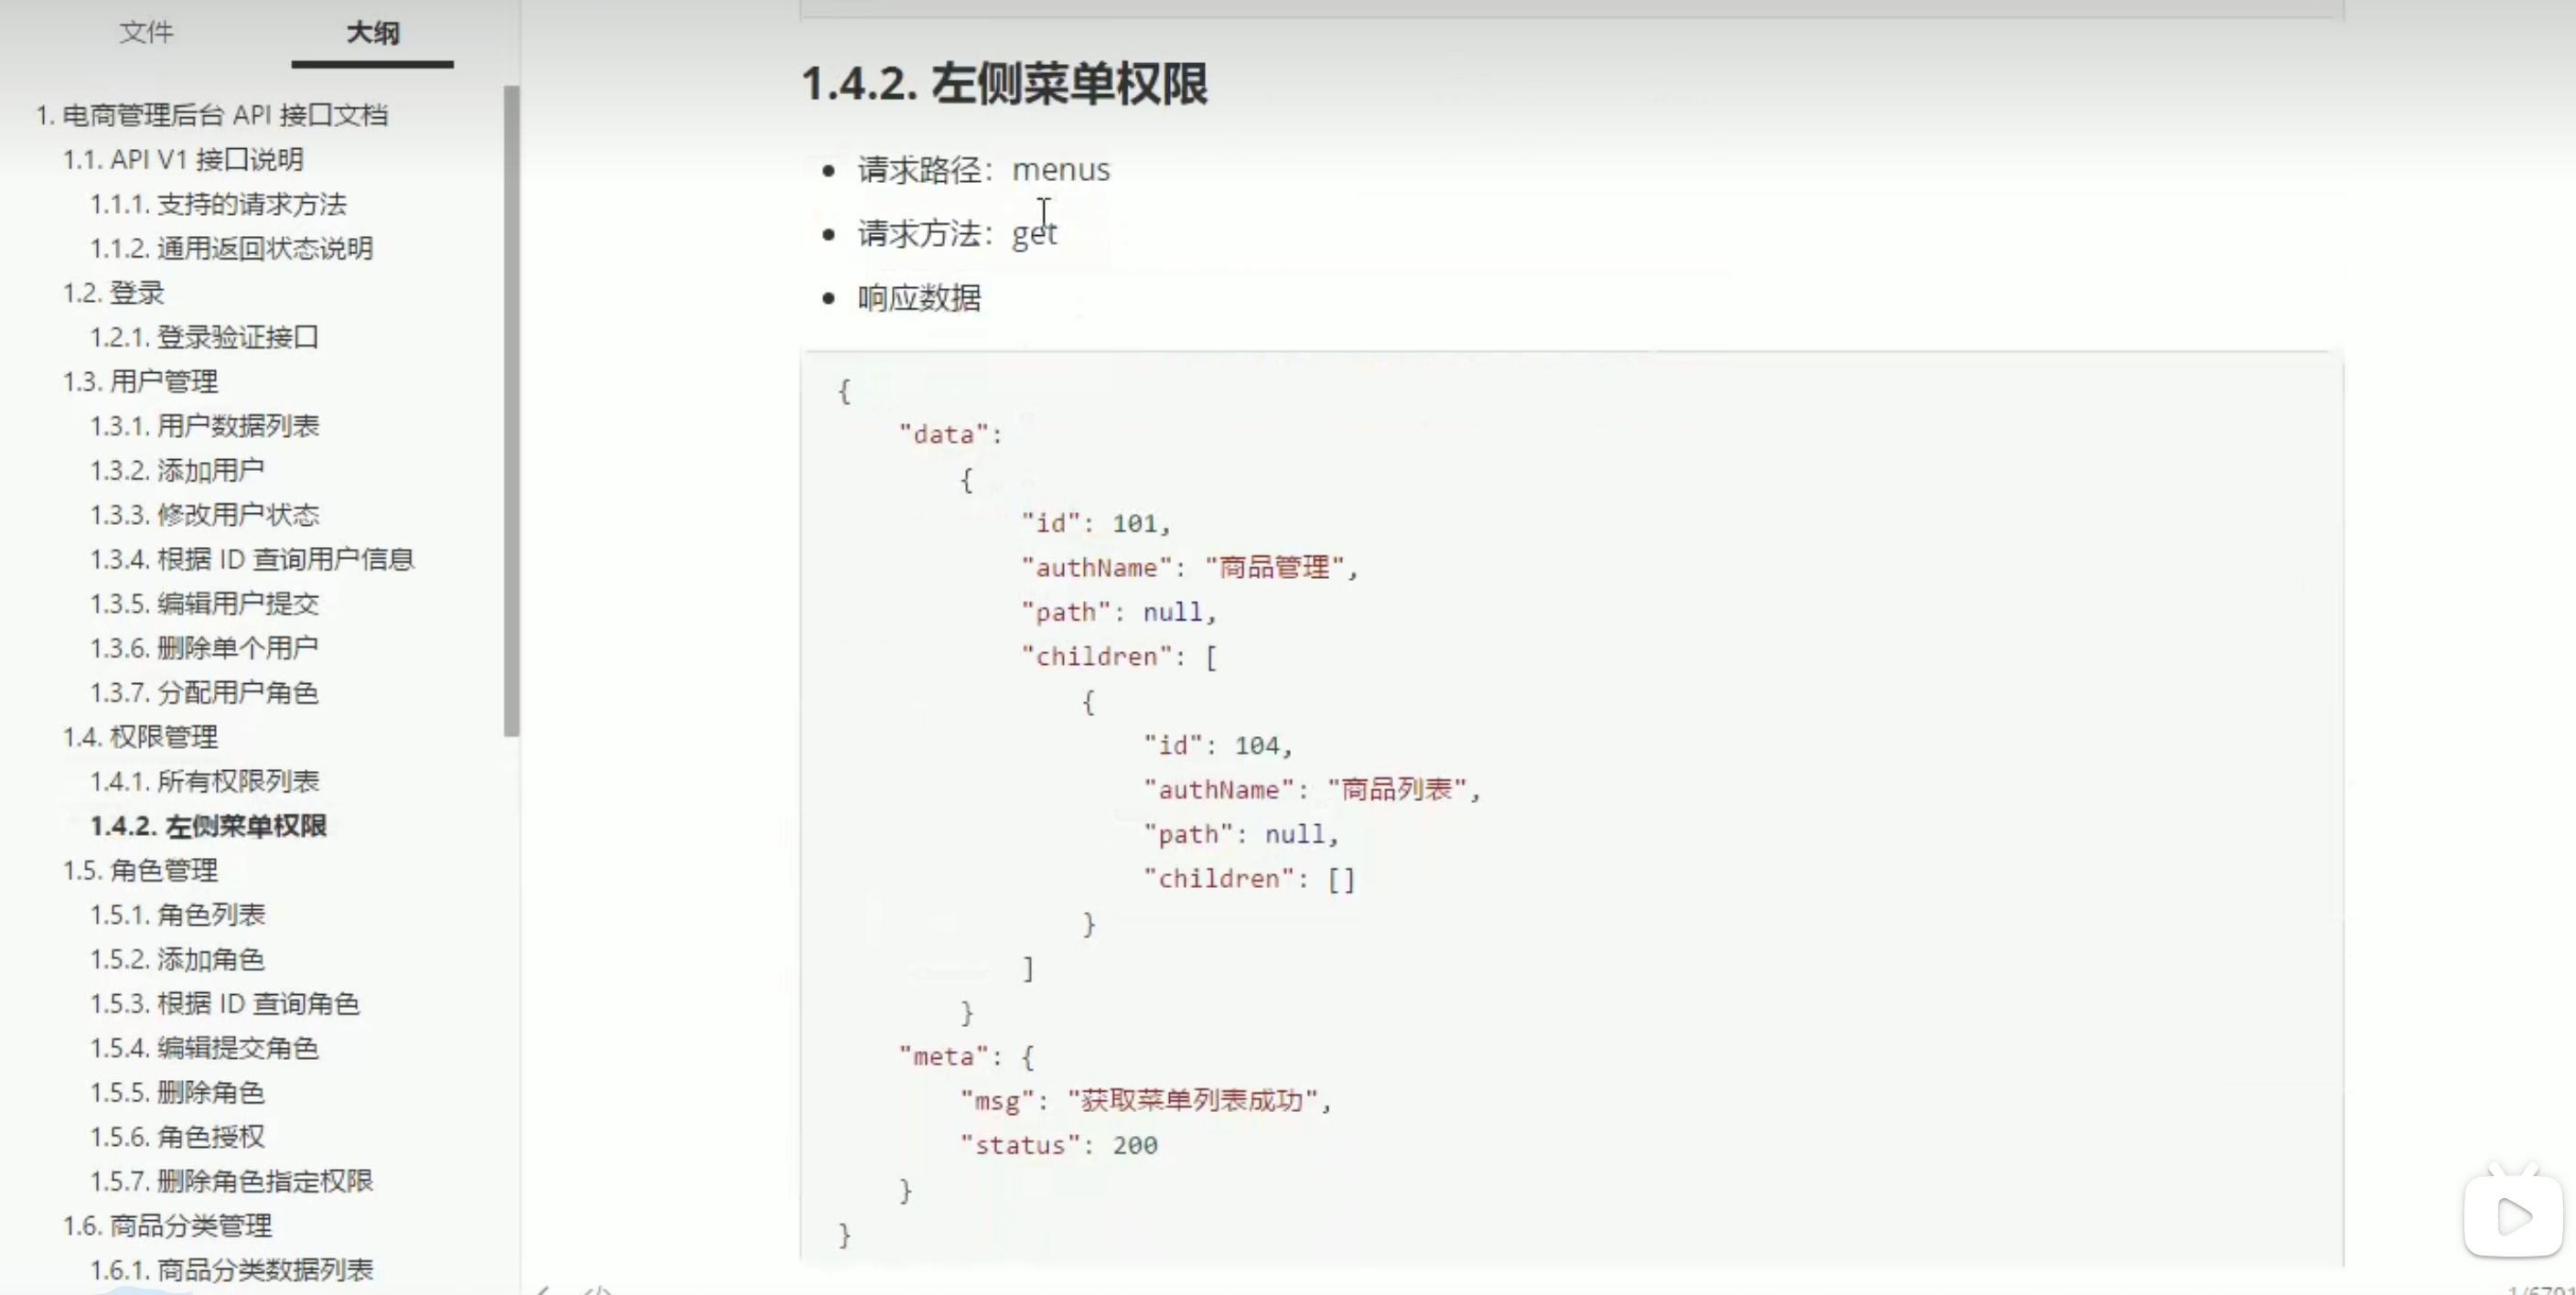
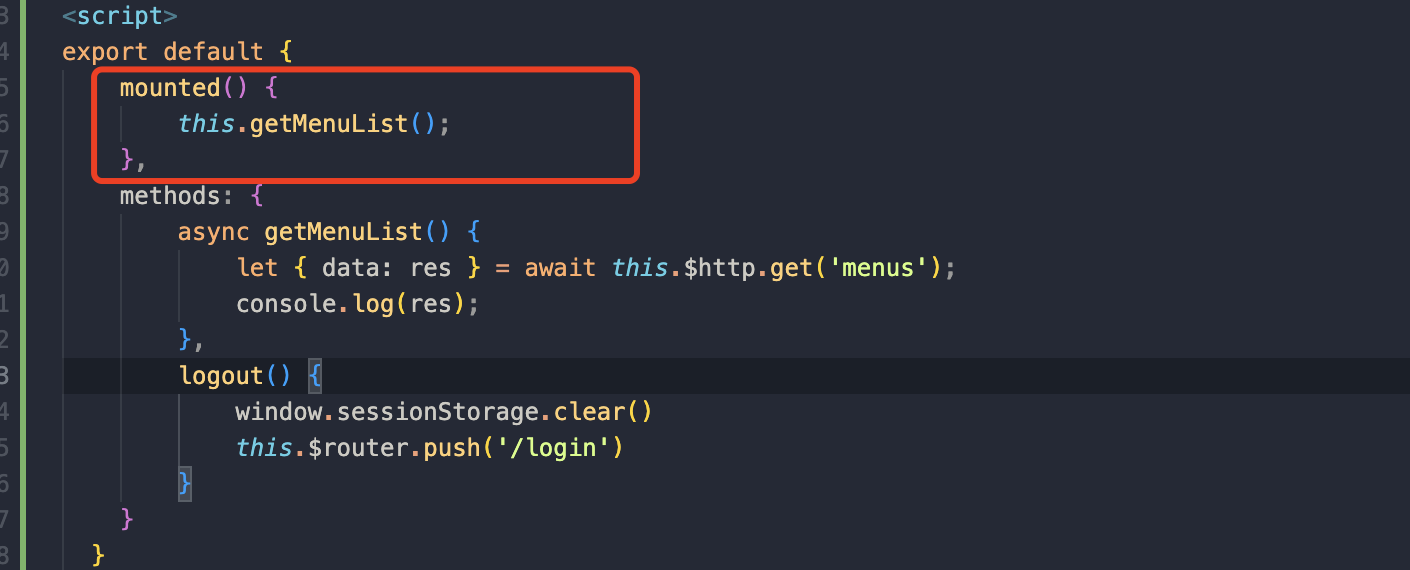
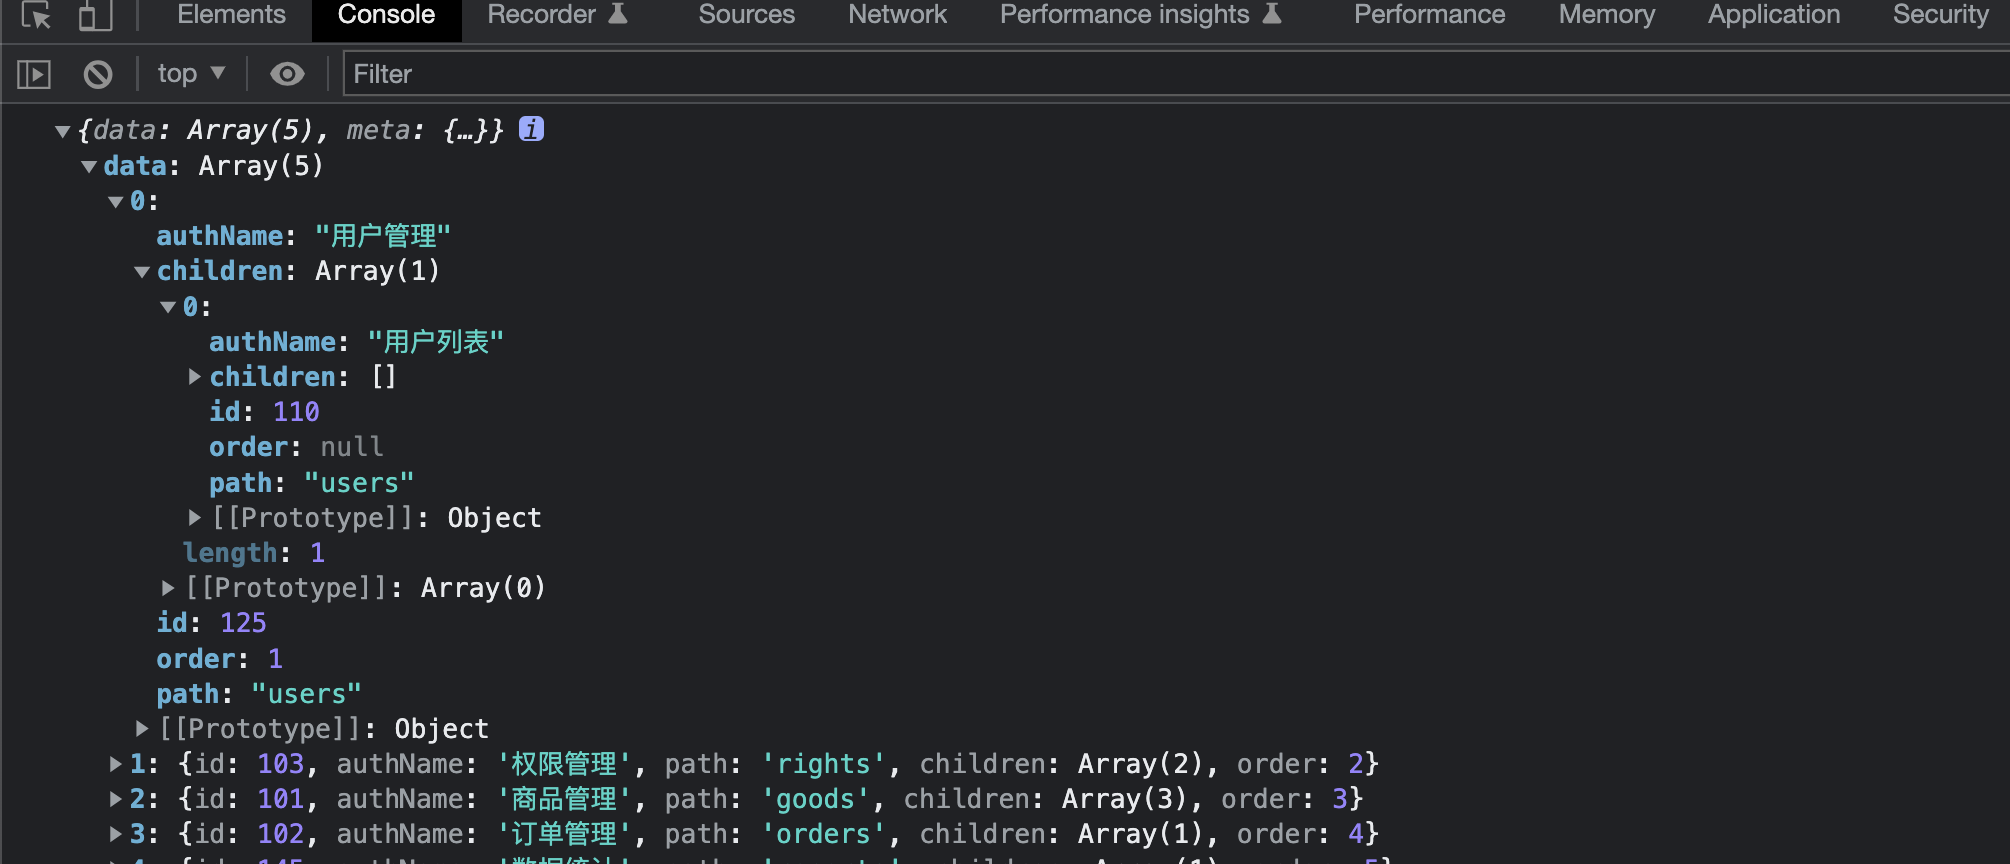
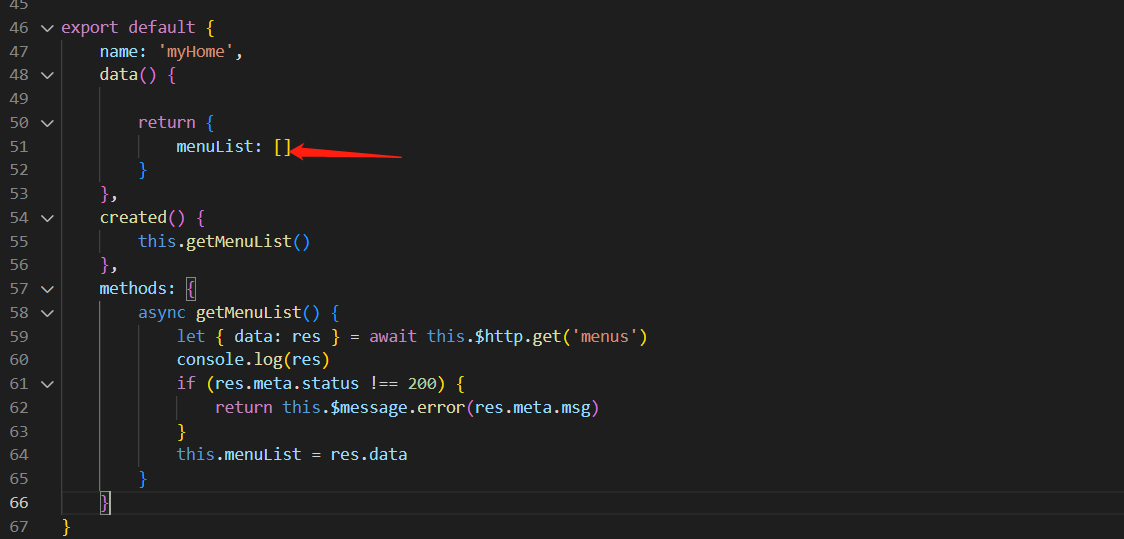
将获取到的数据。立即挂载到自己的data上边
返回结果:
{"data":[{"id":125,"authName":"用户管理","path":"users","children":[{"id":110,"authName":"用户列表","path":"users","children":[],"order":null}],"order":1},{"id":103,"authName":"权限管理","path":"rights","children":[{"id":111,"authName":"角色列表","path":"roles","children":[],"order":null},{"id":112,"authName":"权限列表","path":"rights","children":[],"order":null}],"order":2},{"id":101,"authName":"商品管理","path":"goods","children":[{"id":104,"authName":"商品列表","path":"goods","children":[],"order":1},{"id":115,"authName":"分类参数","path":"params","children":[],"order":2},{"id":121,"authName":"商品分类","path":"categories","children":[],"order":3}],"order":3},{"id":102,"authName":"订单管理","path":"orders","children":[{"id":107,"authName":"订单列表","path":"orders","children":[],"order":null}],"order":4},{"id":145,"authName":"数据统计","path":"reports","children":[{"id":146,"authName":"数据报表","path":"reports","children":[],"order":null}],"order":5}],"meta":{"msg":"获取菜单列表成功","status":200}}3.3 渲染数据
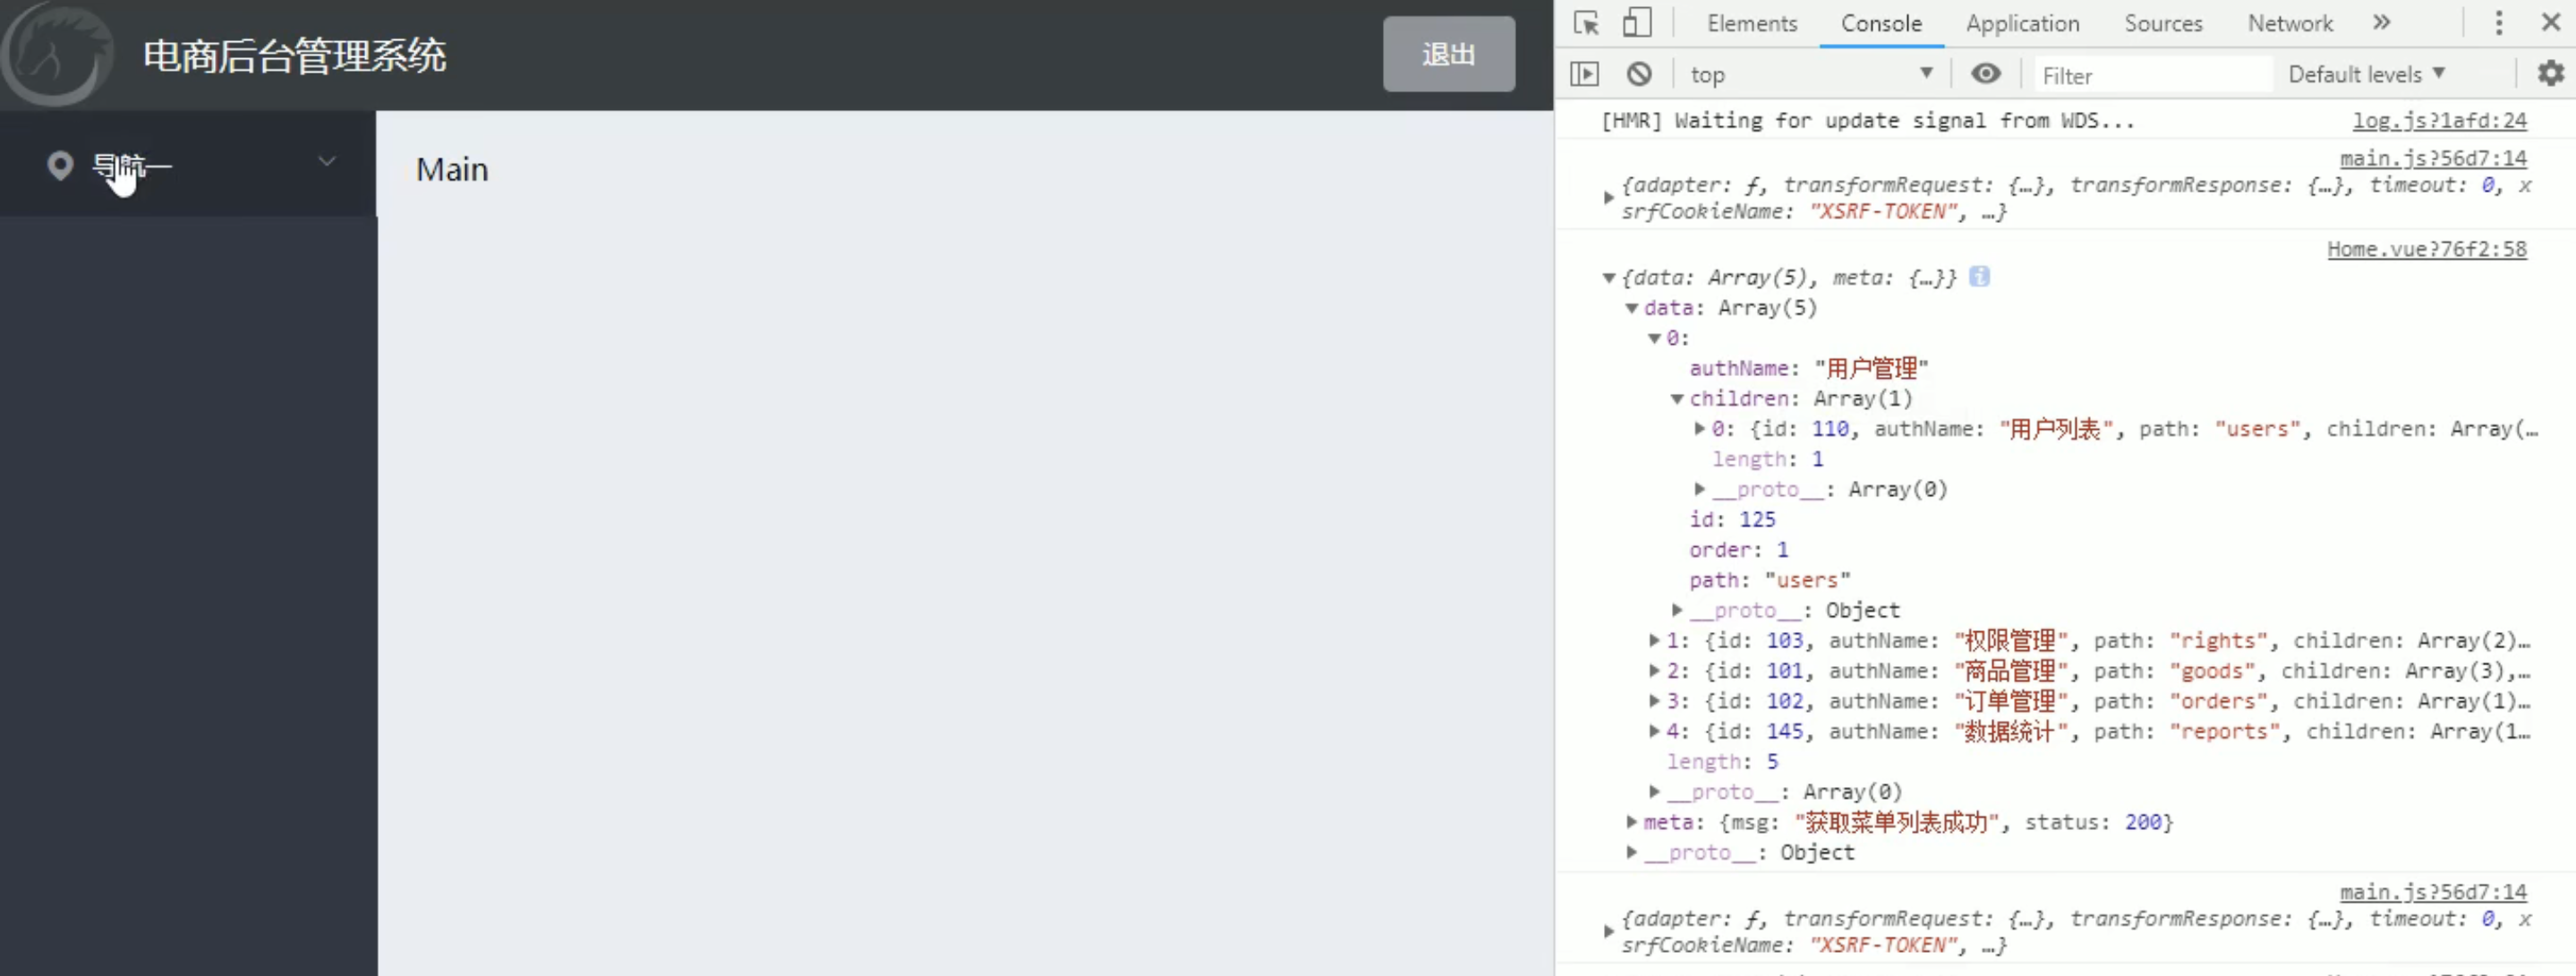
{
    "data":
        {
            "id": 101,
            "authName": "商品管理",
            "path": null,
            "children": [
                {
                    "id": 104,
                    "authName": "商品列表",
                    "path": null,
                    "children": []
                }
            ]
        }
    "meta": {
        "msg": "获取菜单列表成功",
        "status": 200
    }
}
3.3.1 先渲染一级菜单
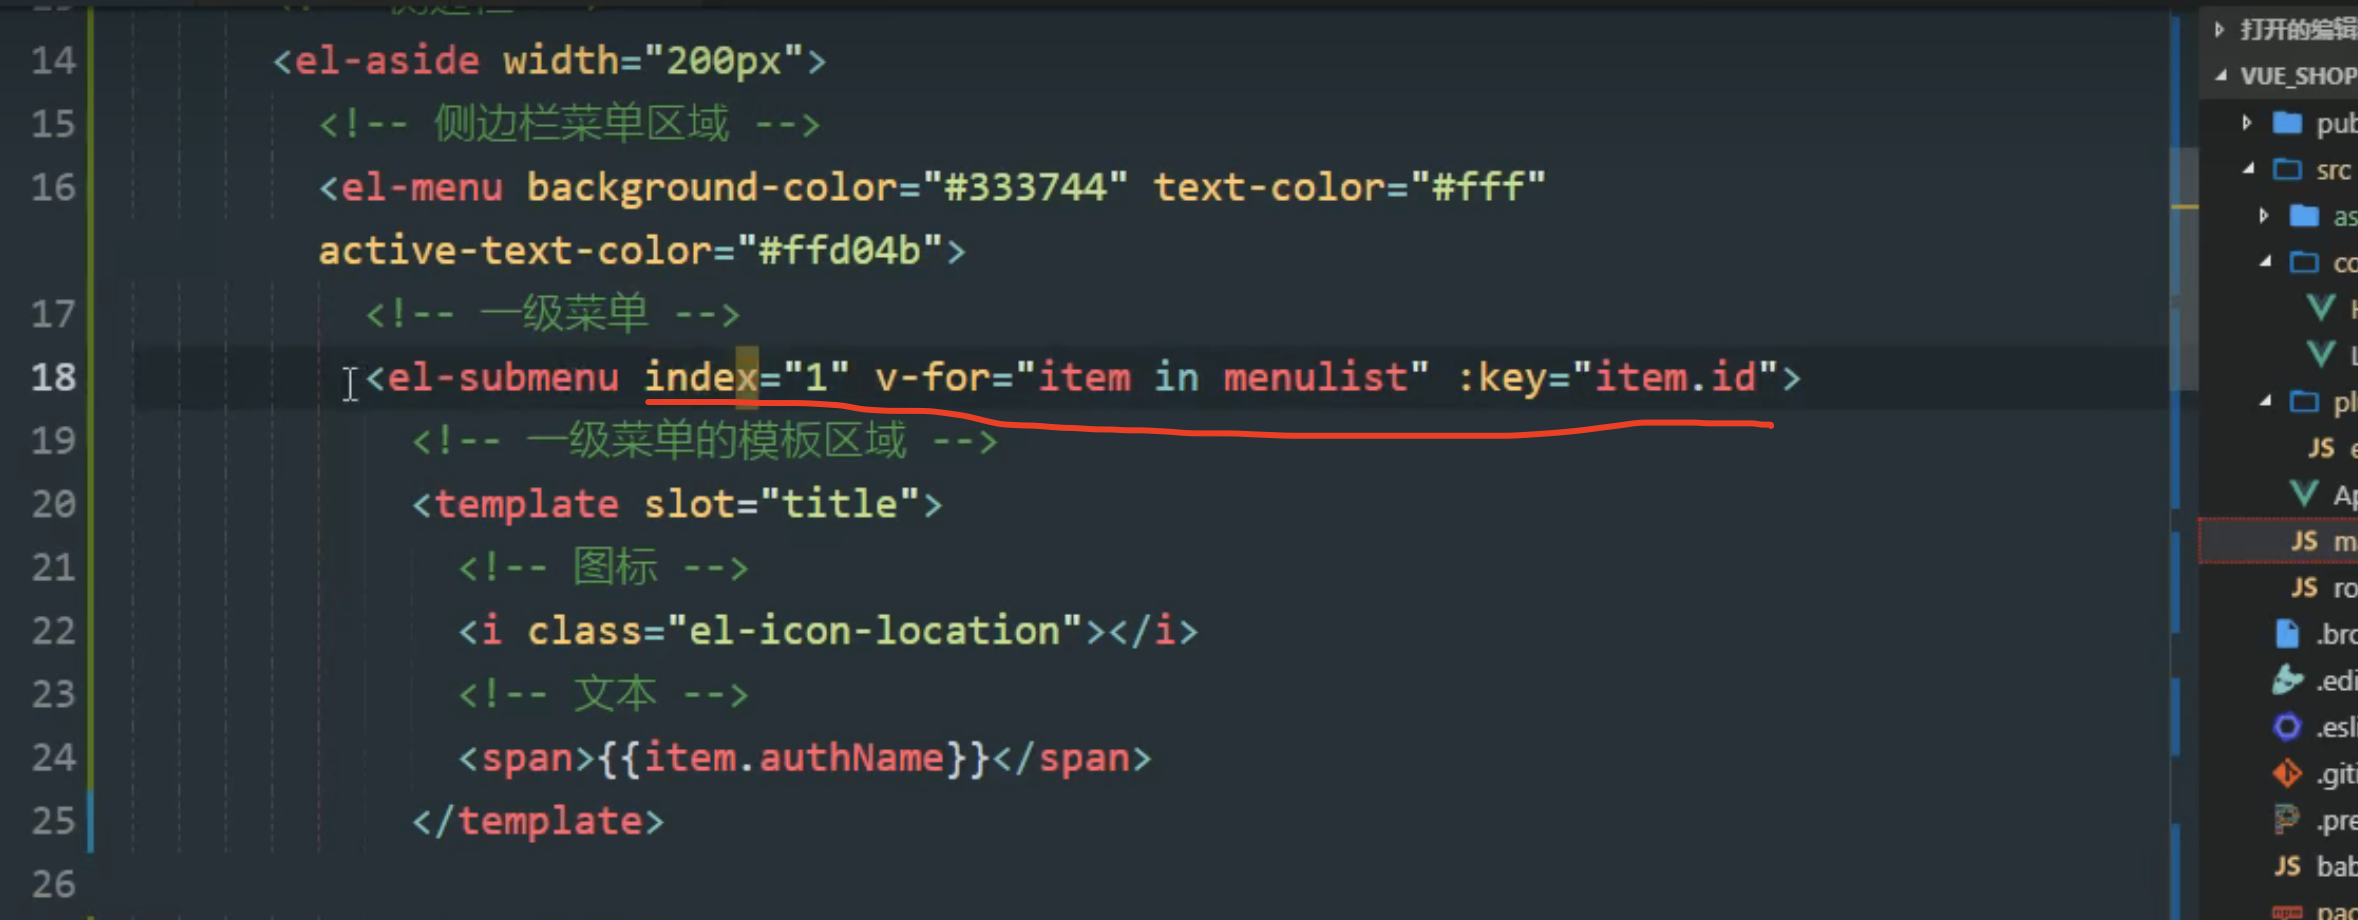
1 现在有一个问题: 一点击用户管理,其他一级分类页打开了。是因为 index是相同的
每一个菜单应该有一个独属于自己的index
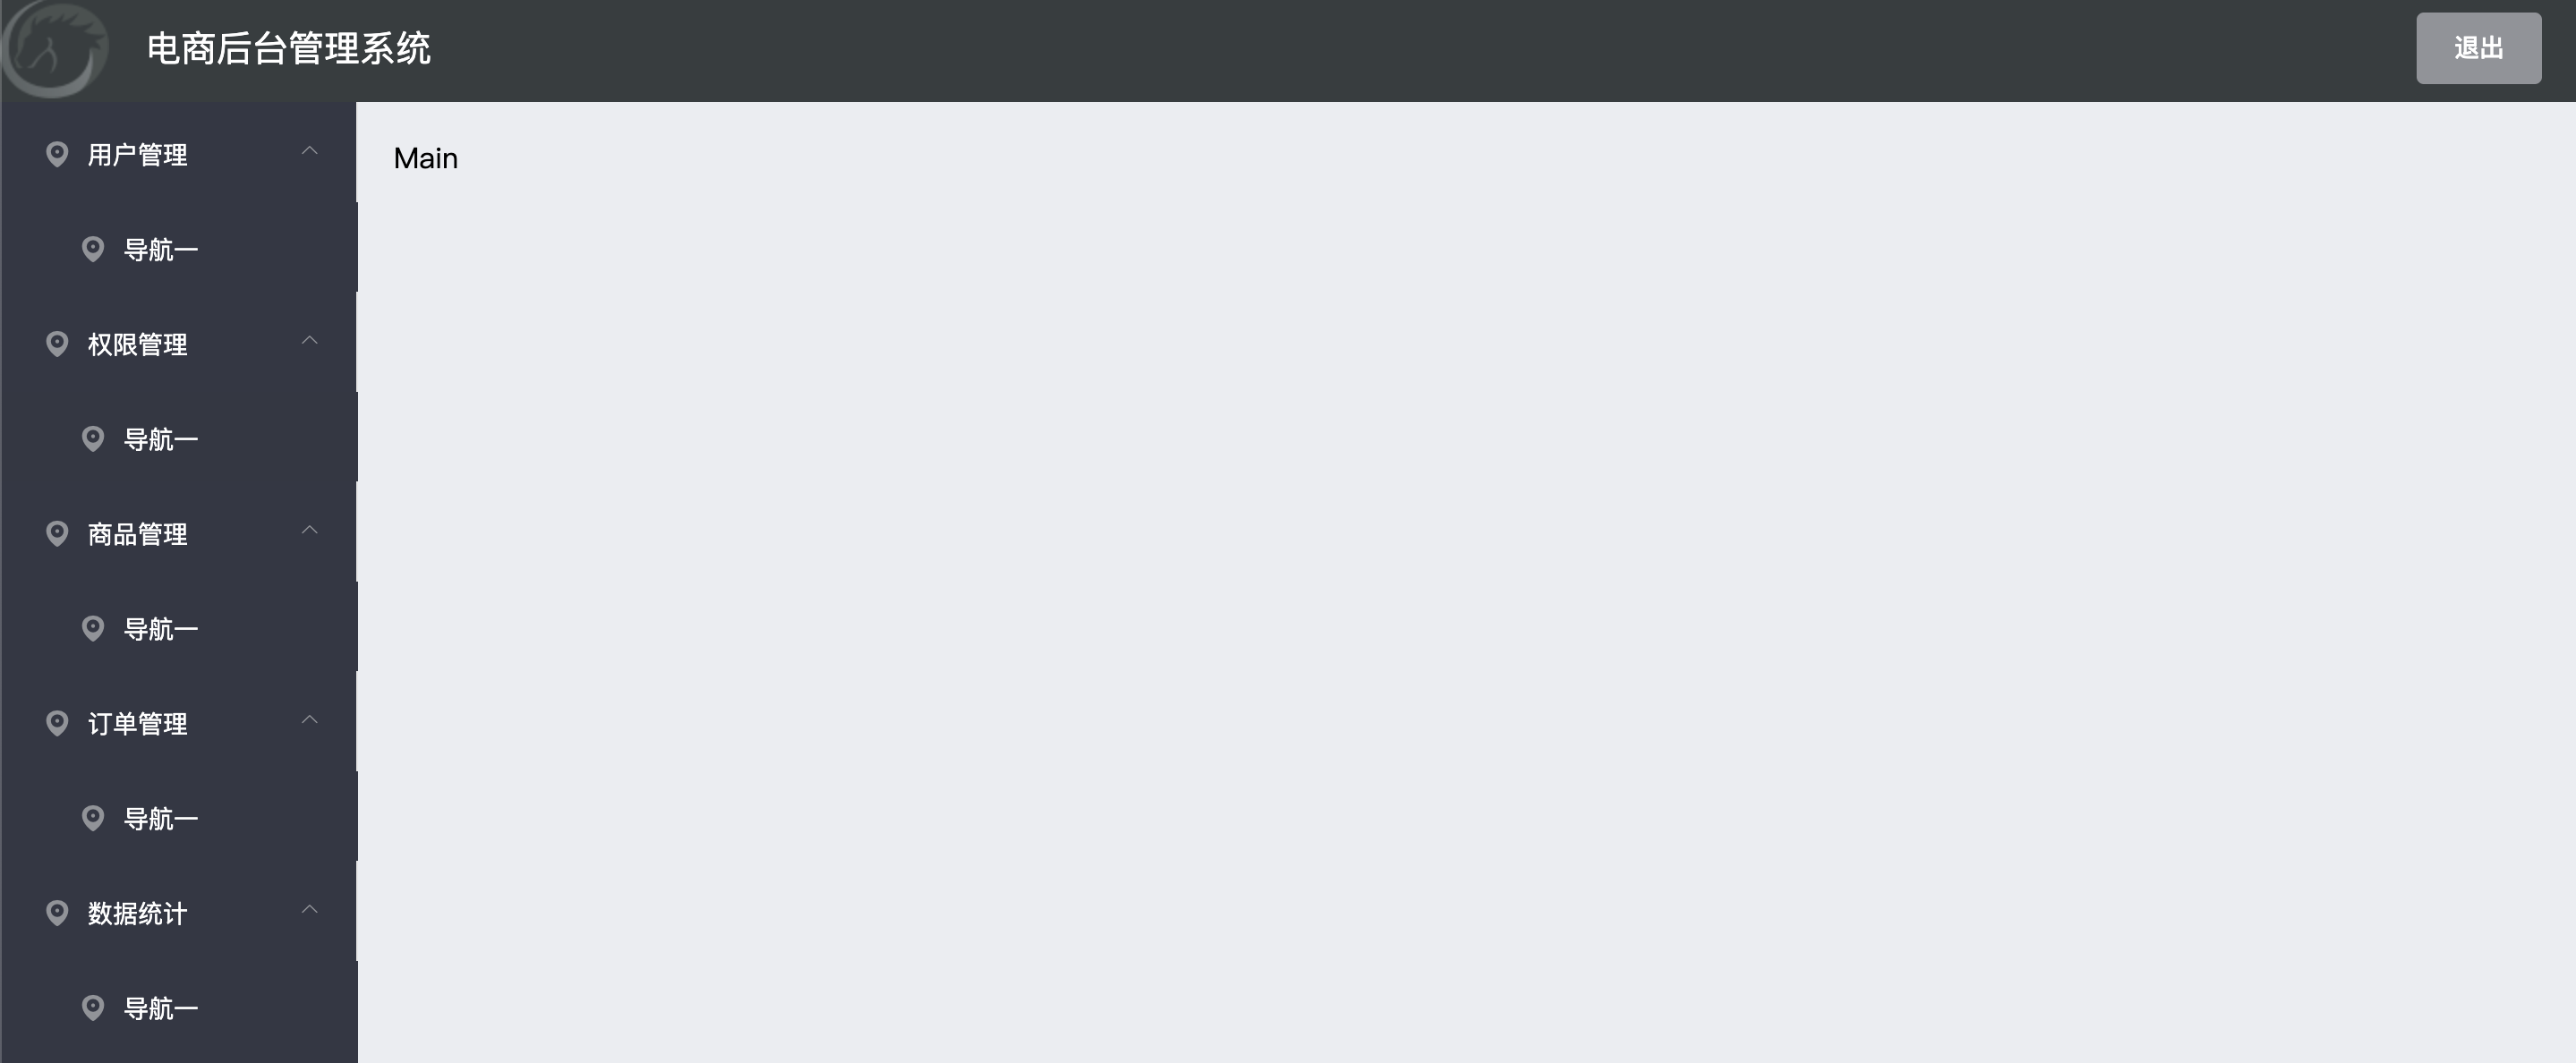
修改:

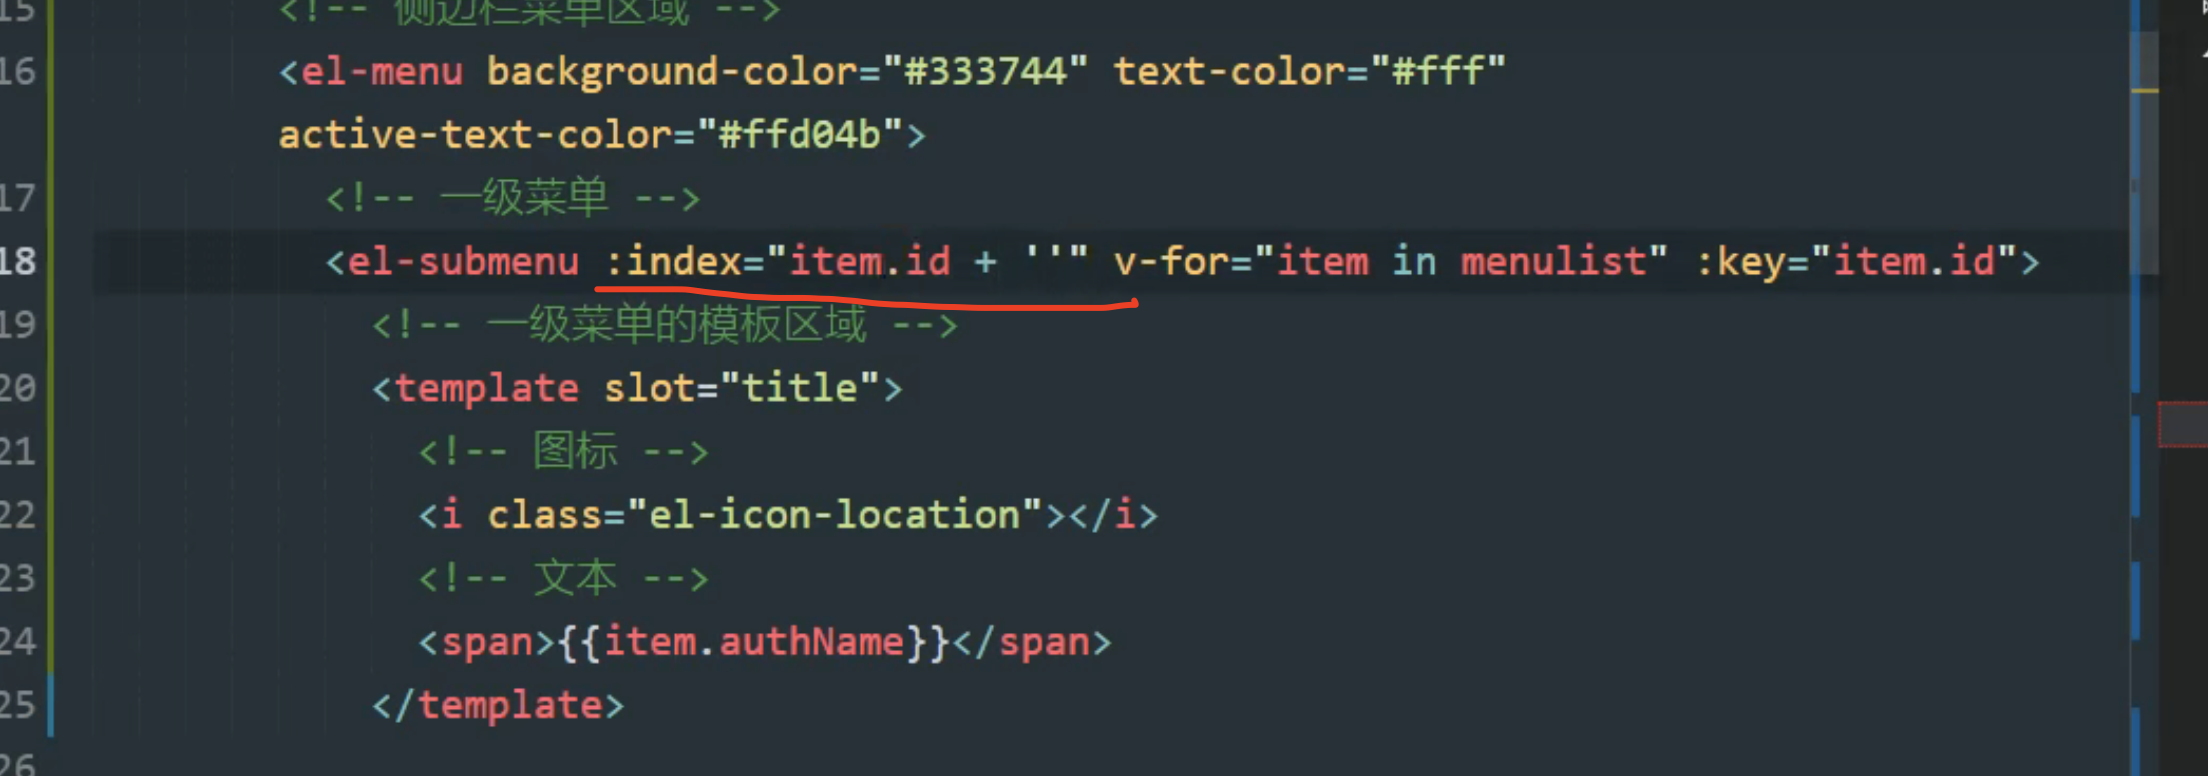
2 控制台还在报错,因为index只接受字符串,不接收 数字
修改:
3.3.2 渲染二级菜单
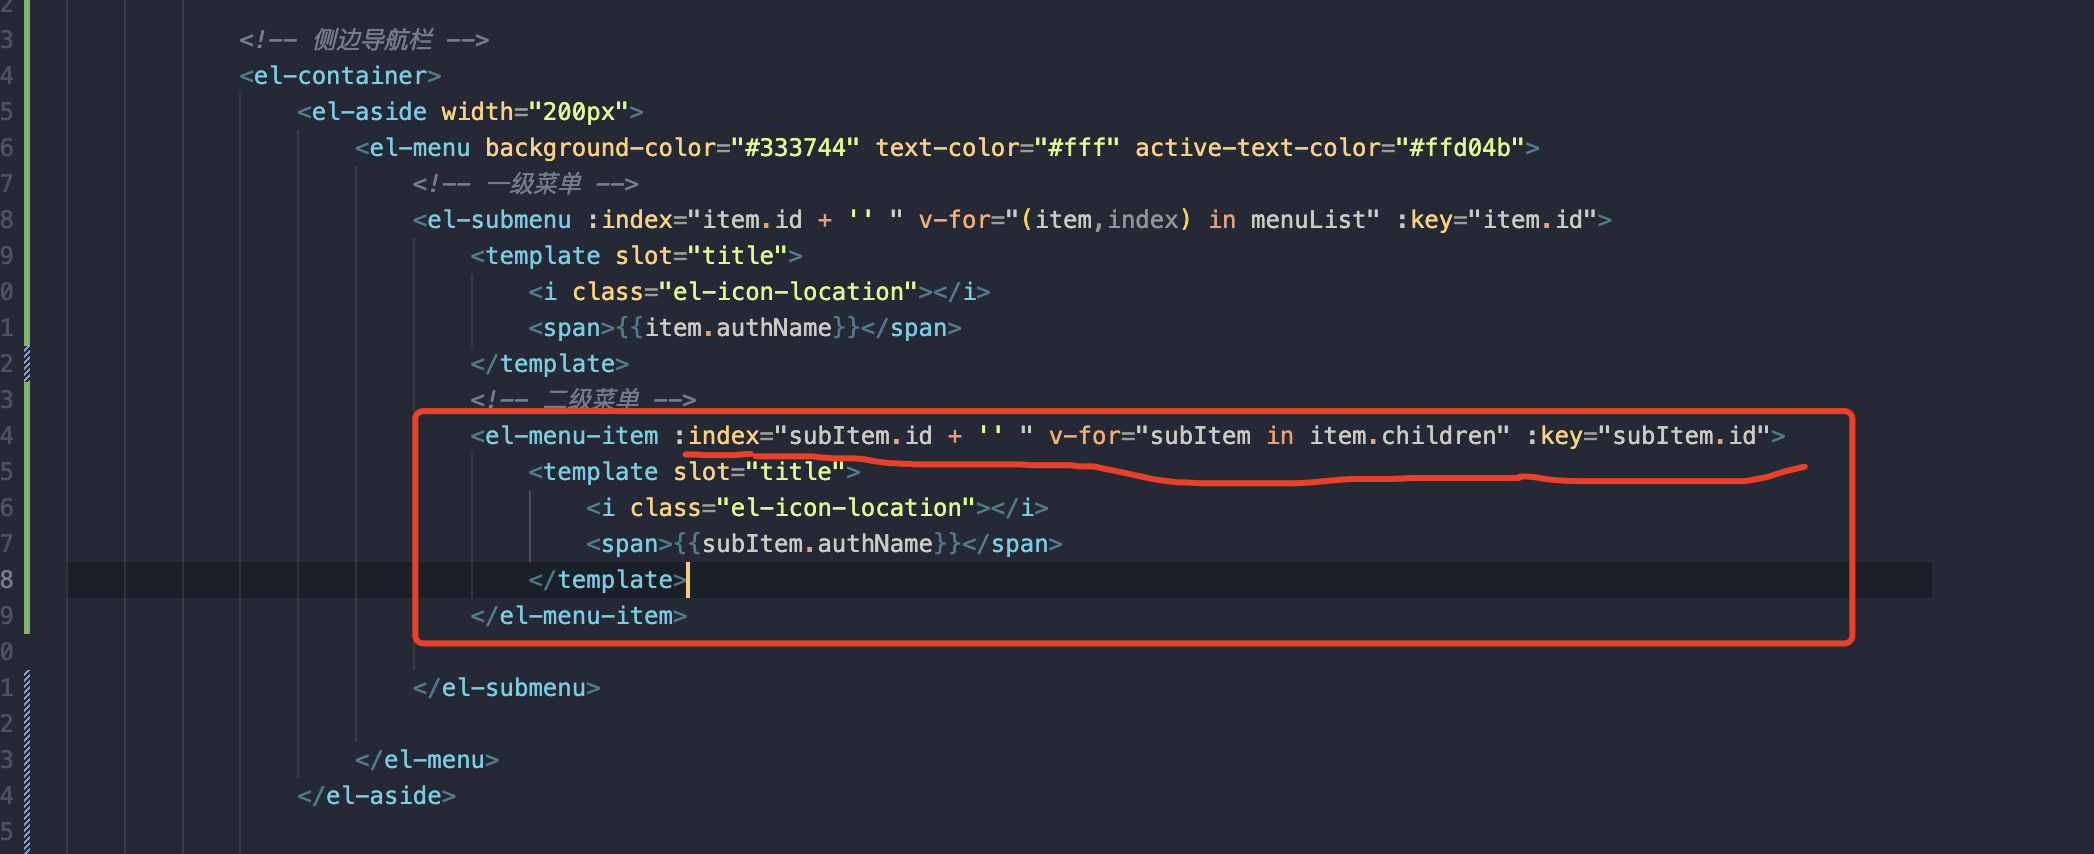
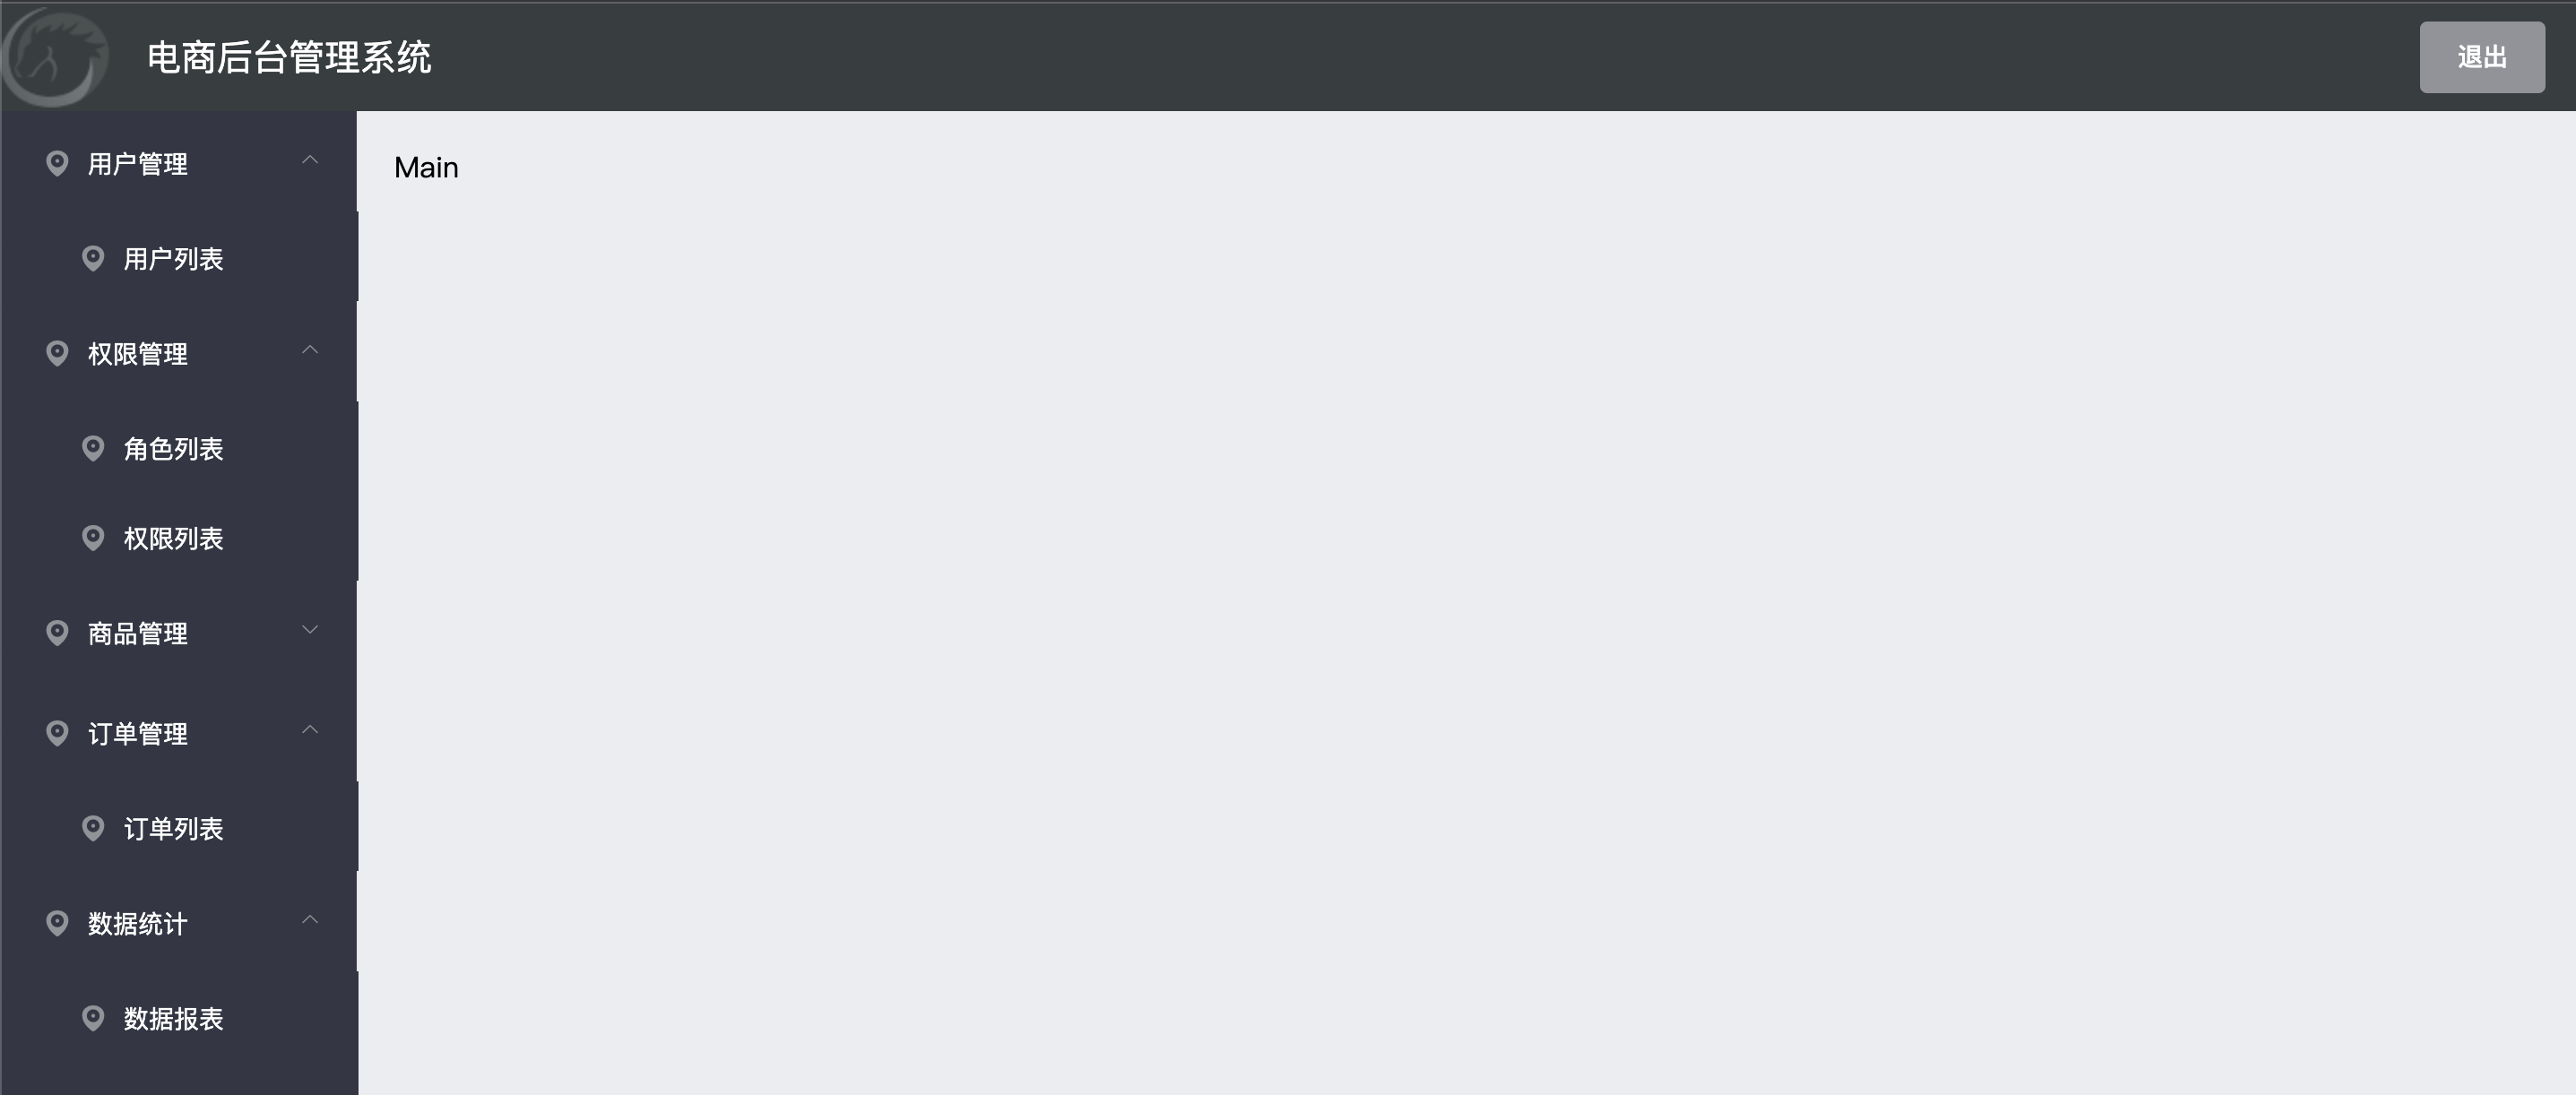
     <!-- 侧边栏菜单区域 -->
        <el-menu background-color="#333744" text-color="#fff" active-text-color="#409EFF" :unique-opened="true"
          :collapse="isCollapse" :collapse-transition="false" :router="true" :default-active="activePath">
          <!-- 一级菜单 -->
          <el-submenu :index="item.id + ''" v-for="item in menuList" :key="item.id">
            <!-- 一级菜单的模板区域 -->
            <template slot="title">
              <!-- 图标 -->
              <i :class="iconsObj[item.id]"></i>
              <!-- 文本 -->
              <span>{{ item.authName }}</span>
            </template>
            <!-- 二级菜单 -->
            <el-menu-item :index="'/' + sunItem.path" v-for="sunItem in item.children" :key="sunItem.id"
              @click="saveActivePath('/' + sunItem.path)">
              <template slot="title">
                <!-- 二级菜单的模板区域 -->
                <i class="el-icon-menu"></i>
                <!-- 图标 -->
                <span>{{ sunItem.authName }}</span>
                <!-- 文本 -->
              </template>
            </el-menu-item>
          </el-submenu>
        </el-menu>
报错:
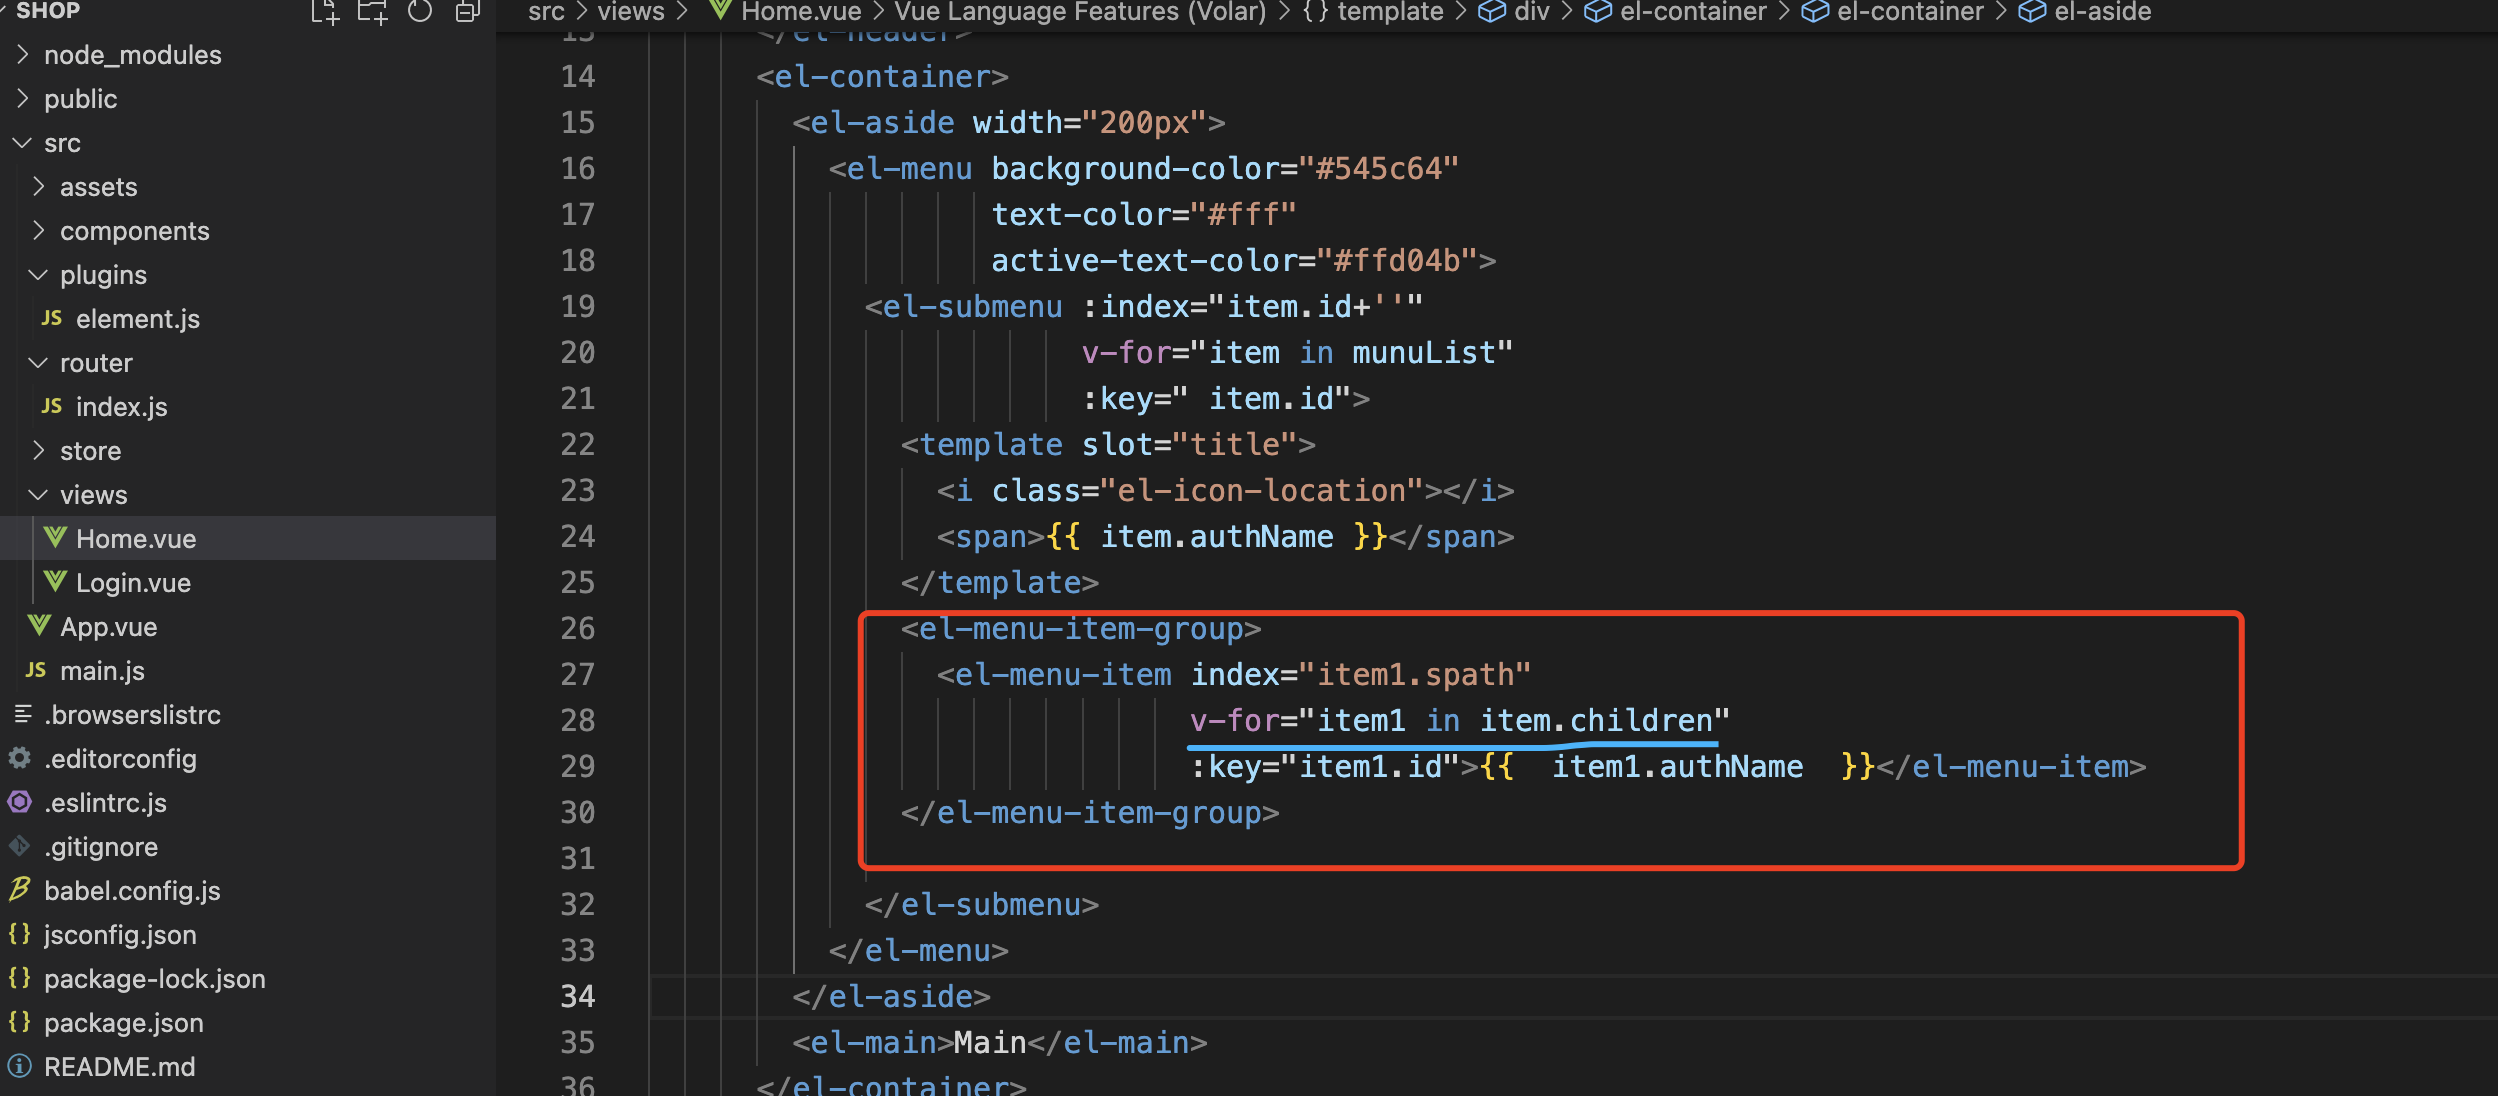

报没有注册进去

4 左侧菜单格式美化
4.1 点击变化颜色
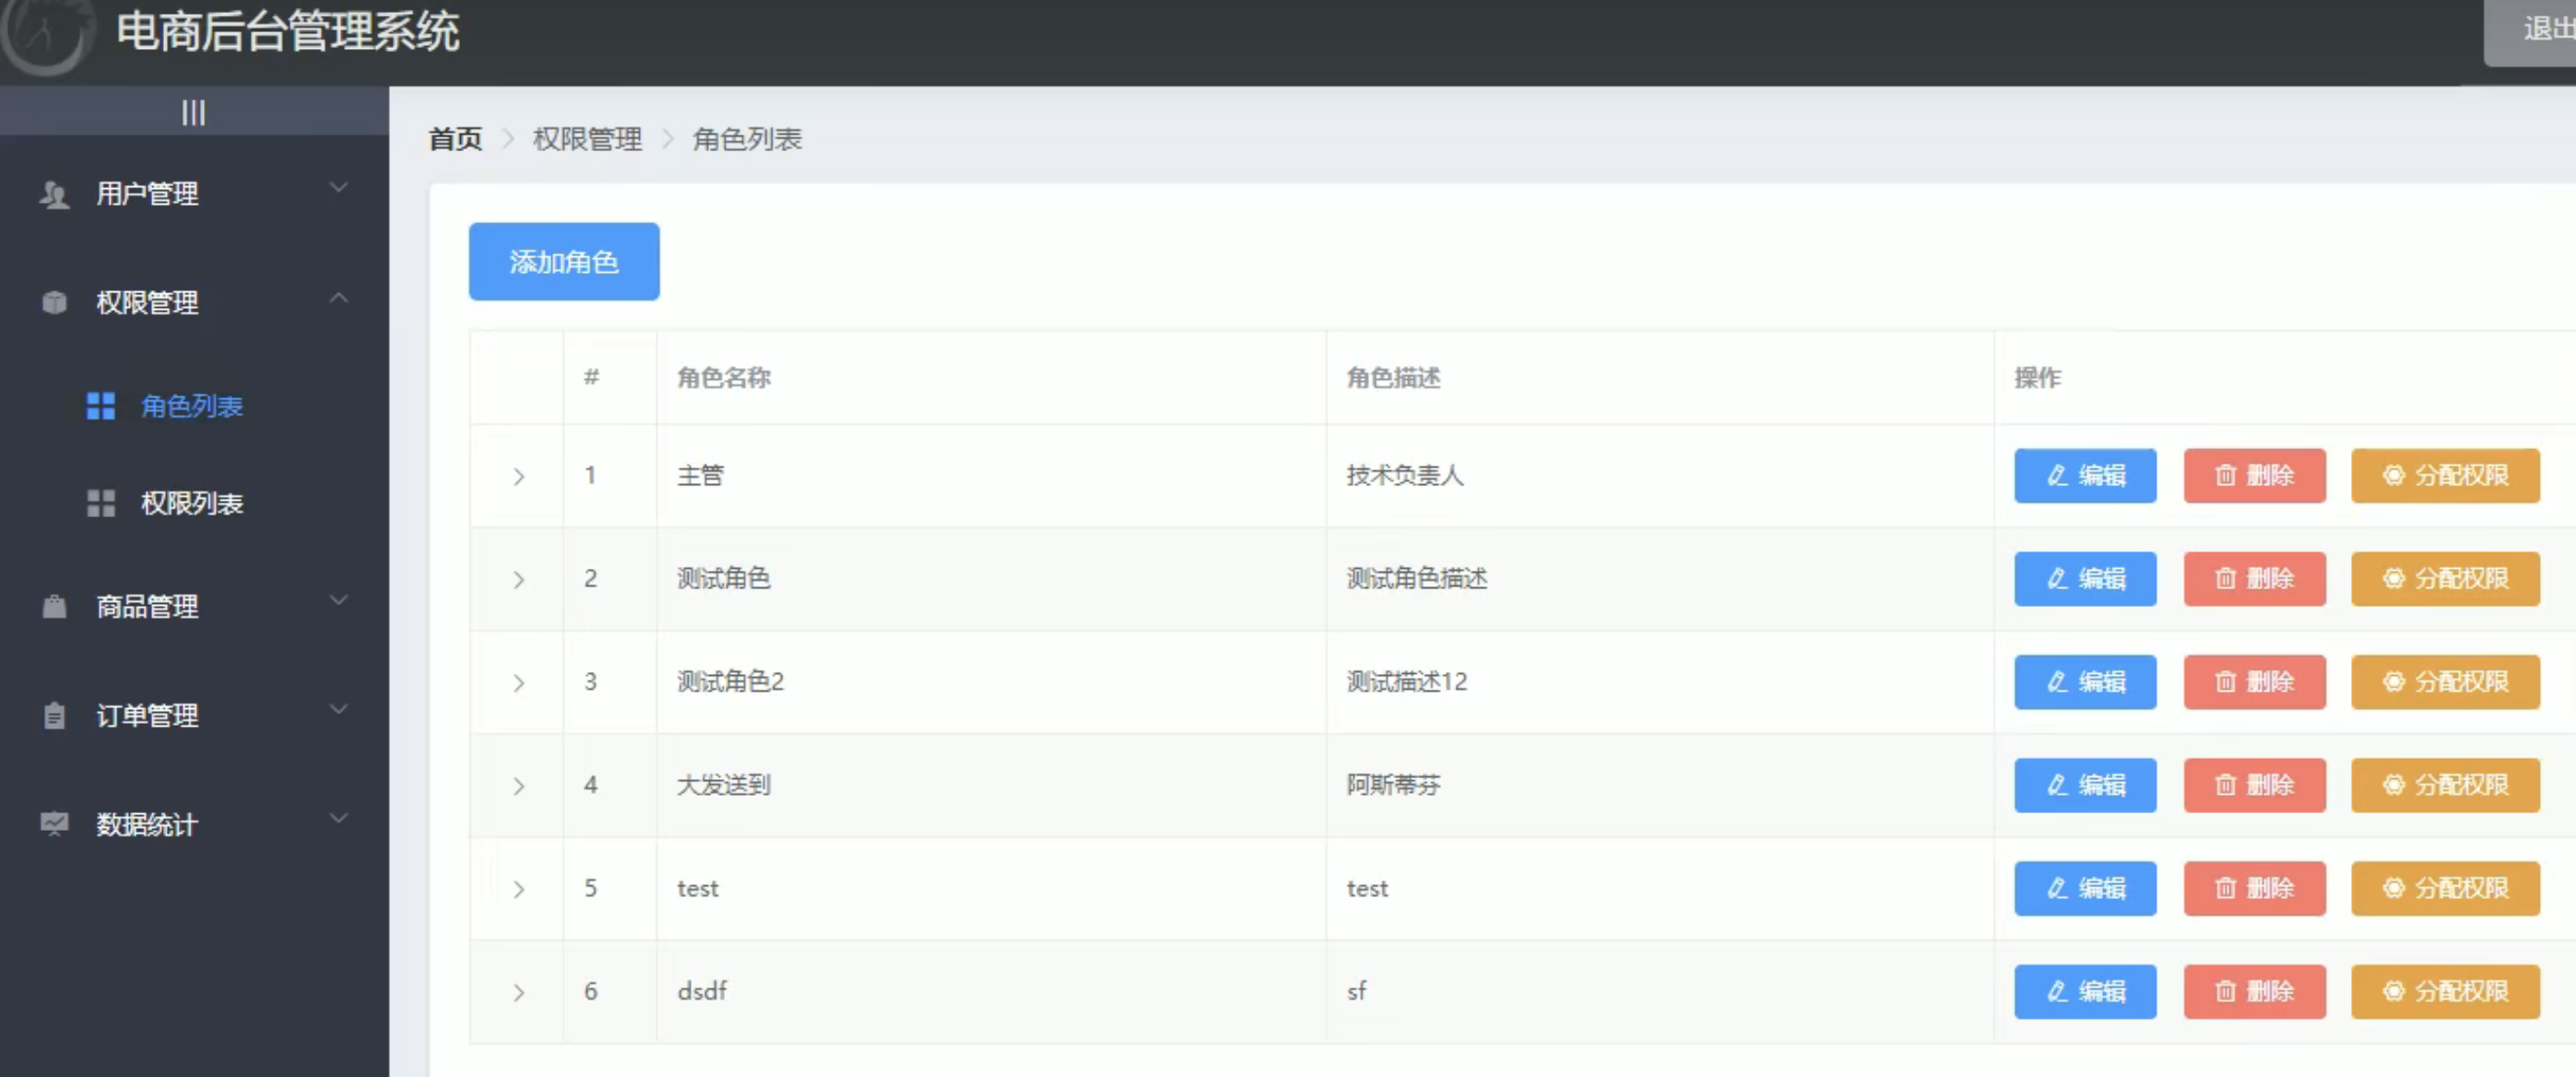
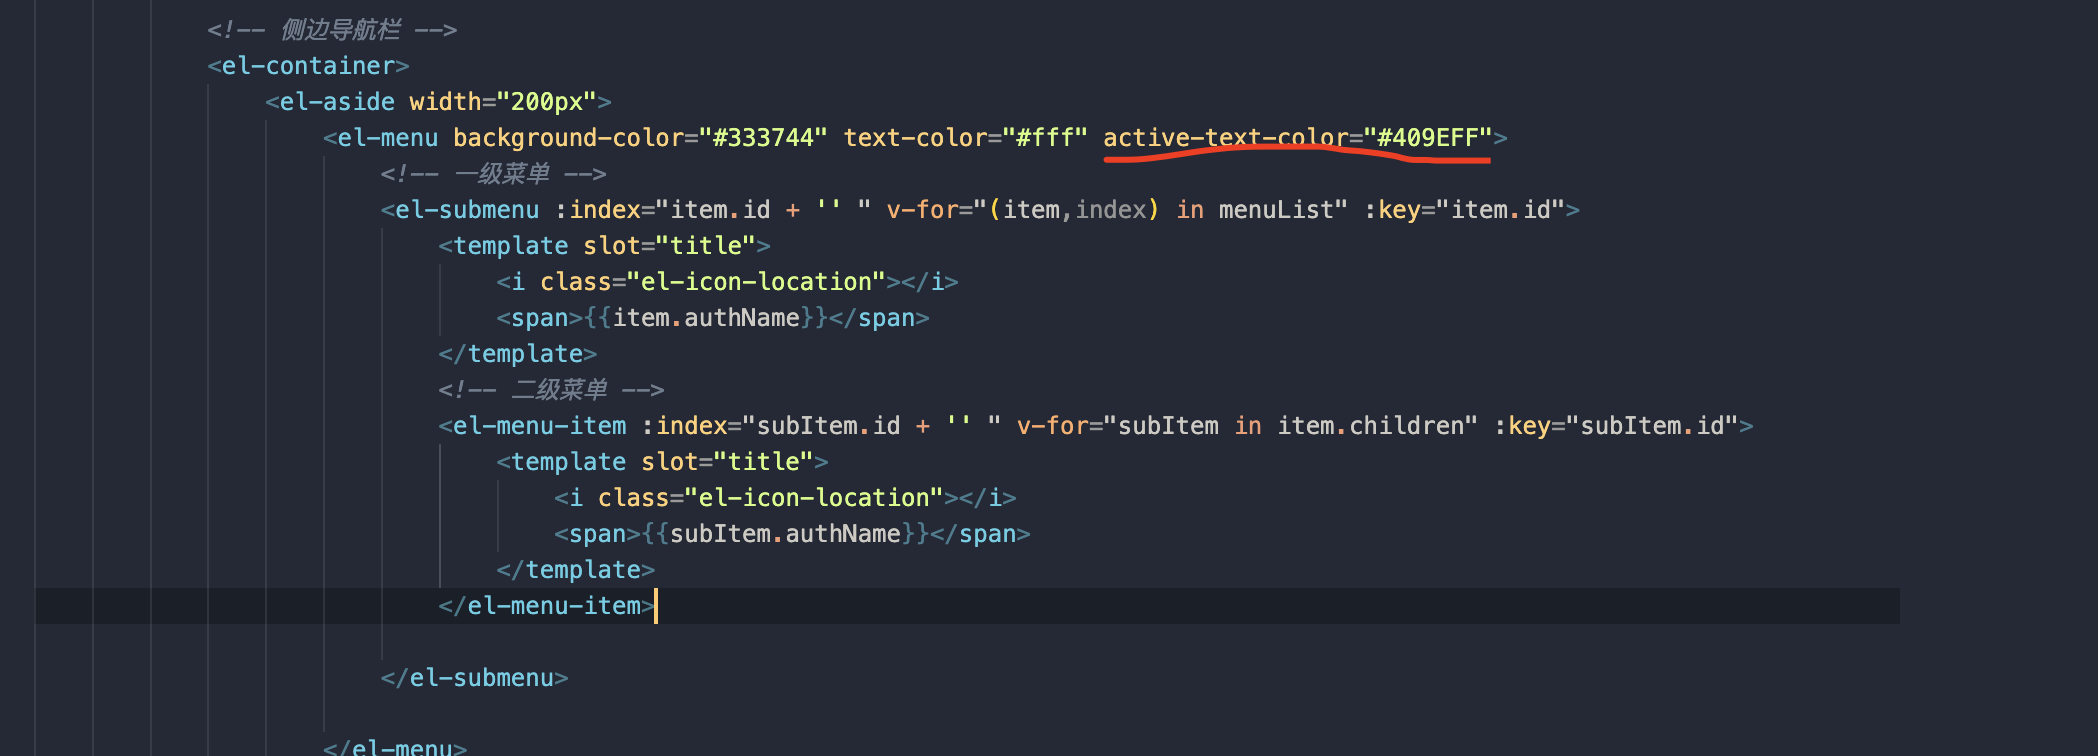
active-text-color="#ffd04b"4.2 二级菜单图标修改
都改成一样的图标


4.3 一级菜单图标
每个菜单的图片是不一样的,怎么按顺序吧图标显示出来?
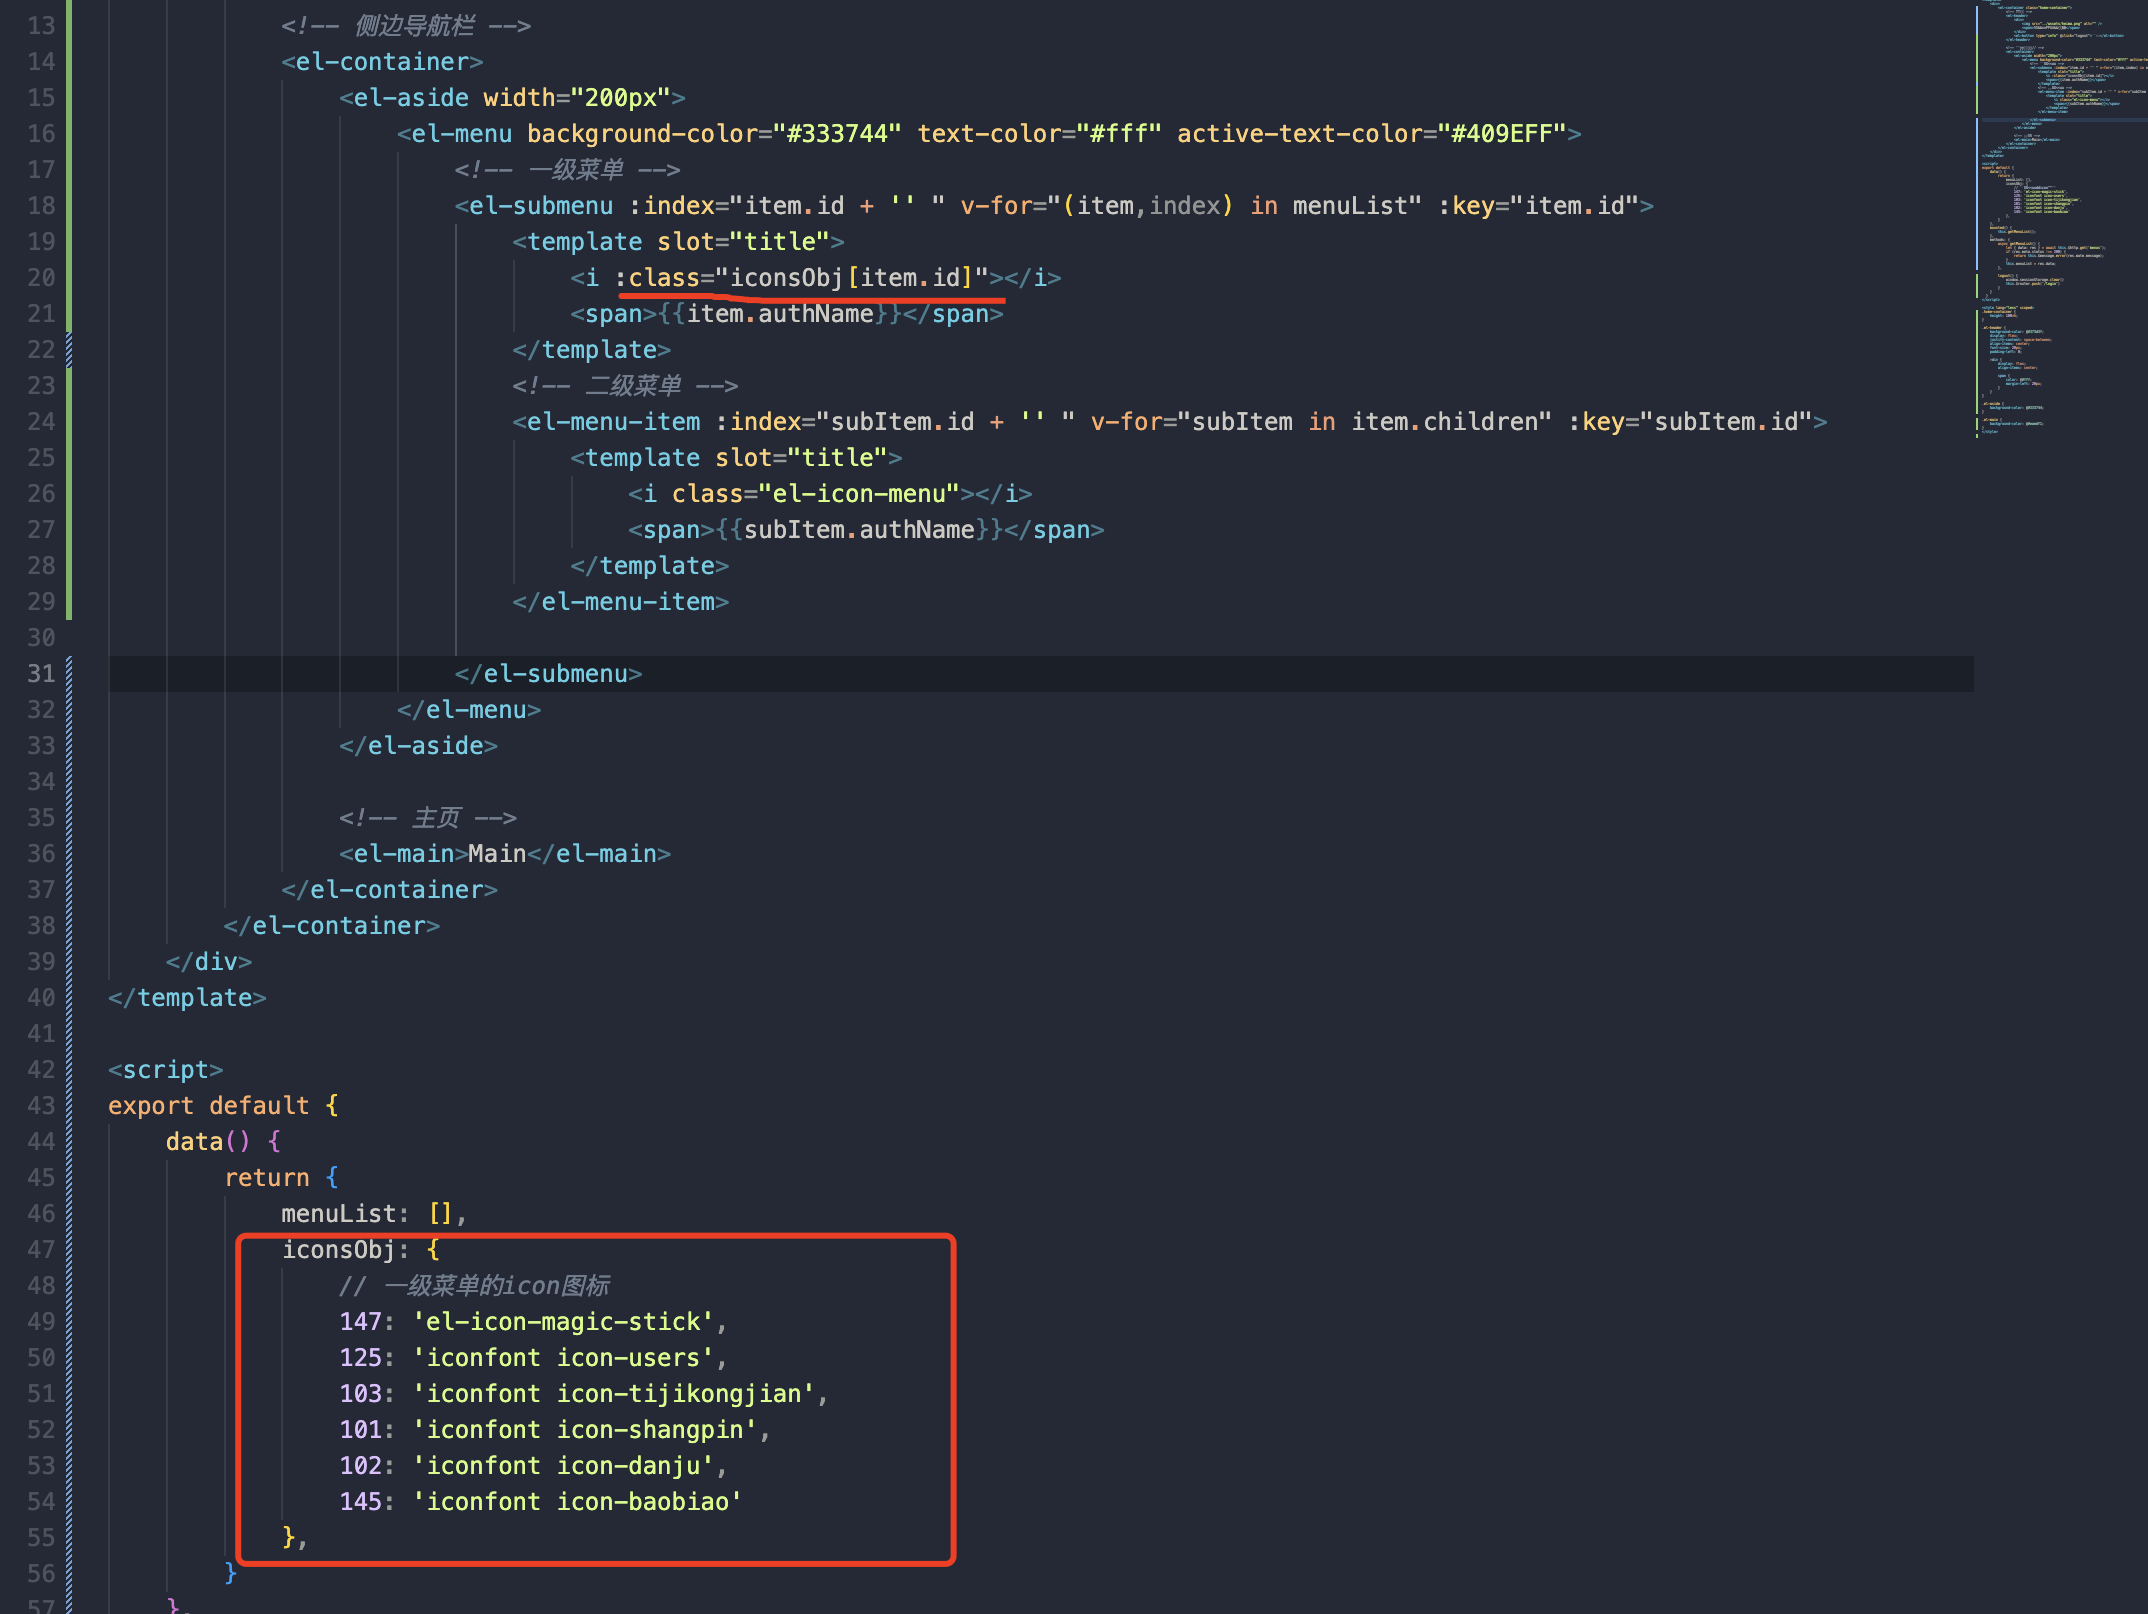
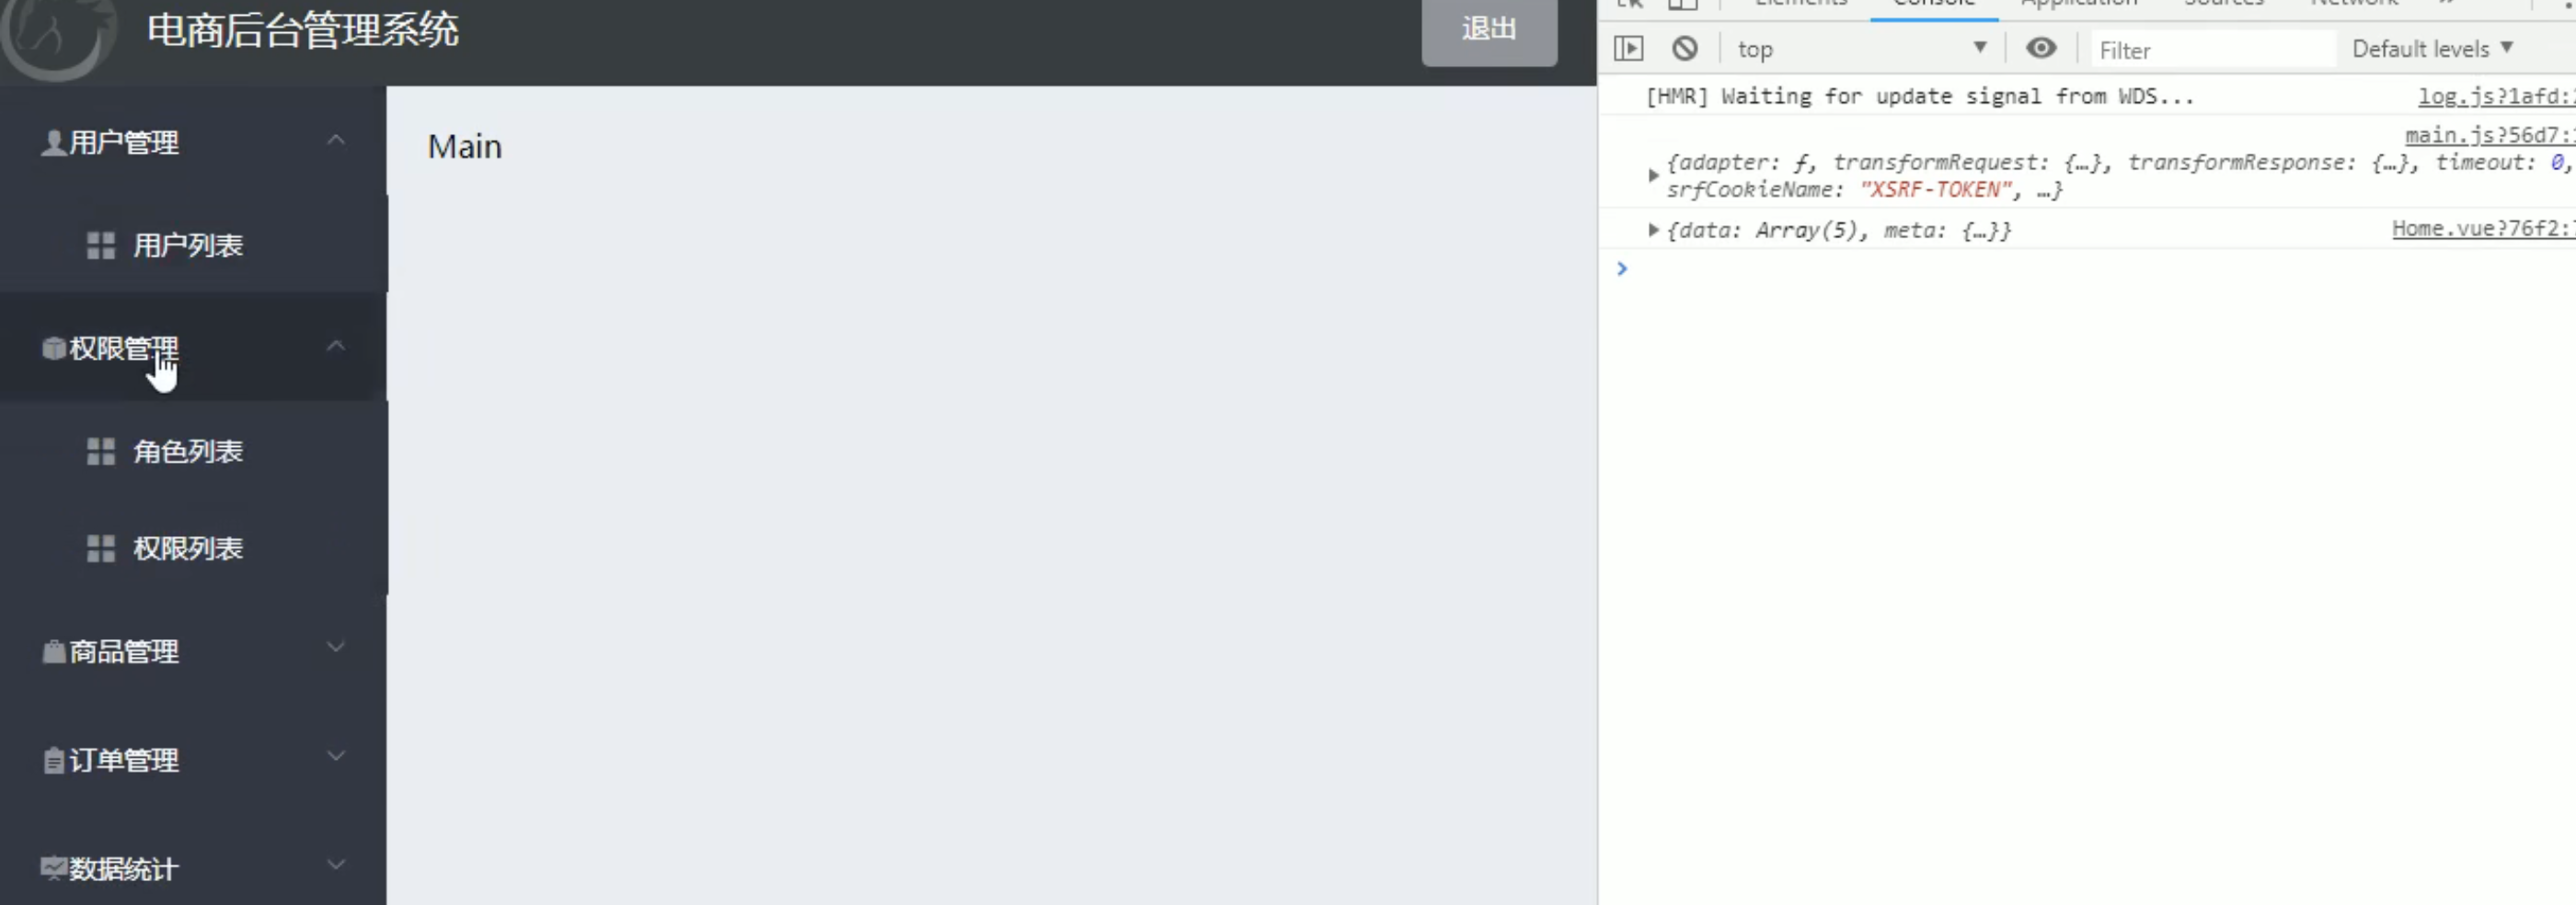
给每个图标添加一个间距

5 左侧菜单优化
5.1 只允许展开一个菜单, 如果你展开其他的菜单,当前的菜单就会关闭,只保留一个

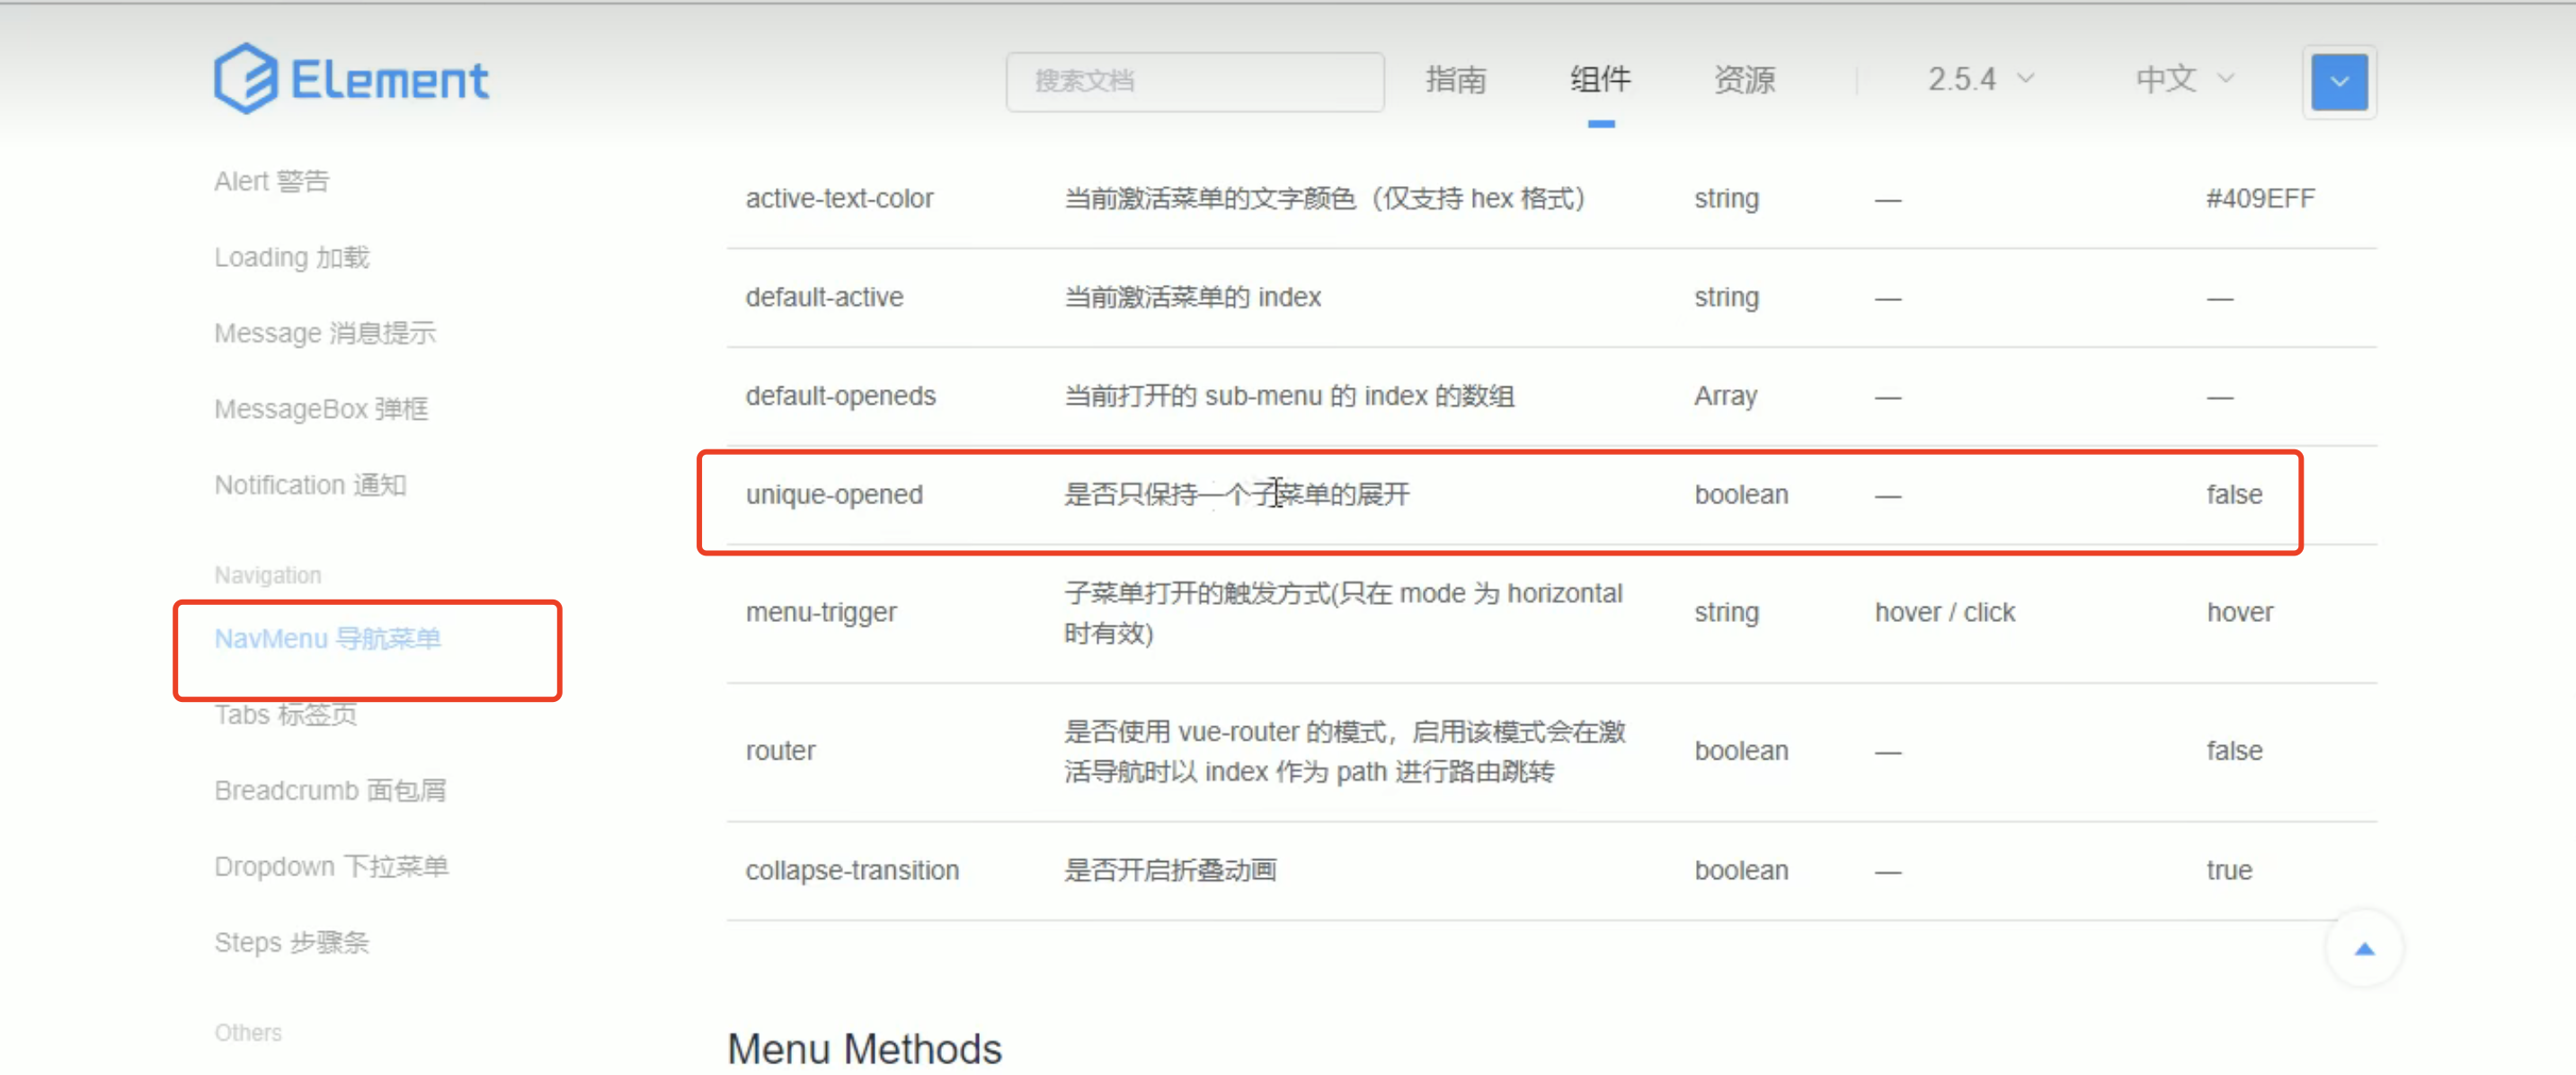
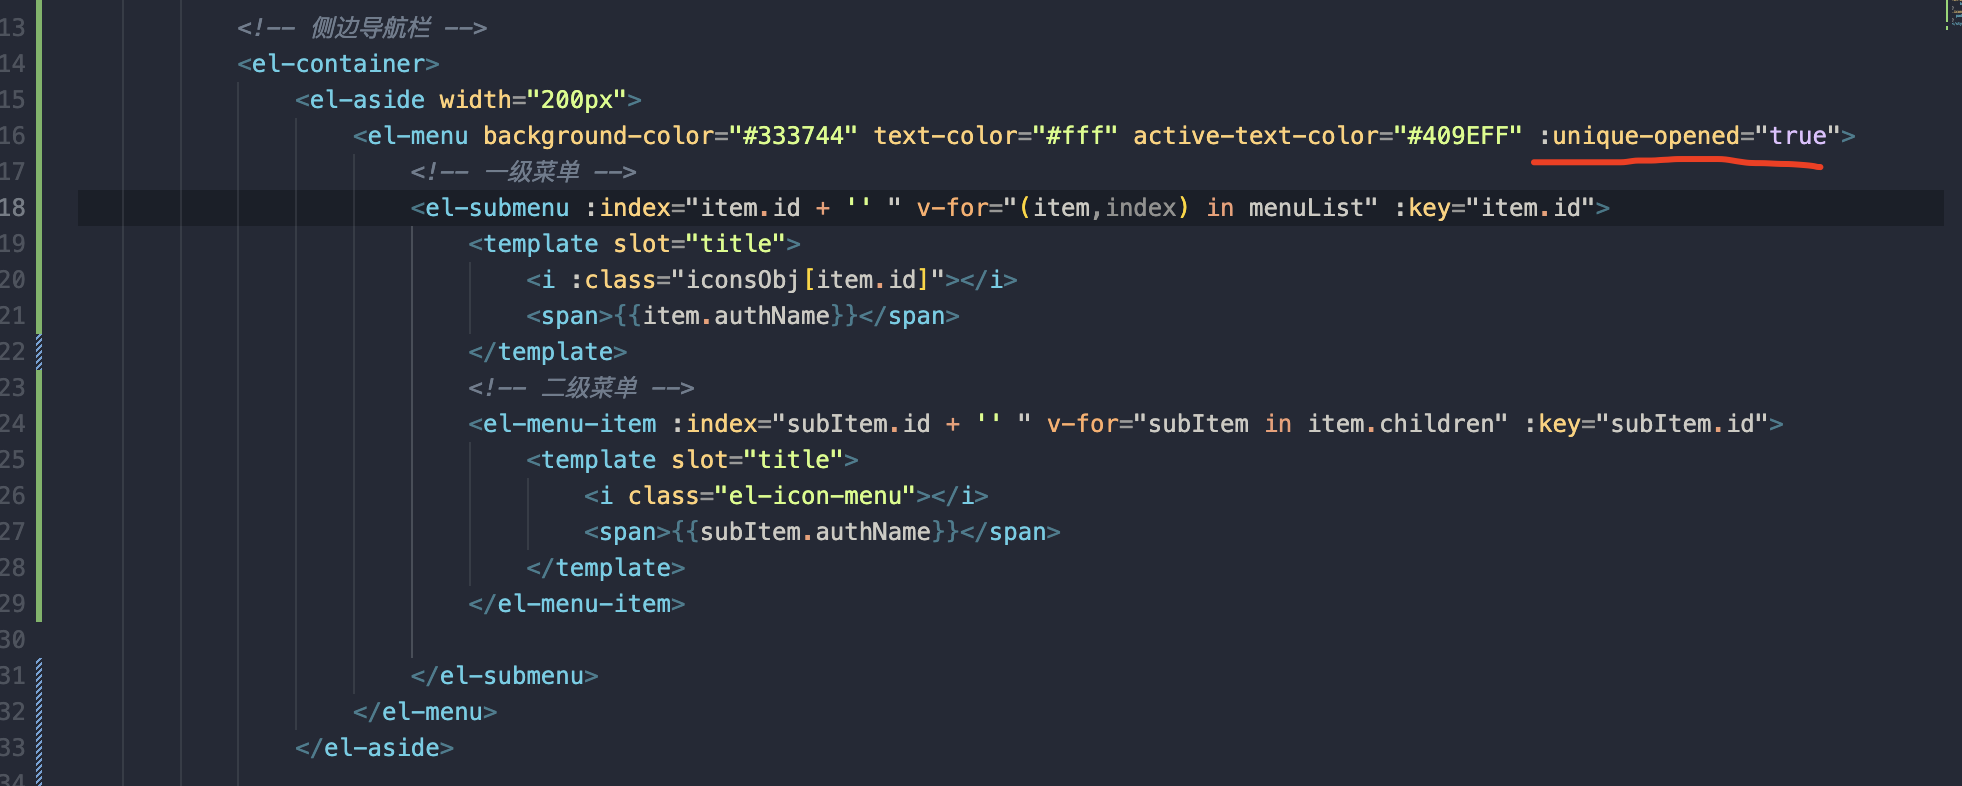
要加:, 不加冒号里边就是个字符串, 加:就是一个布尔值
:unique-opened="true"5.2左侧菜单没对齐
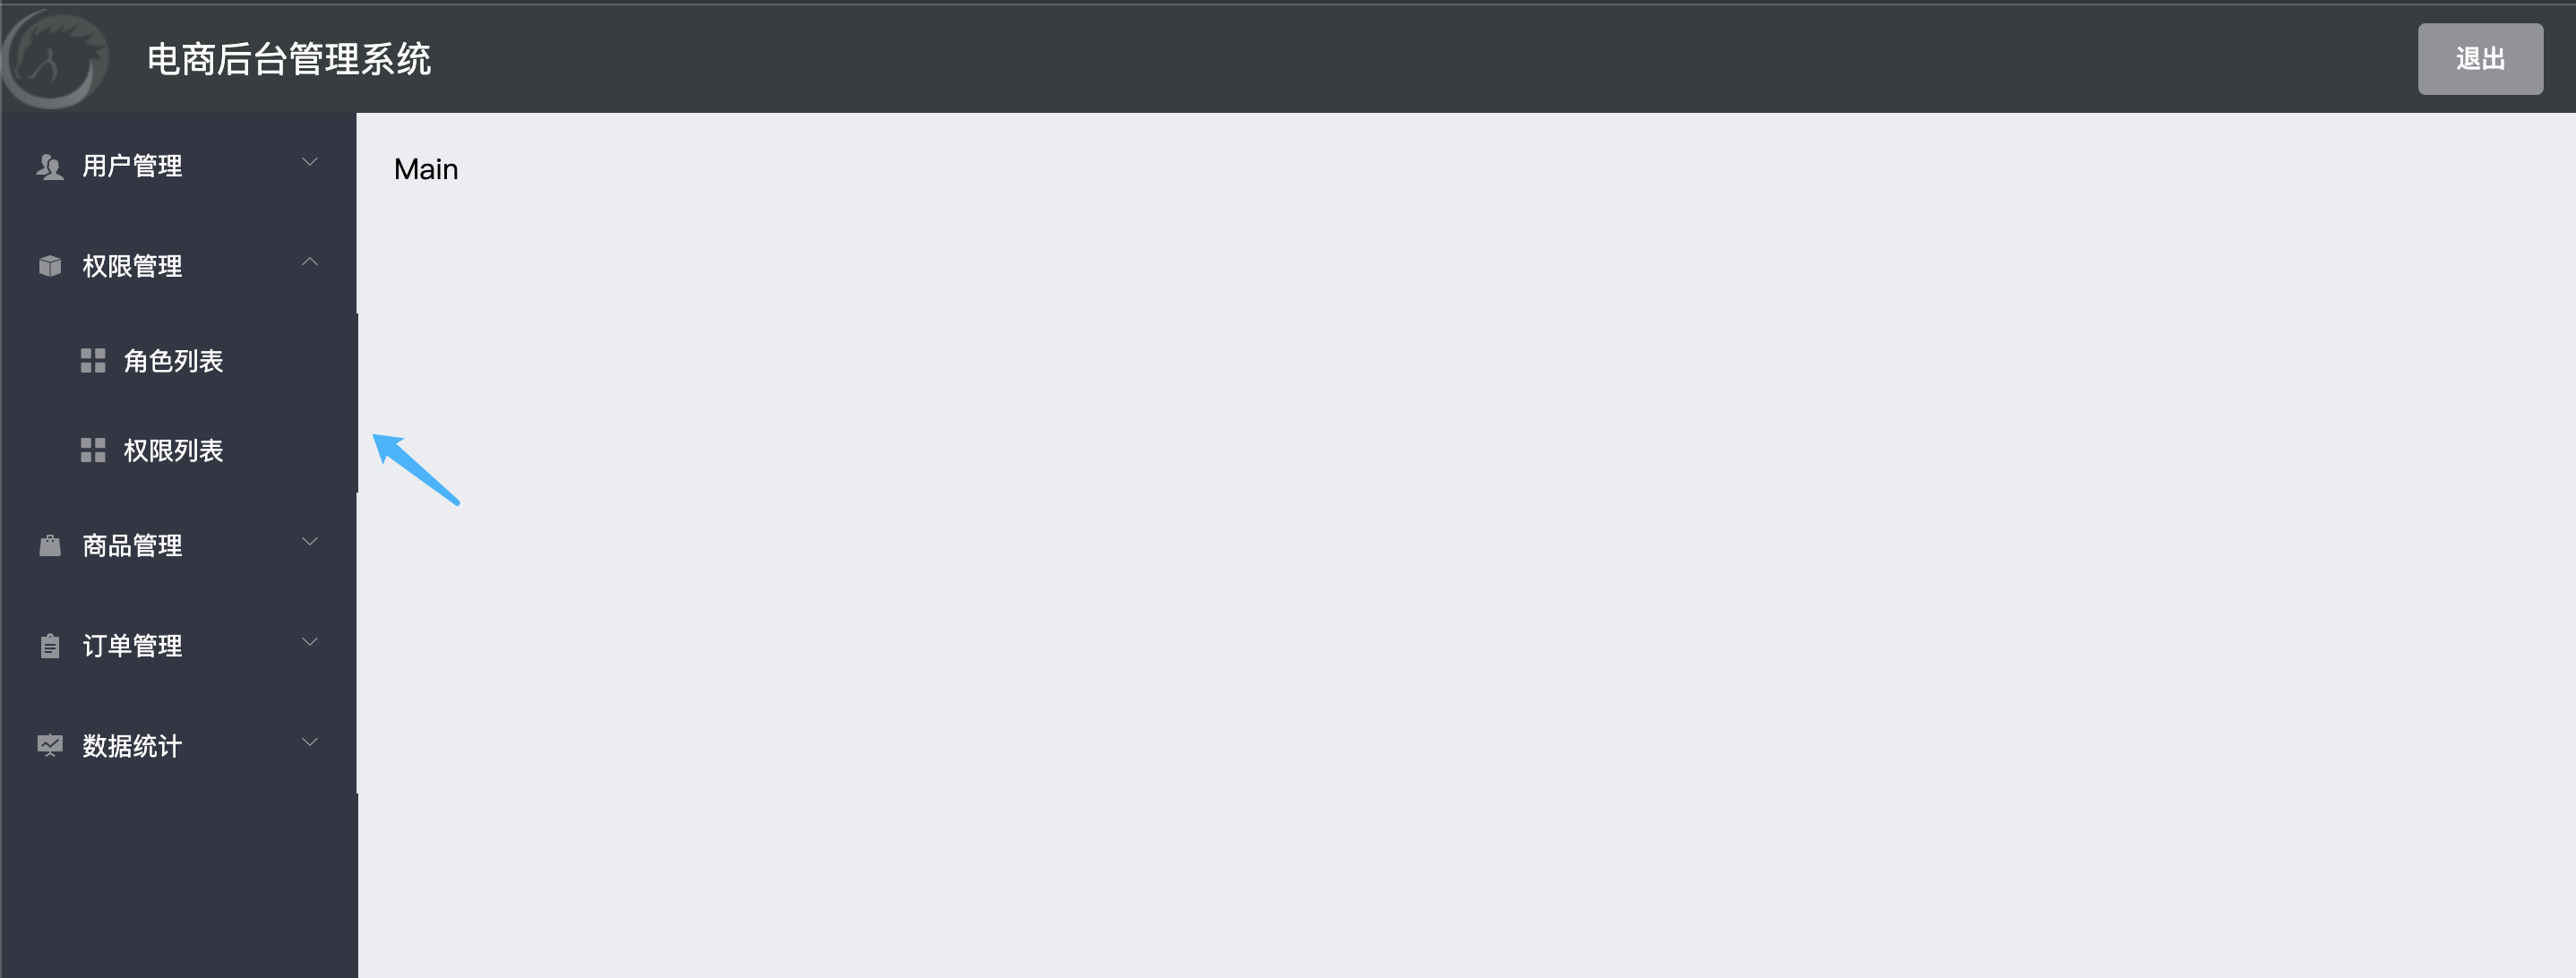
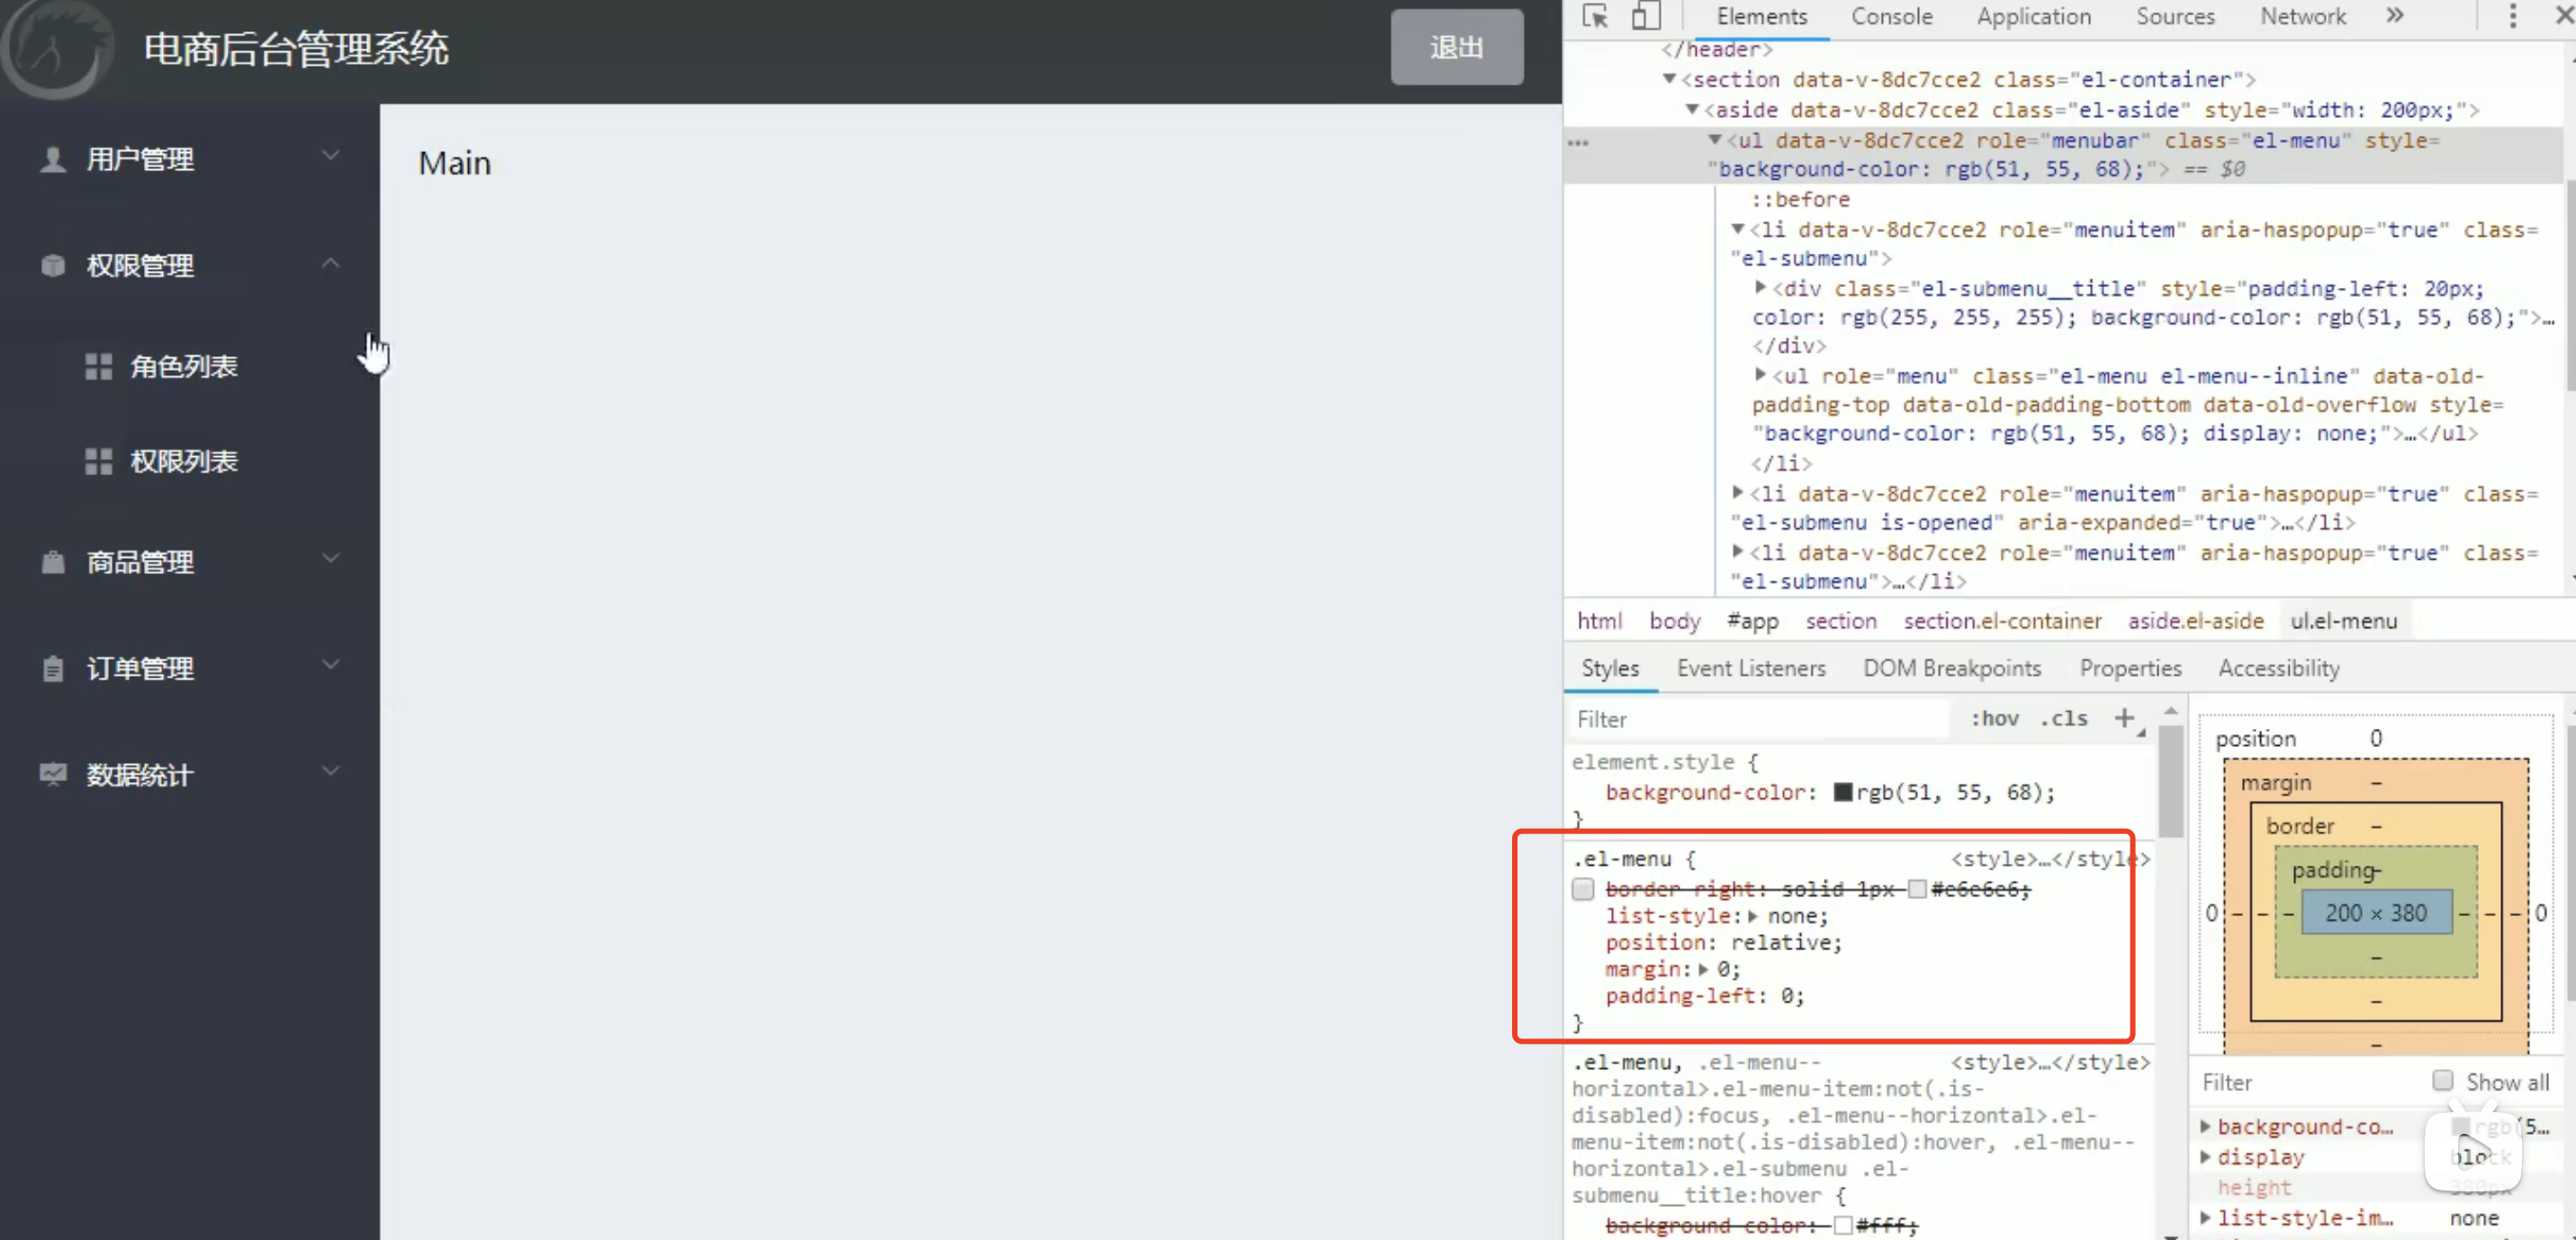
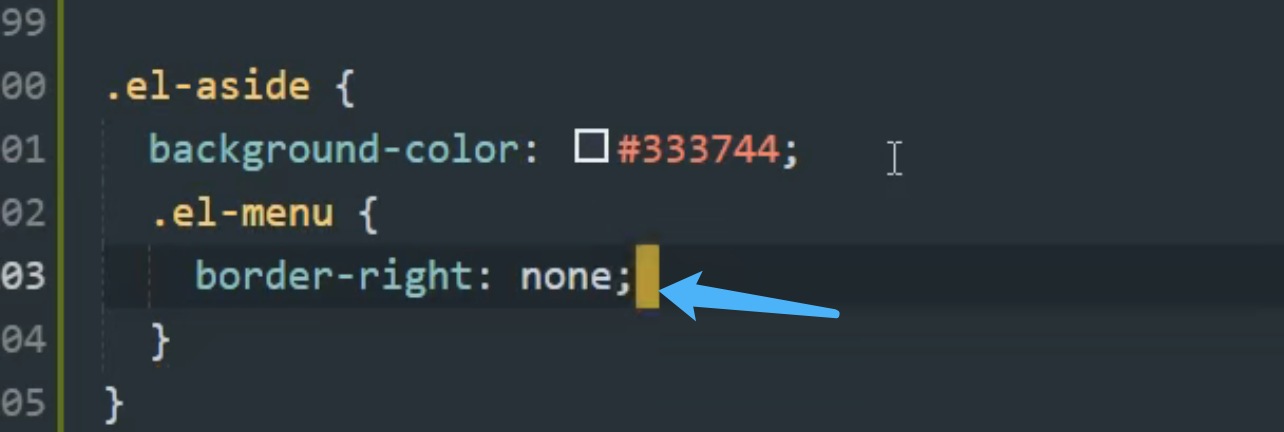
只需要把border-right 设置为0
6 实现左侧菜单的折叠
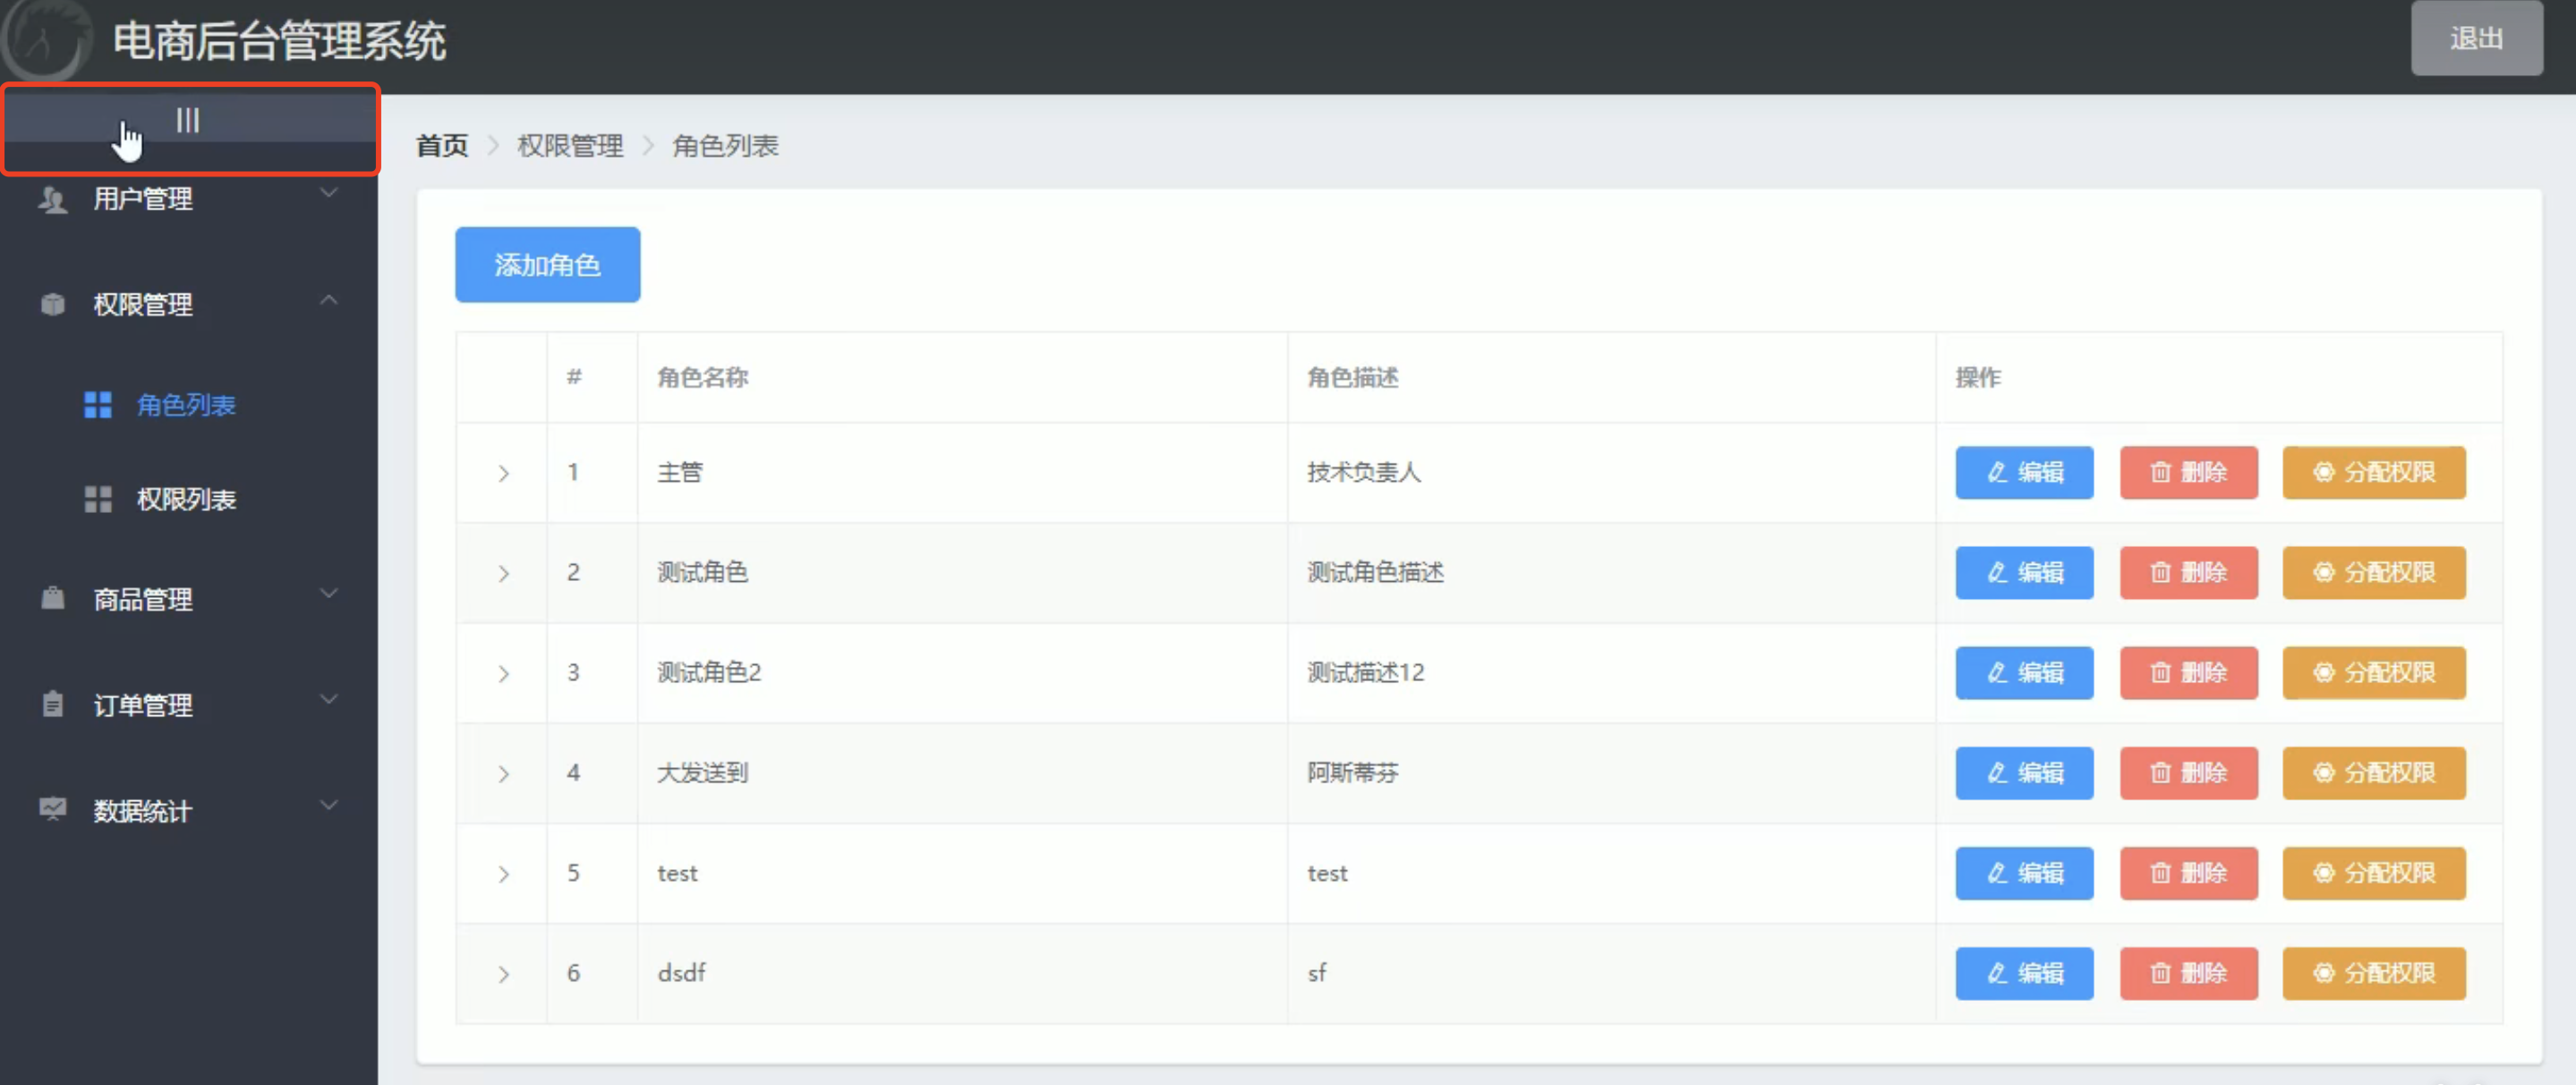
6.1 编写div
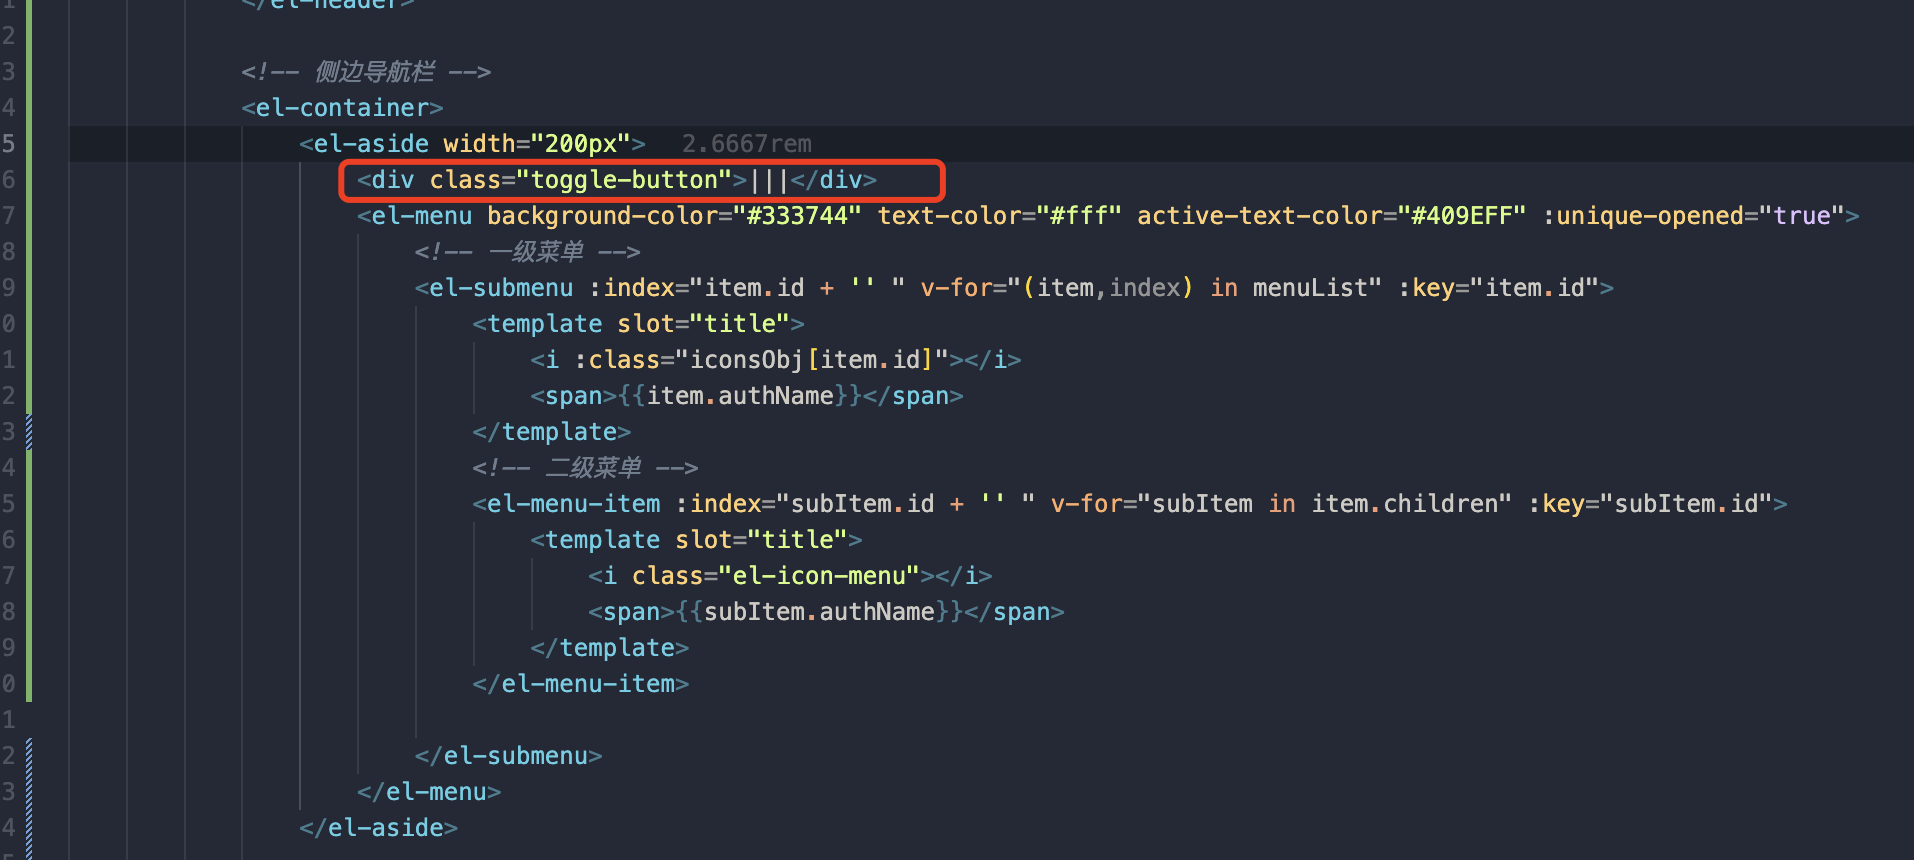
<div class="toggle-button">|||</div>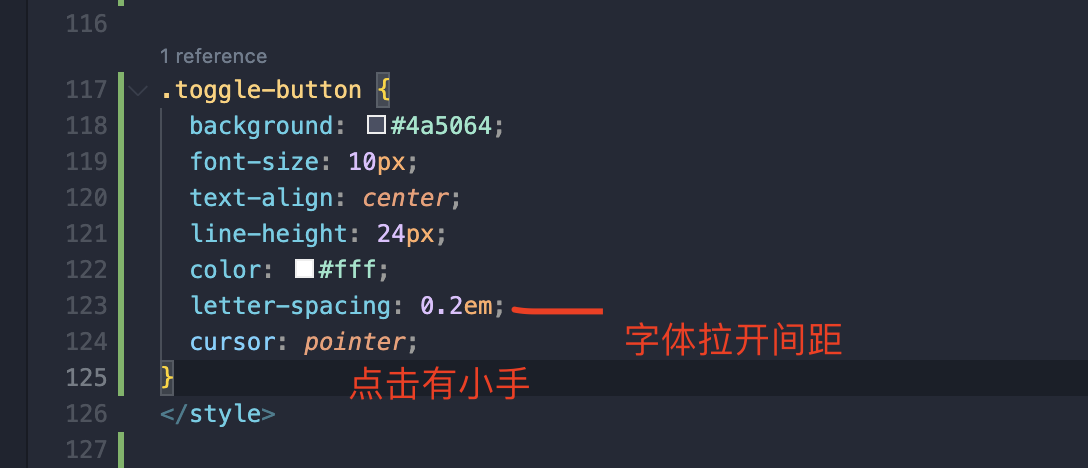
.toggle-button {
  background: #4a5064;
  font-size: 10px;
  text-align: center;
  line-height: 24px;
  color: #fff;
  letter-spacing: 0.2em;
  cursor: pointer;
}
6.2 添加点击事件
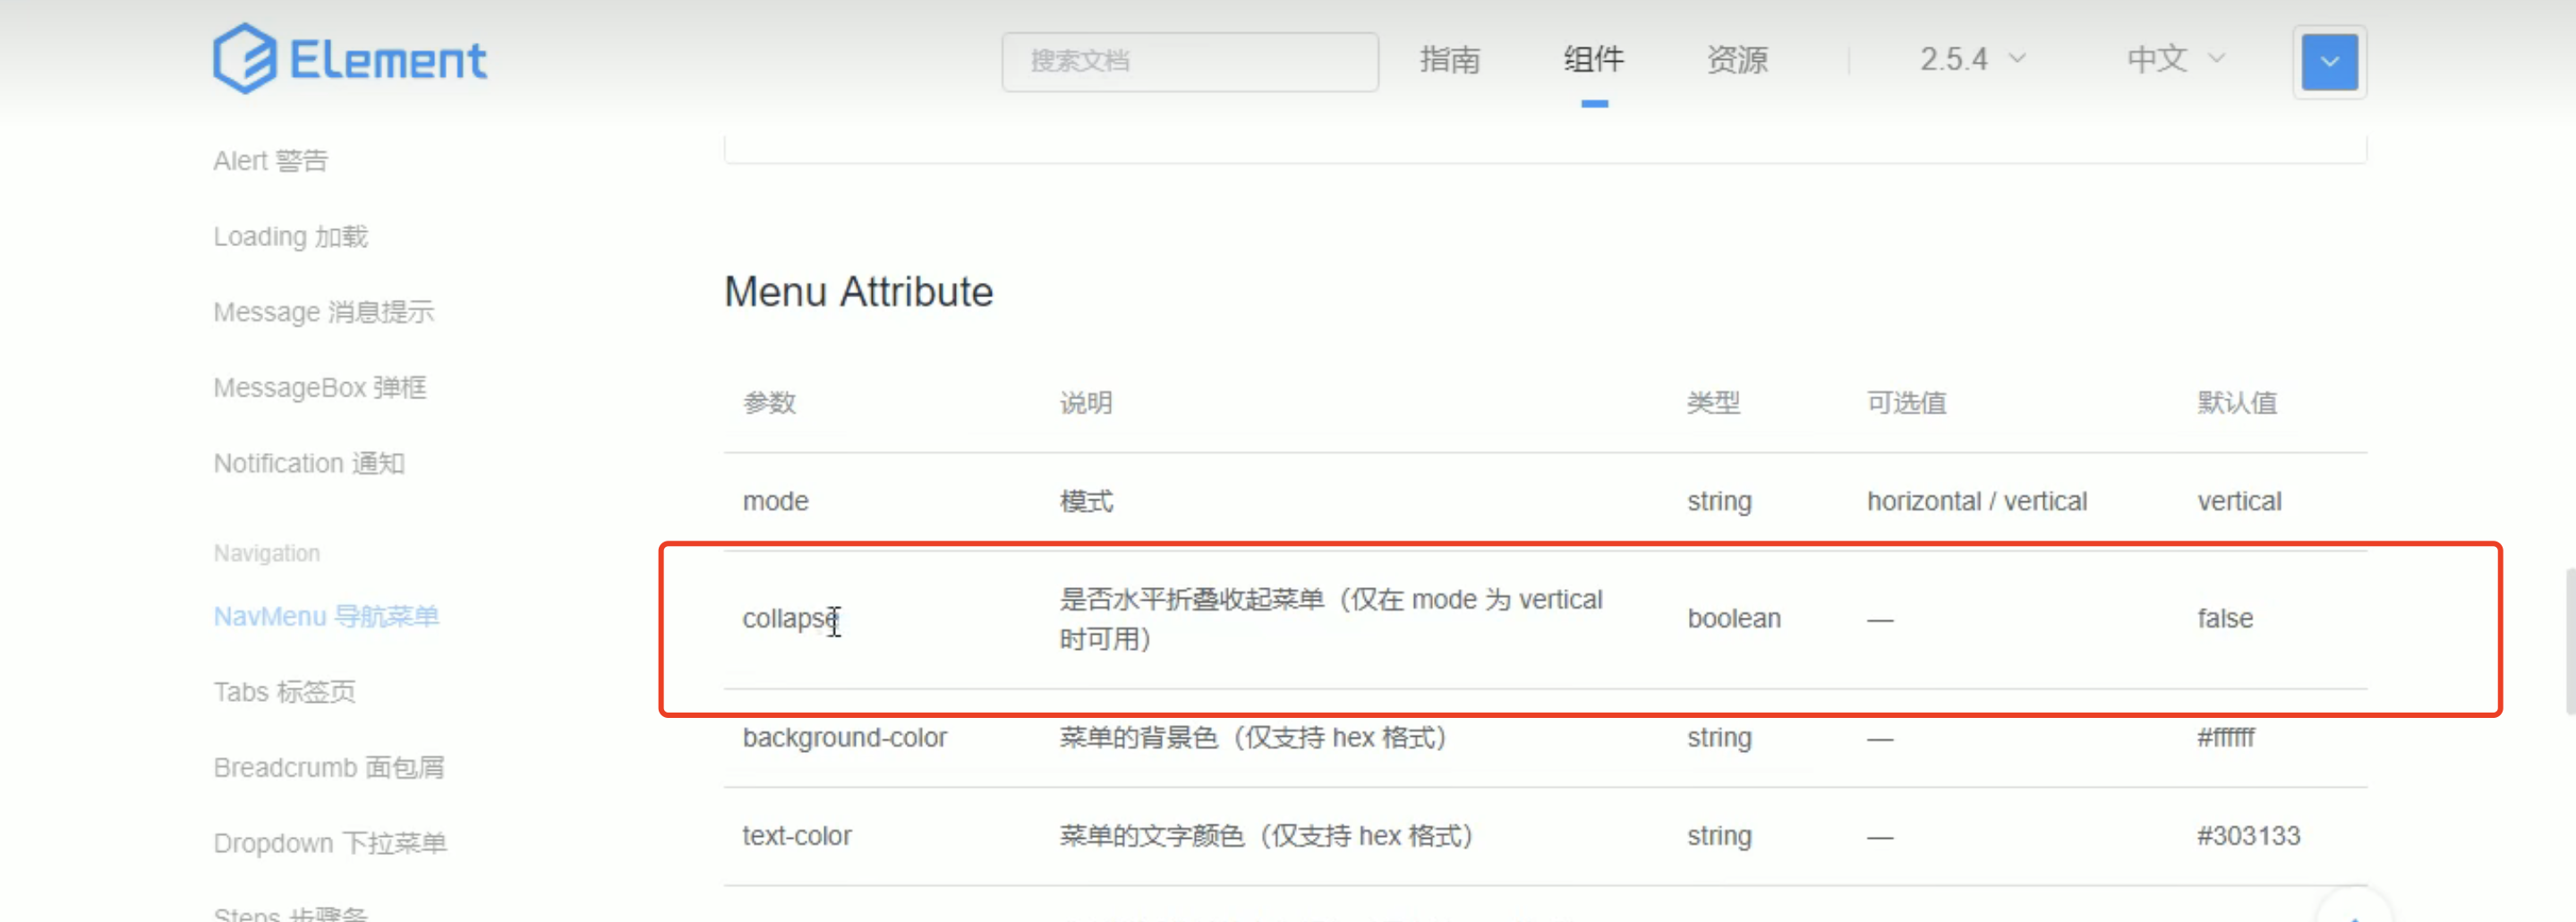


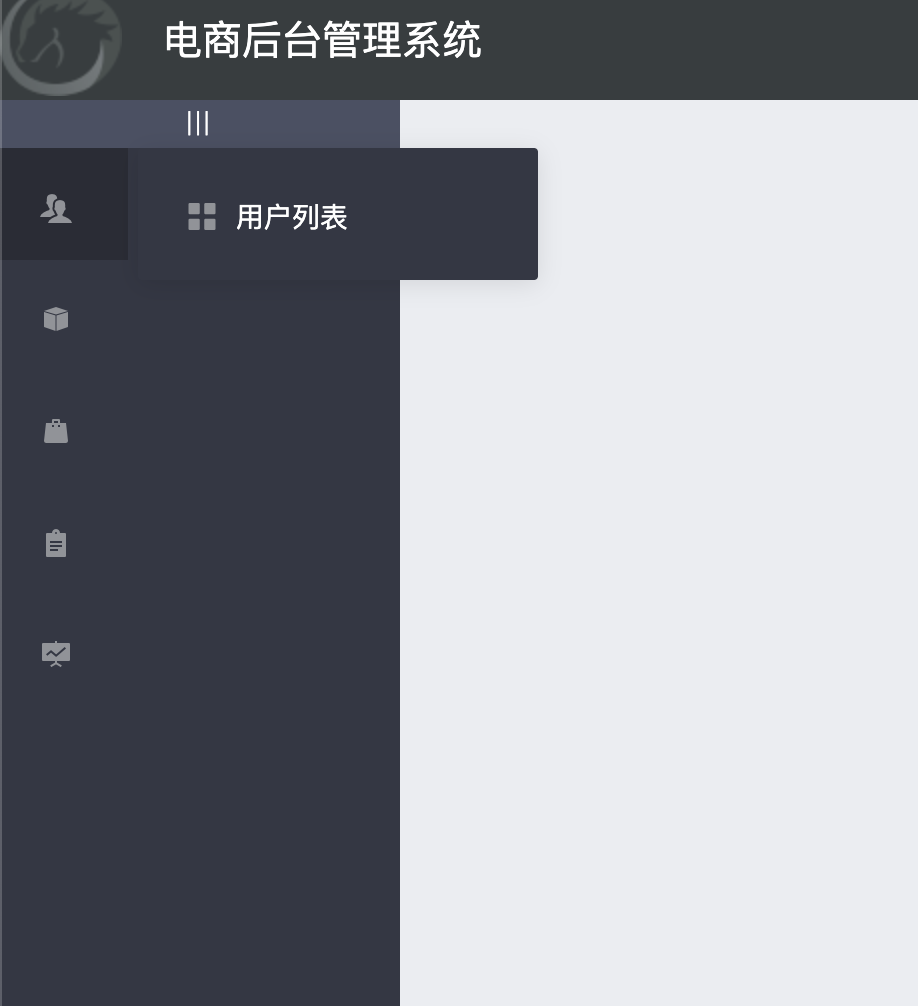
折叠效果太丑了(很卡),为了使动画效果更佳流畅,关闭掉
6.3 关闭动画效果

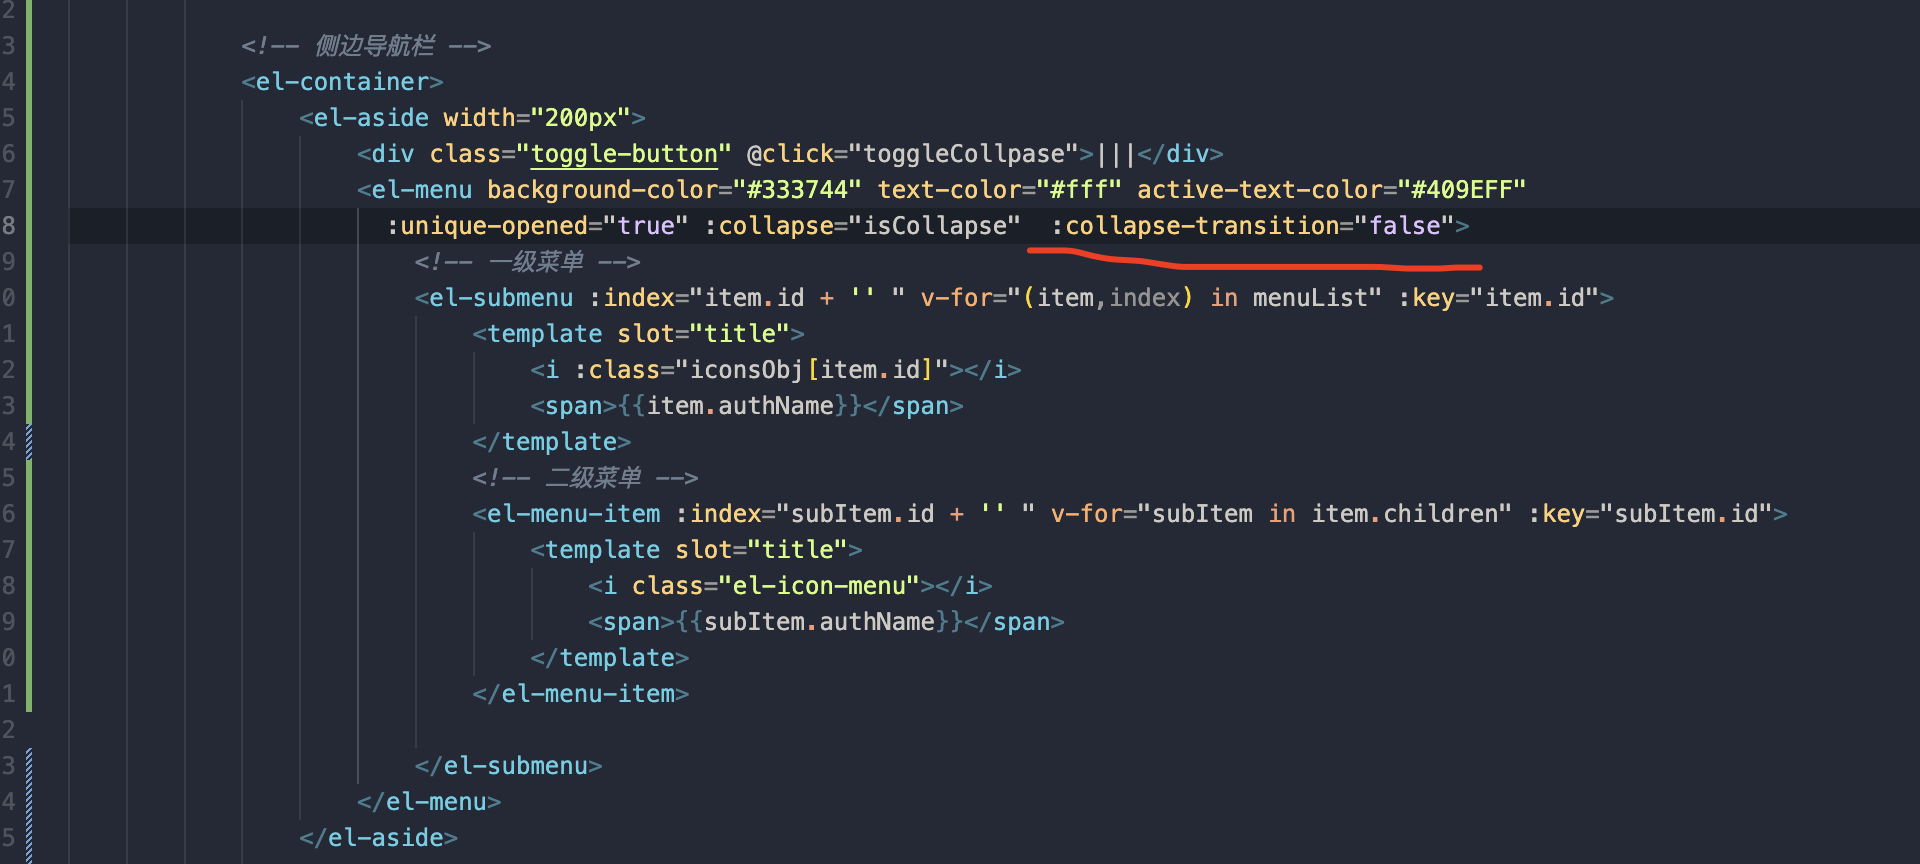
:collapse-transition="false"6.4 导航栏缩小
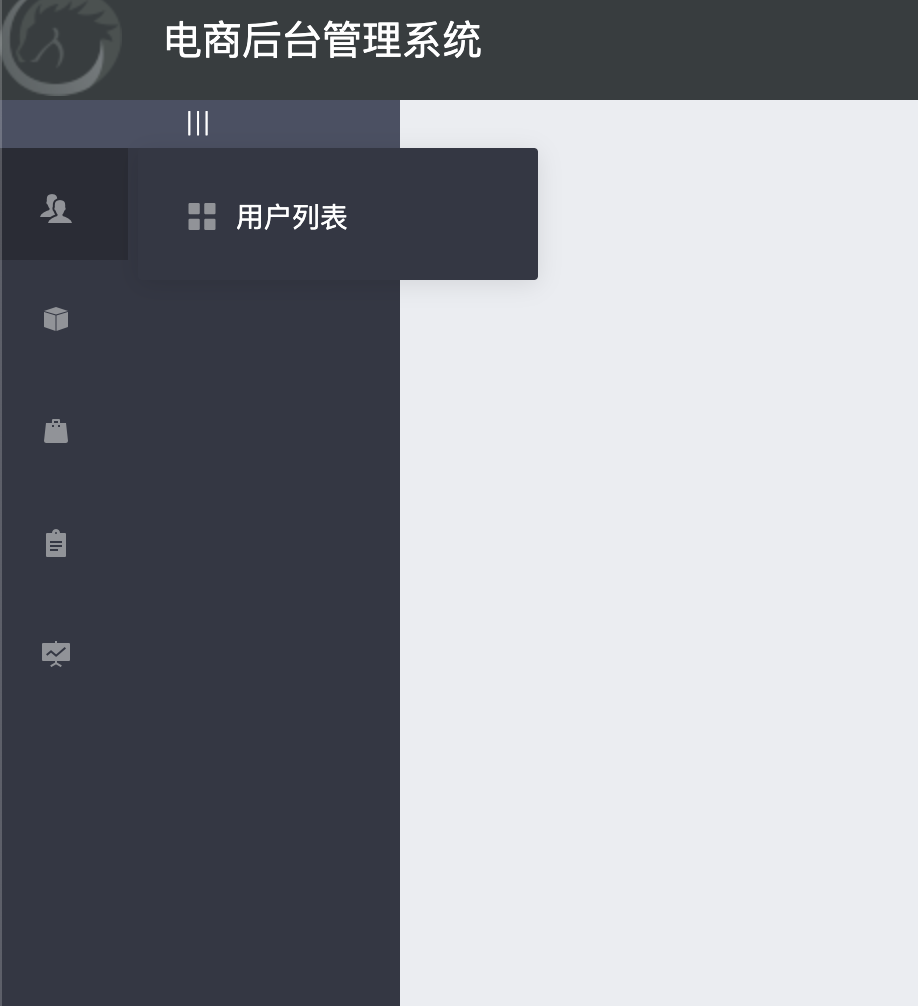
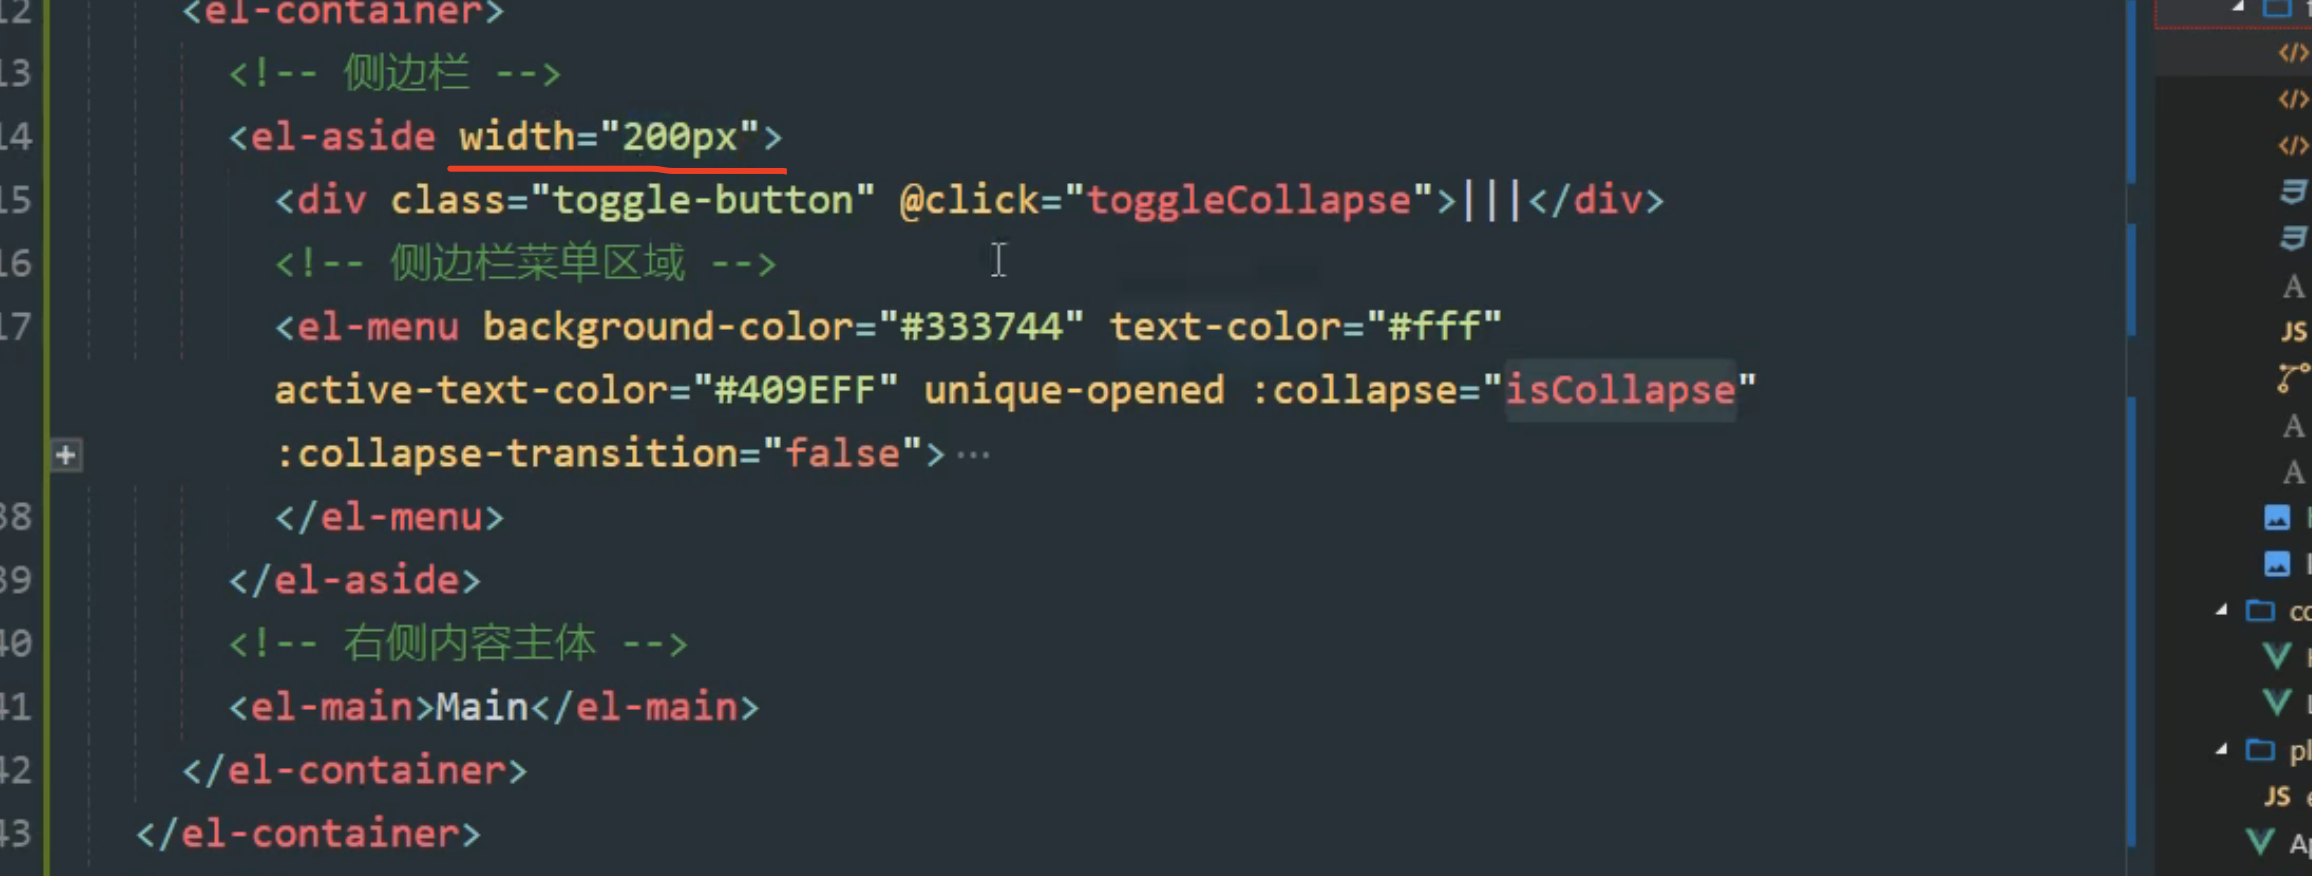
现在不缩小的原因是我们给了一个固定宽度。
我们只需要 isCollapse: true的时候,宽度变小; 当isCollapse:false的时候,在重置成200
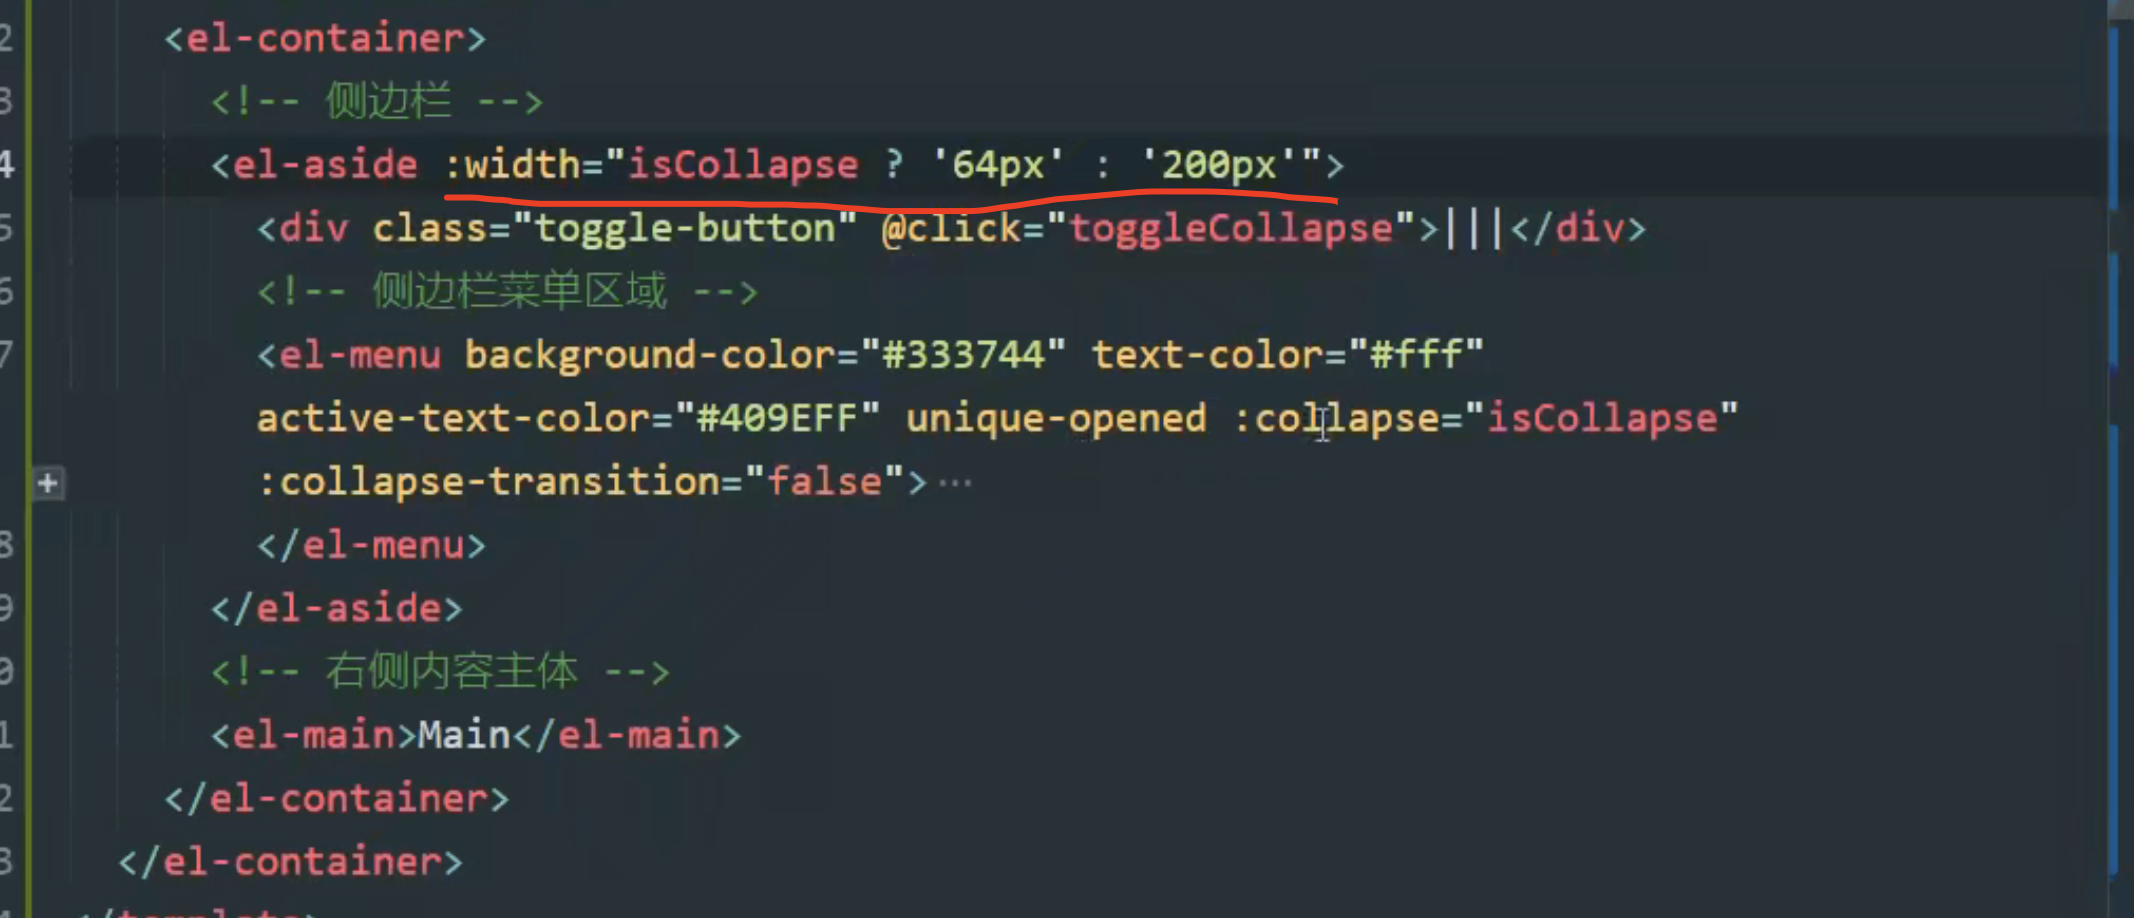
<el-aside :width="isCpllapse? '64px' : '200px'">总体代码
<template>
  <el-container class="home-container">
    <!-- 头部区域 -->
    <el-header>
      <div>
        <img src="~assets/manager.jpg" alt="" />
        <span>电商后台管理系统</span>
      </div>
      <el-button type="info" @click="logout">退出</el-button>
    </el-header>
    <el-container>
      <!-- 侧边栏 -->
      <el-aside :width="isCollapse ? '61px' : '200px'">
        <div class="toggle-button" @click="toggleCollpase">|||</div>
        <!-- 侧边栏菜单区域 -->
        <el-menu background-color="#333744" text-color="#fff" active-text-color="#409EFF" :unique-opened="true"
          :collapse="isCollapse" :collapse-transition="false" :router="true" :default-active="activePath">
          <!-- 一级菜单 -->
          <el-submenu :index="item.id + ''" v-for="item in menuList" :key="item.id">
            <!-- 一级菜单的模板区域 -->
            <template slot="title">
              <!-- 图标 -->
              <i :class="iconsObj[item.id]"></i>
              <!-- 文本 -->
              <span>{{ item.authName }}</span>
            </template>
            <!-- 二级菜单 -->
            <el-menu-item :index="'/' + sunItem.path" v-for="sunItem in item.children" :key="sunItem.id"
              @click="saveActivePath('/' + sunItem.path)">
              <template slot="title">
                <!-- 二级菜单的模板区域 -->
                <i class="el-icon-menu"></i>
                <!-- 图标 -->
                <span>{{ sunItem.authName }}</span>
                <!-- 文本 -->
              </template>
            </el-menu-item>
          </el-submenu>
        </el-menu>
      </el-aside>
      <!-- 右侧内容主题 -->
      <el-main>
        <!-- 路由占位符 -->
        <router-view></router-view>
      </el-main>
    </el-container>
  </el-container>
</template>

<script>
export default {
  name: 'Home',
  data() {
    return {
      // 左侧菜单数据
      menuList: [],
      iconsObj: {
        // 一级菜单的icon图标
        147: 'el-icon-magic-stick',
        125: 'iconfont icon-users',
        103: 'iconfont icon-tijikongjian',
        101: 'iconfont icon-shangpin',
        102: 'iconfont icon-danju',
        145: 'iconfont icon-baobiao'
      },
      isCollapse: false, // 是否折叠属性
      activePath: '/welcome',
      welcome: {
        authName: '欢迎光临',
        id: 147,
        order: 1,
        path: '/welcome',
        children: [
          {
            authName: 'Welcome',
            id: 124,
            order: 1,
            path: 'welcome',
            children: []
          }
        ]
      }
    }
  },
  created() {
    this.getMenuList()
    console.log(this.activePath)
    const path = window.sessionStorage.getItem('activePath')
    if (path) {
      this.activePath = path
    } else {
      this.activePath = '/welcome'
    }
  },
  methods: {
    logout() {
      window.sessionStorage.clear()
      this.$router.push('/login')
    },
    // 获取所有的菜单
    async getMenuList() {
      const { data: res } = await this.$http.get('/menus')
      if (res.meta.status !== 200) return this.$message.error(res.meta.msg)
      this.$message.success(res.meta.msg)
      res.data.unshift(this.welcome)
      this.menuList = res.data
      console.log(res, 'menus')
    },
    // 点击按钮,切换菜单的折叠和展开
    toggleCollpase() {
      this.isCollapse = !this.isCollapse
    },
    saveActivePath(activePath) {
      window.sessionStorage.setItem('activePath', activePath)
      this.activePath = activePath
      // console.log(this.$route.path)
    }
  }
}
</script>

<style lang="less" scoped>
.hwelcome {
  color: #fff;
  font-size: 15px;
  height: 25px;
  text-align: center;
  background: green;

  span {
    margin-left: 10px;
  }
}

.home-container {
  height: 100%;
}

.el-header {
  display: flex;
  justify-content: space-between;
  padding-left: 0;
  background-color: #373d3f;
  align-items: center;
  color: #fff;
  font-size: 20px;

  >div {
    display: flex;
    align-items: center;

    img {
      width: 60px;
      height: 60px;
      border-radius: 50%;
    }

    span {
      margin-left: 15px;
    }
  }
}

.el-aside {
  background-color: #333744;

  .el-menu {
    border-right: none;
  }
}

.el-main {
  background-color: #eaedf1;
}

.iconfont {
  padding-right: 10px;
}

.toggle-button {
  background: #4a5064;
  font-size: 10px;
  text-align: center;
  line-height: 24px;
  color: #fff;
  letter-spacing: 0.2em;
  cursor: pointer;
}
</style>
7实现首页的路由重定向
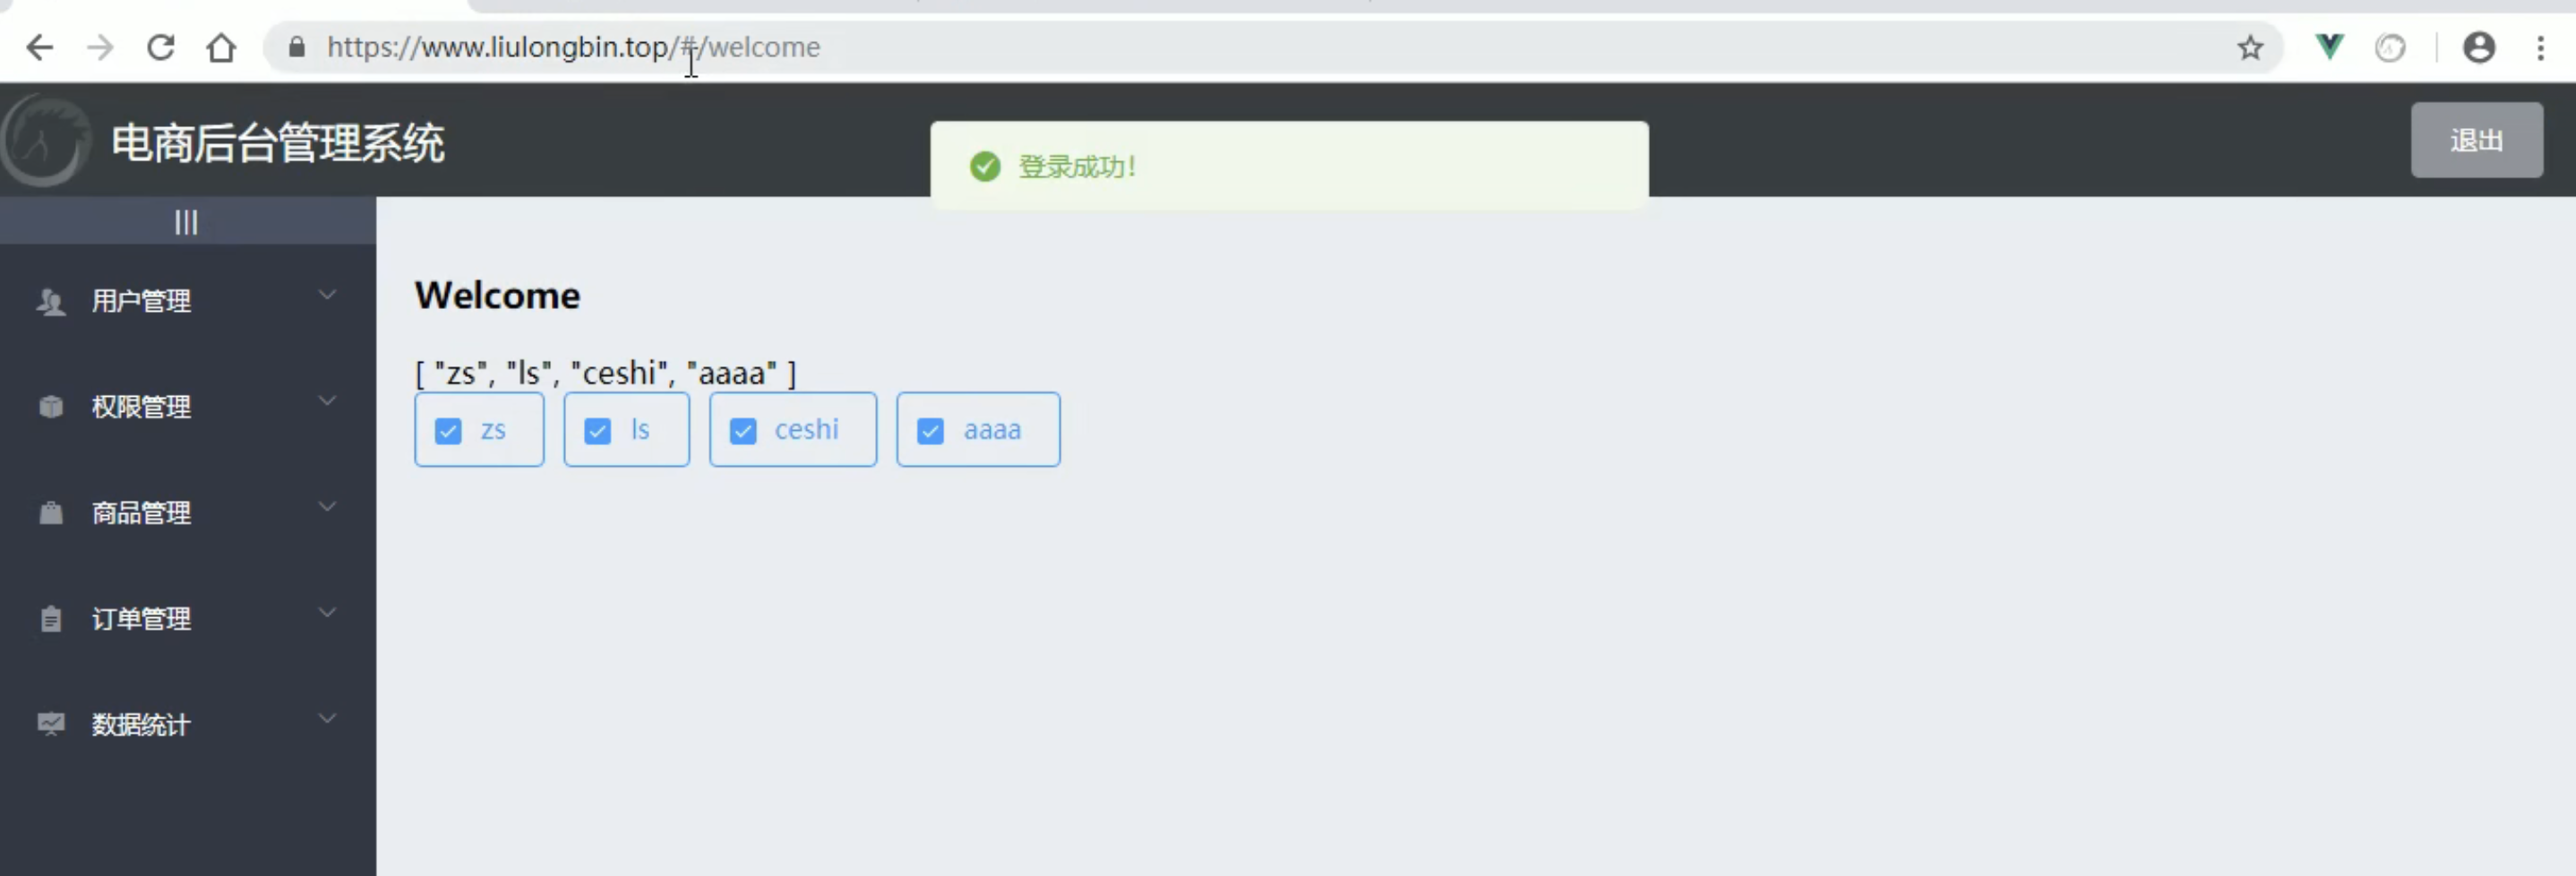
默认是成功之后默认是跳转到 /home , 现在是重定向到了/welcome.同时在主体区域展示 welcome
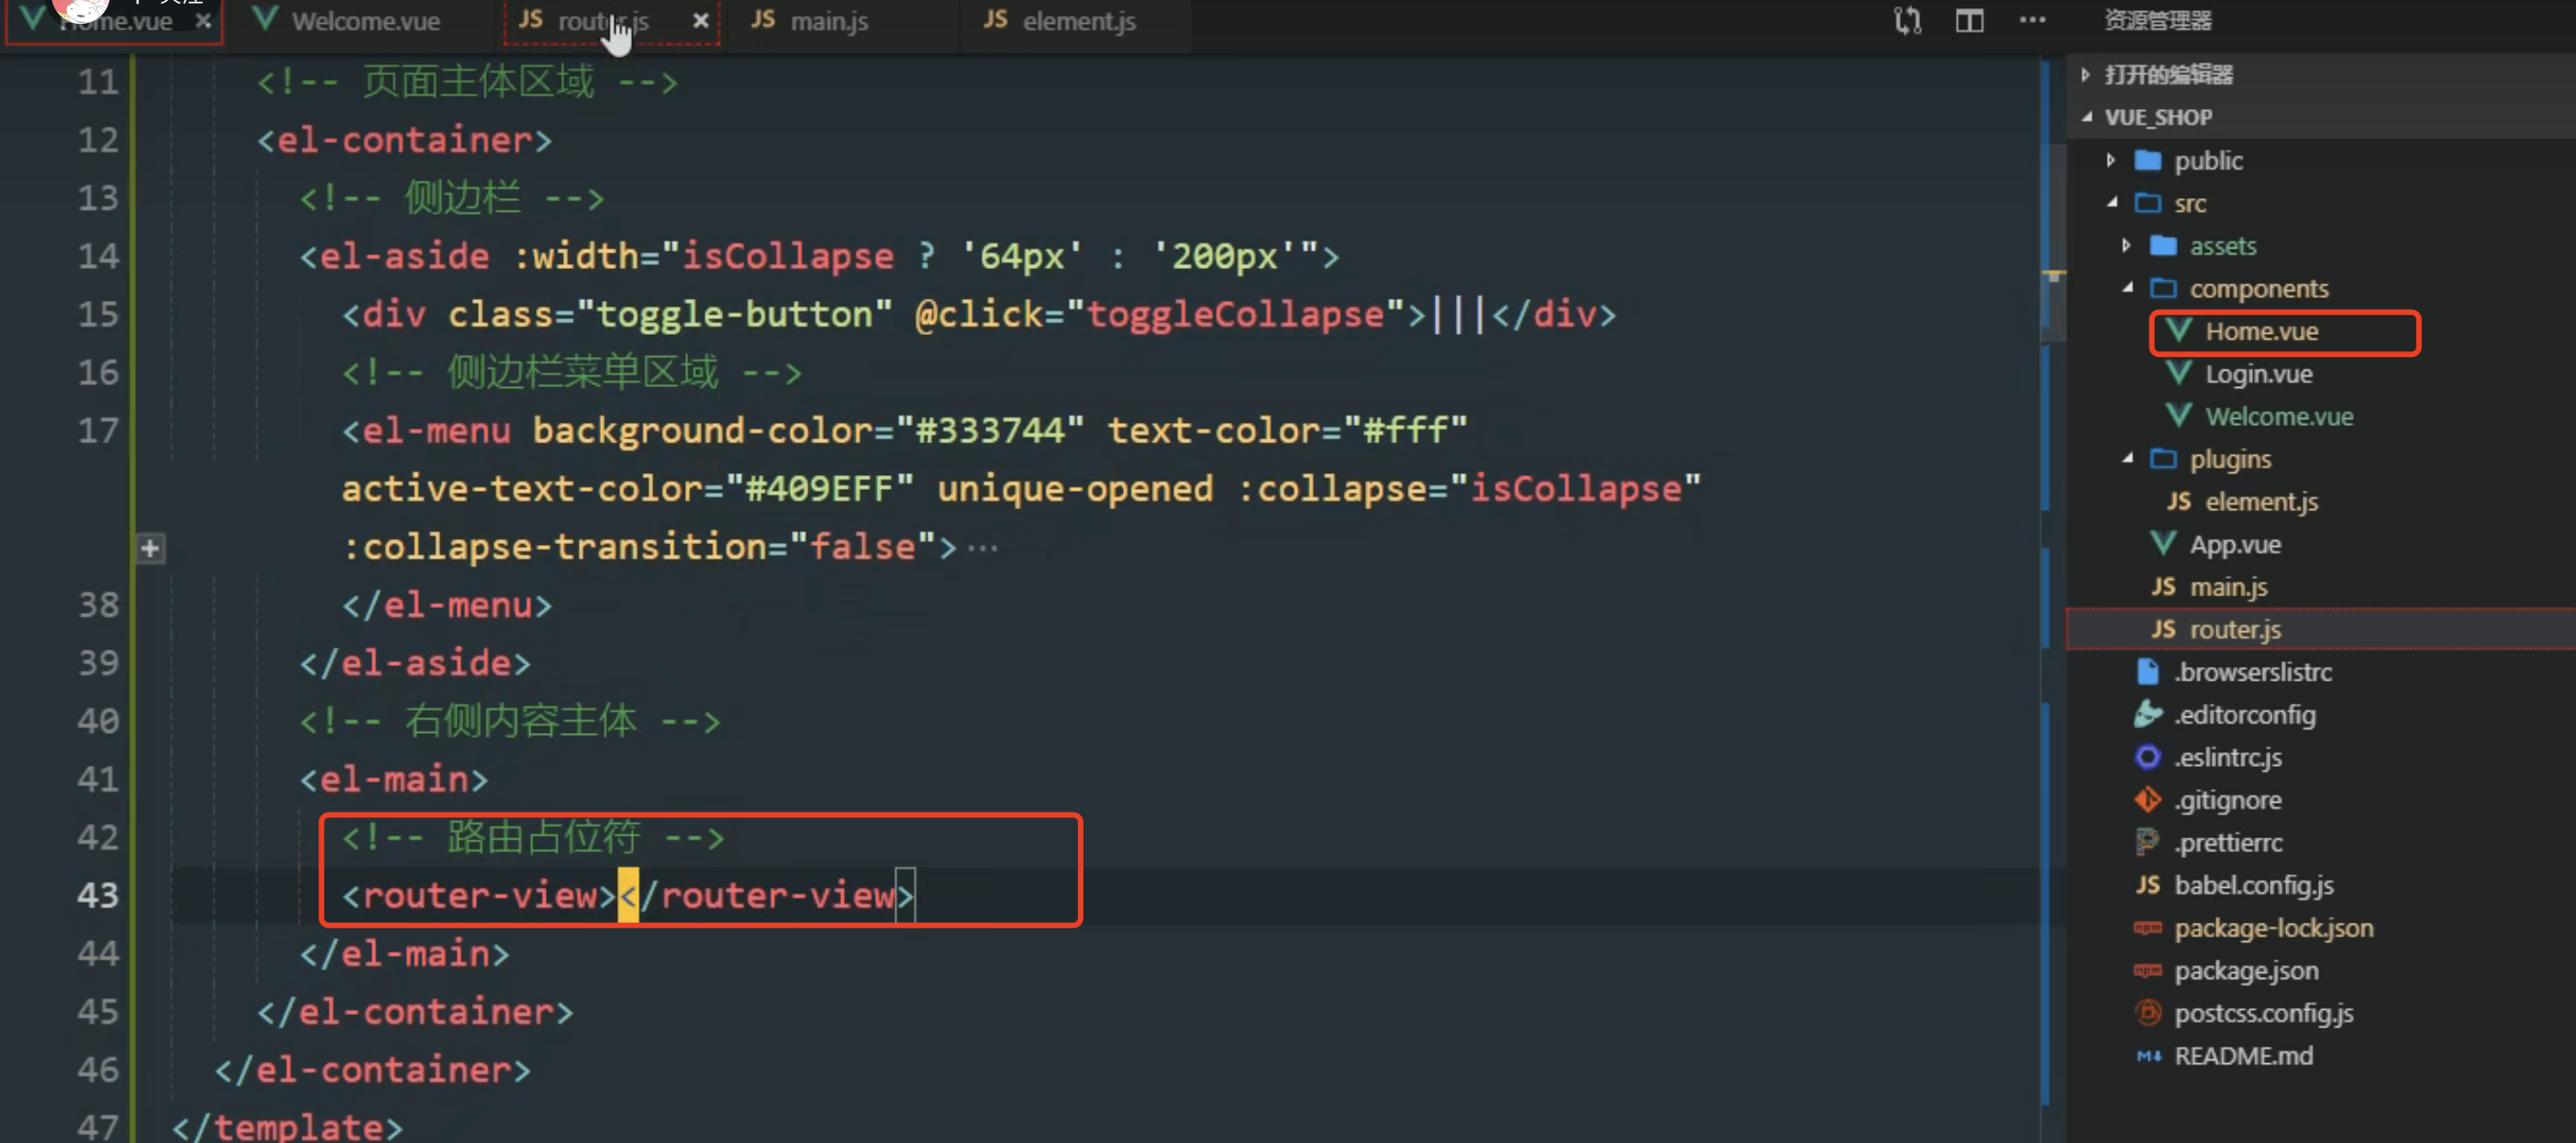
首先 我们需要定义一个welcome的组件,然后再main的这个地方放一个占位符
需要再home组件中在嵌套一个welcome组件
7.1 建立welcome组件

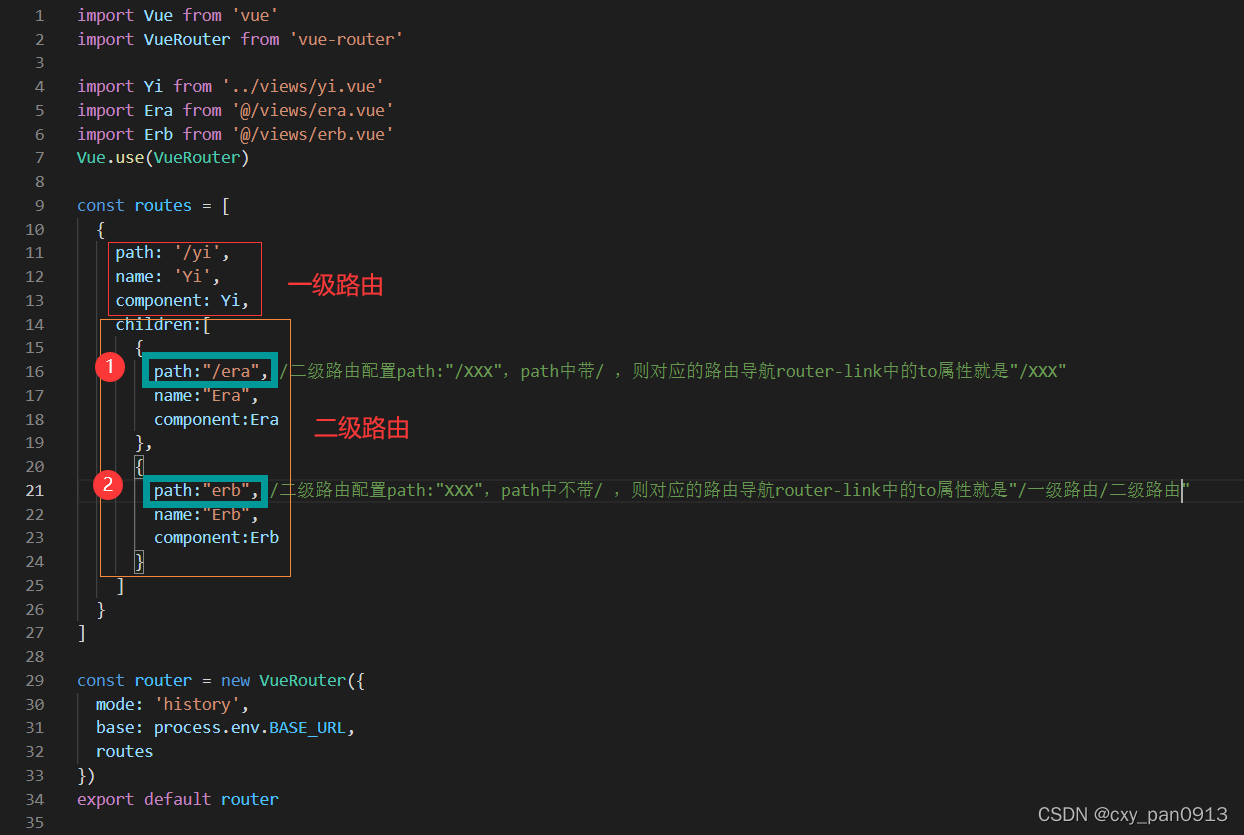
7.2 配置路由
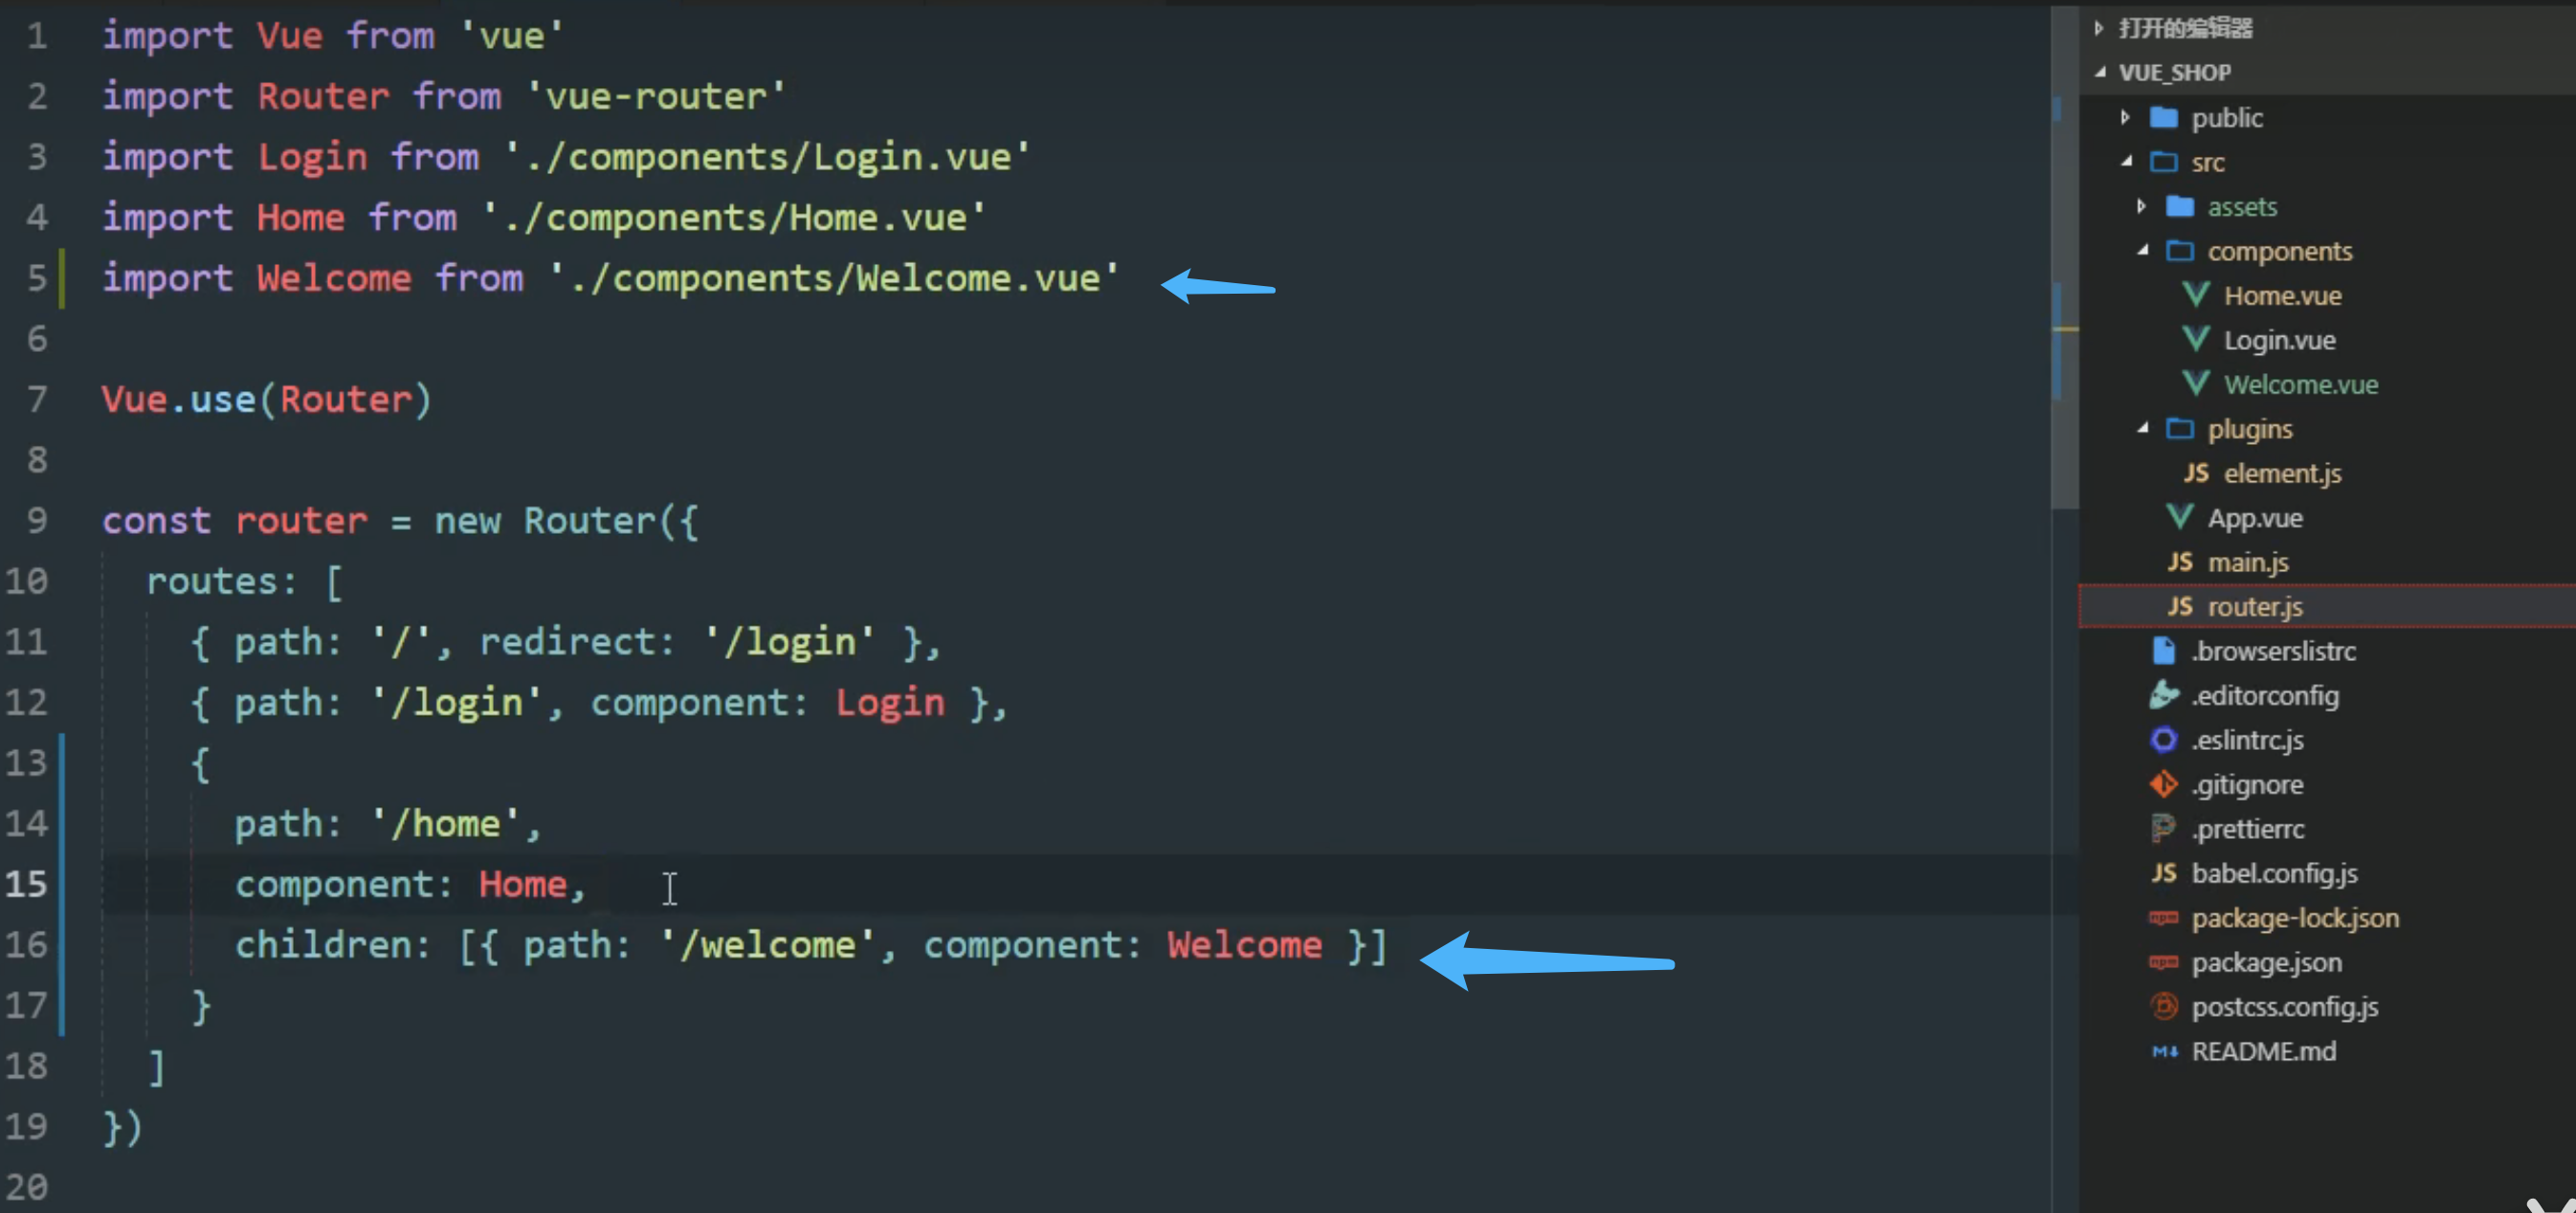
重定向组件: 只要你访问了/login 就重定向到 /welcome
welcome是home的一部分。所以在children里边
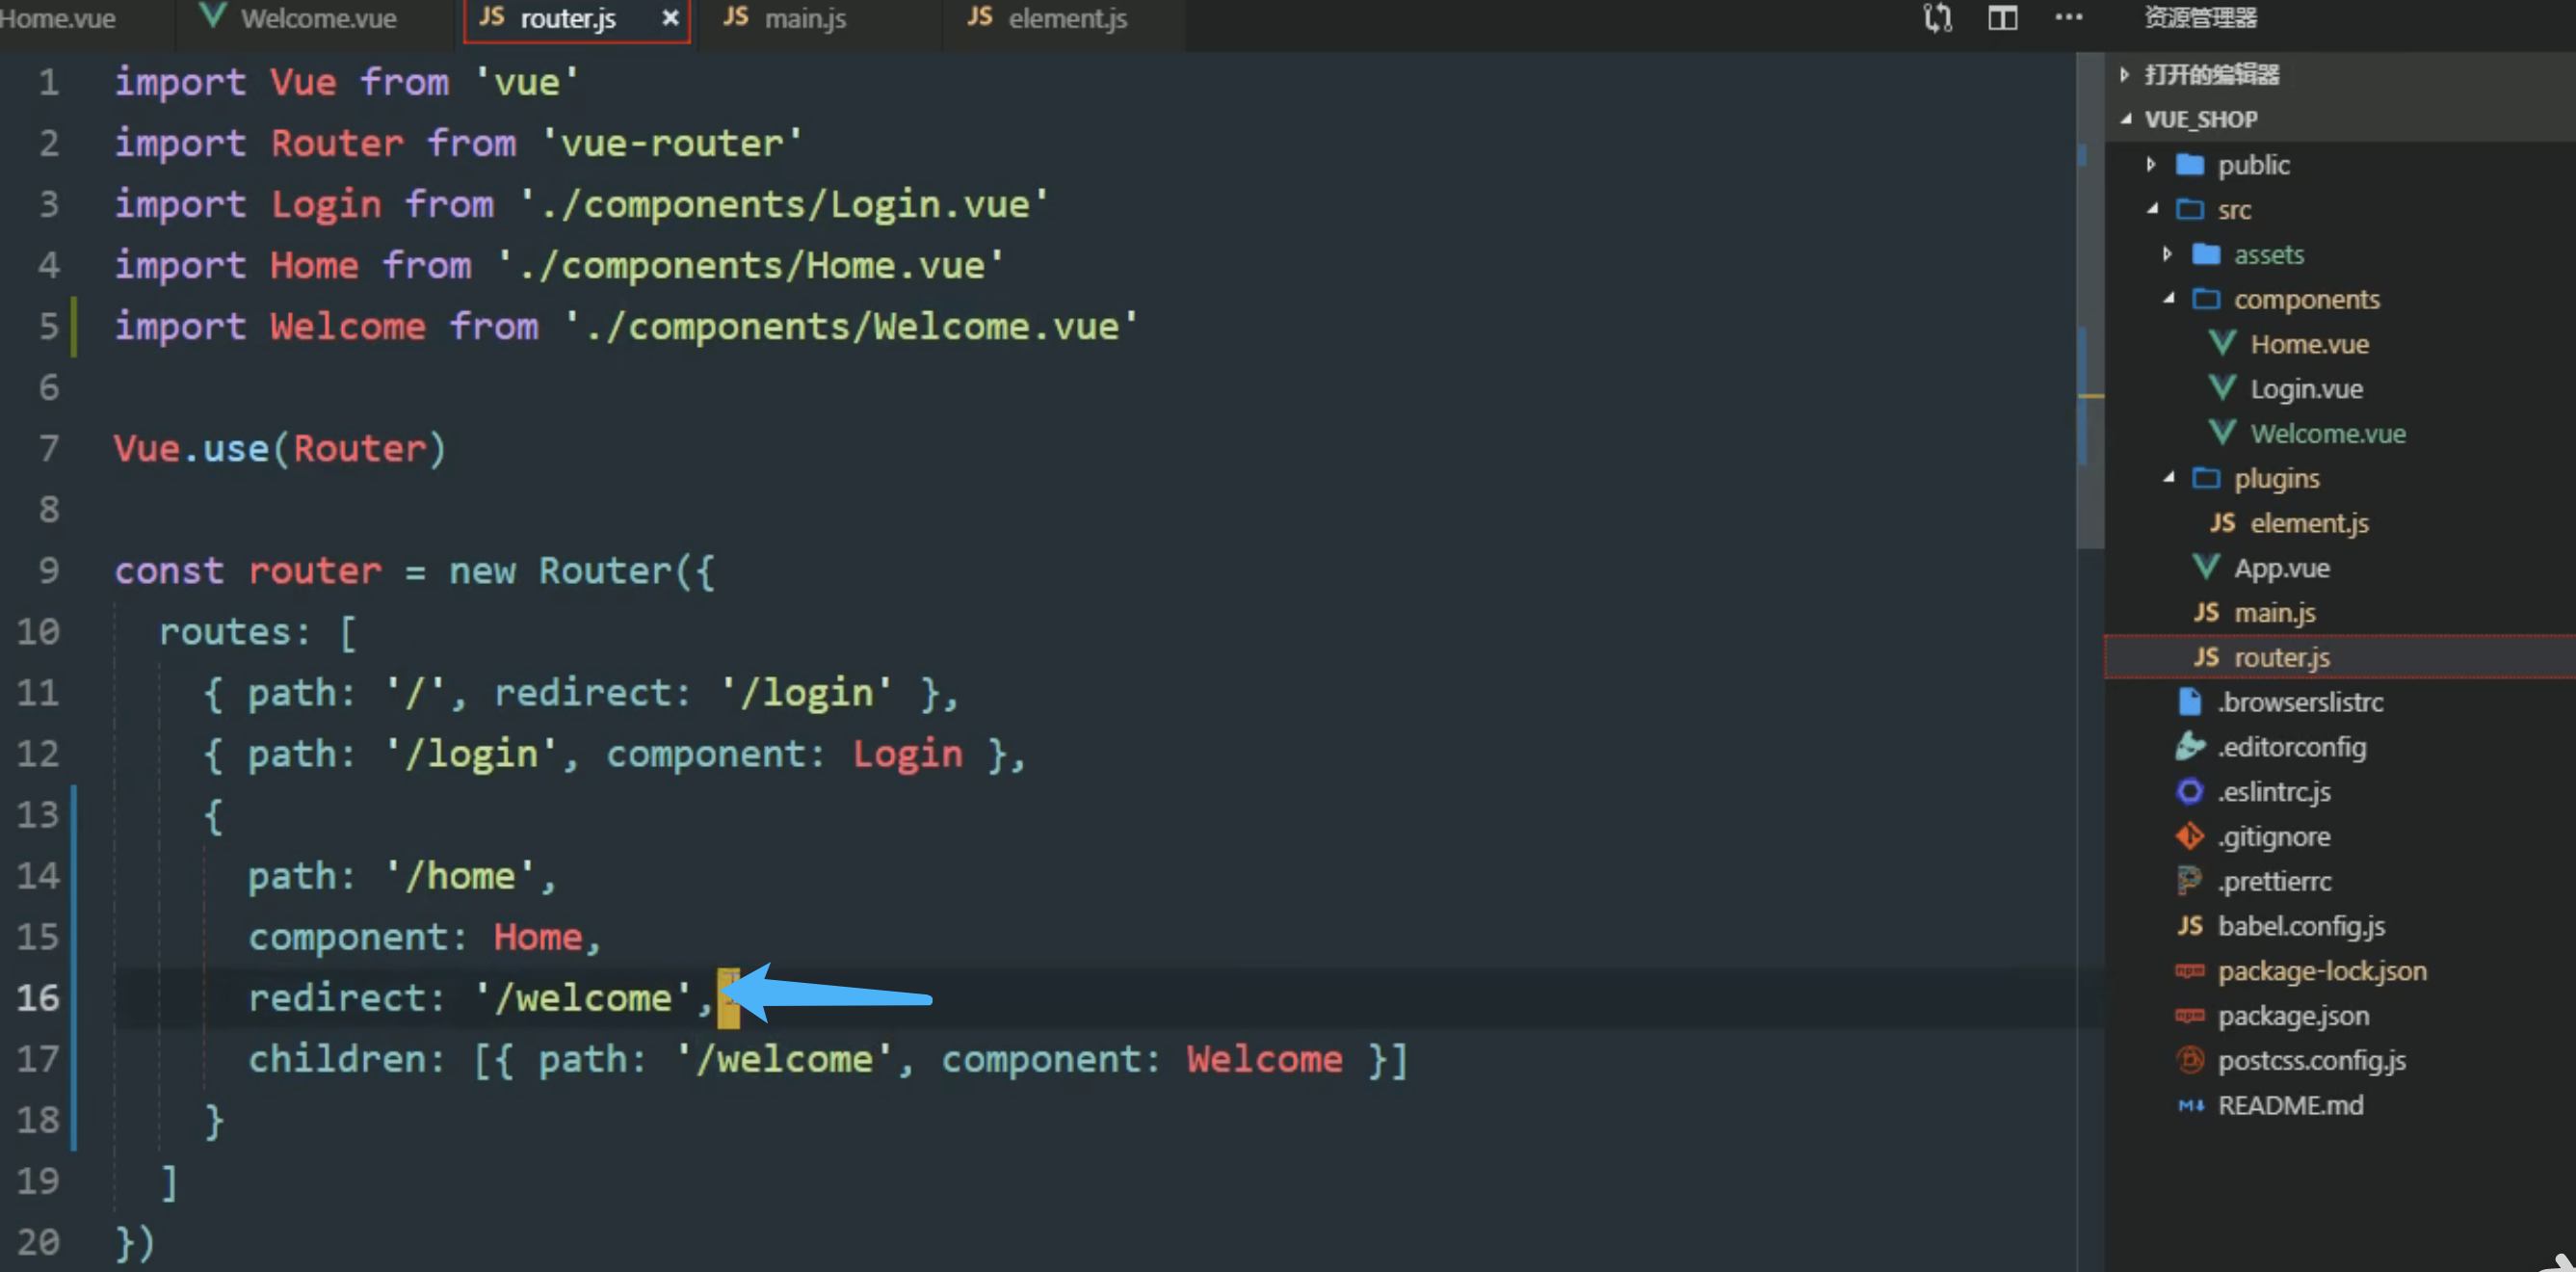
带/ 都方便
7.3 放一个路由占位符
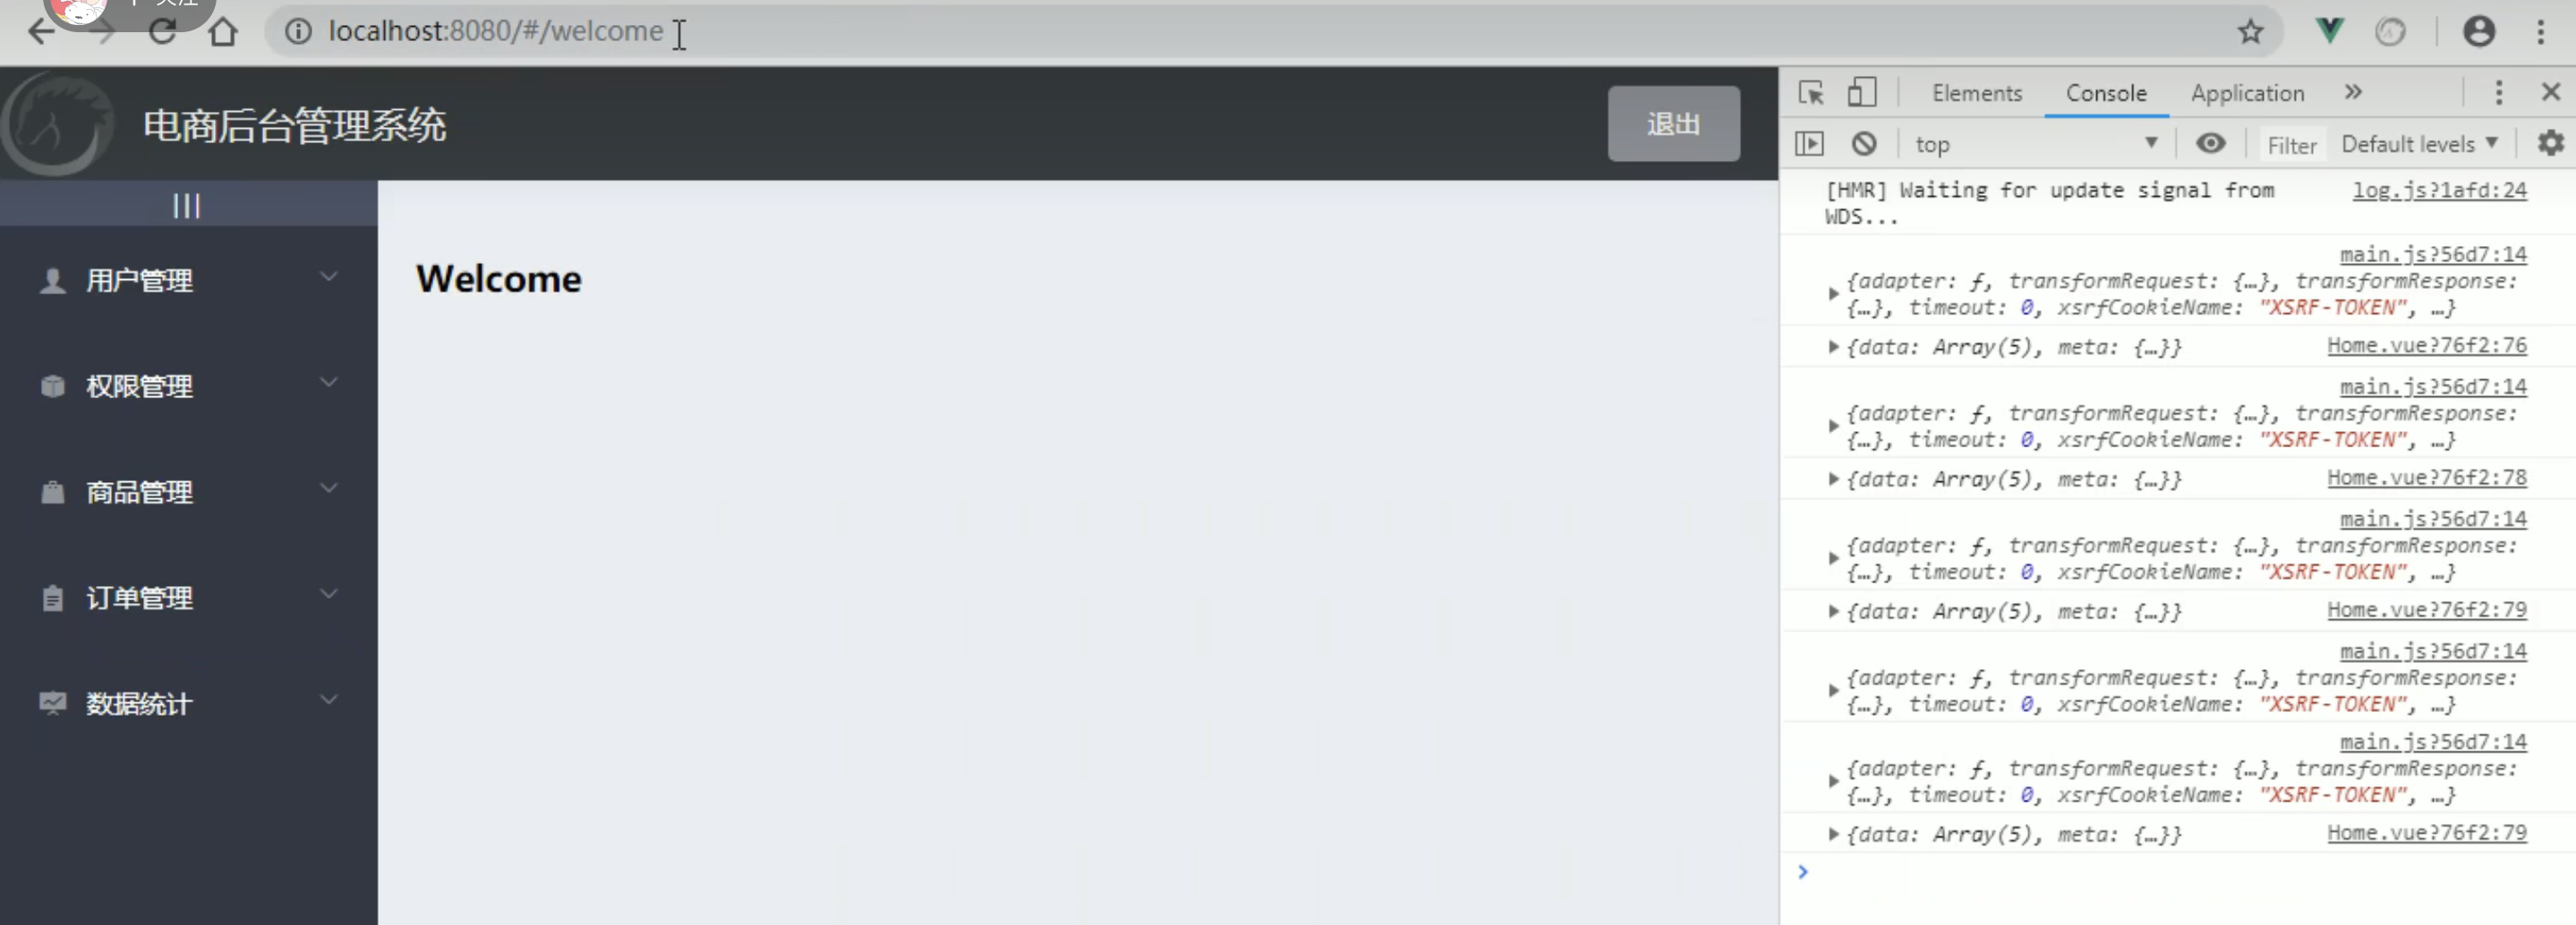
8左侧菜单改为路由连接
把二级链接添加
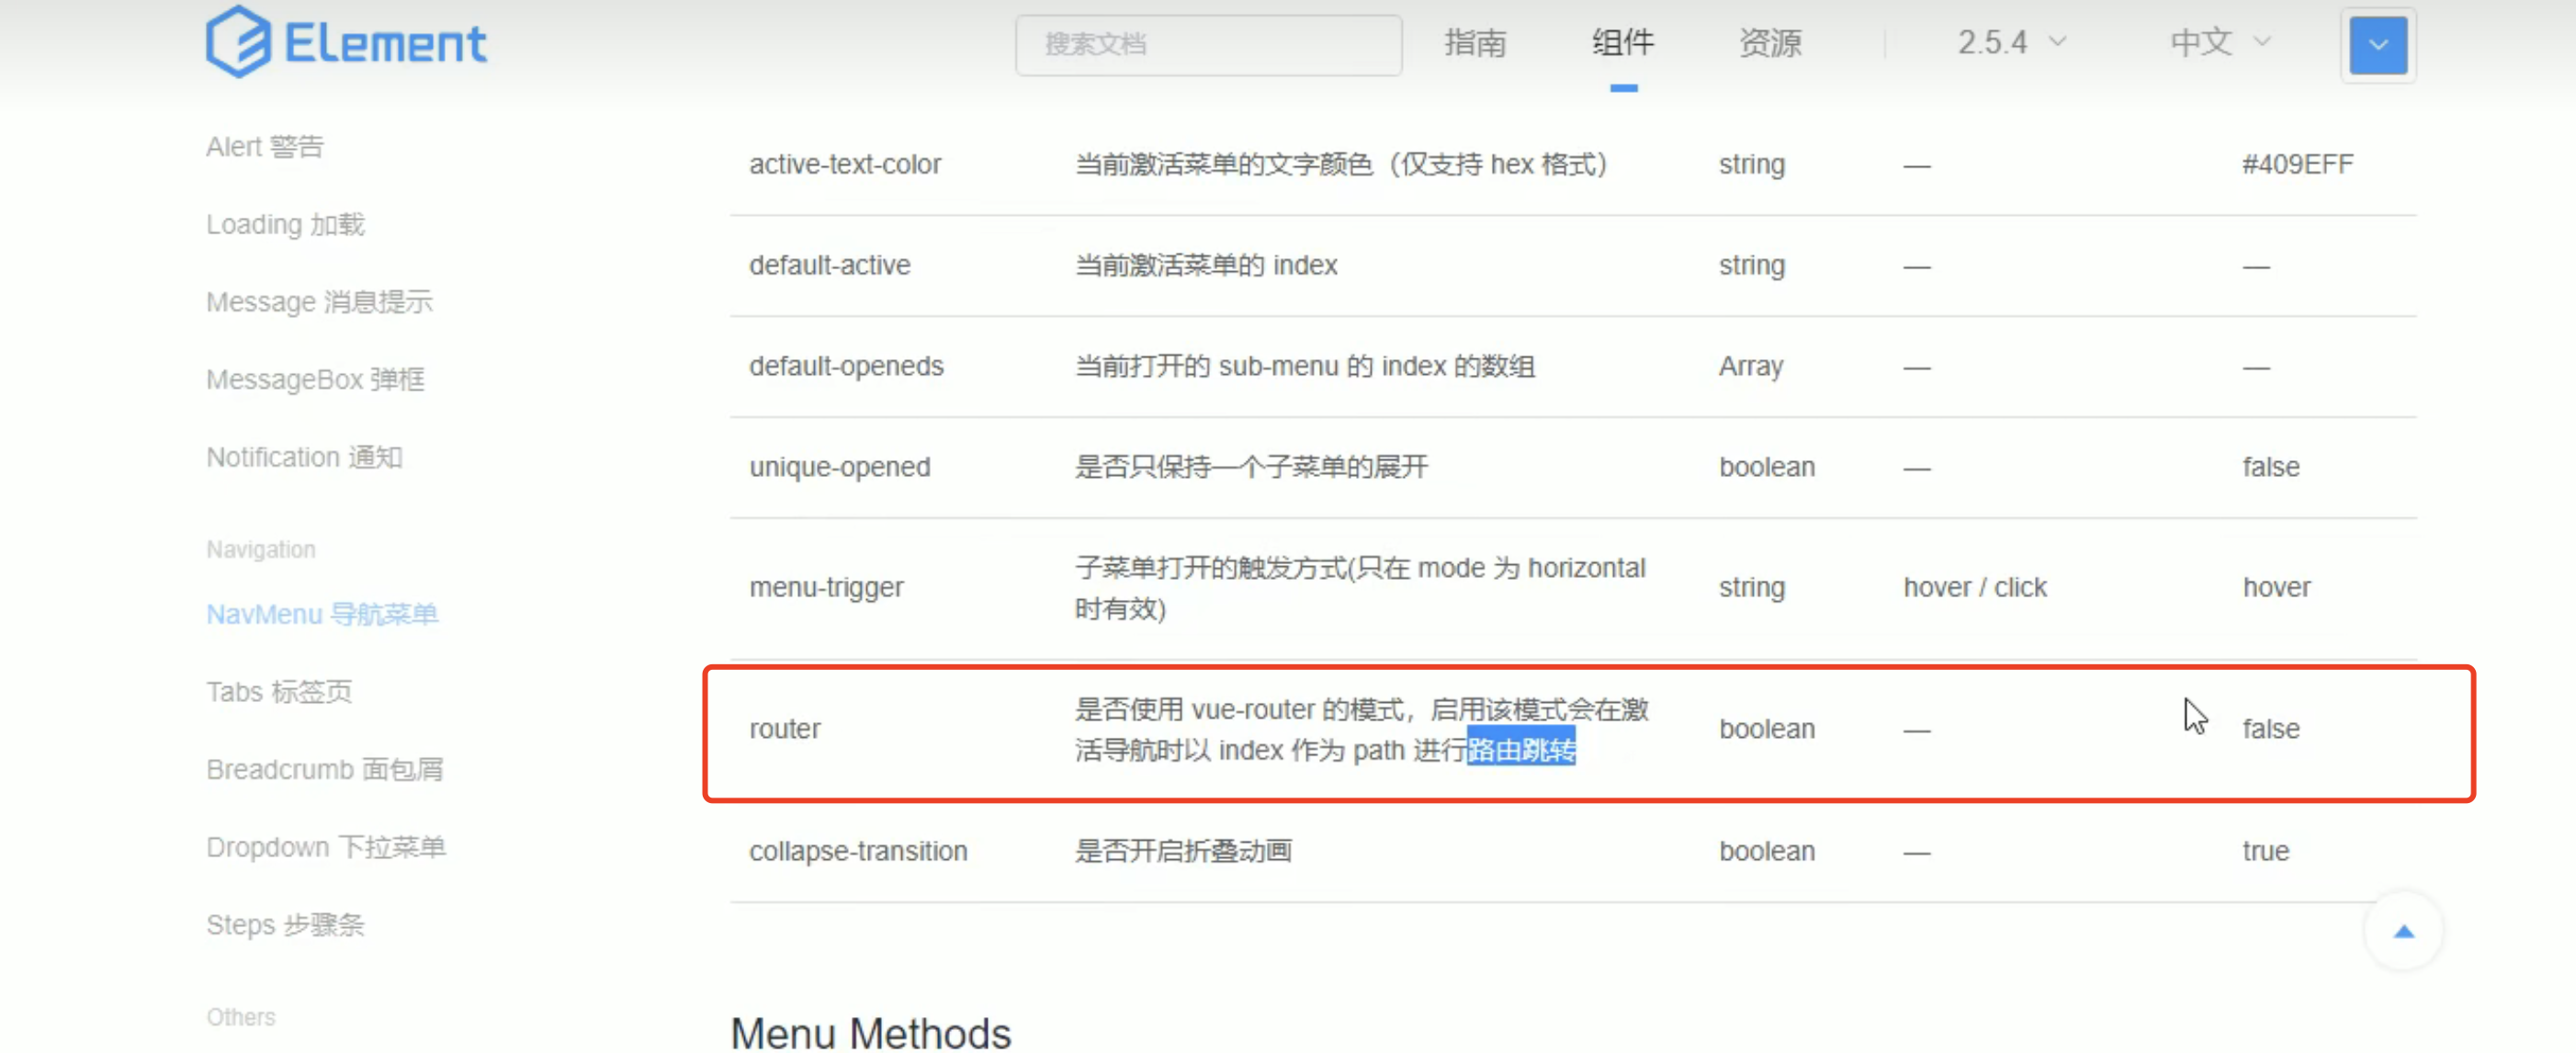
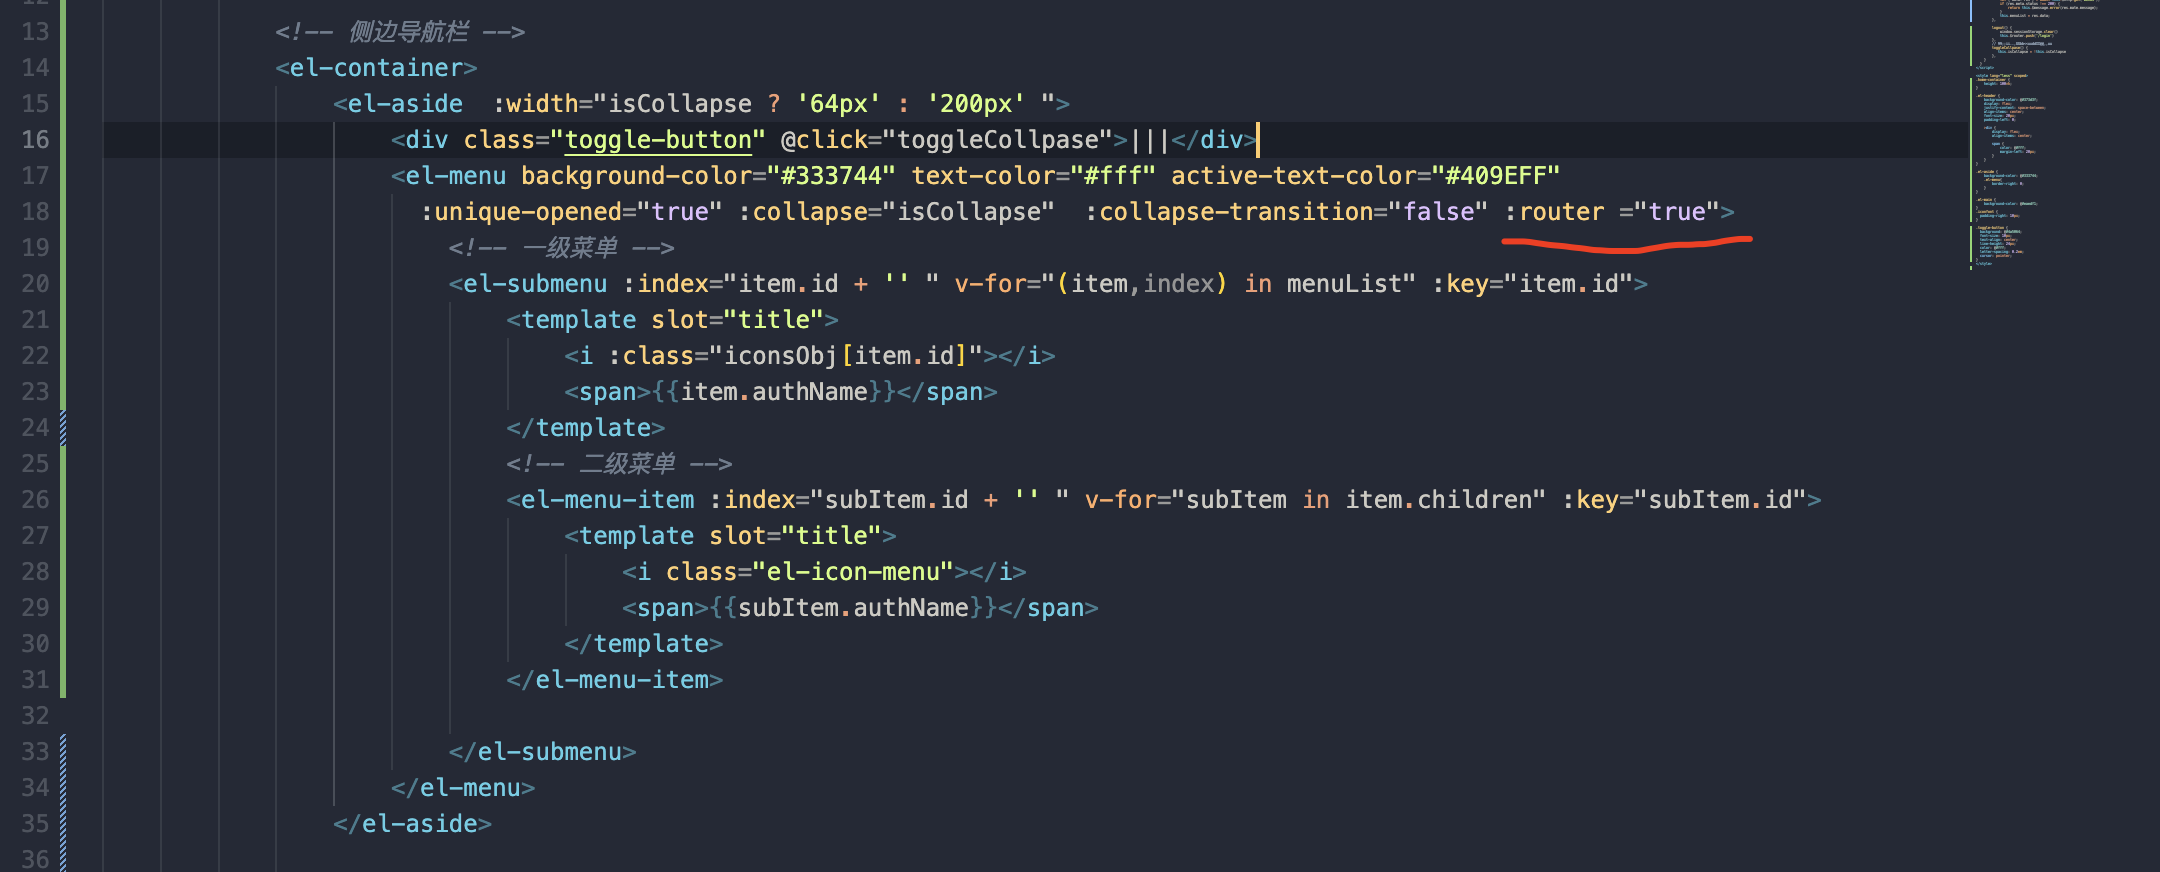
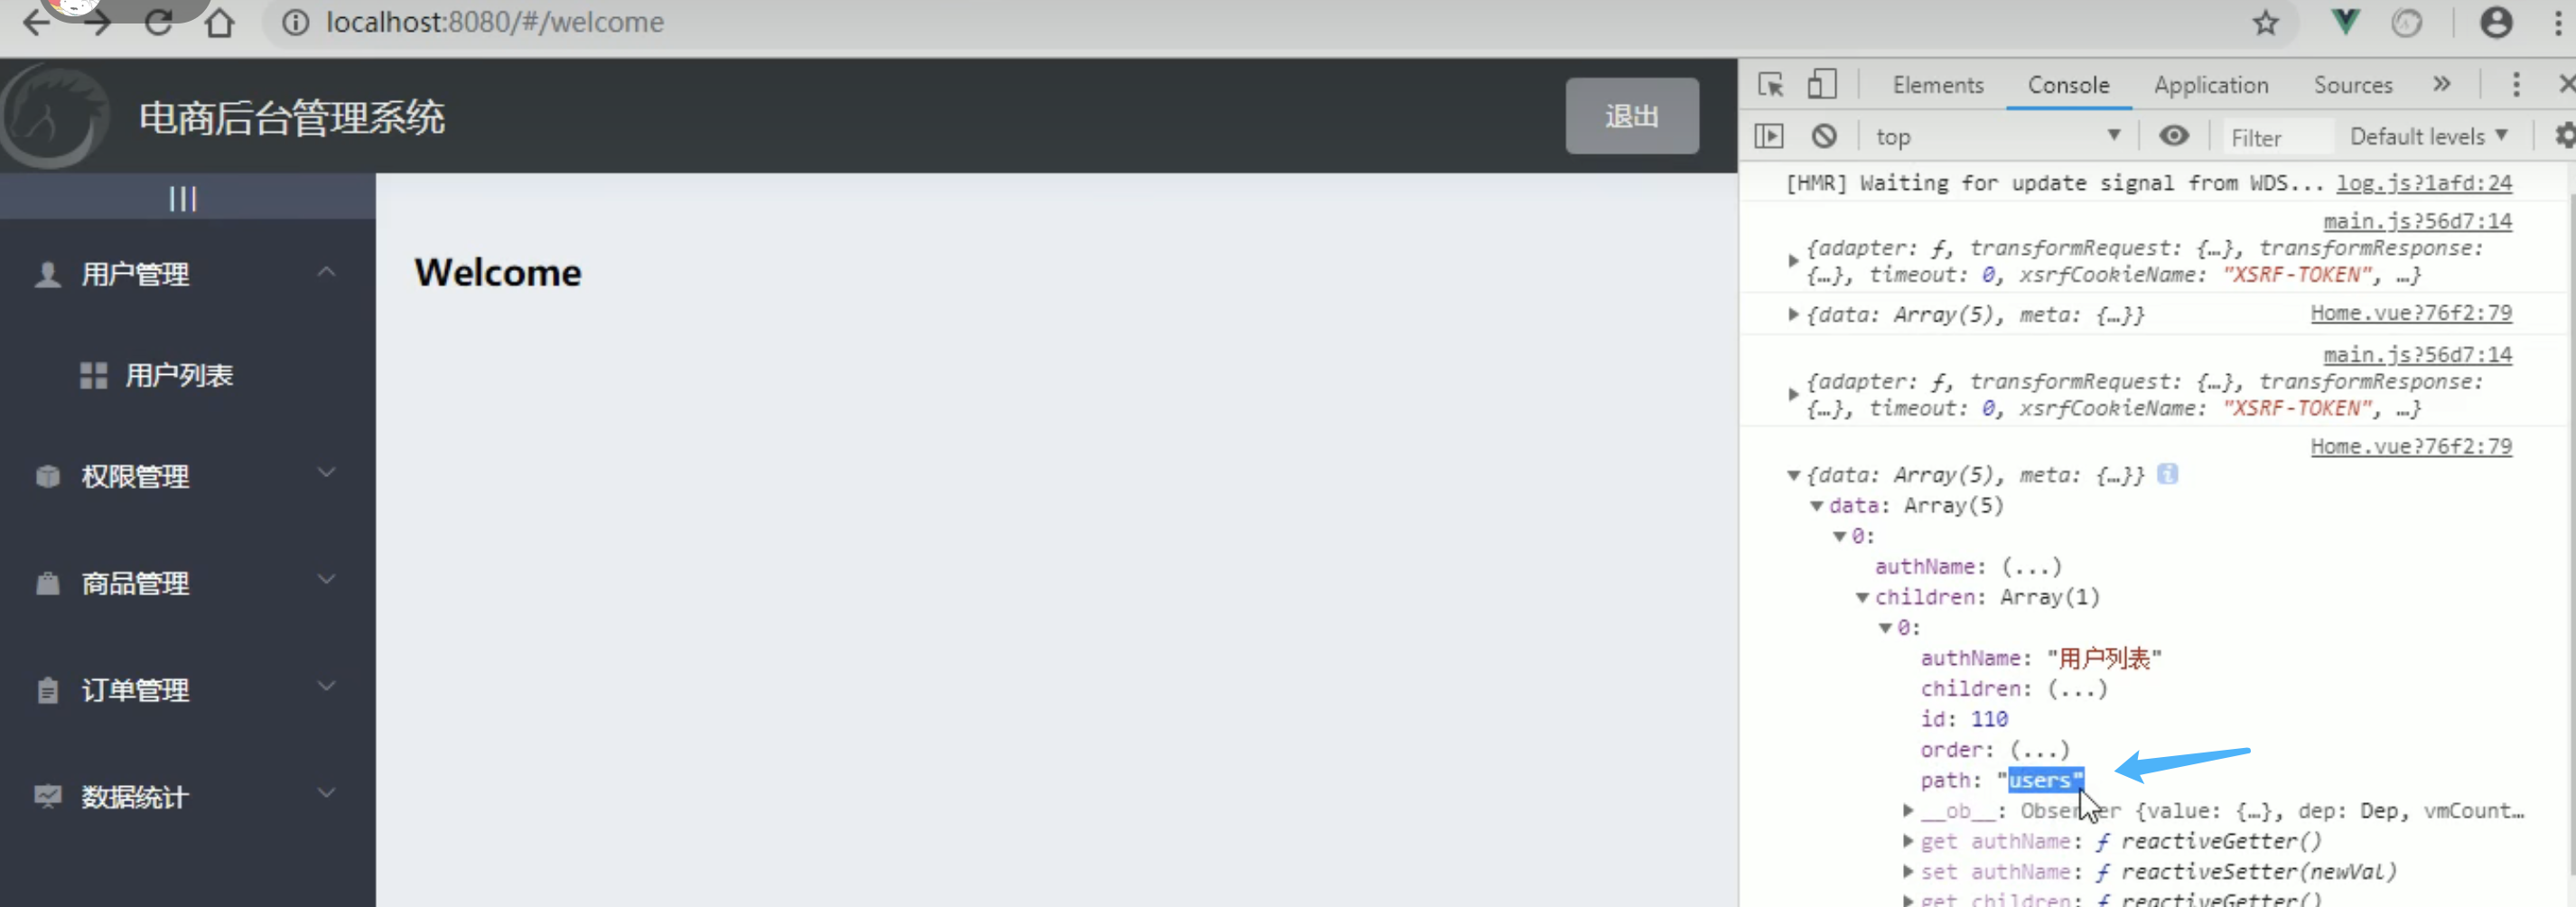
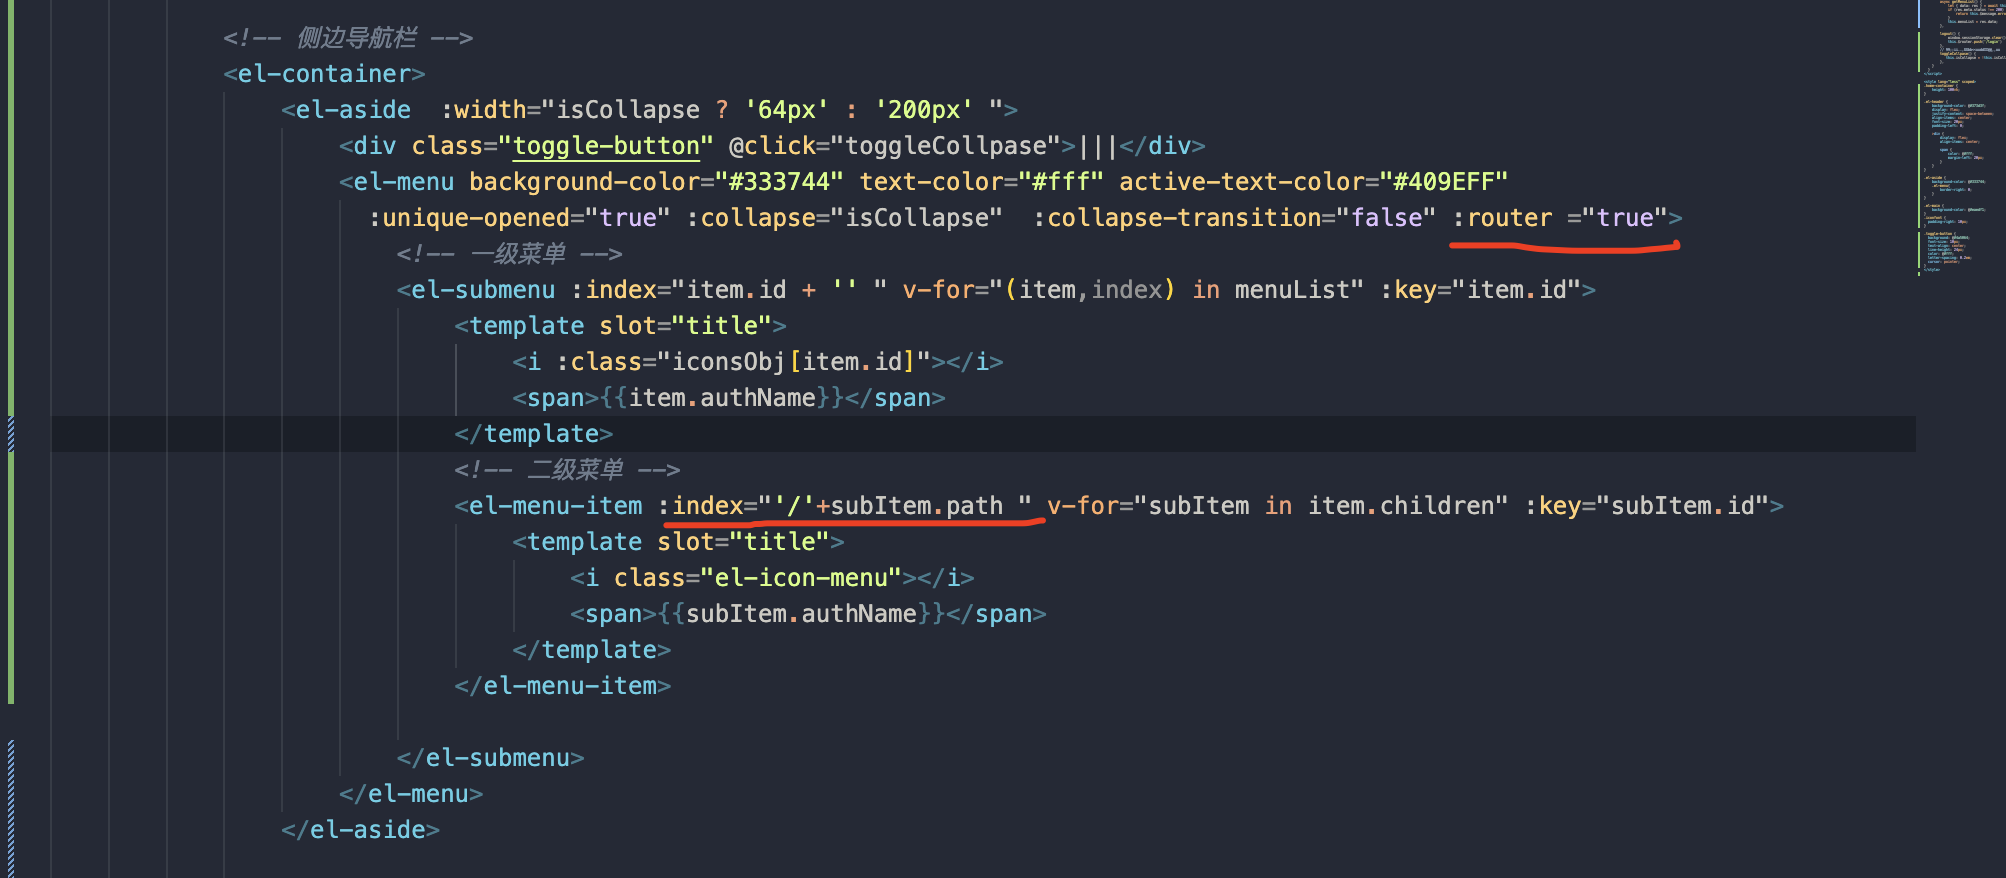
根据 index = item.id 来进行跳转 ,但是拿id跳转并不合适,应该用path进行跳转
修改:


 4816
4816

 被折叠的 条评论
为什么被折叠?


