


感觉和网上的教程很不一样,所以现在来搭一下给自己做个记录
PS:
1.由于idea初识配置的时候联外要【f】墙,所以如果有ss梯子还是搭个梯子,这样bulid起来会快很多很多很多……
2.因为jar包冲突踩雷无数,请向低版本看齐……
3.在pom里添加的jar依赖无比在project struct里添加进web里的lib包
4.如果你是贪快从别地复制java文件,记得改编码Utf-8,否则……真的会报错
OK,开始
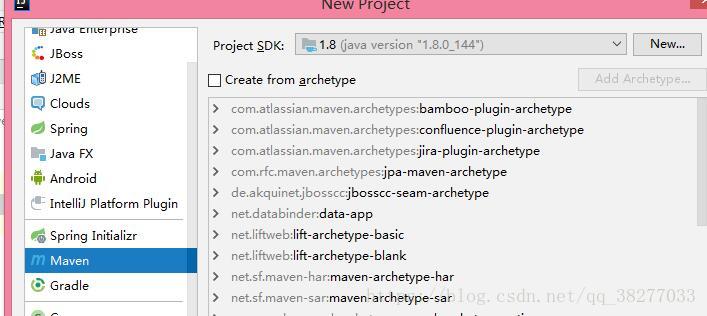
新建工程-选maven(不要选择archetype架构了,没有必要没有必要没有必要!!!)
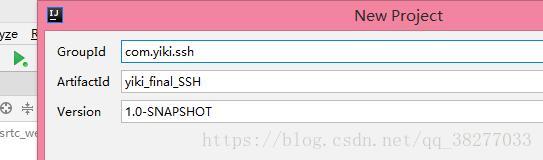
next-->一直next-->
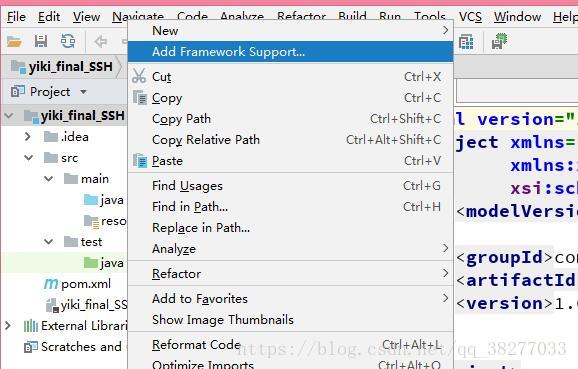
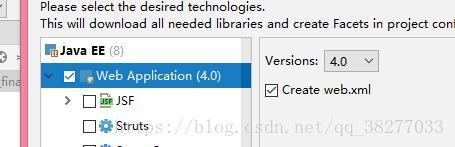
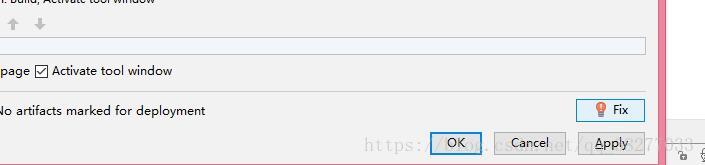
选中项目,添加框架依赖
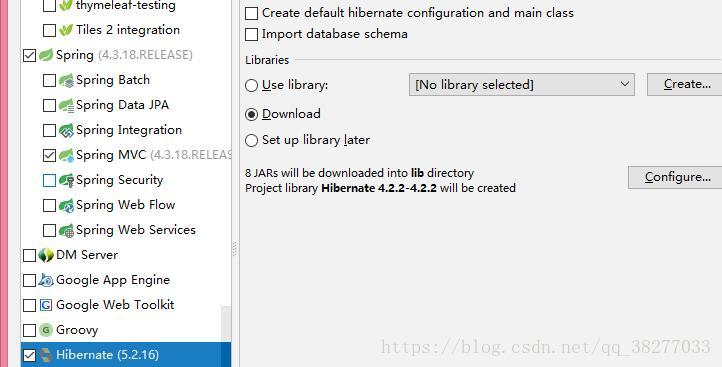
勾选web application,springmvc,已经hibernate(hibernate不要选太高版本了!!!!我本来配好的用的4.3,不知道为什么没有,就选4.2了,总之不要上5……)
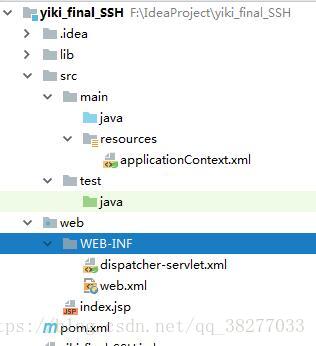
按照规范,把配置文件放进resources里
目录结构如下
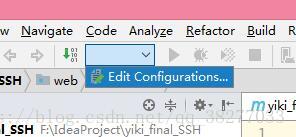
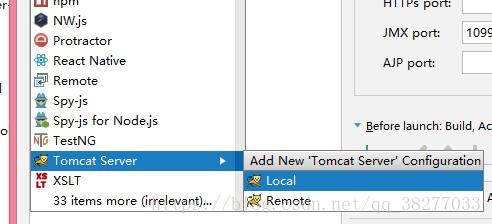
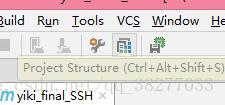
开始配置Tomact
添加依赖(在pom.xml里添加)
里面包括驱动,Jacson包,按需添加
<?xml version="1.0" encoding="UTF-8"?>
<project xmlns="http://maven.apache.org/POM/4.0.0"
         xmlns:xsi="http://www.w3.org/2001/XMLSchema-instance"
         xsi:schemaLocation="http://maven.apache.org/POM/4.0.0 http://maven.apache.org/xsd/maven-4.0.0.xsd">
    <modelVersion>4.0.0</modelVersion>

    <groupId>com.yiki.ssh</groupId>
    <artifactId>yiki_final_SSH</artifactId>
    <version>1.0-SNAPSHOT</version>


    <!-- https://mvnrepository.com/artifact/org.springframework/org.springframework.web -->
    <dependencies>
        <!-- https://mvnrepository.com/artifact/org.springframework/spring-web -->
        <!-- https://mvnrepository.com/artifact/mysql/mysql-connector-java -->
        <dependency>
            <groupId>mysql</groupId>
            <artifactId>mysql-connector-java</artifactId>
            <version>5.1.33</version>
        </dependency>
        <!-- https://mvnrepository.com/artifact/org.apache.commons/commons-lang3 -->
        <!-- https://mvnrepository.com/artifact/commons-dbcp/commons-dbcp -->
        <dependency>
            <groupId>commons-dbcp</groupId>
            <artifactId>commons-dbcp</artifactId>
            <version>1.4</version>
        </dependency>

        <!-- https://mvnrepository.com/artifact/javax.servlet/javax.servlet-api -->
        <dependency>
            <groupId>javax.servlet</groupId>
            <artifactId>javax.servlet-api</artifactId>
            <version>4.0.1</version>
            <scope>provided</scope>
        </dependency>
        <dependency>
            <groupId>org.hibernate.common</groupId>
            <artifactId>hibernate-commons-annotations</artifactId>
            <version>4.0.5.Final</version>
        </dependency>

        <!-- https://mvnrepository.com/artifact/org.hibernate/hibernate-core -->
        <dependency>
            <groupId>org.hibernate</groupId>
            <artifactId>hibernate-core</artifactId>
            <version>4.3.11.Final</version>
        </dependency>
        <!-- https://mvnrepository.com/artifact/org.hibernate/hibernate-ehcache -->
        <dependency>
            <groupId>org.hibernate</groupId>
            <artifactId>hibernate-ehcache</artifactId>
            <version>4.3.11.Final</version>
        </dependency>


        <!-- https://mvnrepository.com/artifact/com.fasterxml.jackson.core/jackson-core -->
        <dependency>
            <groupId>com.fasterxml.jackson.core</groupId>
            <artifactId>jackson-core</artifactId>
            <version>2.9.6</version>
        </dependency>
        <!-- https://mvnrepository.com/artifact/com.fasterxml.jackson.core/jackson-databind -->
        <dependency>
            <groupId>com.fasterxml.jackson.core</groupId>
            <artifactId>jackson-databind</artifactId>
            <version>2.9.6</version>
        </dependency>
        <!-- https://mvnrepository.com/artifact/com.fasterxml.jackson.core/jackson-annotations -->
        <dependency>
            <groupId>com.fasterxml.jackson.core</groupId>
            <artifactId>jackson-annotations</artifactId>
            <version>2.9.6</version>
        </dependency>

        <!-- https://mvnrepository.com/artifact/net.sf.ehcache/ehcache-core -->
        <dependency>
            <groupId>net.sf.ehcache</groupId>
            <artifactId>ehcache-core</artifactId>
            <version>2.4.3</version>
        </dependency>


    </dependencies>

    <properties>
        <maven.compiler.source>1.8</maven.compiler.source>
        <maven.compiler.target>1.8</maven.compiler.target>
    </properties>

</project>
进去project struct
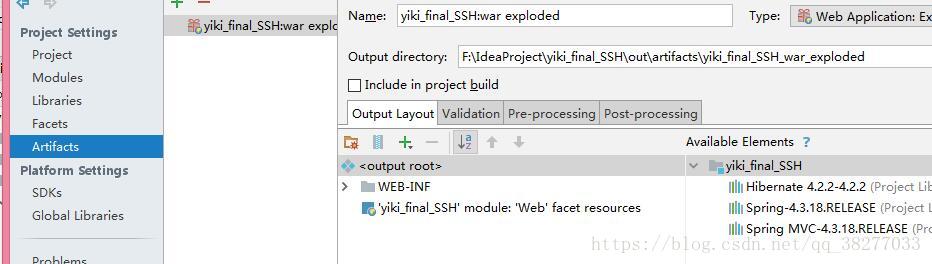
在web-inf下新建lib包,同时双击右侧的包添加到jar里,后面如果刷新还是会有很多包,不止这些的,一定要放完啊!
把配置文件applicationcontex改为springmvc.xml
web.xml
<?xml version="1.0" encoding="UTF-8"?>
<web-app xmlns="http://xmlns.jcp.org/xml/ns/javaee"
         xmlns:xsi="http://www.w3.org/2001/XMLSchema-instance"
         xsi:schemaLocation="http://xmlns.jcp.org/xml/ns/javaee http://xmlns.jcp.org/xml/ns/javaee/web-app_4_0.xsd"
         version="4.0">
    <!-- 放行静态资源 -->
    <servlet-mapping>
        <servlet-name>default</servlet-name>
        <url-pattern>*.css</url-pattern>
        <url-pattern>*.js</url-pattern>
        <url-pattern>*.html</url-pattern>
    </servlet-mapping>
    <context-param>
        <param-name>contextConfigLocation</param-name>
        <param-value>classpath:springmvc.xml</param-value>
    </context-param>

    <listener>
        <listener-class>org.springframework.web.context.ContextLoaderListener</listener-class>
    </listener>


    <servlet>
        <servlet-name>dispatcher</servlet-name>
        <servlet-class>org.springframework.web.servlet.DispatcherServlet</servlet-class>
        <init-param>
            <param-name>contextConfigLocation</param-name>
            <param-value>classpath:springmvc.xml</param-value>
        </init-param>
        <load-on-startup>1</load-on-startup>
    </servlet>
    <servlet-mapping>
        <servlet-name>dispatcher</servlet-name>
        <url-pattern>/</url-pattern>
    </servlet-mapping>

    <!-- 配置过滤器 作用是把Post请求转换为delete和put -->
    <filter>
        <filter-name>HiddenHttpMethodFilter</filter-name>
        <filter-class>org.springframework.web.filter.HiddenHttpMethodFilter</filter-class>
    </filter>

    <filter-mapping>
        <filter-name>HiddenHttpMethodFilter</filter-name>
        <url-pattern>/*</url-pattern>
    </filter-mapping>

</web-app>
springmvc.xml
<?xml version="1.0" encoding="UTF-8"?>
<beans xmlns="http://www.springframework.org/schema/beans"
       xmlns:xsi="http://www.w3.org/2001/XMLSchema-instance"
       xmlns:context="http://www.springframework.org/schema/context"
       xmlns:tx="http://www.springframework.org/schema/tx"
       xmlns:mvc="http://www.springframework.org/schema/mvc"
       xsi:schemaLocation="
http://www.springframework.org/schema/beans http://www.springframework.org/schema/beans/spring-beans-4.0.xsd
http://www.springframework.org/schema/context http://www.springframework.org/schema/context/spring-context-4.0.xsd
http://www.springframework.org/schema/tx http://www.springframework.org/schema/tx/spring-tx-4.0.xsd
http://www.springframework.org/schema/mvc
  http://www.springframework.org/schema/mvc/spring-mvc-4.0.xsd">

    <!-- 自动扫描的包 -->
    <context:component-scan base-package="com.yiki.*"/>
    <!-- 可以使用注解是注入 -->
    <context:annotation-config />
    <mvc:annotation-driven>

    </mvc:annotation-driven>

    <!-- 数据源 -->
    <bean id="dataSource" class="org.apache.commons.dbcp.BasicDataSource"
          destroy-method="close">
        <property name="driverClassName" value="com.mysql.jdbc.Driver" />
        <property name="url"
                  value="jdbc:mysql://localhost:3306/springmvc?useUnicode=true&characterEncoding=UTF-8" />
        <property name="username" value="root" />
        <property name="password" value="*******" />
        <!-- 连接池启动的初始值 -->
        <property name="initialSize" value="1"/>
        <!-- 连接池的最大值 -->
        <property name="maxActive" value="500"/>
    </bean>


    <!-- 它充当数据存储源的代理,并负责创建Session对象 -->
    <bean id="sessionFactory"
          class="org.springframework.orm.hibernate4.LocalSessionFactoryBean">
        <property name="dataSource" ref="dataSource" />

        <property name="annotatedClasses">
            <list>
                <value>com.yiki.POJO.Person</value>
            </list>
        </property>

        <property name="hibernateProperties"><!-- 配置hibernate的属性映射 -->
            <props>
                <!-- 方言 -->
                <prop key="hibernate.dialect">
                    org.hibernate.dialect.MySQL5Dialect
                </prop>
                <prop key="hibernate.show_sql">true</prop>
                <!-- 自动建表 -->
                <prop key="hibernate.hbm2ddl.auto">update</prop>
                <prop key="hibernate.current_session_context_class">org.springframework.orm.hibernate4.SpringSessionContext
                </prop><!-- 开启二级缓存 -->
                <prop key=" hibernate.cache.use_second_level_cache">true</prop>
                <!-- 启用查询缓存 -->
                <prop key=" hibernate.cache.use_query_cache">true</prop>
                <!-- 配置二级缓存提供商 -->
                <prop key="hibernate.cache.region.factory_class">
                    org.hibernate.cache.ehcache.EhCacheRegionFactory
                </prop>
                <!-- 加载缓存所需配置文件 -->
                <prop key="hibernate.net.sf.ehcache.configurationResourceName">
                    classpath:ehcache.xml</prop>


            </props>
        </property>
    </bean>

    <!-- 事务管理器 -->
    <bean id="txManager"
          class="org.springframework.orm.hibernate4.HibernateTransactionManager">
        <property name="sessionFactory" ref="sessionFactory">

        </property>
    </bean>
    <!-- 需要tx命名空间 注解方式实现事务,此功能为注解解析 -->
    <tx:annotation-driven transaction-manager="txManager" />


    <!-- 配置视图解析器:如何把handler方法解析为实际屋里视图 -->
    <bean
            class="org.springframework.web.servlet.view.InternalResourceViewResolver"
            id="internalResourceViewResolver">
        <!-- 前缀 -->
        <property name="prefix" value="/WEB-INF/view/" />
        <!-- 后缀 -->
        <property name="suffix" value=".html" />
    </bean>


    <!-- 配置视图解析器 ,使用视图的名字来解析视图,order可以定义视图优先级 -->
    <bean class="org.springframework.web.servlet.view.BeanNameViewResolver">
        <property name="order" value="100"/>

    </bean>


    <!-- 对Hibernate定义bean
    -->
    <bean id="personService" class="com.yiki.Model.PersonService"></bean>


</beans>
二级缓存配置文件echache.xml
<?xml version="1.0" encoding="UTF-8"?>
<ehcache>
    <diskStore path="D:/cache"/>
    <defaultCache
        maxElementsInMemory="10000"
        eternal="false"
        timeToIdleSeconds="120"
        timeToLiveSeconds="120"
        overflowToDisk="true"
        />

</ehcache>
按一下目录建包
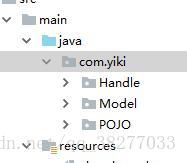
package com.yiki.Handle;

import org.springframework.beans.factory.annotation.Autowired;
import org.springframework.context.ApplicationContext;
import org.springframework.context.support.ClassPathXmlApplicationContext;
import org.springframework.stereotype.Controller;
import org.springframework.web.bind.annotation.PathVariable;
import org.springframework.web.bind.annotation.RequestMapping;
import org.springframework.web.bind.annotation.RequestMethod;

import com.yiki.Model.PersonService;
import com.yiki.POJO.Person;

@RequestMapping("/restStyle")
@Controller
public class RestMapping {

	private PersonService service;

	public void start() {

		ApplicationContext cxt = new ClassPathXmlApplicationContext("springmvc.xml");
		service = (PersonService) cxt.getBean("personService");
	}

	private static final String SUCCESS = "success";

	@RequestMapping(value = "/testRest/{id}", method = RequestMethod.GET)
	public String testRestGet(@PathVariable Integer id) {
		start();
		Person person = service.getPerson(id);
		System.out.println("GET :" + id + person);
		return SUCCESS;
	}

	@RequestMapping(value = "/testRest", method = RequestMethod.POST)
	public String testRestPost() {
		System.out.println("POST");
		return SUCCESS;
	}

	@RequestMapping(value = "/testRest/{id}", method = RequestMethod.DELETE)
	public String testResDeletet(@PathVariable Integer id) {
		System.out.println("Delete :" + id);
		return SUCCESS;
	}

	@RequestMapping(value = "/testRest/{id}", method = RequestMethod.PUT)
	public String testResPut(@PathVariable Integer id) {
		System.out.println("PUT  :" + id);
		return SUCCESS;
	}

}
package com.yiki.Handle;
import org.springframework.context.ApplicationContext;
import org.springframework.context.support.ClassPathXmlApplicationContext;
import org.springframework.stereotype.Controller;
import org.springframework.web.bind.annotation.PathVariable;
import org.springframework.web.bind.annotation.RequestMapping;
import org.springframework.web.bind.annotation.RequestMethod;
import org.springframework.web.bind.annotation.ResponseBody;
import com.yiki.Model.PersonService;
import com.yiki.POJO.Person;
@Controller
public class TestJson {
private PersonService service;
public void start() {
ApplicationContext cxt = new ClassPathXmlApplicationContext("springmvc.xml");
service = (PersonService) cxt.getBean("personService");
}
@ResponseBody
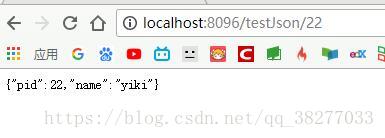
@RequestMapping(value = "**/testJson/{id}", method = RequestMethod.GET)//匹配多层路径
public Person testJson(@PathVariable Integer id){
start();
System.out.println("TestJson");
return service.getPerson(id);
}
}
package com.yiki.Model;

import java.util.List;

import javax.annotation.Resource;
import org.hibernate.SessionFactory;
import org.springframework.transaction.annotation.Transactional;

import com.yiki.POJO.Person;


//读取的操作都不需要开启事务!
@Transactional
public class PersonService {//是一个业务bean

	@Resource // 默认按名称注入,注意同名
	private SessionFactory sessionFactory;

	public void save(Person person) {
		sessionFactory.getCurrentSession().persist(person);// 得到spring管理的session
	}

	public void update(Person person) {
		sessionFactory.getCurrentSession().merge(person);
	}
	//@Transactional(propagation=Propagation.REQUIRED,readOnly=true)
	public Person getPerson(int id) {
	return (Person) sessionFactory.getCurrentSession().get(Person.class, id);
	//	return (Person) sessionFactory.openSession().get(Person.class, id);//open会不起作用
	}

	//@Transactional(noRollbackFor={Exception.class})如果设置不回滚
	public void delete(int id) {
		sessionFactory.getCurrentSession().delete(sessionFactory.getCurrentSession().load(Person.class, id));
		//throw new RuntimeException("测试回滚");

	}
	//@Transactional(propagation=Propagation.REQUIRED,readOnly=true)  //要疯了propagation死也不起作用??????
	public List<Person> getPerson() {//from 类名不是表名
		return sessionFactory.getCurrentSession().createQuery("from person").list();

	}

}
package com.yiki.POJO;

import org.hibernate.annotations.Cache;
import org.hibernate.annotations.CacheConcurrencyStrategy;

import javax.persistence.Entity;
import javax.persistence.GeneratedValue;
import javax.persistence.Id;
@Cache(usage = CacheConcurrencyStrategy.READ_WRITE)
@Entity(name="person")//如果你这里指定了,在查询语句的时候也要写person而不是类名!!!!
public class Person {

	public Person() {
		// TODO Auto-generated constructor stub
	}
	@Id
	@GeneratedValue//mysql底层是自动增长
	private int pid;
	private String name;

	public Person(String name) {
	this.name=name;
	}

	public int getPid() {
		return pid;
	}
	public void setPid(int pid) {
		this.pid = pid;
	}
	public String getName() {
		return name;
	}
	public void setName(String name) {
		this.name = name;
	}
	@Override
	public String toString() {
		return "Person [pid=" + pid + ", name=" + name + "]";
	}


}
根据person在mysql里建表,即可测试
index
<%--
Created by IntelliJ IDEA.
User: Tiffany270
Date: 2018/6/23
Time: 16:25
To change this template use File | Settings | File Templates.
--%>
<%@ page contentType="text/html;charset=UTF-8" language="java" %>
<html>
<head>
<title>$Title$</title>
</head>
<body>
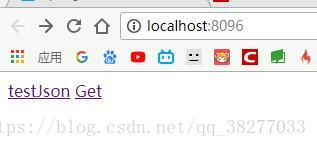
<a href="testJson/22">testJson</a>
<a href="restStyle/testRest/22">Get</a>
</body>
</html>点击测试即可~~~~~(本例还配套增改功能,自行测试。)


 1万+
1万+


 被折叠的 条评论
为什么被折叠?
被折叠的 条评论
为什么被折叠?
 到【灌水乐园】发言


