


1.在Android软件中通知(Notification)是一个比较常见的特色功能,当某个应用不在运行当中时,可能会向用户发送一些信息,比如QQ、微信等应用中新消息提醒的通知栏通知等,本Demo中将展示其用法。
2.使用的开发工具为:Android Studio 3.1.1版本
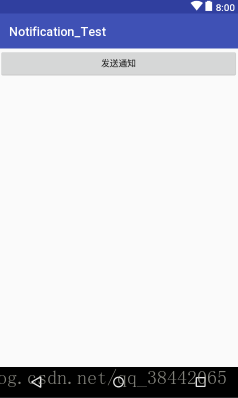
a. 新建一个项目:Notification_Test,修改activity_main.xml中内容为:
<?xml version="1.0" encoding="utf-8"?>
<LinearLayout xmlns:android="http://schemas.android.com/apk/res/android"
    android:orientation="vertical" android:layout_width="match_parent"
    android:layout_height="match_parent">
<Button
    android:id="@+id/send_notice"
    android:layout_width="match_parent"
    android:layout_height="wrap_content"
    android:text="发送通知"/>
</LinearLayout>
布局Design设计如下:
本Demo只是展示简单的使用例子,大家可以根据自己的需要修改后加入到自己的设计当中
紧接着完成MainActivity的设计:
在这里遇到一个小问题,就是当我们使用匿名内部类的监听方法时会报错:

网上查了一下(参考博客:https://blog.csdn.net/qq_34262794/article/details/78851134)之后可以改成使用接口的方式,就不会报错了,这个好像是android版本更新后的问题,修改如下后不报错:
package com.example.gahui.notification_test;

import android.app.Notification;
import android.app.NotificationManager;
import android.app.PendingIntent;
import android.content.Intent;
import android.graphics.BitmapFactory;
import android.support.v4.app.NotificationCompat;
import android.support.v7.app.AppCompatActivity;
import android.os.Bundle;
import android.view.View;
import android.widget.Button;

public class MainActivity extends AppCompatActivity implements View.OnClickListener {

    @Override
    protected void onCreate(Bundle savedInstanceState) {
        super.onCreate(savedInstanceState);
        setContentView(R.layout.activity_main);
        Button sendNotice = (Button)findViewById(R.id.send_notice);
        sendNotice.setOnClickListener(this);
//        sendNotice.setOnClickListener(new View.OnClickListener() {//使用内部类监听方法会报错,这是Android系统版本的问题
//            @Override
//            public void onClick(View v) {
//                NotificationManager manager = (NotificationManager)getSystemService(NOTIFICATION_SERVICE);
//                Notification notification = new Notification.Builder(this)
//                        .setContentTitle("标题")
//                        .setContentText("这里展示的是通知内容~")
//                        .setWhen(System.currentTimeMillis())
//                        .setSmallIcon(R.mipmap.ic_launcher)
//                        .setLargeIcon(BitmapFactory.decodeResource(getResources(), R.mipmap.ic_launcher))
//                        .build();
//                manager.notify(1,notification);
//            }
//        });
    }

    @Override
    public void onClick(View v) {
        switch (v.getId()){
            case R.id.send_notice:
                Intent intent = new Intent(MainActivity.this,NotificationActivity.class);
                PendingIntent pendingIntent = PendingIntent.getActivity(MainActivity.this,0,intent,0);
                NotificationManager manager = (NotificationManager)getSystemService(NOTIFICATION_SERVICE);
                Notification notification = new NotificationCompat.Builder(this)//此处会有中间一道线,并不影响运行,这是android系统版本的问题
                        .setContentTitle("标题")  //显示通知的标题
                        .setContentText("这里展示的是通知内容~")//显示消息通知的内容
                        .setWhen(System.currentTimeMillis())//显示通知的具体时间
                        .setSmallIcon(R.mipmap.ic_launcher)//这里设置显示的是手机顶部系统通知的应用图标
                        .setLargeIcon(BitmapFactory.decodeResource(getResources(), R.mipmap.ic_launcher))//这里设置显示的是下拉通知栏后显示的系统图标
                        .setContentIntent(pendingIntent)
                        //.setAutoCancel(true)//可以在此使用此方法,点击通知后,通知内容自动取消,也可以在NotificationActivity.java中设置方法取消显示通知内容
                        .setVibrate(new long[] {0,1000,1000,1000})//设置发出通知后震动一秒,停止一秒后再震动一秒,需要在manifest.xml中设置权限
                        .build();
                manager.notify(1,notification);
                break;
            default:
                break;
        }
    }
}
到这里,应用可以运行了,但是,我们使用过android智能手机都知道,我们可以在下拉状态栏点击通知后跳转到相应的的活动,那么怎么设置点击功能呢?请看下一步。
b. 之前如果对Intent有所了解的话,那么可能就会对点击事件的处理比较得心应手
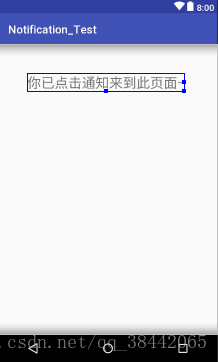
首先新建一个活动使得点击之后可以跳转到对应的页面:
<?xml version="1.0" encoding="utf-8"?>
<LinearLayout xmlns:android="http://schemas.android.com/apk/res/android"
    android:orientation="vertical" android:layout_width="match_parent"
    android:layout_height="match_parent">
    <TextView
        android:layout_width="wrap_content"
        android:layout_height="wrap_content"
        android:text="你已点击通知来到此页面~"
        android:textSize="24dp"
        android:layout_margin="50dp"/>
</LinearLayout>
页面显示如下:
然后修改MainActivity的代码:
我这里还加入了发出通知后震动功能,更多的功能如添加声音等大家可以根据需要加入
switch (v.getId()){
    case R.id.send_notice:
        Intent intent = new Intent(MainActivity.this,NotificationActivity.class);
        PendingIntent pendingIntent = PendingIntent.getActivity(MainActivity.this,0,intent,0);
        NotificationManager manager = (NotificationManager)getSystemService(NOTIFICATION_SERVICE);
        Notification notification = new NotificationCompat.Builder(this)//此处会有中间一道线,并不影响运行,这是android系统版本的问题
                .setContentTitle("标题")  //显示通知的标题
                .setContentText("这里展示的是通知内容~")//显示消息通知的内容
                .setWhen(System.currentTimeMillis())//显示通知的具体时间
                .setSmallIcon(R.mipmap.ic_launcher)//这里设置显示的是手机顶部系统通知的应用图标
                .setLargeIcon(BitmapFactory.decodeResource(getResources(), R.mipmap.ic_launcher))//这里设置显示的是下拉通知栏后显示的系统图标
                .setContentIntent(pendingIntent)
                //.setAutoCancel(true)//可以在此使用此方法,点击通知后,通知内容自动取消,也可以在NotificationActivity.java中设置方法取消显示通知内容
                .setVibrate(new long[] {0,1000,1000,1000})//设置发出通知后震动一秒,停止一秒后再震动一秒,需要在manifest.xml中设置权限
                .build();
        manager.notify(1,notification);
        break;
    default:
        break;
成功完成Demo!
c. 结果演示:
额,由于本人还不会制作GIF图,之后记得的话会补上的~
代码经过在我本人手机上测试成功~
d. 完整源代码地址:https://download.csdn.net/download/qq_38442065/10388157


 524
524


 被折叠的 条评论
为什么被折叠?
被折叠的 条评论
为什么被折叠?
 到【灌水乐园】发言


