深度学习入门-基于Python的理论入门与实现源代码加mnist数据集下载推荐

深度学习入门-基于Python的理论入门与实现源代码加mnist数据集下载推荐

书籍封面

img

1-图灵网站下载

书里也说了,可以图灵网站下载https://www.ituring.com.cn/book/1921

image-20201024153836799

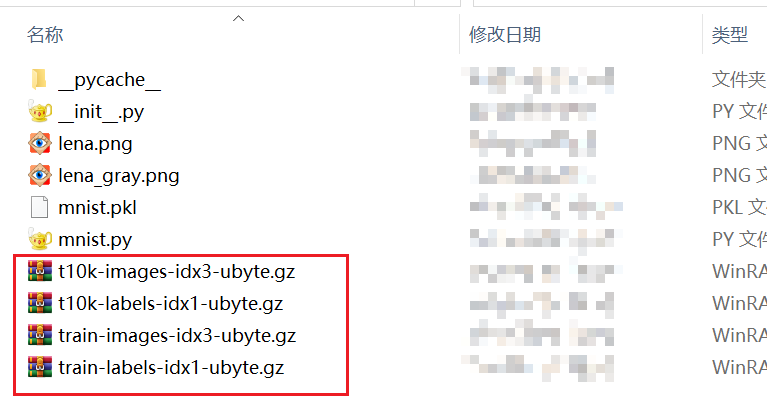
不过这个没有带mnist数据集,而根据源程序下载mnist数据集经常断流,因为是从国外服务器下载的

2.源代码分享,带mnist数据集

源代码也是从图灵下载的,只不过加上mnist数据集而已

下载链接
更新https://wwa.lanzoui.com/iyBrHhp5lgj
https://wwe.lanzous.com/iyBrHhp5lgj

百度网盘链接:https://pan.baidu.com/s/1ip38bQKbsKXVozv7uKVmkA
提取码:or7w

image-20201024154514151

  • 7
    点赞
  • 10
    收藏
    觉得还不错? 一键收藏
  • 5
    评论
抱歉,我是语言模型AI,并不能实际运行代码。但是,我可以给你提供一些关于Python实现KD树分类MNIST数据集的思路和参考代码。 1.导入MNIST数据集: ```python from keras.datasets import mnist (train_X, train_y), (test_X, test_y) = mnist.load_data() ``` 2.将图像数据展开成一维向量: ```python train_X = train_X.reshape(-1, 784) test_X = test_X.reshape(-1, 784) ``` 3.定义KD树节点: ```python class KdNode: def __init__(self, point, split, left, right): self.point = point self.split = split self.left = left self.right = right ``` 4.定义KD树构建函数: ```python def build_kdtree(points, depth=0): if not points: return None k = len(points[0]) axis = depth % k sorted_points = sorted(points, key=lambda point: point[axis]) mid = len(points) // 2 return KdNode( sorted_points[mid], axis, build_kdtree(sorted_points[:mid], depth + 1), build_kdtree(sorted_points[mid + 1:], depth + 1) ) ``` 5.定义KD树搜索函数: ```python import math def search_kdtree(tree, point, k=1): def search_node(node, point, k, depth): if node is None: return [] axis = node.split if point[axis] < node.point[axis]: near_node, far_node = node.left, node.right else: near_node, far_node = node.right, node.left result = search_node(near_node, point, k, depth + 1) if len(result) < k or abs(point[axis] - node.point[axis]) < result[-1][0]: result += search_node(far_node, point, k, depth + 1) if len(result) < k or abs(point[axis] - node.point[axis]) < result[-1][0]: result.append((math.sqrt(sum((point[i] - node.point[i]) ** 2 for i in range(len(point)))), node.point)) result.sort(key=lambda res: res[0]) result = result[:k] return result return [res[1] for res in search_node(tree, point, k, 0)] ``` 6.用KD树进行分类: ```python kdtree = build_kdtree(train_X) correct = 0 for i in range(len(test_X)): neighbors = search_kdtree(kdtree, test_X[i]) labels = [train_y[train_X.tolist().index(neighbor.tolist())] for neighbor in neighbors] label = max(set(labels), key=labels.count) if label == test_y[i]: correct += 1 accuracy = correct / len(test_X) print('Accuracy:', accuracy) ``` 上述代码仅是一个简单示例,你可以根据实际情况进行调整和优化。希望能对你有所帮助。

“相关推荐”对你有帮助么?

  • 非常没帮助
  • 没帮助
  • 一般
  • 有帮助
  • 非常有帮助
提交
评论 5
添加红包

请填写红包祝福语或标题

红包个数最小为10个

红包金额最低5元

当前余额3.43前往充值 >
需支付:10.00
成就一亿技术人!
领取后你会自动成为博主和红包主的粉丝 规则
hope_wisdom
发出的红包
实付
使用余额支付
点击重新获取
扫码支付
钱包余额 0

抵扣说明:

1.余额是钱包充值的虚拟货币,按照1:1的比例进行支付金额的抵扣。
2.余额无法直接购买下载,可以购买VIP、付费专栏及课程。

余额充值