


写在前头
身为一个Android程序员,最麻烦的事情应该就是绑定View吧,一个类有的有十多个View需要绑定更有甚者甚至超过个一百个。一个不会偷懒的程序员一定不是一个好程序员。为了偷懒ButterKnife就应运而生了,ButterKnife可以说是一款很成功的开源库。它不仅可以帮我们绑定View,还可以用来绑定资源文件。
ButterKnife的优点:
(1)代码简洁,易懂
(2)可以简化Adapter中ViewHolder子View的绑定
(3)配置简单
(4)开发效率提高
(5)可绑定监听事件
ButterKnife具体使用方法:
(1)添加依赖
compile 'com.jakewharton:butterknife:8.8.1'
annotationProcessor 'com.jakewharton:butterknife-compiler:8.8.1'//这句一定要加上,不然会出现很多问题
(2)在build.gradle的dependencies中添加以下代码
 dependencies {
        classpath 'com.android.tools.build:gradle:3.0.1'
        classpath 'com.jakewharton:butterknife-gradle-plugin:8.8.1'

        // NOTE: Do not place your application dependencies here; they belong
        // in the individual module build.gradle files
    }
注意:如果需要在Moudle中使用ButterKnife还需要进行其他配置:
1.在module的build.gradle 文件中的dependencies标签中添加代码如下(导入库的依赖)
dependencies {
  compile 'com.jakewharton:butterknife:8.8.1'
  annotationProcessor 'com.jakewharton:butterknife-compiler:8.8.1'
}
2.在module的build.gradle 文件中设置支持插件 ,添加如下代码
apply plugin: 'com.android.library'
apply plugin: 'com.jakewharton.butterknife'
注意:在Moudle中使用时使用资源文件要使用R2而不是R
(3)绑定Veiw
@BindView(R.id.btn1)
    Button mButton;
    @BindView(R.id.textView)
    TextView mTextView;
    @Override
    protected void onCreate(Bundle savedInstanceState) {
        super.onCreate(savedInstanceState);
        setContentView(R.layout.activity_main);
        //绑定控件
        ButterKnife.bind(this);
    }
(4)绑定监听事件
1.点击事件
@OnClick(R.id.btn1)
    private void onClick()
    {
        startActivity(new Intent(MainActivity.this,SecondActivity.class));
    }
2.长按事件
 @OnLongClick(R.id.btn1)
    private void onClick()
    {
        startActivity(new Intent(MainActivity.this,SecondActivity.class));
    }
注意:其他监听事件也都可以通过该方法来绑定
(5)绑定资源文件
1.color资源绑定
@BindColor(R.color.colorAccent)
    Color mColor;
2.string资源绑定
@BindString(R.string.app_name)
    String mString;
注意:同理其他资源绑定也是相同的方法
(6)在Adapter中为ItemView绑定(我们只需要在VeiwHolder中绑定控件即可)
class ViewHolder {
    @BindView(R.id.tv)
    TextView tv;
    @BindView(R.id.iv)
    ImageView iv;

    public ViewHolder(View itemView) {
        ButterKnife.bind(this, itemView); //重点一定要为控件进行绑定
    }
}
(7)为Fragement中的View进行绑定
public class FancyFragment extends Fragment {
  @BindView(R.id.button1) Button button1;
  @BindView(R.id.button2) Button button2;

  @Override public View onCreateView(LayoutInflater inflater, ViewGroup container, Bundle savedInstanceState) {
    View view = inflater.inflate(R.layout.fancy_fragment, container, false);
    ButterKnife.bind(this, view);
    // TODO Use fields...
    return view;
  }
}
ButterKnife插件使用:
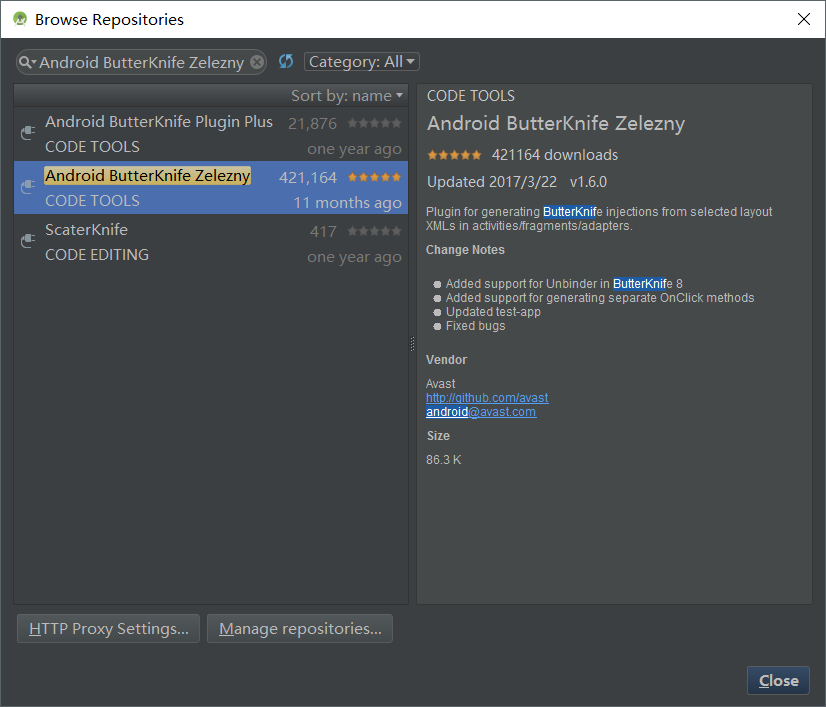
为了偷懒,我们连@BindView都不想写怎么办,使用插件Android ButterKnife Zelezny,该插件可以使用Android Studio直接下载安装。
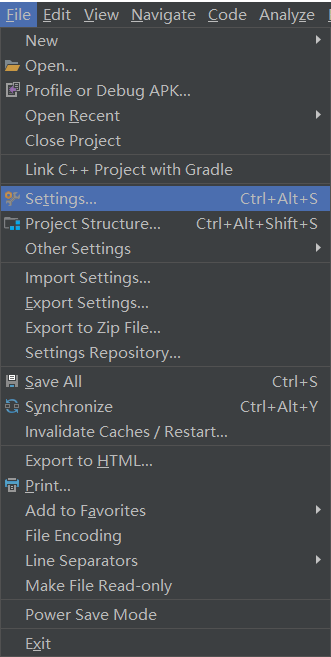
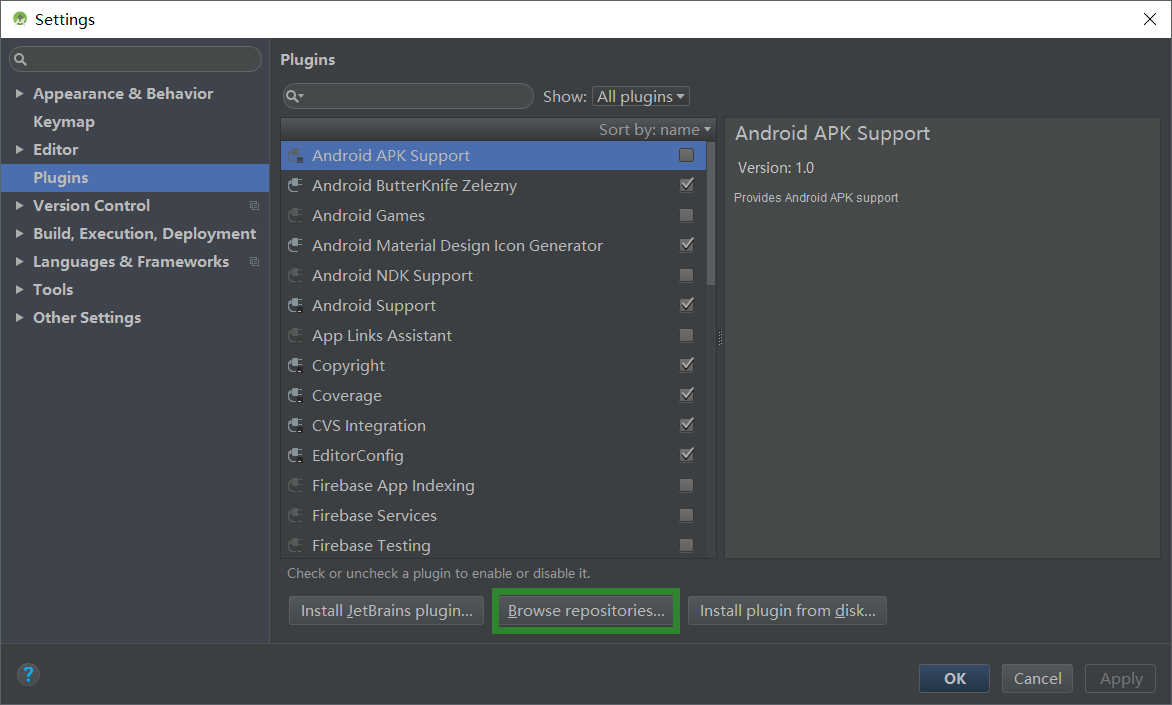
(1)Android ButterKnife Zelezny的安装方法:
(2)Android ButterKnife Zelezny的使用方法(选中需要绑定资源的布局文件点击右键):


 854
854

 被折叠的 条评论
为什么被折叠?
被折叠的 条评论
为什么被折叠?
 到【灌水乐园】发言


