


下载qt-然后安装5.14.2_msvc2017
不知道安装那个就全选5.14.2的父级按钮

https://download.qt.io/archive/qt/5.14/5.14.2/
安装Visual studio,下载直接下一步就行
配置Visual studio的qt环境
在线安装-重启Visual studio会自动安装
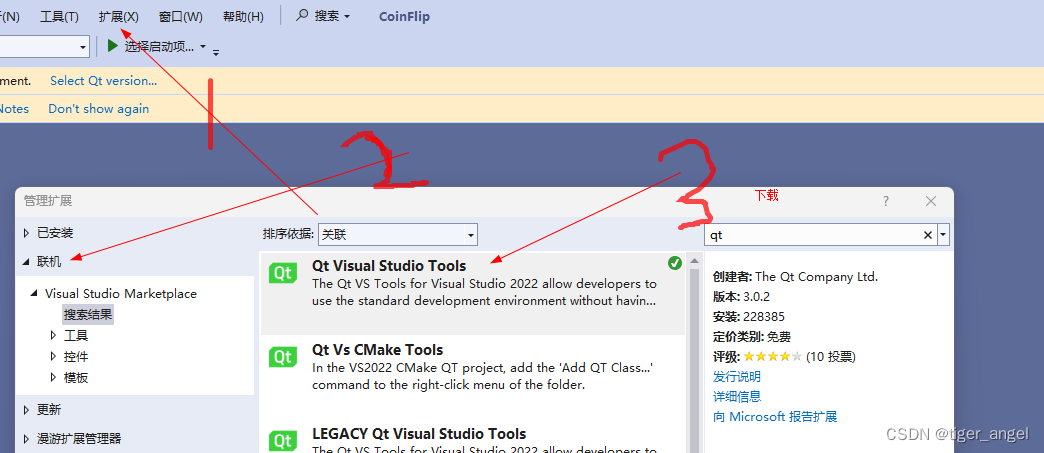
离线安装-关闭Visual studio点击安装
关闭Visual studio点击安装
下载地址
https://download.qt.io/official_releases/vsaddin/
点击安装

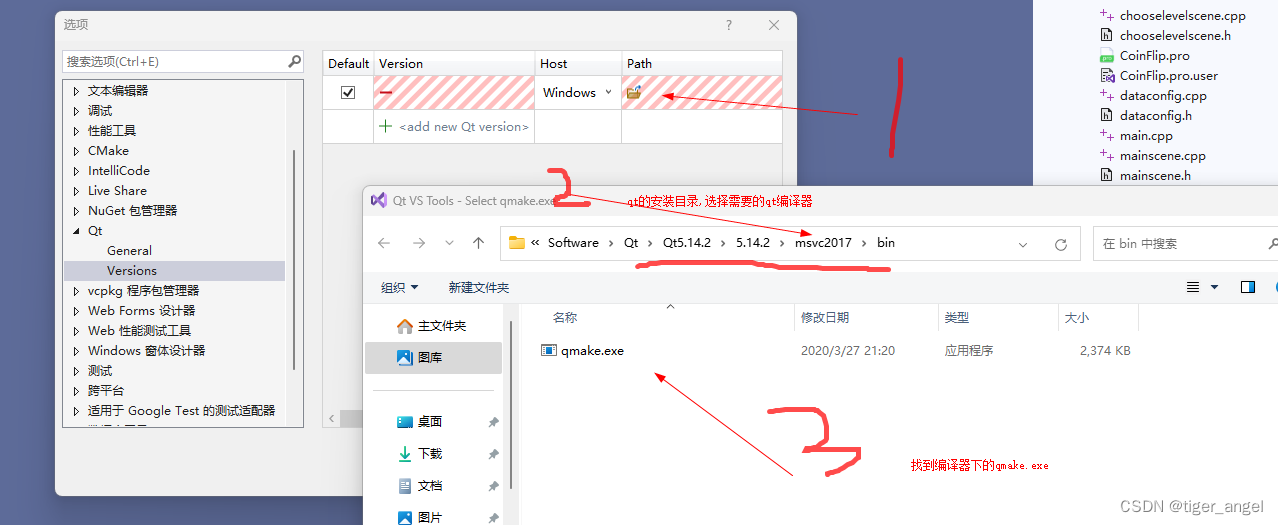
设置环境

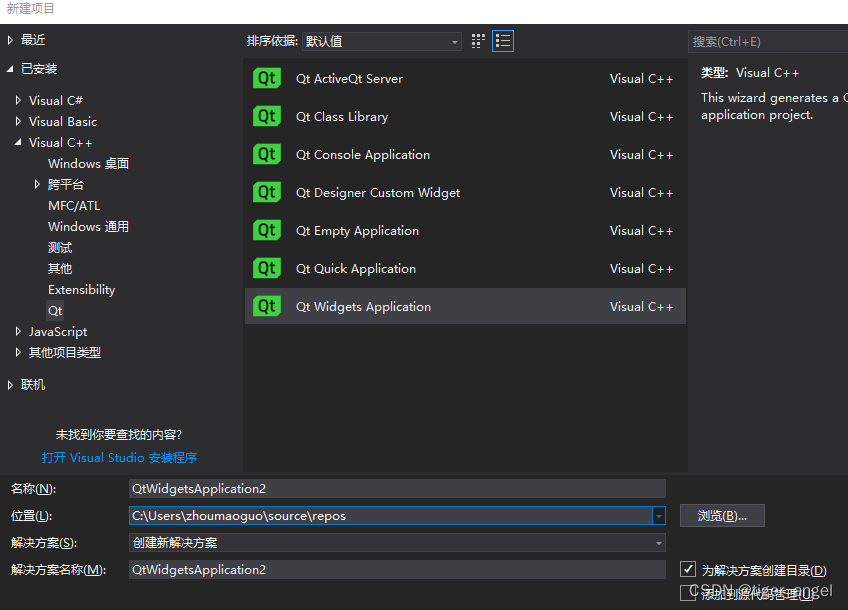
创建Qt项目
这时候就可以创建Qt项目了
使用过程中的问题
记录一下使用过程中我遇到的问题以及解决方案
1.如何添加模块

Qt Vs Tools选择Qt Project Setting 或者右键项目,弹出项目属性,可以在Qt Modules中添加
2…ui文件上放置控件,然后编译后不显示
解决方式很简单
保存UI界面
在项目解决方案.ui文件上右键,然后选择编译(通常到这里就好了)
在项目解决方案右键,然后选择 重新扫描解决方案
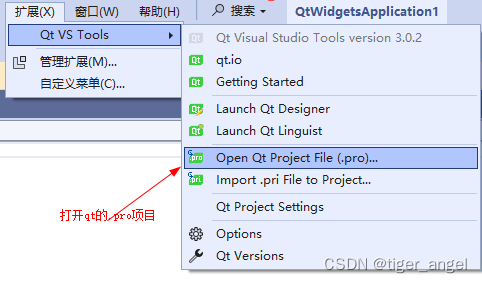
Visual studio打开qt的.pro项目


 1万+
1万+


 被折叠的 条评论
为什么被折叠?
被折叠的 条评论
为什么被折叠?
 到【灌水乐园】发言


