准备工作
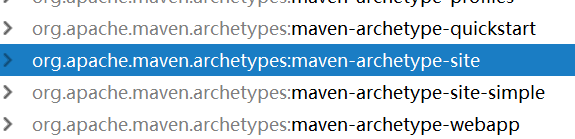
创建一个maven工程,选择maven-archetype-site骨架
第一步:导入主框架的pom文件
	设置打包方式:
		<packaging>pom</packaging>
	根据项目需要的jar包导入需要的依赖,比如mybatis,spring-context,
	spring-aop,spring-tx,spring-webmvc,spring-beans,spring-orm,aspectjweaver,spring-context-support,mybatis-spring,以及jdbc或者ojdbc,德鲁伊连接池druid测试需要junit和spring-test,可能还需要javax.servlet-api,jsp-api和jstl,日志包log4j

	导入编译插件:
	 <pluginManagement>
  <plugins>
    <plugin>
      <groupId>org.apache.maven.plugins</groupId>
      <artifactId>maven-compiler-plugin</artifactId>
      <version>3.2</version>
      <configuration>
        <source>1.8</source>
        <target>1.8</target>
        <encoding>UTF-8</encoding>
        <showWarnings>true</showWarnings>
      </configuration>
    </plugin>
  </plugins>
</pluginManagement>
<plugins>
  <plugin>
    <groupId>org.apache.tomcat.maven</groupId>
    <artifactId>tomcat7-maven-plugin</artifactId>
    <version>2.2</version>
  </plugin>
</plugins>
第二步创建子模块
右键选择创建Module,不需要选择任何maven骨架,之间创建即可,需要的目录自行补全。

注意创建web子模块需要在main下面创建webapp目录,
1.先在web模块下的pom文件注明打包方式为war
2.在webapp目录下创建WEB-INF,在WEB-INF目录下创建web.xml
一般这是在wabapp目录上就会出现蓝色小圆点,这样就算是成功了,如果没有成功试着打开file->project structure->factes 手动添加为web项目。
配置文件
1)applicationContext.xml(一般放在service模块或者web模块)
<?xml version="1.0" encoding="UTF-8"?>
<bean xmlns="http://www.springframework.org/schema/beans"
       xmlns:xsi="http://www.w3.org/2001/XMLSchema-instance"
       xmlns:context="http://www.springframework.org/schema/context"
       xmlns:tx="http://www.springframework.org/schema/tx"
       xsi:schemaLocation="http://www.springframework.org/schema/beans
       http://www.springframework.org/schema/beans/spring-beans-4.2.xsd
       http://www.springframework.org/schema/context
       http://www.springframework.org/schema/context/spring-context.xsd
       http://www.springframework.org/schema/tx
        http://www.springframework.org/schema/tx/spring-tx.xsd">
    <!--接口包扫描    -->
    <bean class="org.mybatis.spring.mapper.MapperScannerConfigurer">
        <property name="basePackage" value="xxx.xxx.dao"></property>
    </bean>
    <!--数据源-->
    <bean id="dataSource" class="com.alibaba.druid.pool.DruidDataSource">
        <property name="driverClassName" value="oracle.jdbc.OracleDriver"></property>
        <property name="url" value="jdbc:oracle:thin:@192.168.80.128:1521:orcl"></property>
        <property name="username" value="ssm_68"></property>
        <property name="password" value="ssm_68"></property>
    </bean>
    <bean id="sqlSessionFactory" class="org.mybatis.spring.SqlSessionFactoryBean">
        <property name="dataSource" ref="dataSource"></property>
        <property name="typeAliasesPackage" value="xxxx.xxxx.domain"></property>
    </bean>
<!--service-->
<!--包扫描-->
<context:component-scan base-package="xxx.xxx"></context:component-scan>
<!--事务管理器-->
<bean id="advice" class="org.springframework.jdbc.datasource.DataSourceTransactionManager">
    <property name="dataSource" ref="dataSource"></property>
</bean>
<!--事务注解驱动-->
<tx:annotation-driven></tx:annotation-driven>
springMvc.xml
<?xml version="1.0" encoding="UTF-8"?>
	<beans xmlns="http://www.springframework.org/schema/beans"
	       xmlns:context="http://www.springframework.org/schema/context"
	       xmlns:mvc="http://www.springframework.org/schema/mvc"
	       xmlns:xsi="http://www.w3.org/2001/XMLSchema-instance"
	       xsi:schemaLocation="http://www.springframework.org/schema/beans
	       http://www.springframework.org/schema/beans/spring-beans-4.2.xsd
	       http://www.springframework.org/schema/context
	       http://www.springframework.org/schema/context/spring-context-4.2.xsd
	       http://www.springframework.org/schema/mvc
	       http://www.springframework.org/schema/mvc/spring-mvc-4.2.xsd">
	    <!--包扫描-->
	    <context:component-scan base-package="xxx.xxx.controller"></context:component-scan>
	    <mvc:annotation-driven></mvc:annotation-driven>
	    <!--视图解析器|-->
	    <bean id="viewResolver" class="org.springframework.web.servlet.view.InternalResourceViewResolver">
	        <property name="prefix" value="/WEB-INF/jsp/"></property>
	        <property name="suffix" value=".jsp"></property>
	    </bean>
	    <!--静态资源放行-->
	    <mvc:default-servlet-handler/>
	</beans>
web.xml
<?xml version="1.0" encoding="UTF-8"?>
<web-app xmlns:xsi="http://www.w3.org/2001/XMLSchema-instance"
         xmlns="http://java.sun.com/xml/ns/javaee"
         xsi:schemaLocation="http://java.sun.com/xml/ns/javaee http://java.sun.com/xml/ns/javaee/web-app_3_0.xsd"
         id="WebApp_ID" version="3.0">
    <welcome-file-list>
        <welcome-file>index.jsp</welcome-file>
    </welcome-file-list>
    <servlet>
        <servlet-name>dispatcherServlet</servlet-name>
        <servlet-class>org.springframework.web.servlet.DispatcherServlet</servlet-class>
        <init-param>
            <param-name>contextConfigLocation</param-name>
            <param-value>classpath:springMvc.xml</param-value>
        </init-param>
        <load-on-startup>1</load-on-startup>
    </servlet>
    <servlet-mapping>
        <servlet-name>dispatcherServlet</servlet-name>
        <url-pattern>/</url-pattern>
    </servlet-mapping>
    <listener>
        <listener-class>org.springframework.web.context.ContextLoaderListener</listener-class>
    </listener>
    <context-param>
        <param-name>contextConfigLocation</param-name>
        <param-value>classpath:applicationContext.xml</param-value>
    </context-param>
    <filter>
        <filter-name>characterEncodingFilter</filter-name>
        <filter-class>org.springframework.web.filter.CharacterEncodingFilter</filter-class>
        <init-param>
            <param-name>encoding</param-name>
            <param-value>UTF-8</param-value>
        </init-param>
    </filter>
    <filter-mapping>
        <filter-name>characterEncodingFilter</filter-name>
        <url-pattern>/*</url-pattern>
    </filter-mapping>
</web-app>


 472
472


 被折叠的 条评论
为什么被折叠?
被折叠的 条评论
为什么被折叠?
 到【灌水乐园】发言


