是互联网上应用最为广泛的一种 网络协议。 是一个 客户端 和 服务端 请求和应答的标准(TCP)。 用于从 WWW服务器 传输超文本到本地浏览器的传输协议。 它可以使浏览器更加高效,使网络传输减少。
是以安全为目标的 http通道,简单讲是 http的安全版,即 http下加入 SSL层。 https 的安全基础是 SSL,因此加密的详细内容就需要 SSL。
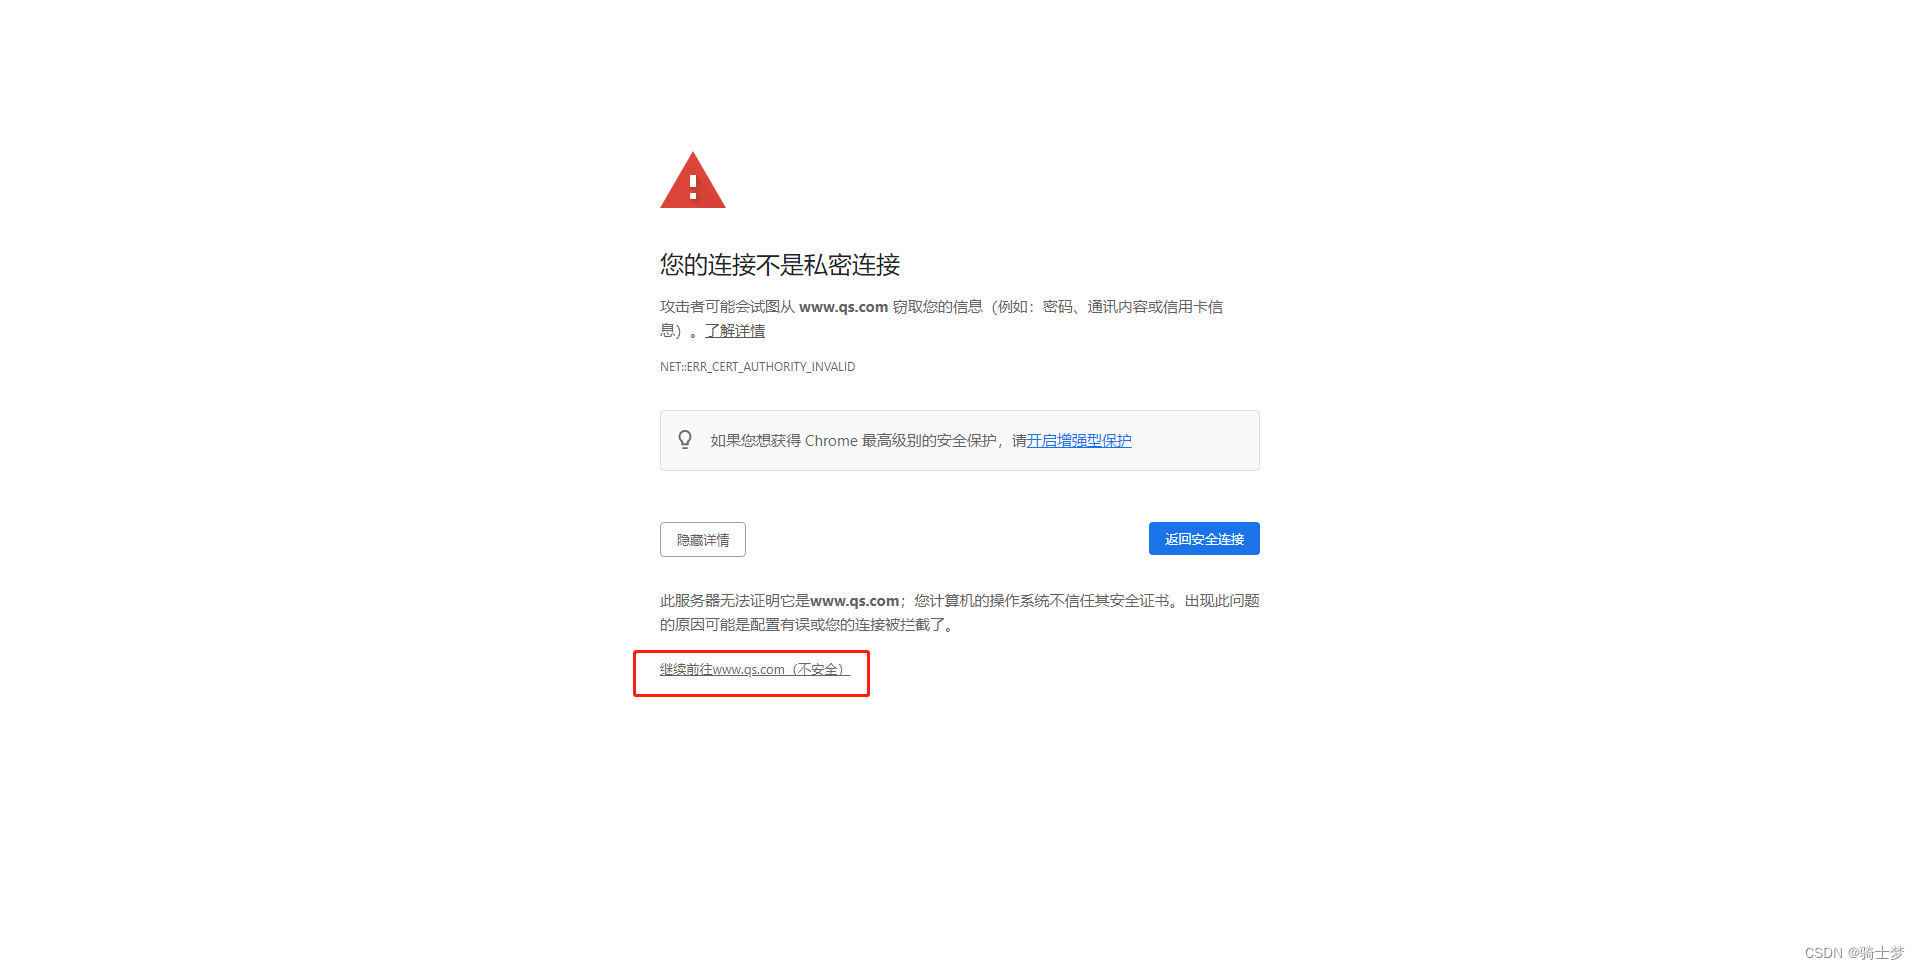
一种是建立一个信息安全通道,来保证数据传输的安全。 另一种就是确认网站的真实性。
https协议 需要到 申请ca证书,一般免费证书较少,因而需要一定费用。 http 是超文本传输协议,信息是明文传输,https 则是具有安全性的 ssl加密 传输协议。 http 和 https 使用的是完全不同的连接方式,用的端口也不一样,前者是80,后者是443。 http 的连接很简单,是无状态的。 https协议 是由 http协议+ssl 构建的可进行加密传输、身份认证的网络协议,比 http协议安全。
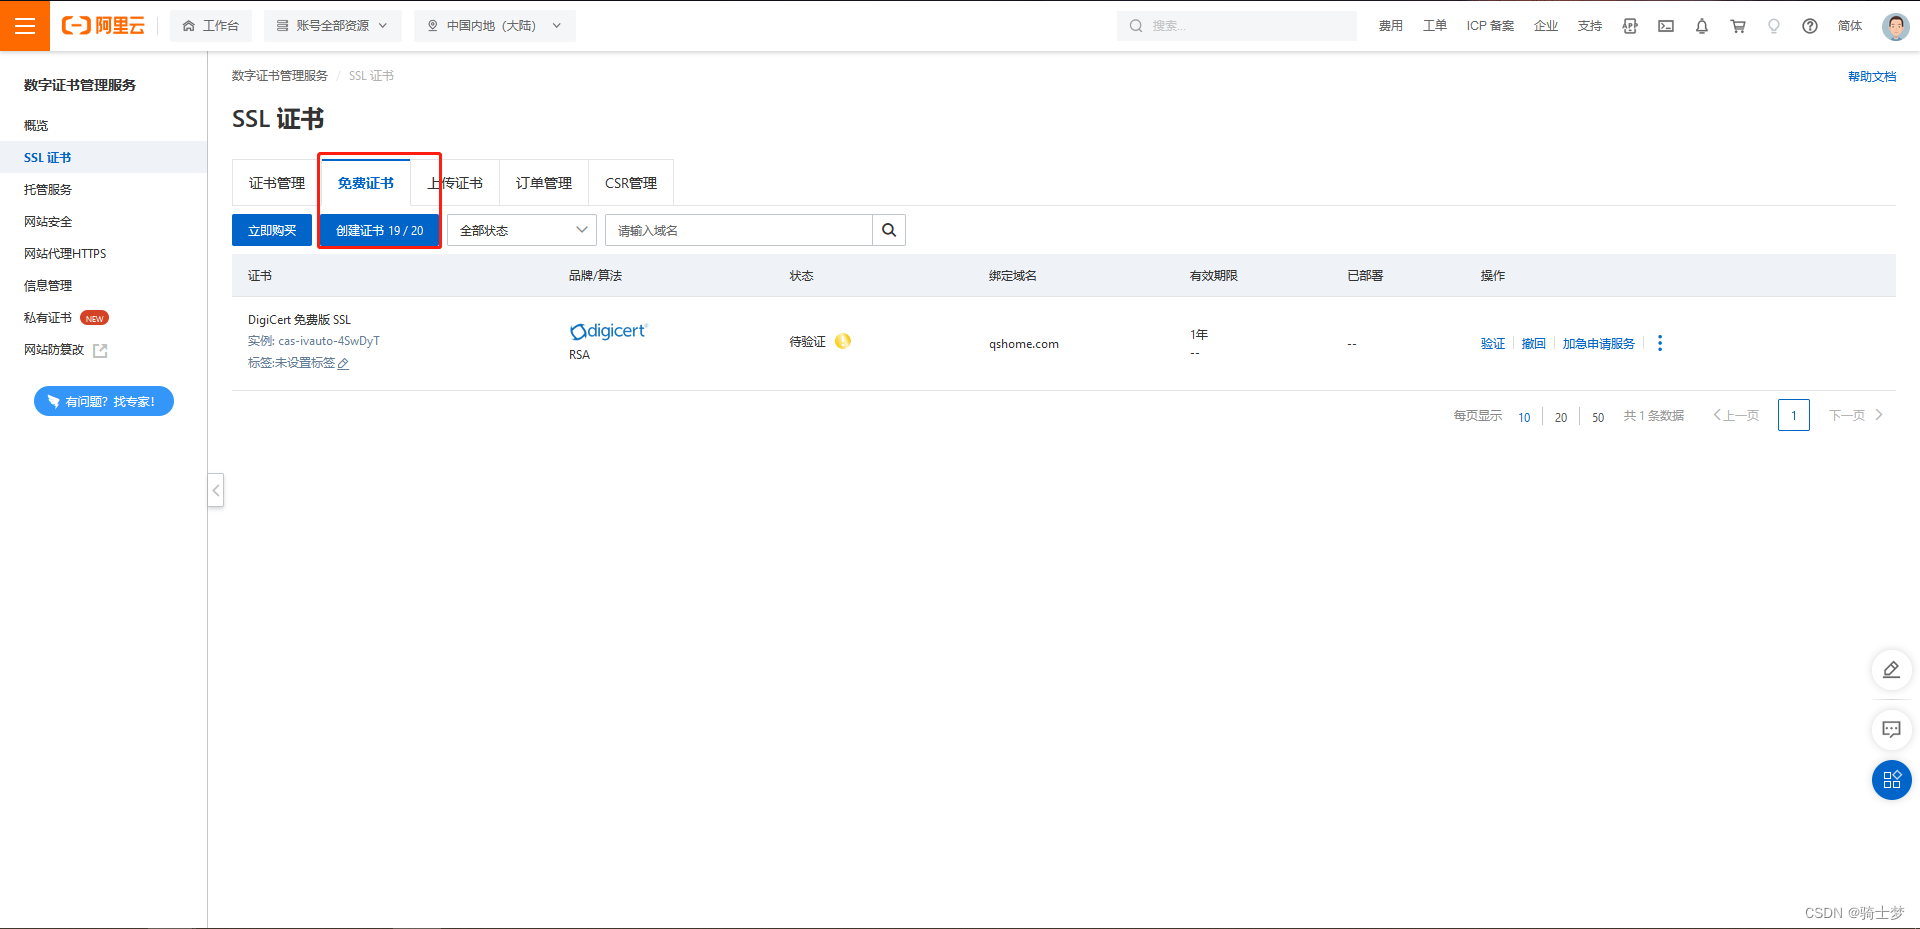
服务器上已经安装 nginx服务,已经具备 http访问。 nginx服务器 是否已经安装 ssl模块的支持。 是否已经拥有 ssl证书,如果没有可以去阿里云或者腾讯云免费申请。
nginx -V
http_ssl_module模块
cd /usr/local/nginx-1.9.9
./configure --prefix= /usr/local/nginx --with-http_stub_status_module --with-http_ssl_module
make
cp /usr/local/nginx/sbin/nginx /usr/local/nginx/sbin/nginx.bak
cp ./objs/nginx /usr/local/nginx/sbin/
/usr/local/nginx/sbin/nginx -V
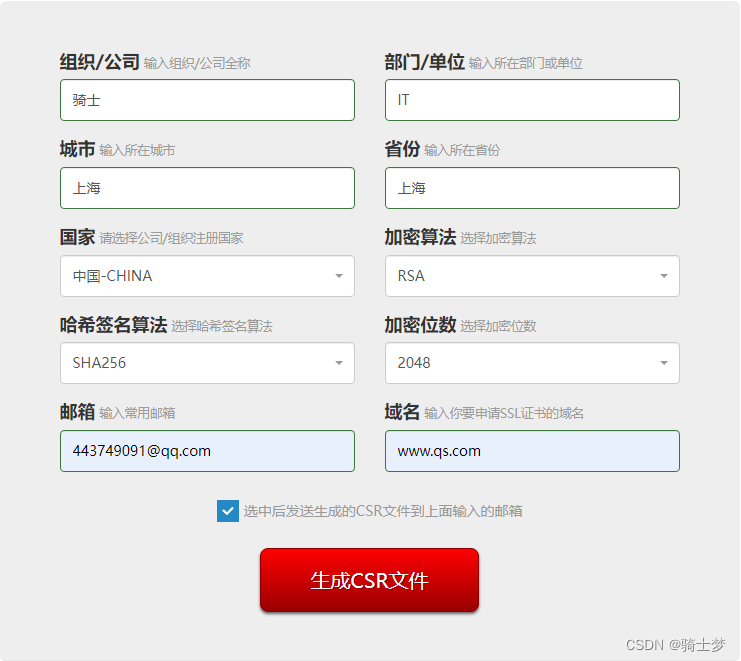
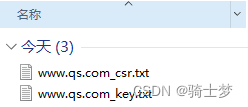
CSR文件
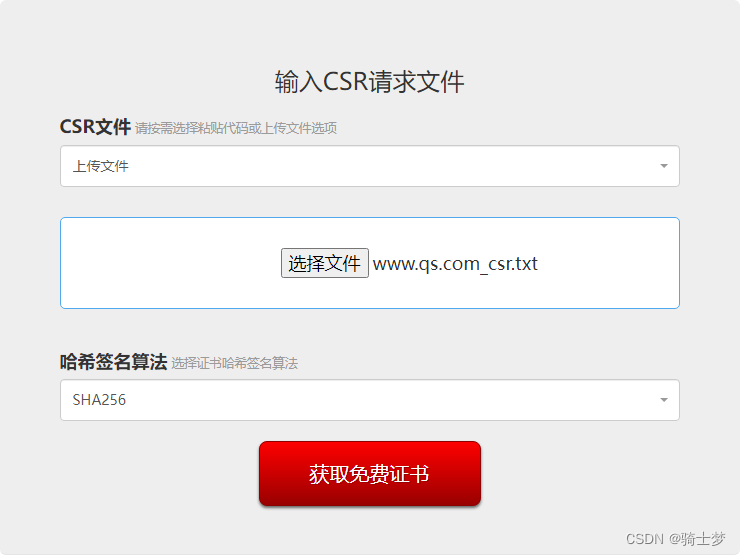
SSL证书
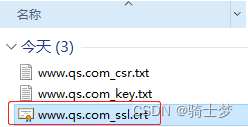
SSL证书生成 把 www.qs.com_csr.txt 转为 www.qs.com_ssl.crt(直接修改后缀无效 )。
sudo openssl x509 -in 'www.qs.com_ssl.crt' -out 'www.qs.com_ssl.pem' -outform PEM
把 www.qs.com_ssl.crt 改为 qs.crt把 www.qs.com_key.txt 改为 qs.key
server {
listen 80;
server_name qs.com;
rewrite ^(.*)$ https: //${ server_name} $1 permanent;
}
server {
listen 443 ssl;
server_name qs.com;
ssl on;
ssl_certificate E: /java/nginx/nginx- 1.22.0/conf/ssl/qs.crt;
ssl_certificate_key E: /java/nginx/nginx- 1.22.0/conf/ssl/qs.key;
ssl_session_timeout 5m;
ssl_protocols SSLv3 TLSv1 TLSv1.1 TLSv1.2;
ssl_ciphers ALL: !ADH: !EXPORT56:RC4+RSA:+HIGH:+MEDIUM:+LOW:+SSLv2:+EXP;
ssl_prefer_server_ciphers on;
ssl_session_cache shared: SSL: 1m;
fastcgi_param HTTPS on;
fastcgi_param HTTP_SCHEME https;
location / {
root html;
index index.html index.htm;
}
}
nginx -t
nginx -s reload
ssl_client_certificate
ssl_client_certificate证书 不需要和 server证书 属于同一个CA根证书:server证书 用于 SSL服务器端认证,在生产环境一定要使用 CA机构颁发的证书。ssl_client_certificate配置 的是客户端认证。
ssl_client_certificate ca.pem;
ssl_verify_client on
如果客户端证书需要密码,则需要使用冒号在 crt文件 后添加密码。
curl -v -s -k --key /etc/nginx/certs/client.key --cert /etc/nginx/certs/client.crt:12345 https://example.com
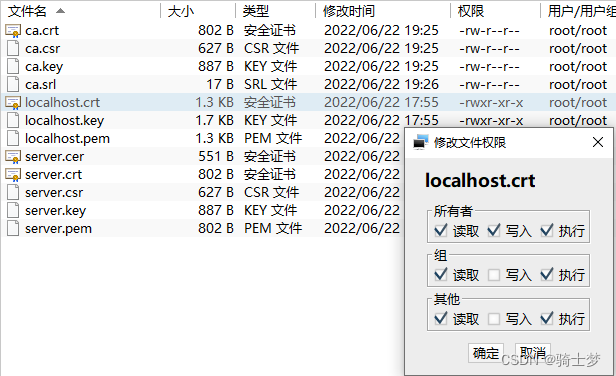
openssl 生成证书
openssl 是目前最流行的 SSL密码库工具: 其提供了一个通用、健壮、功能完备的工具套件,用以支持 SSL/TLS协议 的实现。
openssl req -x509 -nodes -days 36500 -newkey rsa:2048 -keyout /usr/local/ssl/qs.key -out /usr/local/ssl/qs.crt
------------------------------
Generating a 2048 bit RSA private key
.. .. .. .. .. .. .. .. .. .. .. .. .. .. .. .. .. .. .. .. .. .. .. .. .. .. .. .. .. .. .. .. .. .. .. .. .. .. .. .+ ++
.. .. .. .. .. .. .. .+++
writing new private key to '/usr/local/ssl/qs.key'
-----
You are about to be asked to enter information that will be incorporated
into your certificate request.
What you are about to enter is what is called a Distinguished Name or a DN.
There are quite a few fields but you can leave some blank
For some fields there will be a default value,
If you enter '.' , the field will be left blank.
-----
Country Name ( 2 letter code) [ XX] :CN
State or Province Name ( full name) [ ] :shanghai
Locality Name ( eg, city) [ Default City] :shanghai
Organization Name ( eg, company) [ Default Company Ltd] :qs
Organizational Unit Name ( eg, section) [ ] :xxxx
Common Name ( eg, your name or your server's hostname ) [ ] :qs.com
Email Address [ ] :443749091@qq.com
------------------------------
total 8
-rw-r--r--. 1 root root 1391 Apr 21 13 :29 qs.crt
-rw-r--r--. 1 root root 1704 Apr 21 13 :29 qs.key
SSL证书申请
cer|crt证书 + key文件——生成 keystore文件
因为 Tomcat 配置 https,需要将证书转成 keystore文件。 先通过 openssl 将 cer证书 和 私钥文件 生成 p12证书。 再通过 Java的keytool 生成 keystore文件。
openssl pkcs12 -export -in './qs.cer' -inkey './qs.key' -out './qs.p12'
keytool -importkeystore -v -srckeystore './qs.p12' -srcstoretype pkcs12 -srcstorepass '123456' -destkeystore './qs.keystore' -deststoretype jks -deststorepass '123456'
注意:*.p12文件 的密码 需要跟 *.keystore文件 的密码一致,可能会报错。
openssl pkcs12 -export -in './qs.crt' -inkey './qs.key' -out './qs.p12' -name 'tomcat' -CAfile './qs.crt' -caname root -chain
keytool -importkeystore -v -srckeystore './qs.p12' -srcstoretype pkcs12 -srcstorepass '*.p12生产的密码' -destkeystore '*.keystore' -deststoretype jks -deststorepass '*.keystore密钥库的密码'
$TOMCAT_HOME/conf/server.xml
< Executorname = " tomcatThreadPoolHttps" namePrefix = " catalina-exec-https-" maxThreads = " 6000" minSpareThreads = " 100" maxIdleTime = " 120000" /> < Connectorexecutor = " tomcatThreadPoolHttps" port = " 8443" redirctPort = " 6064" protocol = " org.apache.coyote.http11.Http11NioProtocol" SSLEnabled = " true" maxHttpHeaderSize = " 8192" acceptCount = " 1000" enableLookups = " false" scheme = " https" secure = " true" keystoreFile = " /root/qs.keystore" keystorePass = " 123456" clientAuth = " false" sslProtocol = " TLSv1.2" />
$TongWeb/conf/tongweb.xml
< http-listenername = " system-http-listener" port = " 9060" status = " started" address = " 0.0.0.0" io-mode = " nio2" http2-enabled = " false" ssl-enabled = " false" redirect-port = " 443" uri-encoding = " GBK" use-body-encoding-for-uri = " false" max-parameter-count = " 10000" max-post-size = " 2097152" max-swallow-size = " 2097152" parse-body-methods = " POST,PUT,DELETE" default-virtual-host = " admin" create-time = " 2019-10-29 10:54:11" > < sslopenssl-enabled = " false" gm-enabled = " false" keystore-file = " conf/server.keystore" keystore-pass = " vVm6OyRRxhs3QGlTnzcKGA==" keystore-type = " JKS" gm-enc-file = " conf/EncryptionKey.p12" client-auth = " false" ssl-protocol = " TLS" truststore-file = " conf/server.keystore" truststore-type = " JKS" /> < protocolnot-allow-HTTP-methods = " TRACE,OPTIONS,HEAD,CONNECT,DELETE" async-timeout = " 10000" enable-lookups = " false" max-header-count = " 100" use-ipv-hosts = " false" xpowered-by = " false" backlog = " 100" accept-thread-count = " 1" connection-timeout = " 60000" keep-alive-timeout = " 60000" max-threads = " 200" min-spare-threads = " 10" processor-cache = " 200" tcp-no-delay = " true" max-connections = " 10000" self-tuned = " false" > < propertyname = " threadPriority" value = " 5" /> </ protocol> < http-optionscompression = " on" compressable-mime-type = " text/html,text/plain,text/xml" compression-min-size = " 2048" no-compression-user-agents = " " disable-upload-timeout = " true" max-http-header-size = " 8192" max-keep-alive-requests = " 100" /> < advancedisable-keep-alive-percentage = " 75" selector-timeout = " 1000" usecomet = " true" use-sendfile = " true" oom-parachute = " 1048576" /> < propertyname = " server" value = " webserver" /> </ http-listener>
< http-listenername = " tong-http-listener" port = " 8080" io-mode = " nio2" redirect-port = " 8443" uri-encoding = " GBK" parse-body-methods = " POST" default-virtual-host = " server" create-time = " 2019-10-29 10:54:11" > < ssl/> < protocolnot-allow-HTTP-methods = " TRACE,OPTIONS,HEAD,CONNECT,DELETE,PUT" max-threads = " 200" min-spare-threads = " 10" /> < http-optionscompression = " off" /> < advance/> < propertyname = " server" value = " webserver" /> </ http-listener> < http-listenername = " tong-http-listener" port = " 8080" status = " started" address = " 0.0.0.0" io-mode = " nio2" http2-enabled = " false" ssl-enabled = " true" redirect-port = " 443" uri-encoding = " GBK" use-body-encoding-for-uri = " false" max-parameter-count = " 10000" max-post-size = " 2097152" max-swallow-size = " 2097152" parse-body-methods = " POST" default-virtual-host = " server" create-time = " 2019-10-29 10:54:11" > < sslopenssl-enabled = " false" gm-enabled = " false" keystore-file = " conf/qs.keystore" keystore-pass = " 75YIpThjTTFSD/xkeTd4+Q==" keystore-type = " JKS" gm-enc-file = " conf/EncryptionKey.p12" client-auth = " false" ssl-protocol = " TLS" truststore-file = " conf/server.keystore" truststore-type = " JKS" /> < protocolnot-allow-HTTP-methods = " TRACE,OPTIONS,HEAD,CONNECT,DELETE,PUT" async-timeout = " 10000" enable-lookups = " false" max-header-count = " 100" use-ipv-hosts = " false" xpowered-by = " false" backlog = " 100" accept-thread-count = " 1" connection-timeout = " 60000" keep-alive-timeout = " 60000" max-threads = " 200" min-spare-threads = " 10" processor-cache = " 200" tcp-no-delay = " true" max-connections = " 10000" self-tuned = " false" > < propertyname = " threadPriority" value = " 5" /> </ protocol> < http-optionscompression = " off" compressable-mime-type = " text/html,text/xml,text/plain" compression-min-size = " 2048" disable-upload-timeout = " true" max-http-header-size = " 8192" max-keep-alive-requests = " 100" /> < advancedisable-keep-alive-percentage = " 75" selector-timeout = " 1000" usecomet = " true" use-sendfile = " true" oom-parachute = " 1048576" /> < propertyname = " enableRC4" value = " false" /> < propertyname = " server" value = " webserver" /> </ http-listener> < http-listenername = " ejb-server-listener" port = " 5100" uri-encoding = " GBK" parse-body-methods = " POST" default-virtual-host = " server" create-time = " 2019-10-29 10:54:12" > < ssl/> < protocolnot-allow-HTTP-methods = " TRACE,OPTIONS,HEAD,CONNECT,DELETE,PUT" max-threads = " 200" min-spare-threads = " 10" /> < http-options/> < advance/> </ http-listener>


 1506
1506


 被折叠的 条评论
为什么被折叠?
被折叠的 条评论
为什么被折叠?
 到【灌水乐园】发言


