


一.前言
本文主要讲解如何对接阿里云RabbitMQ,以及topic模式的使用
二.对接过程
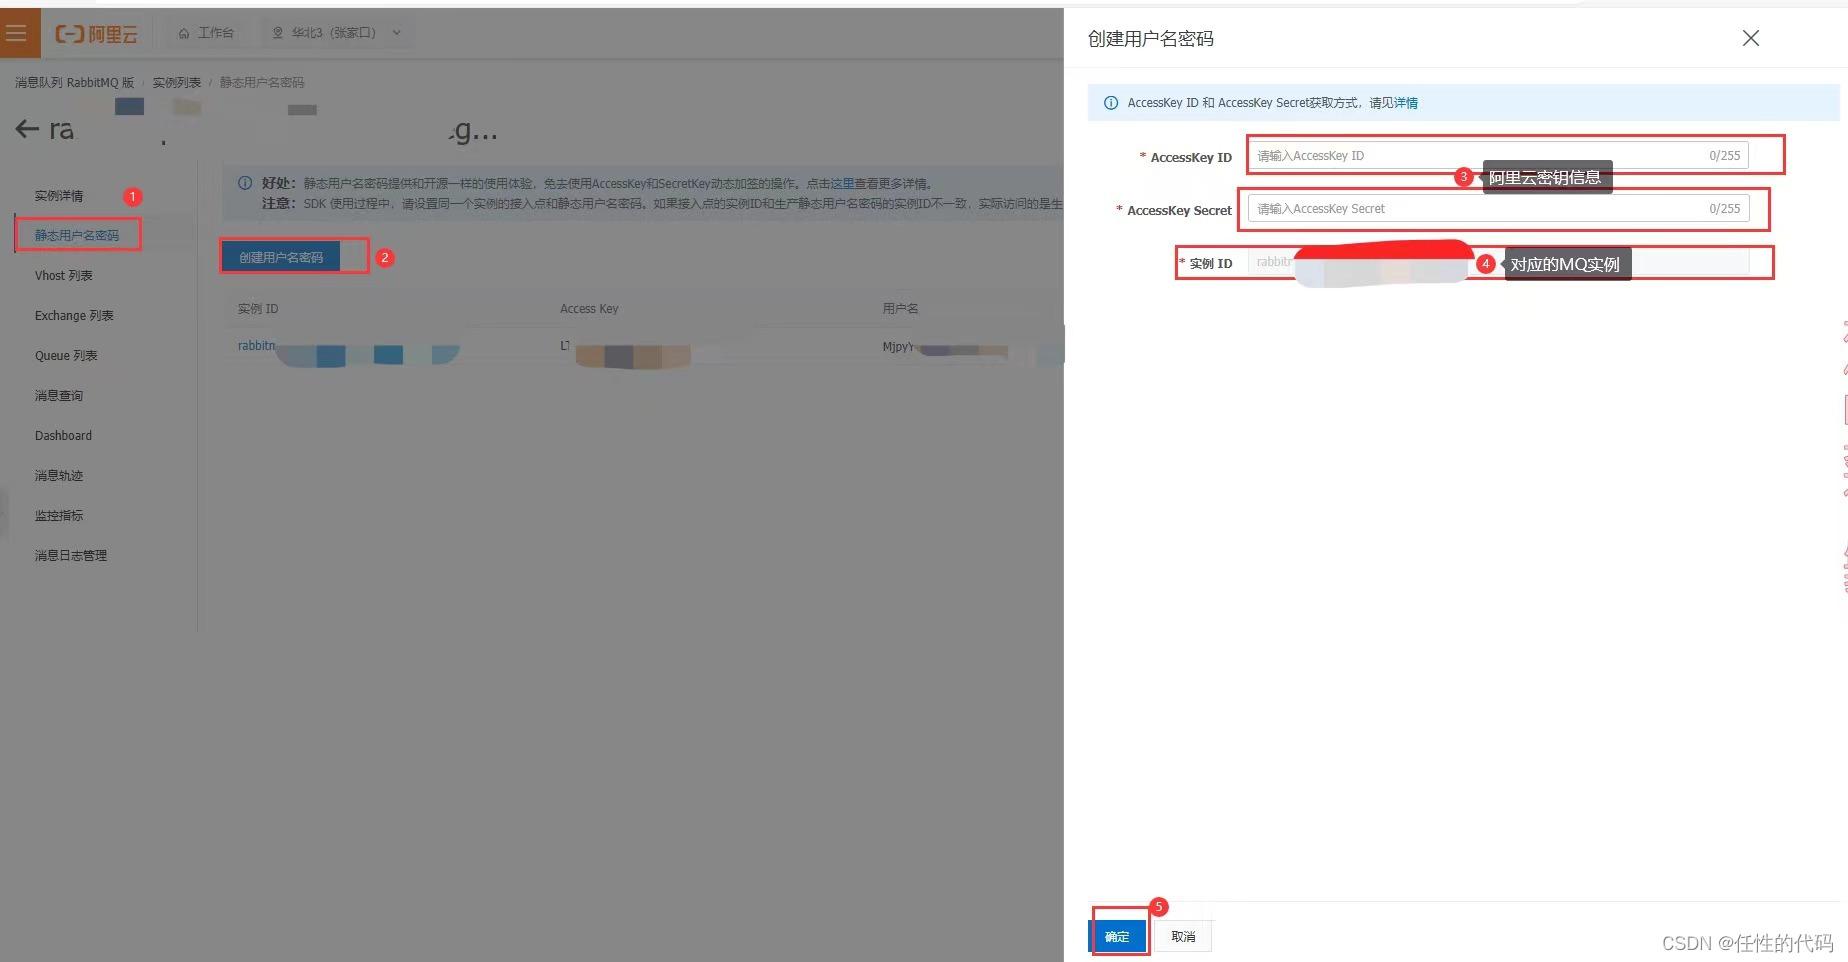
1.开通阿里云RabbitMQ后配置静态用户名密码(对应配置文件中的username/password)
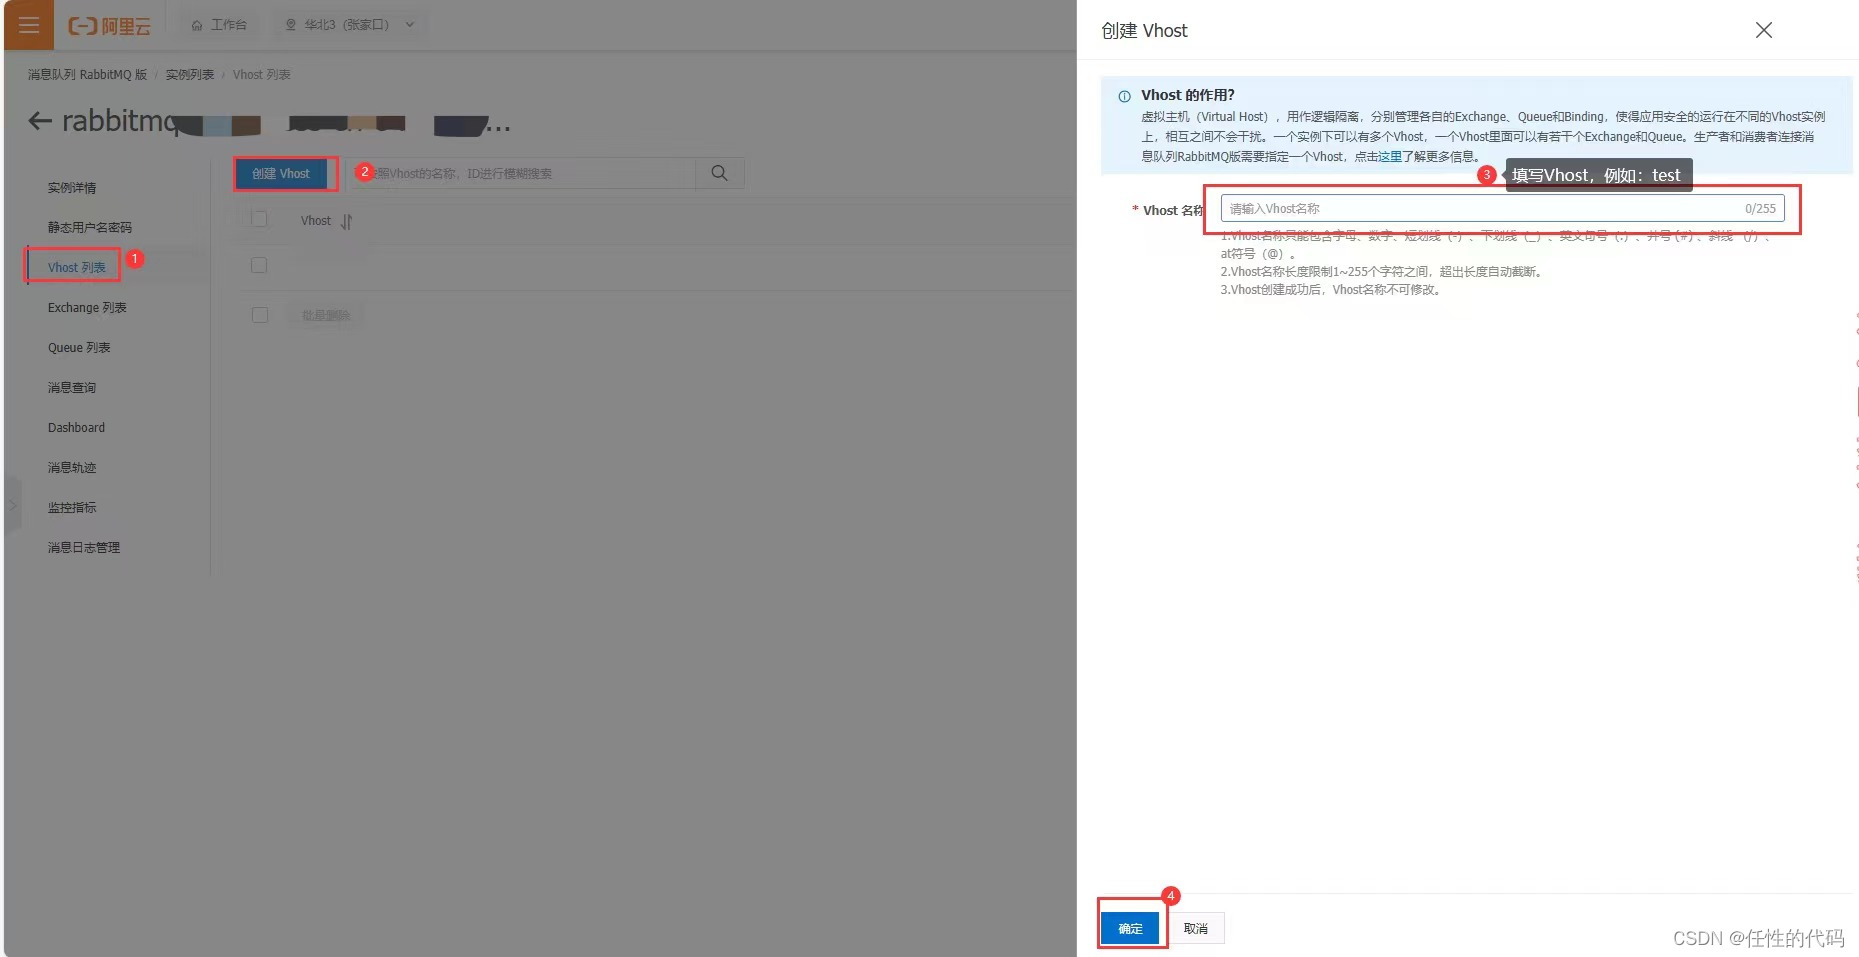
2.创建Vhost
3.Mavem依赖
<dependency>
   <groupId>org.springframework.boot</groupId>
   <artifactId>spring-boot-starter-amqp</artifactId>
</dependency>
4.yaml中参数
#rabbitmq相关配置
spring:
  rabbitmq:
#    instanceId: rabbitmq-serverless-*********** # 阿里云实例ID
    host: rabbitmq-serverless-**************************************************.com
    port: 5672
    username: MjpyYW************************************************************A==
    password: N0I***************************************************************NDA3
    virtual-host: test
    template:
      mandatory: true # 当消息无法到达交换机时会回调
    publisher-returns: true # 消息无法路由到队列时回调发送者
    publisher-confirm-type: correlated # 消息到达交换机后会回调发送者
    listener:
      simple:
        acknowledge-mode: manual # 消费端:消息确认模式(手动确认)
        retry:
          enabled: true # 开启消费者(程序异常)进行重试
          max-attempts: 3 # 最大重试次数
          initial-interval: 1000 # 重试间隔时间
      direct:
        acknowledge-mode: manual # 消费端:消息确认模式(手动确认)
    requested-heartbeat: 60 # 指定心跳超时,单位秒,0为不指定;默认60s
    connection-timeout: 300000 # 连接超时
#        default-requeue-rejected: true #消费者消费失败,自动重新入队
5.RabbitMQ初始化(交换机/队列创建以及绑定)
package cn.iocoder.ydtq.framework.rabbitmq.config;

import cn.iocoder.ydtq.framework.rabbitmq.core.RabbitMqContext;
import lombok.extern.slf4j.Slf4j;
import org.springframework.amqp.core.*;
import org.springframework.beans.factory.annotation.Qualifier;
import org.springframework.context.annotation.Bean;
import org.springframework.context.annotation.Configuration;

/**
 * RabbitMq初始化
 *
 * @author
 */
@Configuration
@Slf4j
public class RabbitMqConfig {


    /**
     * 声明交换机
     *
     * @return
     */
    @Bean("topicExchange")
    public TopicExchange topicExchange() {
        //第二个参数为是否支持持久化
        //对于不同的订阅模式,只需要调用不同的方法即可(此处声明Topic主题模式交换机)
        // 直接模式:ExchangeBuilder.directExchange("");
        // 分列模式:ExchangeBuilder.fanoutExchange("");
        // headers模式:ExchangeBuilder.headersExchange("");
        log.info("[开始注册 topicExchange({}) ]", RabbitMqContext.YDTQ_TOPIC_EXCHANGE_NAME);
        return ExchangeBuilder.topicExchange(RabbitMqContext.YDTQ_TOPIC_EXCHANGE_NAME).durable(true).autoDelete().build();
    }

    /**
     * 声明队列 check
     *
     * @return
     */
    @Bean("checkTopicQueue")
    public Queue checkTopicQueue() {
        // durable创建持久化得队列
        return QueueBuilder.durable(RabbitMqContext.YDTQ_CHECK_TOPIC_QUEUE_MAP_NAME).build();
    }

    /**
     * 绑定队列以及交换机
     *
     * @param queue    队列
     * @param exchange 交换机
     * @return
     */
    @Bean
    public Binding checkTopicQueueExchange(@Qualifier("checkTopicQueue") Queue queue,
                                           @Qualifier("topicExchange") Exchange exchange) {
        //将哪个队列绑定到哪个交换机上,且对应的routingKey是什么
        return BindingBuilder.bind(queue).to(exchange).with(RabbitMqContext.YDTQ_CHECK_ROUTEKEY_NAME).noargs();
    }


}
package cn.iocoder.ydtq.framework.rabbitmq.core;

/**
 * RabbitMq上下文信息
 */
public class RabbitMqContext {

    /**
     * 交换机名称
     */
    public static final String YDTQ_TOPIC_EXCHANGE_NAME = "ydtq.topic.exchange";

    /**
     * 安检队列名称
     */
    public static final String YDTQ_CHECK_TOPIC_QUEUE_MAP_NAME = "topic.check.map.queue";


    /**
     * 安检消息名称
     */
    public static final String YDTQ_CHECK_ROUTEKEY_NAME = "check.change_routekey";


}
6.生产者
public void checkReportMQ(Long id) {
   rabbitTemplate.convertAndSend(RabbitMqContext.YDTQ_TOPIC_EXCHANGE_NAME, RabbitMqContext.YDTQ_CHECK_ROUTEKEY_NAME, "这是消息内容,可以是Object");
}
7.消费者
    @SneakyThrows
    @RabbitListener(queues = RabbitMqContext.YDTQ_CHECK_TOPIC_QUEUE_MAP_NAME, concurrency = "1")
    public void empTopicQueueAsynchronous(String msg, Message message, Channel channel) {
        //手动确认
        long deliveryTag = message.getMessageProperties().getDeliveryTag();
        try {
            // TODO 执行业务
            //  TODO 业务代码
            System.out.println(msg);
            // 手动确认
            channel.basicAck(deliveryTag, false);
        } catch (Exception e) {
            channel.basicAck(deliveryTag, true);
        }
    }
三.总结
本文核心主要是教大家如何简单的集成阿里云RabbitMQ,复杂的场景大家可以自己延申。


 2738
2738


 被折叠的 条评论
为什么被折叠?
被折叠的 条评论
为什么被折叠?
 到【灌水乐园】发言


