


搭建一个SpringBoot项目环境只需要这几步
搭建SpringBoot其实很简单,只需要这几步就能成功。
1.创建一个Maven Project项目。
2.在pom.xml中project标签中引入父项目启动器。
<!--引入父项目启动器 -->
	<parent>
		<groupId>org.springframework.boot</groupId>
		<artifactId>spring-boot-starter-parent</artifactId>
		<version>2.4.3</version>
	</parent>
3.在properties标签中加入
<properties>
    <project.build.sourceEncoding>UTF-8</project.build.sourceEncoding>
    <maven.compiler.source>1.7</maven.compiler.source>
    <maven.compiler.target>1.7</maven.compiler.target>
    <java.version>1.8</java.version>
  </properties>
4.在dependencies标签中加入依赖,引入web启动器
<dependency>
	<groupId>org.springframework.boot</groupId>
	<artifactId>spring-boot-starter-web</artifactId>
</dependency>
5.自动生成的App.java中改写成
@SpringBootApplication//声明当前应用为SpringBoot应用
public class App
{
    public static void main( String[] args )
    {
        SpringApplication.run(App.class,args);//启动运行Spring应用
    }
}
6.编写controller层
@Controller
public class HelloController {
	@ResponseBody
	@RequestMapping("/hello")
	public String hello() {
		return "hello world";
	}
	@ResponseBody
	@RequestMapping("/hello2")
	public Map<String,Object> hello2() {
		Map<String,Object> map = new HashMap<>();
		map.put("name","xiaoming");
		map.put("age",26);
		return map;
	}
}
7.在浏览器地址栏输入:localhost:8080/hello与localhost:8080/hello2分别呈现出效果为:

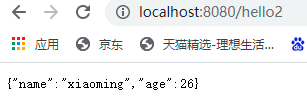
这样我们的springboot环境就搭建成功了!


 4897
4897


 被折叠的 条评论
为什么被折叠?
被折叠的 条评论
为什么被折叠?
 到【灌水乐园】发言


