


给konva加个刻度尺
最近在用konva做一些,一开始写了不少辅助函数。帮助自己给物体定位 ,现在贡献出来给大家用。
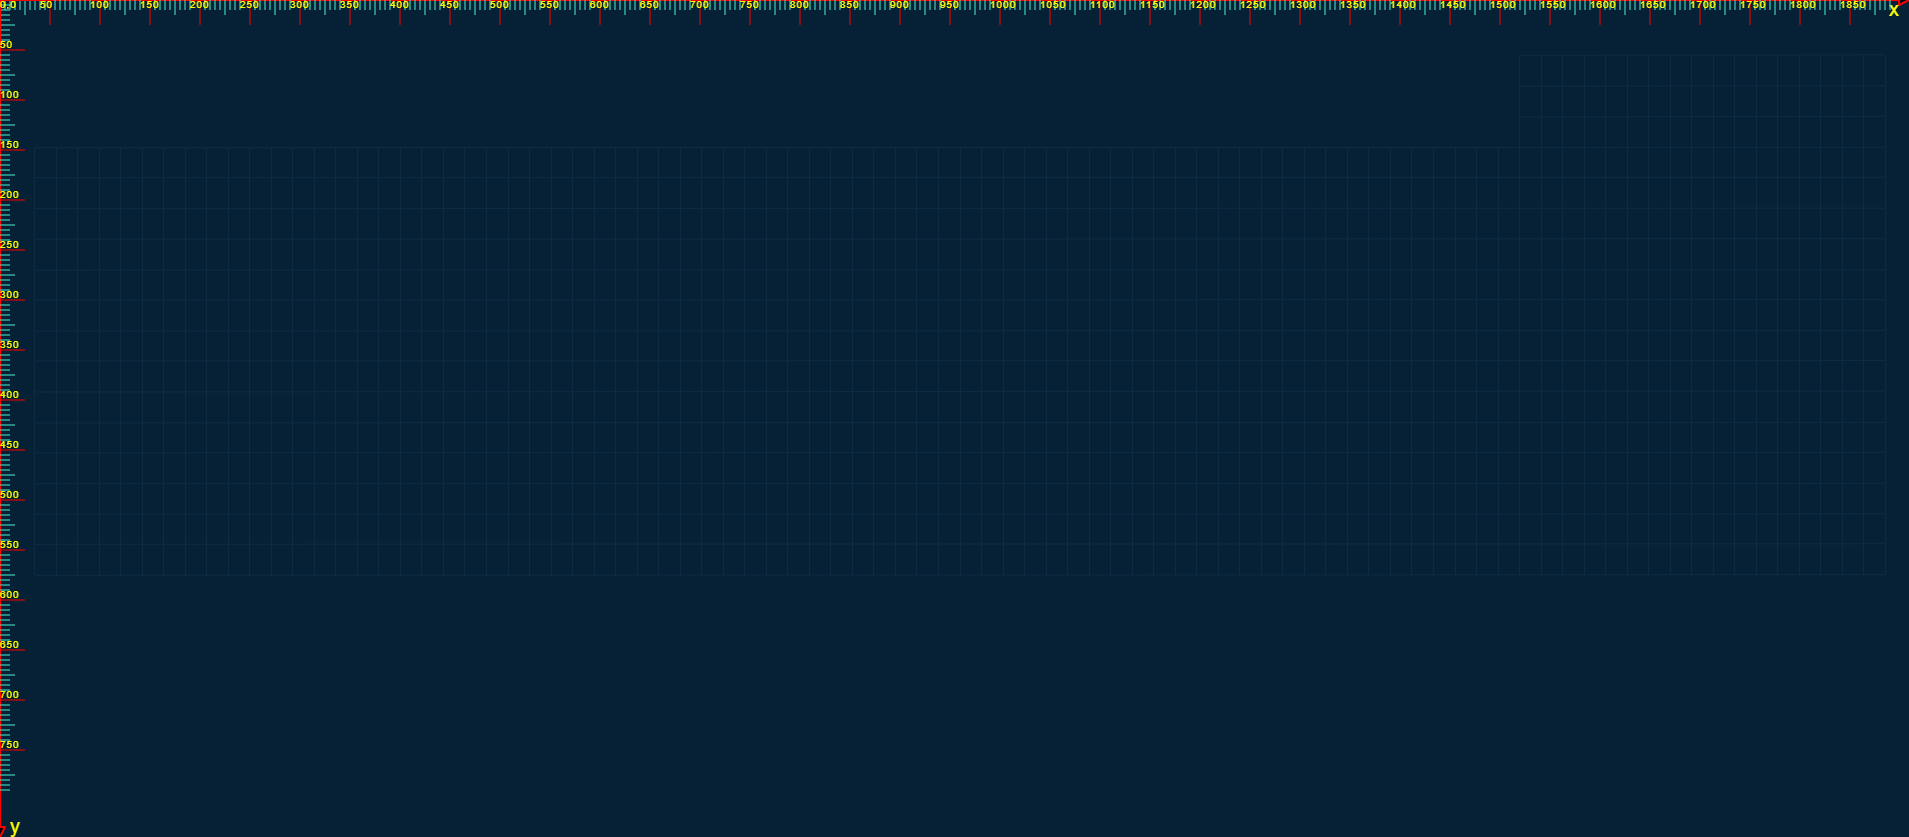
给图层增加刻度尺
顾名思义就是加个刻度显示,效果如下:
代码:
第一个参数时layer,第二个是精度,返回一个layer
stage.add(HelperLayer(deviceUpLayer, 50));
全部代码如下:
export function HelperLayer(layer, precision = 50) {
    const height = layer.height();
    const width = layer.width();
    const offset = {x: layer.offsetX(), y: layer.offsetY()}
    const littleLine = precision / 10;

    //辅助网格层
    let helperLayer = new Konva.Layer();
    const x = new Konva.Arrow({
        points: [offset.x, offset.y, width - offset.y, offset.y],
        stroke: 'red',
        strokeWidth: 2,
        lineCap: 'round',
        lineJoin: 'round',
        fill: 'black',
    })
    for (let j = 1; j < 10; j++) {
        helperLayer.add(new Konva.Line({
            points: [offset.x + j * littleLine, offset.y, offset.x + j * littleLine, j === 5 ? offset.x + 15 : offset.x + 10],
            stroke: '#48f3cc',
            strokeWidth: 1,
        }))
    }
    const xLabel = new Konva.Text({
        x: width - 20,
        y: 0,
        text: 'x',
        fontSize: 20,
        fill: 'yellow',
    })
    const y = new Konva.Arrow({
        points: [offset.x, offset.y, offset.x, height - offset.x],
        stroke: 'red',
        fill: 'black',
        strokeWidth: 2,
        lineCap: 'round',
        lineJoin: 'round',
    })
    for (let j = 1; j < 9; j++) {
        helperLayer.add(new Konva.Line({
            points: [offset.x, offset.y + j * littleLine, j === 5 ? offset.y + 15 : offset.y + 10, offset.y + j * littleLine],
            stroke: '#48f3cc',
            strokeWidth: 1,
        }))
    }
    const yLabel = new Konva.Text({
        x: 10,
        y: height - 20,
        text: 'y',
        fontSize: 20,
        width: 100,
        fill: 'yellow',
    })
    helperLayer.add(x, y, xLabel, yLabel);

    helperLayer.add(new Konva.Text({
        x: offset.x,
        y: offset.y,
        text: "0,0",
        fontSize: 10,
        fill: 'yellow',
    }))

    // y轴刻度
    for (let i = 1; i < Math.floor(height / precision); i++) {
        helperLayer.add(new Konva.Line({
            points: [offset.x, i * precision + offset.y, 25, i * precision + offset.y],
            stroke: 'red',
            strokeWidth: 1,
        }))
        for (let j = 1; j < 9; j++) {
            helperLayer.add(new Konva.Line({
                points: [offset.x, i * precision + offset.y + j * littleLine, j === 5 ? offset.y + 15 : offset.y + 10, i * precision + offset.y + j * littleLine],
                stroke: '#48f3cc',
                strokeWidth: 1,
            }))
        }

        helperLayer.add(new Konva.Text({
            x: offset.x,
            y: i * precision + offset.y - 10,
            text: '' + i * precision,
            fontSize: 10,
            fill: 'yellow',
        }))
    }

    // x轴刻度
    for (let i = 1; i < Math.floor(width / precision); i++) {
        helperLayer.add(new Konva.Line({
            points: [i * precision + offset.x, offset.y, i * precision + offset.x, 25],
            stroke: 'red',
            strokeWidth: 1,
        }))
        for (let j = 1; j < 9; j++) {
            helperLayer.add(new Konva.Line({
                points: [offset.x + i * precision + j * littleLine, offset.y, offset.x + i * precision + j * littleLine, j === 5 ? offset.x + 15 : offset.x + 10],
                stroke: '#48f3cc',
                strokeWidth: 1,
            }))
        }
        helperLayer.add(new Konva.Text({
            x: i * precision + offset.x - 10,
            y: offset.y,
            text: '' + i * precision,
            fontSize: 10,
            fill: 'yellow',
        }))
    }

    return helperLayer;
}
拖动显示坐标
效果如下,当你做拖动元素的时候会自动显示该元素的坐标。

实现如下:
第一个参数是需要拖动的元素,第二个参数是元素所在的图层,无返回值
function showCoord(node, layer) {
    node.on('dragmove', function (event) {
        if (event.target.coord) {
            event.target.coord.destroy()
        }
        event.target.coord = new Konva.Text({
            x: event.target.attrs.x,
            y: event.target.attrs.y + 10,
            text: `(${event.target.attrs.x},${event.target.attrs.y})`,
            fontSize: 20,
            fill: '#bcef63',
        });
        layer.add(event.target.coord);
    });
}
总结
代码很简单,其实也可以更近一步,但是我犯懒了。# 给konva加个刻度尺
最近在用konva做一些,一开始写了不少辅助函数。帮助自己给物体定位 ,现在贡献出来给大家用。
给图层增加刻度尺
顾名思义就是加个刻度显示,效果如下:
代码:
第一个参数时layer,第二个是精度,返回一个layer
stage.add(HelperLayer(deviceUpLayer, 50));
全部代码如下:
export function HelperLayer(layer, precision = 50) {
    const height = layer.height();
    const width = layer.width();
    const offset = {x: layer.offsetX(), y: layer.offsetY()}
    const littleLine = precision / 10;

    //辅助网格层
    let helperLayer = new Konva.Layer();
    const x = new Konva.Arrow({
        points: [offset.x, offset.y, width - offset.y, offset.y],
        stroke: 'red',
        strokeWidth: 2,
        lineCap: 'round',
        lineJoin: 'round',
        fill: 'black',
    })
    for (let j = 1; j < 10; j++) {
        helperLayer.add(new Konva.Line({
            points: [offset.x + j * littleLine, offset.y, offset.x + j * littleLine, j === 5 ? offset.x + 15 : offset.x + 10],
            stroke: '#48f3cc',
            strokeWidth: 1,
        }))
    }
    const xLabel = new Konva.Text({
        x: width - 20,
        y: 0,
        text: 'x',
        fontSize: 20,
        fill: 'yellow',
    })
    const y = new Konva.Arrow({
        points: [offset.x, offset.y, offset.x, height - offset.x],
        stroke: 'red',
        fill: 'black',
        strokeWidth: 2,
        lineCap: 'round',
        lineJoin: 'round',
    })
    for (let j = 1; j < 9; j++) {
        helperLayer.add(new Konva.Line({
            points: [offset.x, offset.y + j * littleLine, j === 5 ? offset.y + 15 : offset.y + 10, offset.y + j * littleLine],
            stroke: '#48f3cc',
            strokeWidth: 1,
        }))
    }
    const yLabel = new Konva.Text({
        x: 10,
        y: height - 20,
        text: 'y',
        fontSize: 20,
        width: 100,
        fill: 'yellow',
    })
    helperLayer.add(x, y, xLabel, yLabel);

    helperLayer.add(new Konva.Text({
        x: offset.x,
        y: offset.y,
        text: "0,0",
        fontSize: 10,
        fill: 'yellow',
    }))

    // y轴刻度
    for (let i = 1; i < Math.floor(height / precision); i++) {
        helperLayer.add(new Konva.Line({
            points: [offset.x, i * precision + offset.y, 25, i * precision + offset.y],
            stroke: 'red',
            strokeWidth: 1,
        }))
        for (let j = 1; j < 9; j++) {
            helperLayer.add(new Konva.Line({
                points: [offset.x, i * precision + offset.y + j * littleLine, j === 5 ? offset.y + 15 : offset.y + 10, i * precision + offset.y + j * littleLine],
                stroke: '#48f3cc',
                strokeWidth: 1,
            }))
        }

        helperLayer.add(new Konva.Text({
            x: offset.x,
            y: i * precision + offset.y - 10,
            text: '' + i * precision,
            fontSize: 10,
            fill: 'yellow',
        }))
    }

    // x轴刻度
    for (let i = 1; i < Math.floor(width / precision); i++) {
        helperLayer.add(new Konva.Line({
            points: [i * precision + offset.x, offset.y, i * precision + offset.x, 25],
            stroke: 'red',
            strokeWidth: 1,
        }))
        for (let j = 1; j < 9; j++) {
            helperLayer.add(new Konva.Line({
                points: [offset.x + i * precision + j * littleLine, offset.y, offset.x + i * precision + j * littleLine, j === 5 ? offset.x + 15 : offset.x + 10],
                stroke: '#48f3cc',
                strokeWidth: 1,
            }))
        }
        helperLayer.add(new Konva.Text({
            x: i * precision + offset.x - 10,
            y: offset.y,
            text: '' + i * precision,
            fontSize: 10,
            fill: 'yellow',
        }))
    }

    return helperLayer;
}
拖动显示坐标
效果如下,当你做拖动元素的时候会自动显示该元素的坐标。
实现如下:
第一个参数是需要拖动的元素,第二个参数是元素所在的图层,无返回值
function showCoord(node, layer) {
    node.on('dragmove', function (event) {
        if (event.target.coord) {
            event.target.coord.destroy()
        }
        event.target.coord = new Konva.Text({
            x: event.target.attrs.x,
            y: event.target.attrs.y + 10,
            text: `(${event.target.attrs.x},${event.target.attrs.y})`,
            fontSize: 20,
            fill: '#bcef63',
        });
        layer.add(event.target.coord);
    });
}
总结
代码很简单,其实也可以更近一步,但是我犯懒了。


 被折叠的 条评论
为什么被折叠?
被折叠的 条评论
为什么被折叠?
 到【灌水乐园】发言


