


theme: channing-cyan
highlight: androidstudio
我正在参加中秋创意投稿大赛,详情请看:中秋创意投稿大赛
完整代码
爬虫、前端、后端代码
链接: https://pan.baidu.com/s/1mG0Q4LWJvsw9RUZdOx6H4g
提取码: 5ve6
爬取数据
我们先分步讲解代码,在后面再上完整代码
requests
我认为,爬虫的过程就是模拟请求,然后从请求到的信息中提取出我们所需要的内容。
python能实现请求的库有request、requests、urllib等等。
requests介绍
-
requests是使用Apache2 licensed 许可证的HTTP库。
-
比urllib2模块更简洁。
-
Request支持HTTP连接保持和连接池,支持使用cookie保持会话,支持文件上传,支持自动响应内容的编码,支持国际化的URL和POST数据自动编码。
-
在python内置模块的基础上进行了高度的封装,从而使得python进行网络请求时,变得人性化,使用Requests可以轻而易举的完成浏览器可有的任何操作。
-
requests会自动实现持久连接keep-alive
requests.Session
会话对象,能够跨请求保持某些参数
requests我们在这里就不详细说了,我们只了解一下我们要使用的requests.Session。
可以为请求添加请求头、cookies等信息。
requests.get():参数为请求的网址,返回值是网站响应给我们的信息
s = requests.Session()
s.auth = ('auth','passwd')
s.headers = {'key':'value'}
r = s.get('url')
r1 = s.get('url1')
代码
这是我们定义的login方法,使用requests.session创建一个会话。为其添加请求头、cookies(这些参数在别的方法中获取的)等信息,再通过get方法获得响应。然后我们先是将响应的信息输出到txt文档中了(后面我们要存入mysql数据库中)。
def login(self):
        # 开启一个session会话
        session = requests.session()
        # 设置请求头信息
        session.headers = self.headers
        # 将cookiesJar赋值给会话
        session.cookies = self.read_cookies()
        # 向测试站点发起请求
        response = session.get(self.test_url)
        html = response.content.decode()
        with open("淘宝html.txt","w") as f:
             f.write(html)  #这句话自带文件关闭功能,不需要再写f.close()
cookie
分析
淘宝需要cookie进行验证你是否登陆了。
我们通过账号密码登陆最好。
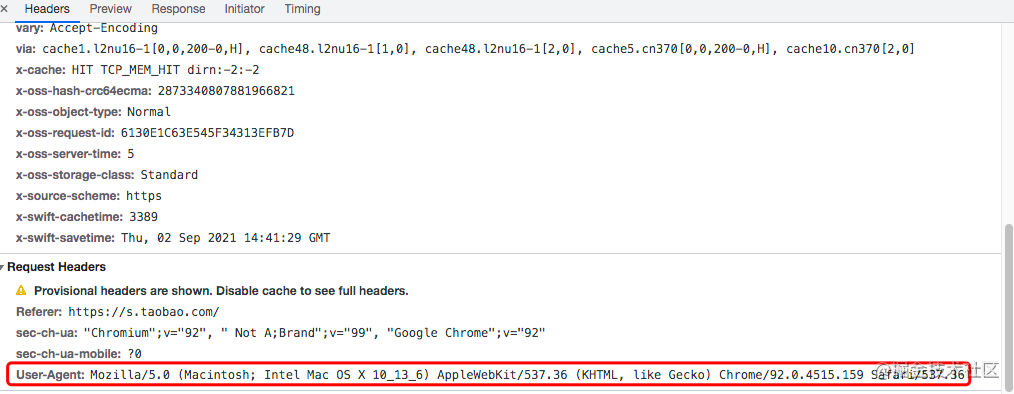
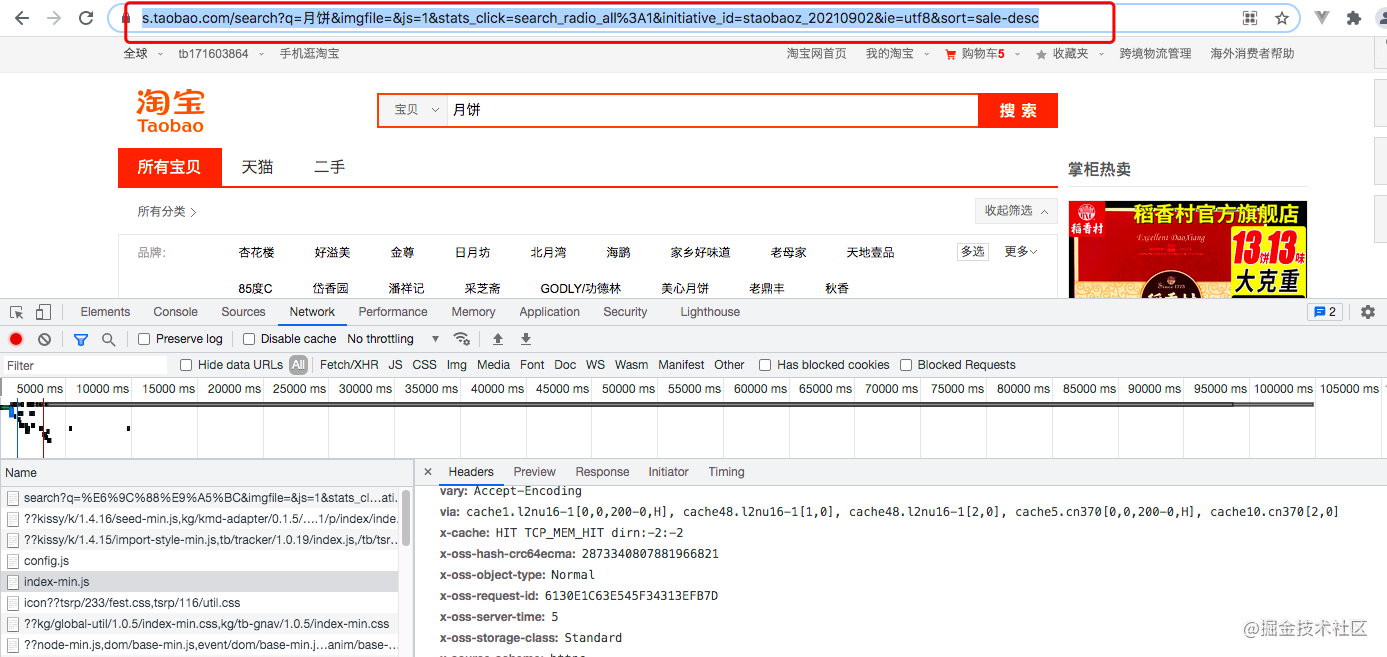
登陆之后我搜索了关键字 “月饼”,因为我们今天只谈月饼,不谈嫦娥。打开network,点开第一个接口
。找到它的cookie,如下图

新建一个名为mycookies.txt的文件,将cookie复制到文件中。

代码
读取mycookies.txt,获得cookies,并将经历[字符串]–>[字典数据类型]–>[CookieJar]的处理后,供上一步的login方法中使用。
 # 读取mycookies.txt中的cookies
    def read_cookies(self):
        with open("mycookies.txt", 'r', encoding='utf-8') as f:
            cookies_txt = f.read().strip(';')  # 读取文本内容
            # 由于requests只保持 cookiejar 类型的cookie,而我们手动复制的cookie是字符串需先将其转为dict类型后利用requests.utils.cookiejar_from_dict转为cookiejar 类型
            # 手动复制的cookie是字符串转为字典:
            for cookie in cookies_txt.split(';'):
                name, value = cookie.strip().split('=', 1)  # 用=号分割,分割1次
                self.cookies[name] = value  # 为字典cookies添加内容
        # 将字典转为CookieJar:
        cookiesJar = requests.utils.cookiejar_from_dict(self.cookies, cookiejar=None, overwrite=True)
        return cookiesJar
请求头
这一段都是请求头所需要的信息,里面的内容我们可以完全不需要做改变。
self.headers = {"Origin": "https://login.taobao.com",
                        "Upgrade-Insecure-Requests": "1",
                        "Content-Type": "application/x-www-form-urlencoded",
                        "Accept": "text/html,application/xhtml+xml,application/xml;q=0.9,image/webp,image/apng,*/*;q=0.8",
                        "Referer": "https://login.taobao.com/member/login.jhtml?redirectURL=https%3A%2F%2Fwww.taobao.com%2F",
                        "Accept-Encoding": "gzip, deflate, br",
                        "Accept-Language": "zh-CN,zh;q=0.9",
                        "User-Agent": set_user_agent()}
最后的User-Agent后面又写了一个方法,这个是为了建立一个代理池。其实也完全可以不写这个代理池,直接以键值对的形式将User-Agent的具体内容写到后面。
def set_user_agent():
    USER_AGENTS = [
        "Mozilla / 5.0(Windows NT 10.0;Win64;x64) AppleWebKit / 537.36(KHTML, like Gecko) Chrome / 89.0.4389.90 Safari / 537.36 Edg / 89.0.774.54"
        # "Mozilla/5.0 (compatible; MSIE 9.0; Windows NT 6.1; Win64; x64; Trident/5.0; .NET CLR 3.5.30729; .NET CLR 3.0.30729; .NET CLR 2.0.50727; Media Center PC 6.0)",
        # "Mozilla/5.0 (compatible; MSIE 8.0; Windows NT 6.0; Trident/4.0; WOW64; Trident/4.0; SLCC2; .NET CLR 2.0.50727; .NET CLR 3.5.30729; .NET CLR 3.0.30729; .NET CLR 1.0.3705; .NET CLR 1.1.4322)",
        # "Mozilla/4.0 (compatible; MSIE 7.0b; Windows NT 5.2; .NET CLR 1.1.4322; .NET CLR 2.0.50727; InfoPath.2; .NET CLR 3.0.04506.30)",
        # "Mozilla/5.0 (Windows; U; Windows NT 5.1; zh-CN) AppleWebKit/523.15 (KHTML, like Gecko, Safari/419.3) Arora/0.3 (Change: 287 c9dfb30)",
        # "Mozilla/5.0 (X11; U; Linux; en-US) AppleWebKit/527+ (KHTML, like Gecko, Safari/419.3) Arora/0.6",
        # "Mozilla/5.0 (Windows; U; Windows NT 5.1; en-US; rv:1.8.1.2pre) Gecko/20070215 K-Ninja/2.1.1",
        # "Mozilla/5.0 (Windows; U; Windows NT 5.1; zh-CN; rv:1.9) Gecko/20080705 Firefox/3.0 Kapiko/3.0",
        # "Mozilla/5.0 (X11; Linux i686; U;) Gecko/20070322 Kazehakase/0.4.5"
    ]
    user_agent = random.choice(USER_AGENTS)
    return user_agent
获取User-Agent:
将请求到的代码输出
我们上完整代码,其中的几个函数我们已经提过了。再提一下__init__方法是python类的初始化方法。其中的test_url也就是我们要爬取页面的URL
code
import requests
import random
import re
import pymysql
def set_user_agent():
    USER_AGENTS = [
        "Mozilla / 5.0(Windows NT 10.0;Win64;x64) AppleWebKit / 537.36(KHTML, like Gecko) Chrome / 89.0.4389.90 Safari / 537.36 Edg / 89.0.774.54"
        # "Mozilla/5.0 (compatible; MSIE 9.0; Windows NT 6.1; Win64; x64; Trident/5.0; .NET CLR 3.5.30729; .NET CLR 3.0.30729; .NET CLR 2.0.50727; Media Center PC 6.0)",
        # "Mozilla/5.0 (compatible; MSIE 8.0; Windows NT 6.0; Trident/4.0; WOW64; Trident/4.0; SLCC2; .NET CLR 2.0.50727; .NET CLR 3.5.30729; .NET CLR 3.0.30729; .NET CLR 1.0.3705; .NET CLR 1.1.4322)",
        # "Mozilla/4.0 (compatible; MSIE 7.0b; Windows NT 5.2; .NET CLR 1.1.4322; .NET CLR 2.0.50727; InfoPath.2; .NET CLR 3.0.04506.30)",
        # "Mozilla/5.0 (Windows; U; Windows NT 5.1; zh-CN) AppleWebKit/523.15 (KHTML, like Gecko, Safari/419.3) Arora/0.3 (Change: 287 c9dfb30)",
        # "Mozilla/5.0 (X11; U; Linux; en-US) AppleWebKit/527+ (KHTML, like Gecko, Safari/419.3) Arora/0.6",
        # "Mozilla/5.0 (Windows; U; Windows NT 5.1; en-US; rv:1.8.1.2pre) Gecko/20070215 K-Ninja/2.1.1",
        # "Mozilla/5.0 (Windows; U; Windows NT 5.1; zh-CN; rv:1.9) Gecko/20080705 Firefox/3.0 Kapiko/3.0",
        # "Mozilla/5.0 (X11; Linux i686; U;) Gecko/20070322 Kazehakase/0.4.5"
    ]
    user_agent = random.choice(USER_AGENTS)
    return user_agent
class TaoBao:
    def __init__(self):
        # test_url是我们实际登陆后才能看到的内容,为了确保模拟成功在此用它进行测试
        self.test_url = 'https://s.taobao.com/search?q=%E6%9C%88%E9%A5%BC&imgfile=&js=1&stats_click=search_radio_all%3A1&initiative_id=staobaoz_20210902&ie=utf8&sort=sale-desc'
        self.headers = {"Origin": "https://login.taobao.com",
                        "Upgrade-Insecure-Requests": "1",
                        "Content-Type": "application/x-www-form-urlencoded",
                        "Accept": "text/html,application/xhtml+xml,application/xml;q=0.9,image/webp,image/apng,*/*;q=0.8",
                        "Referer": "https://login.taobao.com/member/login.jhtml?redirectURL=https%3A%2F%2Fwww.taobao.com%2F",
                        "Accept-Encoding": "gzip, deflate, br",
                        "Accept-Language": "zh-CN,zh;q=0.9",
                        "User-Agent": set_user_agent()}
        self.cookies = {}  # 申明一个字典用于存储手动复制的cookies
        self.res_cookies_txt = ""  # 申明刚开始浏览器返回的cookies为空字符串
    # 读取mycookies.txt中的cookies
    def read_cookies(self):
        with open("mycookies.txt", 'r', encoding='utf-8') as f:
            cookies_txt = f.read().strip(';')  # 读取文本内容
            # 由于requests只保持 cookiejar 类型的cookie,而我们手动复制的cookie是字符串需先将其转为dict类型后利用requests.utils.cookiejar_from_dict转为cookiejar 类型
            # 手动复制的cookie是字符串转为字典:
            for cookie in cookies_txt.split(';'):
                name, value = cookie.strip().split('=', 1)  # 用=号分割,分割1次
                self.cookies[name] = value  # 为字典cookies添加内容
        # 将字典转为CookieJar:
        cookiesJar = requests.utils.cookiejar_from_dict(self.cookies, cookiejar=None, overwrite=True)
        return cookiesJar

    # 保存模拟登陆成功后从服务器返回的cookies,通过对比可以发现是有所不同的
    def set_cookies(self, cookies):
        # 将CookieJar转为字典:
        res_cookies_dic = requests.utils.dict_from_cookiejar(cookies)
        # 将新的cookies信息更新到手动cookies字典
        for i in res_cookies_dic.keys():
            self.cookies[i] = res_cookies_dic[i]
        # 将服务器返回的cookies写入到mycookies.txt中实现更新
        for k in self.cookies.keys():
            self.res_cookies_txt += k + "=" + self.cookies[k] + ";"
        with open('mycookies.txt', "w", encoding="utf-8") as f:
            f.write(self.res_cookies_txt)

    def login(self):
        # 开启一个session会话
        session = requests.session()
        # 设置请求头信息
        session.headers = self.headers
        # 将cookiesJar赋值给会话
        session.cookies = self.read_cookies()
        # 向测试站点发起请求
        response = session.get(self.test_url)
        html = response.content.decode()
        with open("淘宝html.txt","w") as f:
             f.write(html)  #这句话自带文件关闭功能,不需要再写f.close()

if __name__ == '__main__':
    taobao = TaoBao()
    taobao.login()
最后是在主方法中,实例话一个对象,再调用对象的login方法。
测试一下
我们运行一下代码 测试一下
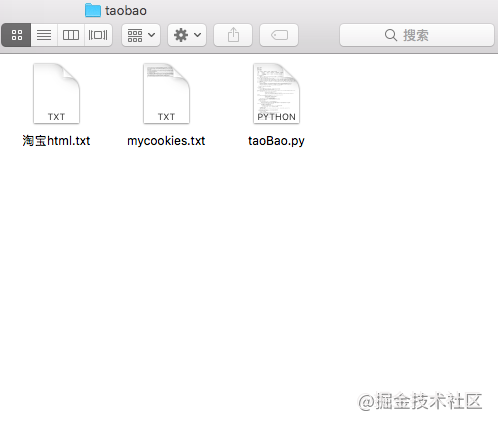
在我们的文件夹下现在有三个文件
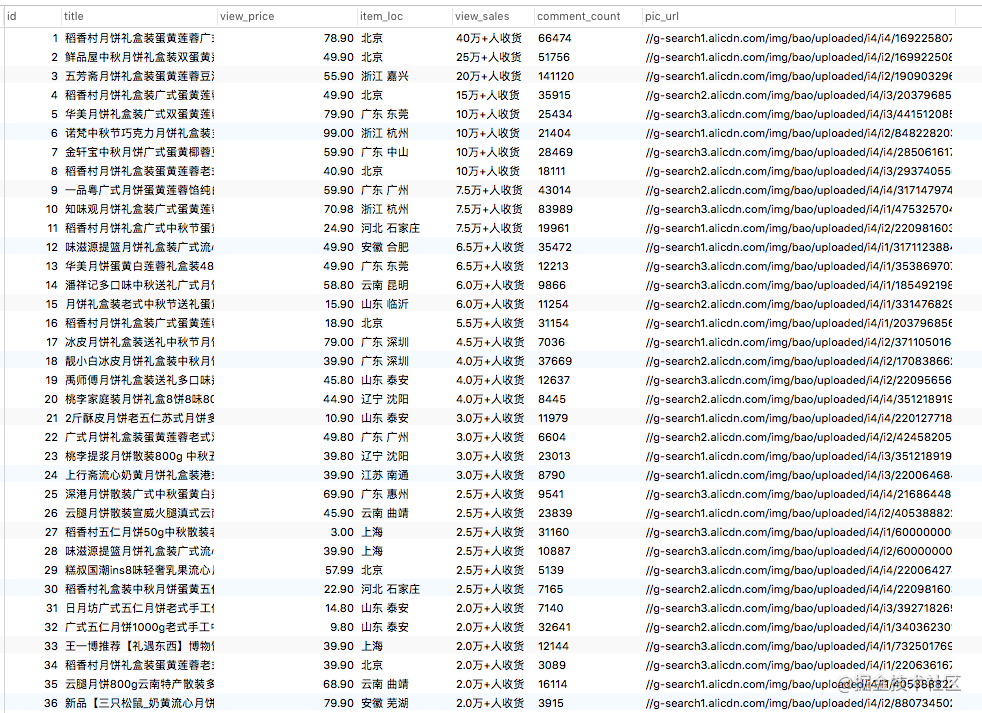
点开 淘宝html.txt 文件,我们看到爬到了整个html页面的代码。我们向下👇 滑,发现这一大串就是我们页面中的数据(价格、标题…等等)。

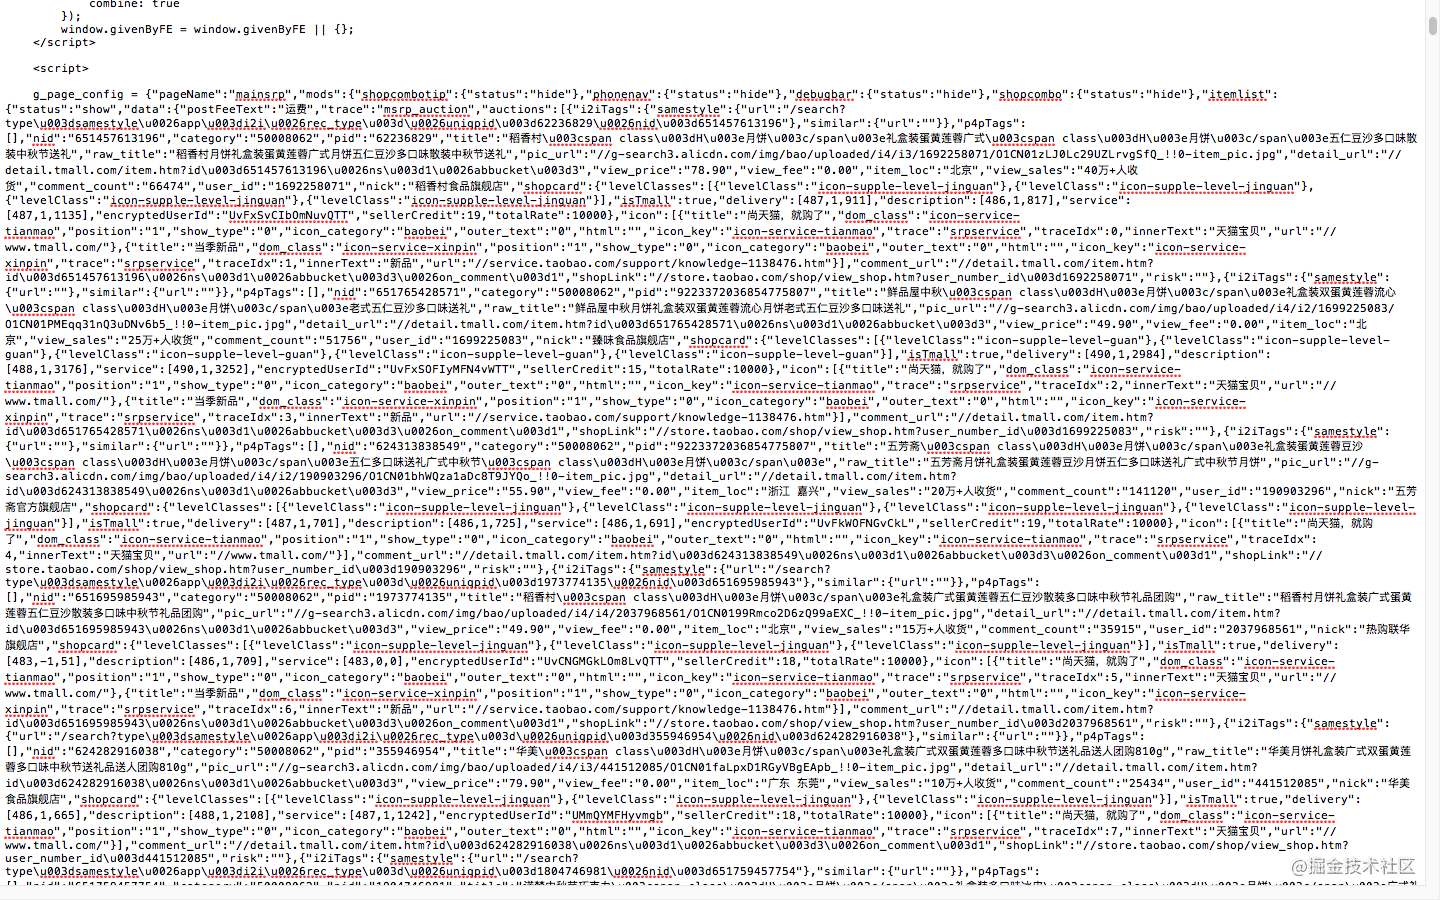
到现在我们的一个小目标实现了。
设计数据库表
我们提取出我们所需的各个字段
新建mysql数据库

sql如下:
/*
 Navicat Premium Data Transfer

 Source Server         : mine
 Source Server Type    : MySQL
 Source Server Version : 50731
 Source Host           : localhost:3306
 Source Schema         : taoBao

 Target Server Type    : MySQL
 Target Server Version : 50731
 File Encoding         : 65001

 Date: 04/09/2021 15:13:11
*/

SET NAMES utf8mb4;
SET FOREIGN_KEY_CHECKS = 0;

-- ----------------------------
-- Table structure for moon
-- ----------------------------
DROP TABLE IF EXISTS `moon`;
CREATE TABLE `moon` (
  `id` int(11) NOT NULL AUTO_INCREMENT,
  `title` varchar(255) DEFAULT NULL COMMENT '题目',
  `view_price` decimal(10,2) DEFAULT NULL COMMENT '价格',
  `item_loc` varchar(255) DEFAULT NULL COMMENT '发货地址',
  `view_sales` varchar(255) DEFAULT NULL COMMENT '销量',
  `pic_url` varchar(255) DEFAULT NULL COMMENT '图片地址',
  `comment_count` varchar(255) DEFAULT NULL COMMENT '评论数量',
  PRIMARY KEY (`id`)
) ENGINE=InnoDB DEFAULT CHARSET=utf8;

SET FOREIGN_KEY_CHECKS = 1;
提取所需数据
使用正则
正则表达式的知识点我们在这里就不具体说了,大家感兴趣可以去自己百度深入了解。
导入包
import re
提取相应字段"raw_title":"(.*?)"' 是提取键是"raw_title"对应的值,"(.*?)"是提取双引号直接的所有内容。
[re.findall]第一个参数是正则表达式,第二个参数是未提取前的字符串
        title = re.findall(r'"raw_title":"(.*?)"', html)  # 找raw_title
        view_price = re.findall(r'"view_price":"(.*?)"', html)  # view_price
        item_loc= re.findall(r'"item_loc":"(.*?)"', html)
        view_sales=re.findall(r'"view_sales":"(.*?)"', html)
        pic_url=re.findall(r'"pic_url":"(.*?)"', html)
        comment_count = re.findall(r'"comment_count":"(.*?)"',html)
输出提取到的各个字段,可以发现我们打印出来的title等都是列表的格式
print(title,view_price,item_loc,view_sales,pic_url,comment_count)

存入数据库
导入pymysql
import pymysql
创建连接
- connect:创建连接。
- cur = db.cursor():创建游标
- cur.execute(sql):执行sql语句
db = pymysql.connect(host='localhost',user='root',password='root', db='taoBao')
        cur = db.cursor()
        for i in range(0,40):
            print("-----------------------",i)
            sql = "INSERT INTO moon(title,view_price,item_loc,view_sales,pic_url,comment_count) VALUES ('%s', '%s', '%s','%s', '%s','%s')" % \
                   (title[i],view_price[i],item_loc[i],view_sales[i],pic_url[i],comment_count[i])
            print(sql);
            try:
                cur.execute(sql)
                db.commit()
                print("插入数据成功")
            except Exception as e:
                print(e)
                db.rollback()
                print("插入数据失败")
                db.close()
数据库数据
至此我们所需数据就获取到了。
展示
后端
我们用的是SpringBoot项目
文件目录结构

Controller
moonController
package com.example.demoSpringBoot.controller;

import com.example.demoSpringBoot.entity.moon;
import com.example.demoSpringBoot.service.moonService;
import com.example.demoSpringBoot.utils.R;
import io.swagger.annotations.Api;
import io.swagger.annotations.ApiOperation;
import org.springframework.beans.factory.annotation.Autowired;
import org.springframework.web.bind.annotation.CrossOrigin;
import org.springframework.web.bind.annotation.GetMapping;
import org.springframework.web.bind.annotation.RequestMapping;
import org.springframework.web.bind.annotation.RestController;

import java.util.List;

@Api(description = "月饼数据")
@RestController
@CrossOrigin
@RequestMapping("/moon/price")
public class moonController {
    @Autowired
    private moonService moonService;
    @ApiOperation(value = "查询所有月饼数据")
    @GetMapping("findAll")
    public R findAllTeacher() {
        List<moon> list = moonService.list(null);
        return R.ok().data("items", list);
    }
}
entity
moon
- 使用了lombok的注解,有了lombok的注解@Data 就不用再写set get。
- 声明的变量对应数据库字段,我数据库中的字段是有下划线的,⚠️ 下划线的变量名要按照驼峰规则。
package com.example.demoSpringBoot.entity;

import lombok.Data;

// 有了lombok的注解@Data 就不用再写set get
@Data
public class moon {
//    下划线需要改成大写
    private Integer id;
    private String title;
    private Double viewPrice;
    private String itemLoc;
    private String viewSales;
    private String picUrl;
    private String commentCount;
}
mapper
我们使用的mybatisplus的BaseMapper 就不用再写sql了。
package com.example.demoSpringBoot.mapper;

import com.example.demoSpringBoot.entity.moon;
import com.baomidou.mybatisplus.core.mapper.BaseMapper;
import org.apache.ibatis.annotations.Mapper;

@Mapper
public interface moonMapper extends BaseMapper<moon> {
}
service
moonService
使用了mybatisplus 的 IService
package com.example.demoSpringBoot.service;

import com.baomidou.mybatisplus.extension.service.IService;
import com.example.demoSpringBoot.entity.moon;

public interface moonService extends IService<moon> {

}
impl
moonServiceImpl
package com.example.demoSpringBoot.service.impl;

import com.baomidou.mybatisplus.extension.service.impl.ServiceImpl;
import com.example.demoSpringBoot.entity.moon;
import com.example.demoSpringBoot.mapper.moonMapper;
import com.example.demoSpringBoot.service.moonService;
import org.springframework.stereotype.Service;
@Service
public class moonServiceImpl extends ServiceImpl<moonMapper,moon> implements moonService {

}
utils
R
封装的数据返回格式
package com.example.demoSpringBoot.utils;

import io.swagger.annotations.ApiModelProperty;
import lombok.Data;

import java.util.HashMap;
import java.util.Map;

@Data
public class R {

    @ApiModelProperty(value = "是否成功")
    private Boolean success;

    @ApiModelProperty(value = "返回码")
    private Integer code;

    @ApiModelProperty(value = "返回消息")
    private String message;

    @ApiModelProperty(value = "返回数据")
    private Map<String, Object> data = new HashMap<String, Object>();

    //把构造方法私有化
    private R(){}

    //链式编程
    //    R.ok().code().message()
    // 成功静态方法
    public static R ok(){
        R r = new R();
        r.setSuccess(true);
        r.setCode(ResultCode.SUCCESS);
        r.setMessage("成功");
        return r;
    }
    // 失败静态方法
    public static  R error(){
        R r = new R();
        r.setSuccess(false);
        r.setCode(ResultCode.ERROR);
        r.setMessage("失败");
        return r;
    }
    public R success(Boolean success){
        this.setSuccess(success);
        // 返回对象
        return this;
    }

    public R message(String message){
        this.setMessage(message);
        return this;
    }

    public R code(Integer code){
        this.setCode(code);
        return this;
    }

    public R data(String key, Object value){
        this.data.put(key, value);
        return this;
    }

    public R data(Map<String, Object> map){
        this.setData(map);
        return this;
    }
}
ResultCode
成功失败状态码
package com.example.demoSpringBoot.utils;

public class ResultCode {
    public static Integer SUCCESS = 20000; //成功

    public static Integer ERROR = 20001; //失败
}
启动类
DemoSpringBootApplication
MapperScan扫描mapper后面mapper对应的包
@EnableSwagger2: 使用swagger
package com.example.demoSpringBoot;

import org.mybatis.spring.annotation.MapperScan;
import org.springframework.boot.SpringApplication;
import org.springframework.boot.autoconfigure.SpringBootApplication;
import org.springframework.context.annotation.ComponentScan;
import springfox.documentation.swagger2.annotations.EnableSwagger2;

@SpringBootApplication
@MapperScan("package com.example.demoSpringBoot.mapper")
//@ComponentScan(basePackages = {"com.video"})
@EnableSwagger2
public class DemoSpringBootApplication {

   public static void main(String[] args) {
      SpringApplication.run(DemoSpringBootApplication.class, args);
   }

}
application.properties
对应一些配置,如端口号、数据库驱动。 ⚠️ springboot 2.1版本之后的数据库驱动要加 cj
以及需要写入时区。
# 应用名称
server.port=8001
spring.application.name=demoSpringBoot
spring.datasource.driver-class-name=com.mysql.cj.jdbc.Driver
# 时区serverTimezone
spring.datasource.url=jdbc:mysql://localhost:3306/taoBao?serverTimezone=GMT%2B8
spring.datasource.username=root
spring.datasource.password=root

#mybatis-plus.global-config.db-config.logic-delete-value=1
#mybatis-plus.global-config.db-config.logic-not-delete-value=0

#»·¾³ÉèÖãºdev¡¢test¡¢prod
spring.profiles.active=dev

#mybatisÈÕÖ¾
mybatis-plus.configuration.log-impl=org.apache.ibatis.logging.stdout.StdOutImpl
pom.xml
<?xml version="1.0" encoding="UTF-8"?>
<project xmlns="http://maven.apache.org/POM/4.0.0" xmlns:xsi="http://www.w3.org/2001/XMLSchema-instance"
   xsi:schemaLocation="http://maven.apache.org/POM/4.0.0 https://maven.apache.org/xsd/maven-4.0.0.xsd">
   <modelVersion>4.0.0</modelVersion>
   <parent>
      <groupId>org.springframework.boot</groupId>
      <artifactId>spring-boot-starter-parent</artifactId>
      <version>2.2.7.RELEASE</version>
      <relativePath/> <!-- lookup parent from repository -->
   </parent>
   <groupId>com.example</groupId>
   <artifactId>demoSpringBoot</artifactId>
   <version>0.0.1-SNAPSHOT</version>
   <name>demoSpringBoot</name>
   <description>Demo project for Spring Boot</description>
   <properties>
      <java.version>1.8</java.version>
   </properties>
   <dependencies>
      <dependency>
         <groupId>org.springframework.boot</groupId>
         <artifactId>spring-boot-starter</artifactId>
      </dependency>
      <!--springboot web 启动器-->
      <dependency>
         <groupId>org.springframework.boot</groupId>
         <artifactId>spring-boot-starter-web</artifactId>
      </dependency>
      <dependency>
         <groupId>org.springframework.boot</groupId>
         <artifactId>spring-boot-devtools</artifactId>
         <scope>runtime</scope>
         <optional>true</optional>
      </dependency>
      <!--mysql驱动-->
      <dependency>
         <groupId>mysql</groupId>
         <artifactId>mysql-connector-java</artifactId>
         <scope>runtime</scope>
      </dependency>
      <dependency>
         <groupId>org.springframework.boot</groupId>
         <artifactId>spring-boot-configuration-processor</artifactId>
         <optional>true</optional>
      </dependency>
      <!--lombok-->
      <dependency>
         <groupId>org.projectlombok</groupId>
         <artifactId>lombok</artifactId>
         <optional>true</optional>
      </dependency>
      <dependency>
         <groupId>org.springframework.boot</groupId>
         <artifactId>spring-boot-starter-test</artifactId>
         <scope>test</scope>
      </dependency>
      <!--mybatis-plus 持久层-->
      <dependency>
         <groupId>com.baomidou</groupId>
         <artifactId>mybatis-plus-boot-starter</artifactId>
         <version>3.0.5</version>
      </dependency>
      <!-- swagger -->
      <dependency>
         <groupId>io.springfox</groupId>
         <artifactId>springfox-swagger2</artifactId>
         <version>2.9.2</version>
      </dependency>
      <dependency>
         <groupId>io.springfox</groupId>
         <artifactId>springfox-swagger-ui</artifactId>
         <version>2.9.2</version>
      </dependency>
   </dependencies>

   <build>
      <plugins>
         <plugin>
            <groupId>org.springframework.boot</groupId>
            <artifactId>spring-boot-maven-plugin</artifactId>
            <configuration>
               <excludes>
                  <exclude>
                     <groupId>org.projectlombok</groupId>
                     <artifactId>lombok</artifactId>
                  </exclude>
               </excludes>
            </configuration>
         </plugin>
      </plugins>
   </build>

</project>
访问接口文档swagger
http://127.0.0.1:8001/swagger-ui.html#

点击Excute 可以看到我们接口查到的数据

前端
v-charts
vue官方推荐的第三方图表插件。只需要向组件传参数,及数据。
安装命令:npm i v-charts echarts -S
axios
也就是ajax技术
安装命令:npm install axios --save
在main.js 全局引用
我试了这种方式,但是没有办法添加到Vue实例对象上。一直提示 axios.get undefined
Vue.prototype.$axios = Axios
试了第二种方法
new Vue({
    render: h => h(App),
    axios
}).$mount('#app')
main.js
引入v-charts、axios,并将其挂载。vue-resource 也可以不使用。
import Vue from 'vue'
import App from './App.vue'
import VCharts from 'v-charts'
//导入Axios
import axios from 'axios'
import  VueResource  from 'vue-resource'
Vue.config.productionTip = false
Vue.use(VCharts)
Vue.use(VueResource)
new Vue({
    render: h => h(App),
    axios
}).$mount('#app')
App.vue
引入组件 Chart(我们自己定义的),并使用
<template>
  <div id="app">
      <chart/>
  </div>
</template>

<script>
import Chart from './Chart.vue'

export default {
  name: 'App',
  components: {
    Chart
  }
}
</script>

<style>
</style>
Chart.vue
请求接口,并将数据渲染。引入的 request 是我们封装的请求接口的方法。
<template>
 <div>
    <div style="display: flex; border: #3b4151 solid 1px; width: 100%">
    <!-- <ve-line :data="chartData" height="400px;flex:1"></ve-line> -->
    <div style="flex: 1; height: 400px;border: #3b4151 solid 1px; width: 100%">
      <ve-line :data="chartData_1" height="400px"></ve-line>
    </div>
      <div style="flex: 1; height: 400px;border: #3b4151 solid 1px; width: 100%">
      <ve-histogram :data="chartData_1" height="400px"></ve-histogram>
    </div>
  </div>
  <div style="display: flex; border: #3b4151 solid 1px; width: 100%">
    <!-- <ve-line :data="chartData" height="400px;flex:1"></ve-line> -->
    <div style="flex: 1; height: 400px;border: #3b4151 solid 1px; width: 100%">
      <ve-histogram :data="chartData_3" height="400px" :settings="chartSettings"></ve-histogram>
    </div>
      <div style="flex: 1; height: 400px;border: #3b4151 solid 1px; width: 100%">
      <ve-histogram :data="chartData_2" height="400px"></ve-histogram>
    </div>
  </div>
 </div>

</template>

<script>
import { request } from "./network/request";
export default {
  name: "Chart",
  data: function () {
     this.chartSettings = {
      area: true
    }
    return {
      chartData_1: {
        columns: ["名称","价格"],
        rows: [

        ],
      },
      chartData_2: {
        columns: ["名称","销量(万)","价格"],
        rows: [

        ],
      },
      chartData_3: {
        columns: ["名称","销量","评论"],
        rows: [

        ],
      },
    };
  },
  methods: {},
  created() {
    request({
      //请求的数据
      url: "/moon/price/findAll",
      //    成功的响应
    })
      .then((res) => {
        console.log(res);
        let data = res.data.data.items
        console.log(data,"data")
        let tempList = []
        let tempList1 = []
        let tempList2 = []
        for(let value of data){
          let tempObj= {}
          let tempObj1 = {}
          let tempObj2 = {}
          let viewSales = value.viewSales.replace("万+人收货","")
          tempObj["名称"] = value.title
          tempObj1["名称"] = value.title
          tempObj2["名称"] = value.title
          tempObj1["销量(万)"] = viewSales
          tempObj2["销量"] = Number(viewSales)*10000
          tempObj["价格"] = value.viewPrice
          tempObj1["价格"] = value.viewPrice
          tempObj2["评论"] = value.commentCount
          tempList.push(tempObj)
          tempList1.push(tempObj1)
          tempList2.push(tempObj2)
        }
        this.chartData_1.rows = tempList
        this.chartData_2.rows = tempList1
         this.chartData_3.rows = tempList2
        console.log(this.chartData_1.rows,"this.chartData_1.rows")
        //    失败的响应
      })
      .catch((err) => {
        console.log(err);
      });
  },
};
</script>

<style>
</style>
request.js
baseURL指定了请求后端的地址 (此处是本地的8001端口)
//导入axios
import axios from 'axios'
// {{ (第四种方式 , 最简介的方式) }}
export function request(config) {
//    1 : 创建一个axios实例
    const instance = axios.create({
        //请求的url
        // baseURL: 'http://152.136.185.210:8000',
        baseURL: 'http://127.0.0.1:8001',
        timeout: 5000
    })
    axios.interceptors.response.use()

//    3 : 发送正在的网络请求
    return instance(config)

}
最终的展示效果


 618
618


 被折叠的 条评论
为什么被折叠?
被折叠的 条评论
为什么被折叠?
 到【灌水乐园】发言


