


一、Vue组件化开发
1. 组件的构成
- Vue中规定组件的后缀名是.vue。
- 每个.vue组件都由三部分组成,分别是
- template,组件的模板结构,可以包含HTML标签及其他的组件。
- script,组件的JavaScript代码
- style,组件的样式。
2. 编写组件并使用
编写一个组件Hello.vue
<template>
    <h1>hello</h1>
</template>

<script>

</script>

<style >

</style>
在App.vue中导入组件
<script>
import Hello from './components/Hello.vue'

export default {
  name: 'App',
  components: {
    Hello
  }
}
</script>
在App.vue中使用组件
<template>
  <Hello></Hello>
</template>
二、第三方组件element-ui
1.组件间的传值
- 组件可以由内部的Data提供数据,也可以由父组件通过prop的方式传值。
- 兄弟组件之间可以通过Vuex等统一数据源提供数据共享。
改造之前的Hello.vue
<template>
    <h1>hello {{msg}}</h1>
</template>

<script>
export default {
  name: 'Hello',//组件取个名字
  props: {
    msg: String //定义组件传入的值
  }
}
</script>

<style >

</style>
在App.vue中使用组件
<Hello msg="666"></Hello>
2. element-ui介绍
element-ui 是饿了么前端出品的基于 Vue.js的 后台组件库,方便程序员进行页面快速布局和构建。
Element-UI官方站点:https://element.eleme.cn/#/zh-CN
可以进去选择想要的组件,直接复制代码,改巴改巴,就可以运用到自己的项目场景。
3. 安装
当前项目下打开终端, 安装依赖包 ,执行下面的命令(这个是支持vue2的,vue3安装跟这个语法不一样)
npm i element-ui -S

打开 main.js , 导入Element-UI 相关资源
//导入组件库
import ElementUI from 'element-ui'

//导入组件相关样式
import 'element-ui/lib/theme-chalk/index.css'

//配置Vue插件 将El安装到Vue上
Vue.use(ElementUI);
完整的main.js
import Vue from 'vue'
import App from './App.vue'
//导入组件库
import ElementUI from 'element-ui'

//导入组件相关样式
import 'element-ui/lib/theme-chalk/index.css'

//配置Vue插件 将El安装到Vue上
Vue.use(ElementUI);

Vue.config.productionTip = false

new Vue({
  render: h => h(App),
}).$mount('#app')
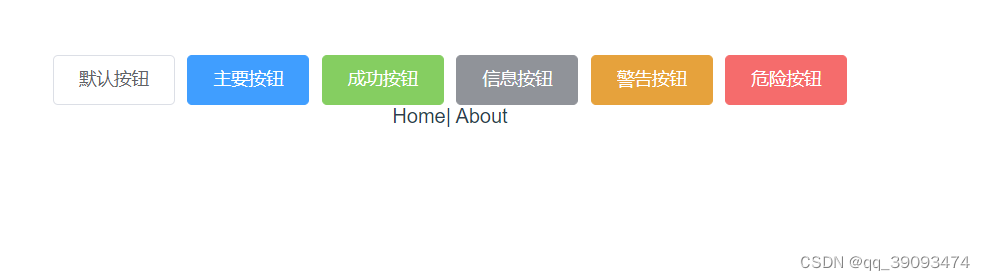
复制Element 按钮样式 到app.vue文件的 template下
在官网中找一个喜欢的样式(Element-UI官方站点:https://element.eleme.cn/#/zh-CN)
<template>
  <div id="app">
     <!-- 测试elementUI -->
        <el-row>
            <el-button>默认按钮</el-button>
            <el-button type="primary">主要按钮</el-button>
            <el-button type="success">成功按钮</el-button>
            <el-button type="info">信息按钮</el-button>
            <el-button type="warning">警告按钮</el-button>
            <el-button type="danger">危险按钮</el-button>
        </el-row>
        <div id="nav">
            <router-link to="/">Home</router-link>|
            <router-link to="/about">About</router-link>
        </div>
  </div>
</template>
启动项目 npm run serve, 查看页面
三、 第三方图标库
1. 介绍
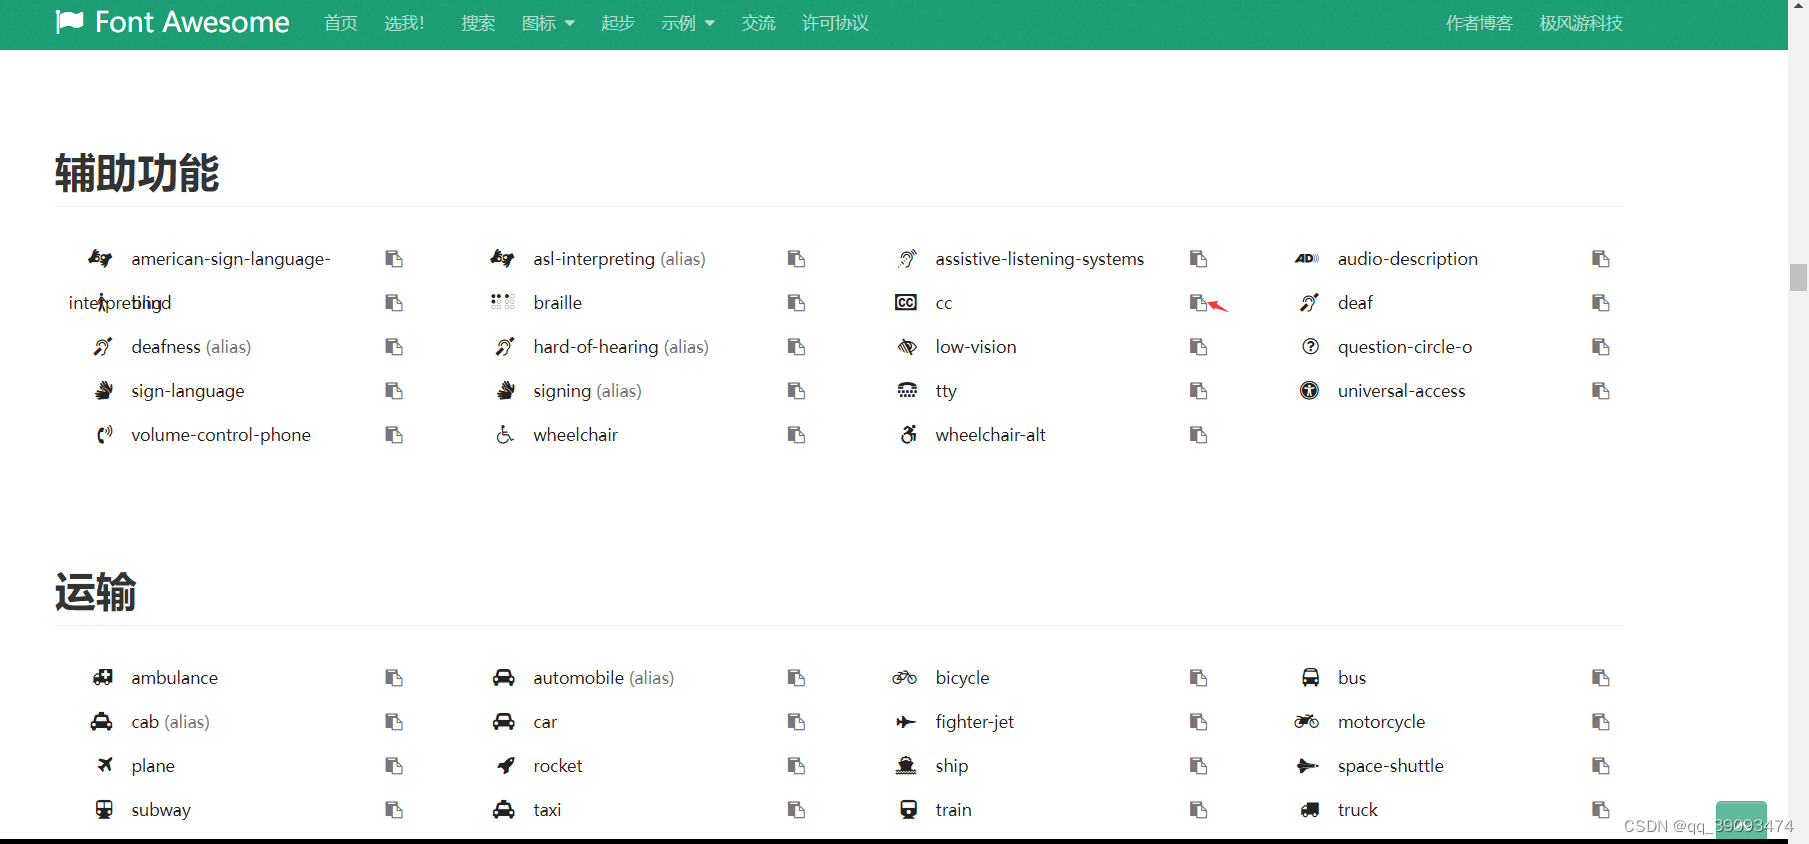
由于Element UI提供的字体图符较少,一般会采用其他图标库,如著名的Font Awesome图标库
Font Awesome提供了675个可缩放的矢量图标,可以使用CSS所提供的所有特性对它们进行修改,包括大小,颜色,阴影或者其他任何支持的效果。
官网:https://fontawesome.dashgame.com/
图标库:http://www.fontawesome.com.cn/faicons/
另一个常用的图标库是阿里矢量图标库https://www.iconfont.cn/
2. 安装
npm install font-awesome
在main.js中添加样式
import 'font-awesome/css/font-awesome.min.css'
或者通过引用方式
将以下代码粘贴到网页HTML代码的 部分
<link href="//netdna.bootstrapcdn.com/font-awesome/4.5.0/css/font-awesome.min.css" rel="stylesheet">
3.使用方法
- 打开图标库的页面:https://fontawesome.dashgame.com/
- 点击示例->基本图标
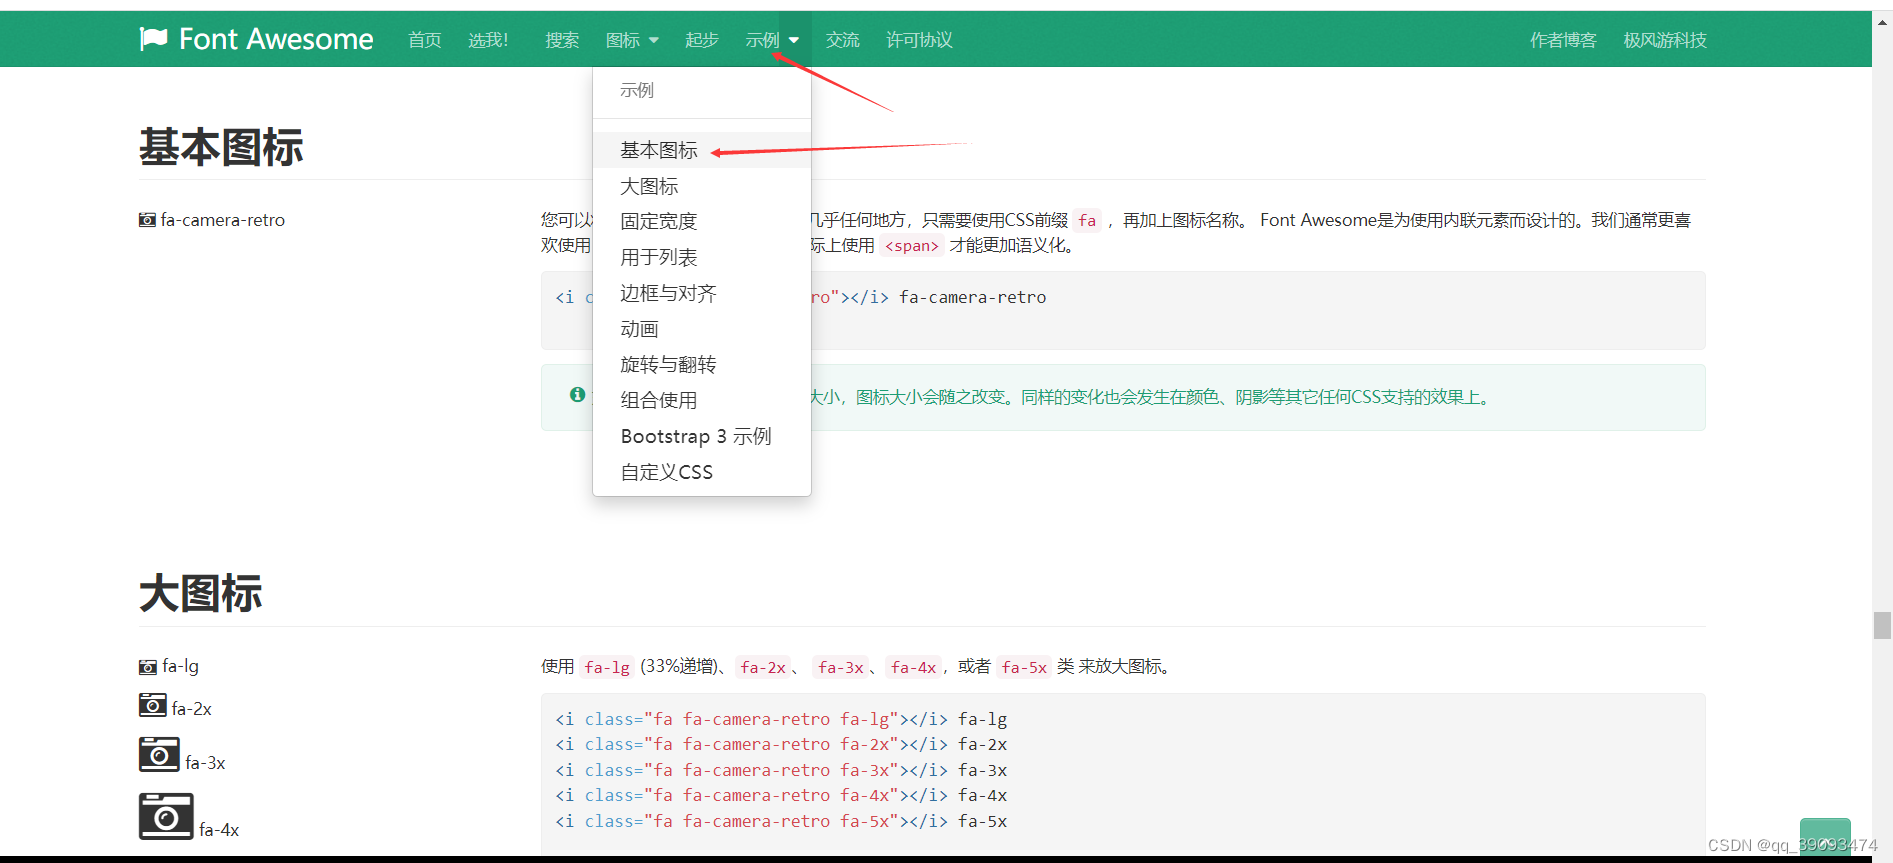
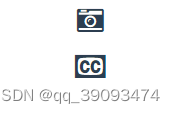
随便选择一个喜欢的组件,这里选择照相机
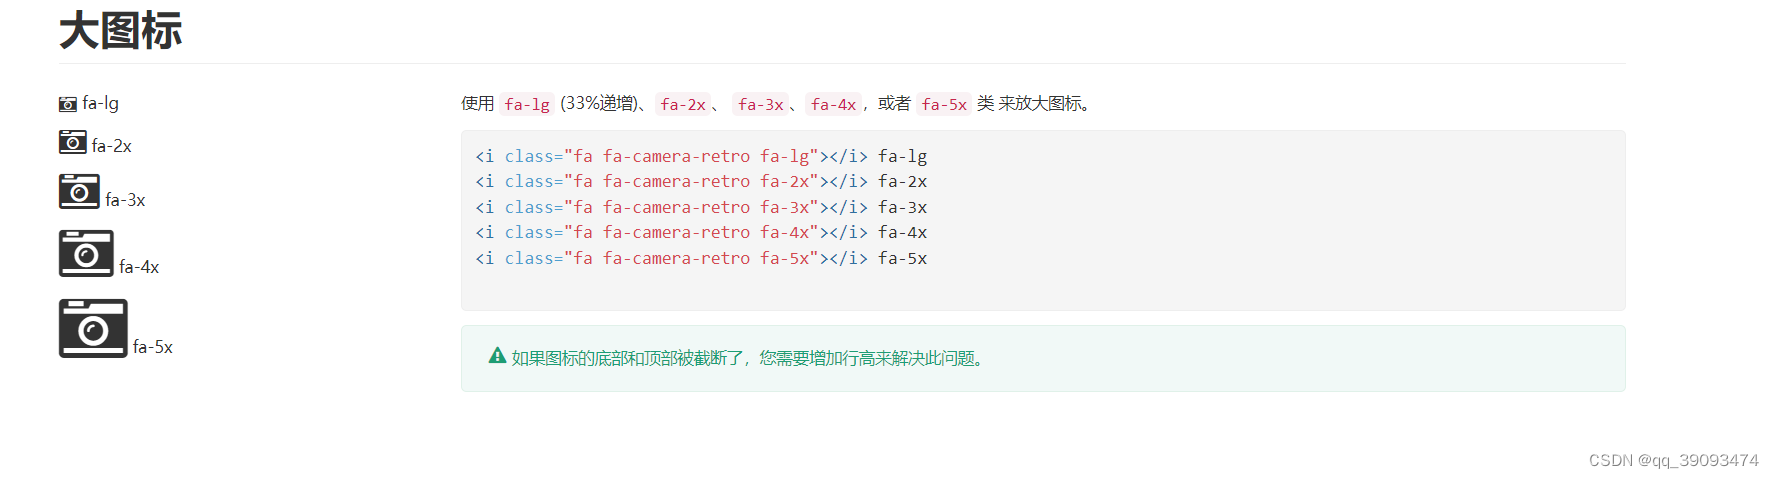
<i class="fa fa-camera-retro fa-lg"></i> fa-lg
如果想换其他的图标,到图标中找就行
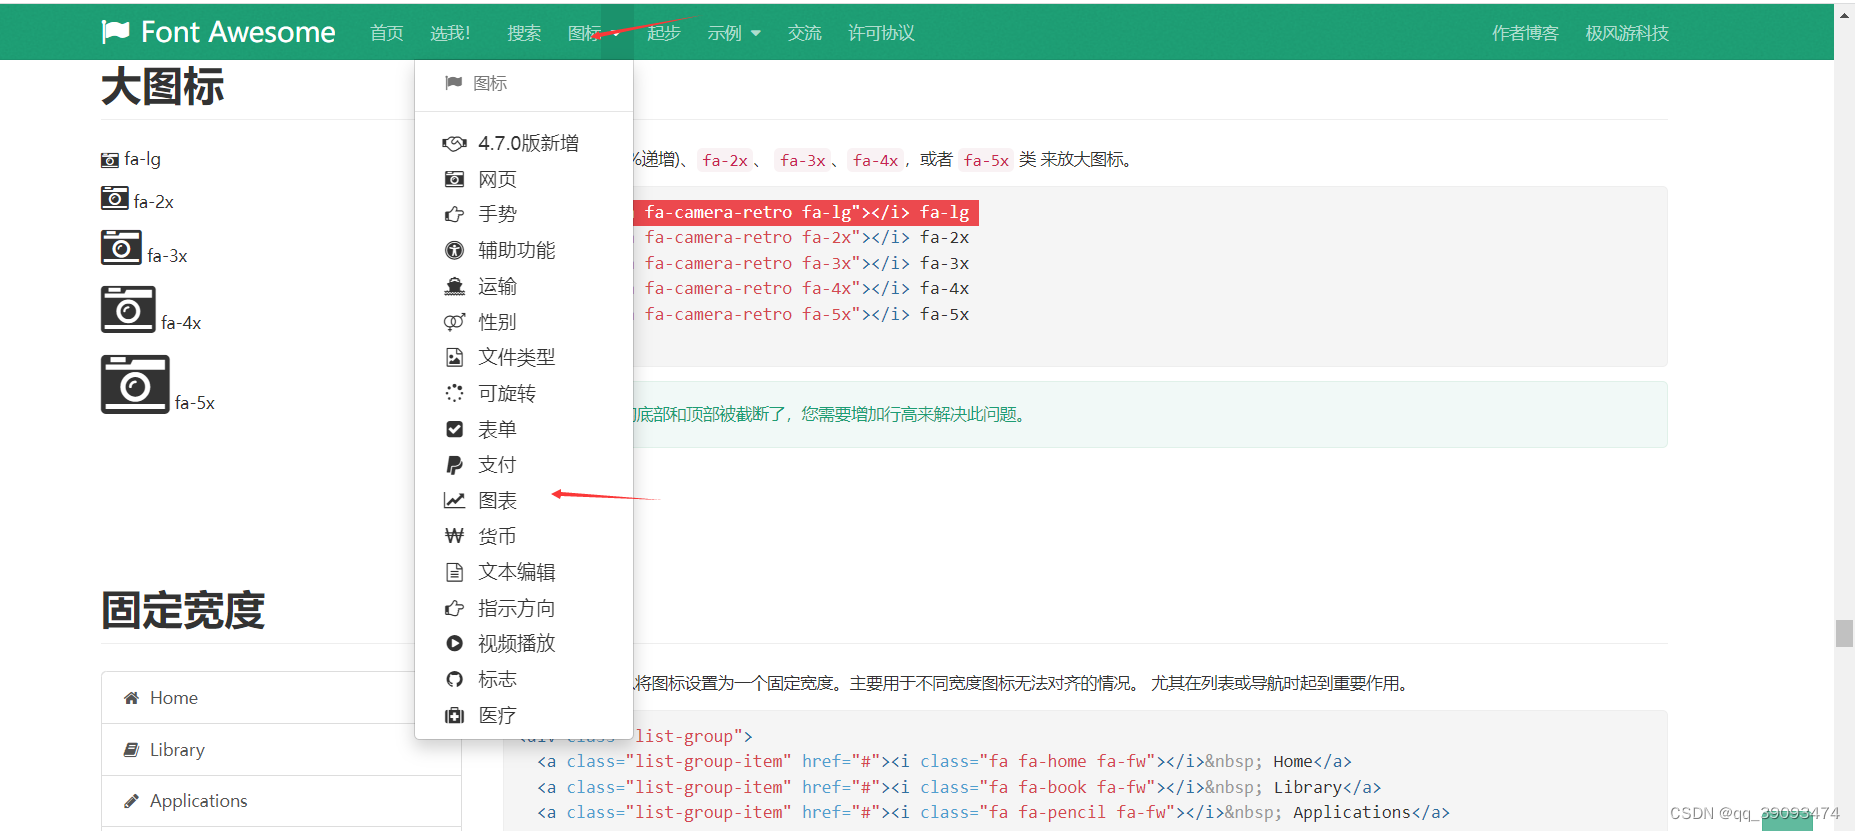
点击复制图标
把前面fa-camera-retro替换成fa-cc
   <i class="fa fa-camera-retro fa-lg"></i>
   <br><br>
   <i class="fa fa-cc fa-lg"></i>
四、第三方组件Axios
1. Axios介绍
- 在实际项目开发中,前端页面所需要的数据往往需要从服务器端获取,这必然涉及与服务器的通信。
- Axios是一个基于promise网络请求库,作用于node.js和浏览器中。
- Axios在浏览器端使用XMLHttpRequest发送网络请求,并能自动完成JSON数据的转换。
2. 安装
使用 npm安装
npm install axios
3.发送网络请求
发起一个 GET 请求
// 向给定ID的用户发起请求
axios.get('/user?ID=12345')
  .then(function (response) {
    // 处理成功情况
    console.log(response);
  })
  .catch(function (error) {
    // 处理错误情况
    console.log(error);
  })
  .then(function () {
    // 总是会执行
  });
// 上述请求也可以按以下方式完成(可选)
// 上述请求也可以按以下方式完成(可选)
axios.get('/user', {
    params: {
      ID: 12345
    }
  })
  .then(function (response) {
    console.log(response);
  })
  .catch(function (error) {
    console.log(error);
  })
  .then(function () {
    // 总是会执行
  });
发起一个 POST 请求
axios.post('/user', {
    firstName: 'Fred',
    lastName: 'Flintstone'
  })
  .then(function (response) {
    console.log(response);
  })
  .catch(function (error) {
    console.log(error);
  });
异步回调
支持async/await用法
// 支持async/await用法
async function getUser() {
  try {
    const response = await axios.get('/user?ID=12345');
    console.log(response);
  } catch (error) {
    console.error(error);
  }
注意: 由于
async/await是ECMAScript 2017中的一部分,而且在IE和一些旧的浏览器中不支持,所以使用时务必要小心。
其他请求方式
参考:https://www.axios-http.cn/docs/req_config
// 发起一个post请求
axios({
  method: 'post',
  url: '/user/12345',
  data: {
    firstName: 'Fred',
    lastName: 'Flintstone'
  }
});
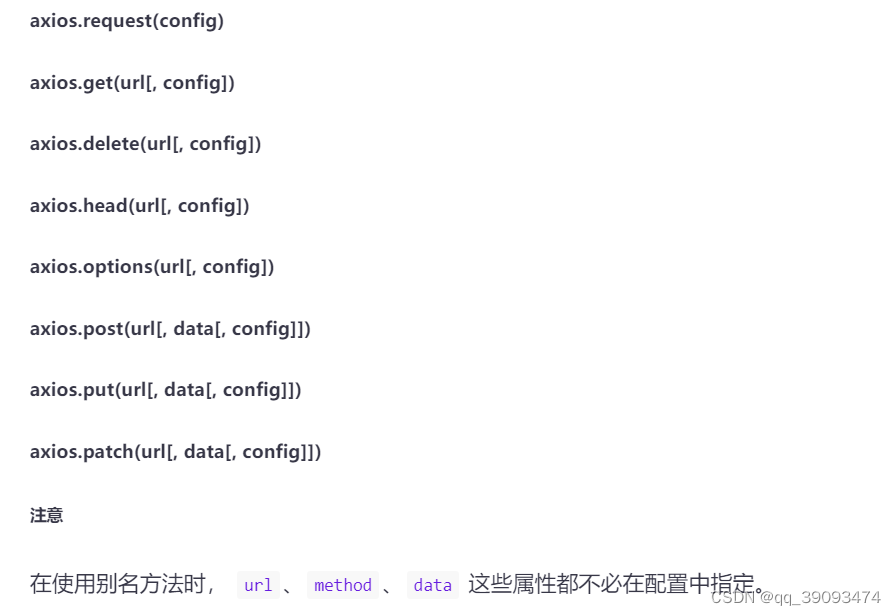
请求方式别名
为了方便起见,已经为所有支持的请求方法提供了别名。
4.vue中使用Axios发送请求
在组件中使用
<script>
//导入组件
import axios from 'axios';
export default {
//组件被创建的时候执行
created:function(){
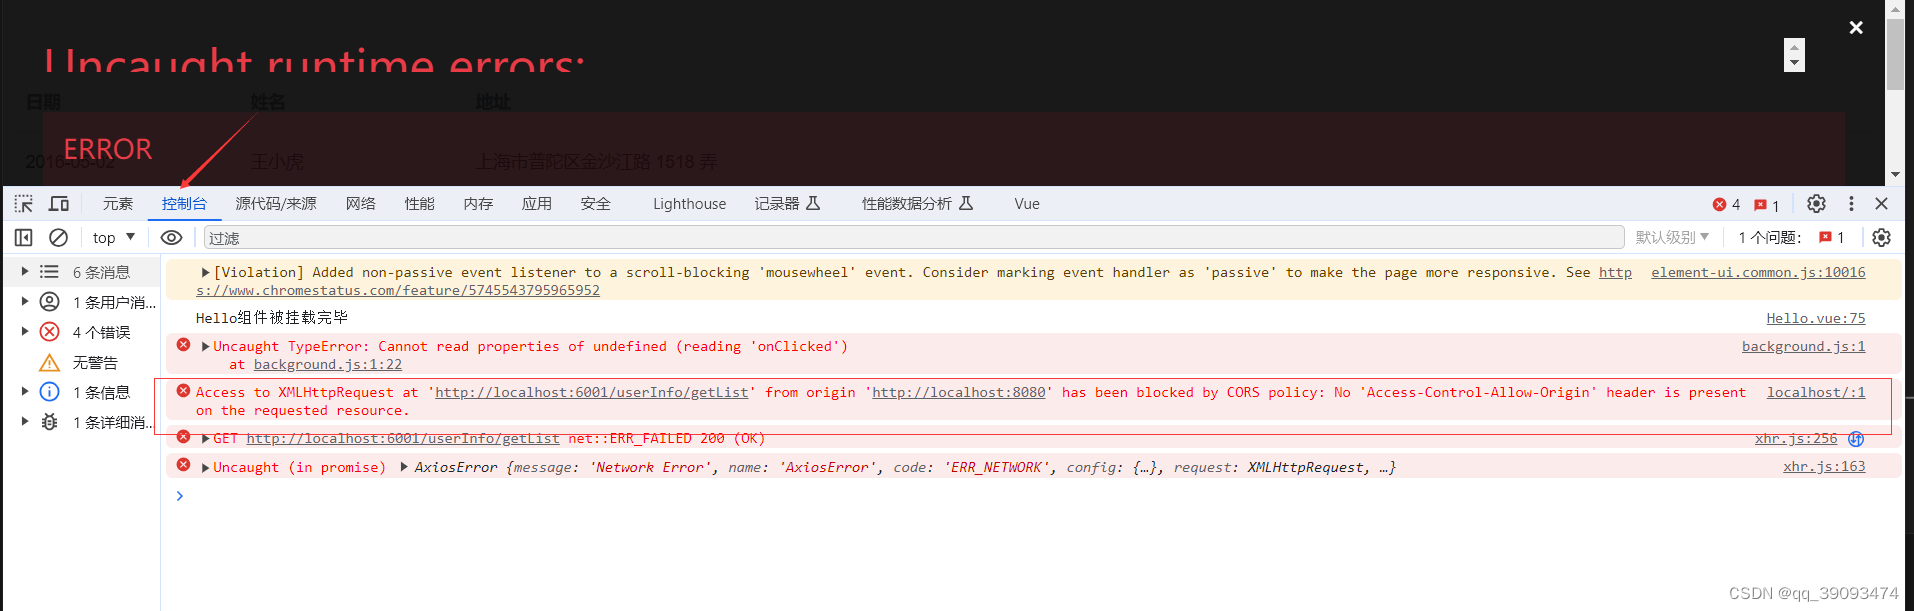
axios.get('http://localhost:6001/userInfo/getList').then(function(response){
console.log(response)
})
},
//组件被挂载完毕时执行
mounted:function(){
console.log("Hello组件被挂载完毕")
},
}
</script>
此时查看网页报错,发送跨越问题
实践应用:前后端分离实践中常遇到的跨域问题
SpringBoot 解决跨域问题的 5 种方案!
完整的代码
<script>
import axios from 'axios';
  export default {
    data() {
      return {
        tableData: []
      }
    },
    //组件被创建的时候执行
    created:function(){
      /**
       * axios.get('http://localhost:6001/userInfo/getList').then(function(response){
        this.tableData=response.data //此时作用域使用不到tableData
      })
       */
      axios.get('http://localhost:6001/userInfo/getList').then((response)=>{
        this.tableData=response.data
      })

    },
    //组件被挂载完毕时执行
    mounted:function(){
      console.log("Hello组件被挂载完毕")
    },
  }
</script>
与Vue结合
- 在实际项目开发中,几乎每个组件中都会用到axios发起数据请求,此时遇到如下两个问题:
- 每个组件中都需要导入axios
- 每次发请求都需要填写完整的请求路径
- 可以通过全局配置的方式解决上述问题“
在main.js文件中导入axios 相关资源
//引入axios
import axios from 'axios'

//配置请求根路径
axios.defaults.baseURL='http://localhost:6001'

//将axios作为全局的自定义属性,每个组件可以在内部之间访问vue2
Vue.prototype.$http = axios;
//将axios作为全局的自定义属性,每个组件可以在内部之间访问vue3
//app.config.globalProperties.$http = axios;
在任何组件中使用
   this.$http.get('userInfo/getList').then((response)=>{
        this.tableData=response.data
      })
五、前端路由VueRouter
1. VueRouter的安装与使用
- Vue路由vue-router是官方的路由插件,能够轻松的管理SPA项目中组件的切换。
- Vue的单页面应用是基于路由和组件的,路由用于设定访问路径,并将路径和组件映射起来。
- vue-router目前有3.x的版本和4.x的版本,
vue-router 3.x只能结合vue2进行使用,vue-router 4.x只能结合vue3进行使用。 - 官方文档:https://router.vuejs.org/zh
2. 安装
使用 npm安装
npm install vue-router@3  //安装vue2
 //npm install vue-router@4  //安装vue3
3. 创建路由组件
在项目中定义Discover.vue,Friends.vue,My.vue三个组件,将来要使用vue-router来控制他们的展示和切换
Discover.vue
<template>
    <div>
        <h1>发现音乐</h1>
    </div>
</template>
Friends.vue
<template>
     <div>
        <h1>关注</h1>
    </div>
</template>
My.vue
<template>
     <div>
        <h1>我的音乐</h1>
    </div>
</template>
4. 声明路由链接和占位标签
可以使用<router-link>标签来声明路由标签,并使用<router-view>标签来声明路由占位符,示例代码如下
App.vue
<template>
  <div id="app">
    <!-- 使用 router-link 组件来导航. -->
    <!-- 通过传入 `to` 属性指定链接. -->
    <!-- <router-link> 默认会被渲染成一个 `<a>` 标签 -->
    <router-link to="/discover">发现音乐</router-link>
    <router-link to="/friends">关注</router-link>
    <router-link to="/my">我的音乐</router-link>
  <!-- 路由出口 -->
  <!-- 路由匹配到的组件将渲染在这里 -->
  <router-view></router-view>
  </div>
</template>
5. 创建路由模块
在项目中创建index.js路由模块,加入以下代码
import VueRouter from 'vue-router'
import Vue from 'vue'

import Discover from '../components/Discover.vue'
import My from '../components/My.vue'
import Friends from '../components/Friends.vue'


//将VueRouter设置为vue的组件
Vue.use(VueRouter)

const router = new VueRouter({
    //指定hash属性与组件的对应关系
    routes: [
      { path: '/discover', component: Discover },
      { path: '/friends', component: Friends },
      { path: '/my', component: My }

    ]
  })

  export default router
6. 挂载路由模块
在main.js中导入并挂载router
import Vue from 'vue'
import App from './App.vue'
import router from './router/index.js'

Vue.config.productionTip = false

new Vue({
  render: h => h(App),
  router:router
}).$mount('#app')
7. 路由重定向
路由重定向指的是:用户在访问地址A的时候,强制用户跳转到地址C,从而展示特定的组件页面。
通过路由规则的redirect属性,指定一个新的路由地址,可以很方便的设置路由的重定向。
const router = new VueRouter({
    //指定hash属性与组件的对应关系
    routes: [
      //当用户访问/时,跳转到/discover
      { path: '/', redirect: '/discover'},
      { path: '/discover', component: Discover },
      { path: '/friends', component: Friends },
      { path: '/my', component: My }

    ]
  })
8. 嵌套路由
在Discover.vue组件中,声明toplist和playlist的子路由链接以及子路由占位符,示例代码如下:
<template>
    <div>
        <h1>发现音乐</h1>
        <!-- 子路由链接 -->
        <router-link to="/discover/toplist">推荐</router-link>
        <router-link to="/discover/playlist">歌单</router-link>
        <!-- 子路由占位符 -->
        <router-view></router-view>
    </div>
</template>
在src/router/index.js路由模块中,导入需要的组件,并使用children属性声明子路由规则:
const router = new VueRouter({
    //指定hash属性与组件的对应关系
    routes: [
      //当用户访问/时,跳转到/discover
      { path: '/', redirect: '/discover'},
      { path: '/discover',
        component: Discover,
       //通过children属性,嵌套声明子路由
       children:[
            { path: '/discover/toplist', component: TopList },
            { path: '/discover/playlist', component: PlayList },
       ]
      },
      { path: '/friends', component: Friends },
      { path: '/my', component: My }

    ]
  })
9. 动态路由
思考:有如下3个路由链接:
 <router-link to="/product/1">商品1</router-link>
 <router-link to="/product/2">商品2</router-link>
 <router-link to="/product/3">商品3</router-link>
const router = new VueRouter({
    //指定hash属性与组件的对应关系
    routes: [
      { path: '/product/1', component: Product},
      { path: '/product/1', component: Product},
      { path: '/product/1', component: Product}
    ]
  })
上述方式复用性非常差
动态路由指的是:把Hash地址中可变的部分定义为参数项,从而提高路由规则的复用性,在 vue-router 中使用英文的冒号:来定义路由的参数项,示例代码如下
{ path: '/product/:id', component: Product}
通过动态路由匹配的方式渲染出来的组件中,可以使用$route.params 对象访问到动态匹配的参数值,比如在商品详情组件的内部,根据id值,请求不同的商品数据。
<template>
    <div>
        <!-- 获取动态的id值 -->
        <p>{{ $route.params.id  }}</p>
    </div>
</template>
为了简化路由参数的获取形式, vue-router允许在路由规则中开启props传参,实例代码如下:
{ path: '/product/:id', component: Product,props:true}
<template>
    <div>
        <!-- 获取动态的id值 -->
        <p>{{ id  }}</p>
    </div>
</template>
<script>
export default {
    name : 'Product',
    props: ["id"]
}
</script>
10. 编程式的导航
| 声明式 | 编程式 |
|---|---|
<router-link :to="..."> | router.push(...) |
除了使用 <router-link> 创建 a 标签来定义导航链接,我们还可以借助 router 的实例方法,通过编写代码来实现。
想要导航到不同的 URL,则使用 router.push 方法。这个方法会向 history 栈添加一个新的记录,所以,当用户点击浏览器后退按钮时,则回到之前的 URL。
当你点击 <router-link> 时,这个方法会在内部调用,所以说,点击 <router-link :to="..."> 等同于调用 router.push(...)。
<template>
     <div>
        <h1>关注</h1>
        <button @click="getoProduct(2)">跳转到商品2</button>
    </div>
</template>

<script>
export default {
    methods:{
        getoProduct:function(id){
                //不带参数的跳转
                //router.push("/my/${id}")
                // 带查询参数
                this.$router.push({ path: `/my/${id}` }) // -> /my/2
        }
    }
}
</script>
11. 导航守卫
导航守卫可以控制路由的访问权限,示意图如下:
全局导航守卫会拦截每个路由规则,从而对每个路由进行访问权限的控制。
你可以使用 router.beforeEach 注册一个全局前置守卫:
router.beforeEach((to, from, next) => {
  if (to.path!=== 'main' && !isAuthenticated){
  		next('login')
  }
  else {
  		next()
  }
})
-
to:即将要进入的目标。 -
from:当前导航正要离开的路由。 -
next:在守卫方法中如果声明了next形参,则必须调用next()函数,否则不允许用户访问任何一个路由。- 直接放行:next()。
- 强制其停留在当前页面:next(false)。
- 强制其跳转到登录页面:next(‘login’)。
六、状态管理Vuex
1. Vuex介绍
- 对于组件化开发来说,大型应用的状态往往跨越多个组件,在多层嵌套的父子组件之间传递状态已经十分麻烦,而Vue更是没有为兄弟组件提供直接共享数据的办法。
- 基于这个问题,许多框架提供了解决方案——使用全局的状态管理器,将所有分散的共享数据交由状态管理器保管,Vue也不例外。
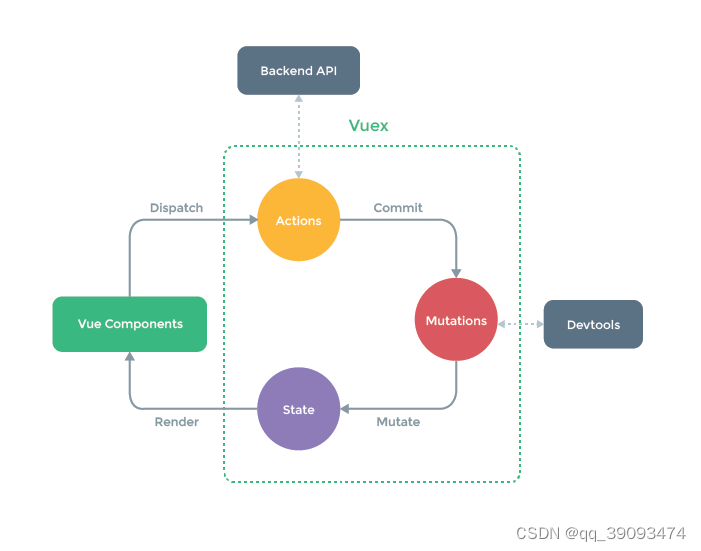
- Vuex是一个专为Vue.js应用程序开发的状态管理库,采用集中式存储管理应用的所有组件的状态。
- 简单来说,Vuex用于管理分散在Vue各个组件中的数据。
官方文档:https://v3.vuex.vuejs.org/zh/
2. 安装
npm install vuex@3
3. 状态管理
- 每一个Vuex应用的核心都是一个
store,与普通的全局对象不同的是,基于Vue数据与视图绑定的特点,当store中的状态发生变化时,与之绑定的视图也会被重新渲染。 store中的状态不允许被直接修改,改变store中的状态的唯一途径就是显式地提交(commit)mutation,这可以让我们方便地跟踪每一个状态的变化。- 在大型复杂应用中,如果无法有效的跟踪到状态的变化,将会对理解和维护代码带来极大的困扰。
- Vuex中有5个重要的概念:State,Getter,Mutation,Action,Module。
State
State用于维护所有应用层的状态,并确保应用只有唯一的数据源。
//创建一个新的store实例
const store = new Vuex.Store({
  state: {
    count: 0
  },
  mutations: {
    increment (state) {
      state.count++
    }
  }
})
在组件中,可以直接使用this.$store.state.count访问数据,也可以先用mapState辅助函数将其映射下来
// 在单独构建的版本中辅助函数为 Vuex.mapState
import { mapState } from 'vuex'

export default {
  // ...
  computed: mapState({
    // 箭头函数可使代码更简练
    count: state => state.count,

    // 传字符串参数 'count' 等同于 `state => state.count`
    countAlias: 'count',

    // 为了能够使用 `this` 获取局部状态,必须使用常规函数
    countPlusLocalState (state) {
      return state.count + this.localCount
    }
  })
}
实际应用
- 创建一个store文件夹,新建一个index.js文件
import Vue from 'vue'
import Vuex from 'vuex'

Vue.use(Vuex)

const store = new Vuex.Store({
  state: {
    count: 0 //属性
  },
  mutations: {
    increment (state) {
      state.count++
    }
  }
})

export default store
- 在main.js中导入store
import Vue from 'vue'
import App from './App.vue'
import store from './store'
Vue.config.productionTip = false

new Vue({
  render: h => h(App),
  store:store
}).$mount('#app')
- 在HelloWorld组件中使用
this.$store.state.count取值。
<template>
  <div class="hello">
    <h1>{{ this.$store.state.count }}</h1>
     <button @click="add">+1</button>
  </div>
</template>
- 修改count的值,使用add方法。
<script>
export default {
  name: 'HelloWorld',
  methods:{
    add(){
      this.$store.commit("increment")
    }
  }
}
</script>
- 通过computed计算属性简化上述操作
<script>
export default {
  name: 'HelloWorld',
  computed: {
    count () {
      return this.$store.state.count
    }
  },
  methods:{
    add(){
      this.$store.commit("increment")
    }
  }
}
</script>
使用mapState 辅助函数简化
当一个组件需要获取多个状态的时候,将这些状态都声明为计算属性会有些重复和冗余。为了解决这个问题,我们可以使用 mapState 辅助函数帮助我们生成计算属性,让你少按几次键:
<template>
  <div class="hello">
    <h1>{{ count }}</h1>
    <h1>{{ countAlias }}</h1>

    <button @click="add">+1</button>
  </div>
</template>

<script>
// 在单独构建的版本中辅助函数为 Vuex.mapState
import { mapState } from 'vuex'
export default {
  name: 'HelloWorld',
  computed:mapState({
    // 箭头函数可使代码更简练
    count: state => state.count,

    // 传字符串参数 'count' 等同于 `state => state.count`
    countAlias: 'count',

    // 为了能够使用 `this` 获取局部状态,必须使用常规函数
      countPlusLocalState (state) {
        return state.count + this.localCount
      }
  }),
  methods:{
    add(){
      this.$store.commit("increment")
    }
  }
}
</script>
当映射的计算属性的名称与 state 的子节点名称相同时,我们也可以给 mapState 传一个字符串数组。
computed: mapState([
  // 映射 this.count 为 store.state.count
  'count'
])
Getter
Getter维护由State派生的一些状态,这些状态随着Sate状态的变化而变化。
const store = new Vuex.Store({
  state: {
    todos: [
      { id: 1, text: '...', done: true },
      { id: 2, text: '...', done: false }
    ]
  },
  getters: {
    doneTodos: state => {
      return state.todos.filter(todo => todo.done)
    }
  }
})
在组件中,可以直接使用this.$store.getters.doneTodos,也可以先用mapGetters辅助函数将其映射下来,代码如下:
import { mapGetters } from 'vuex'

export default {
  // ...
  computed: {
  // 使用对象展开运算符将 getter 混入 computed 对象中
    ...mapGetters([
      'doneTodosCount',
      'anotherGetter',
      // ...
    ])
  }
}
实际应用
- 在之前写的index.js中添加数据
const store = new Vuex.Store({
  state: {
    count: 0,
    todos: [
      { id: 1, text: '吃饭', done: true },
      { id: 2, text: '睡觉', done: false }
    ]
  },
  mutations: {
    increment (state) {
      state.count++
    }
  },
  getters: { //数据过滤
    doneTodos: state => {
      return state.todos.filter(todo => todo.done)
    }
  }
})
- 如果想要显示全部数据
<template>
  <div class="hello">
    <ul>
      <li v-for="todo in todos" :key="todo.id">{{ todo.text }}</li>
    </ul>

  </div>
</template>

<script>
// 在单独构建的版本中辅助函数为 Vuex.mapState
import { mapState } from 'vuex'
export default {
  name: 'HelloWorld',
  computed: mapState([
  // 映射 this.count 为 store.state.count
  'count','todos'
])
}
</script>
- 如果想要使用doneTodos进行过滤数据,先要修改
template标签中内容
 <ul>
      <li v-for="todo in doneTodos" :key="todo.id">{{ todo.text }}</li>
    </ul>
- 在
script标签中进行mapGetters映射
<script>
// 在单独构建的版本中辅助函数为 Vuex.mapState
import { mapState,mapGetters  } from 'vuex'
export default {
  name: 'HelloWorld',
  computed: {
    ...mapState([
  // 映射 this.count 为 store.state.count
  'count','todos'
  ]),
  // 使用对象展开运算符将 getter 混入 computed 对象中
    ...mapGetters([
      'doneTodos',
      'anotherGetter',
      // ...
    ])

  },
  methods:{
    add(){
      this.$store.commit("increment")
    }
  }
}
</script>
Mutation
在组件中,可以直接使用store.commit来提交mutation。
methods: {
  increment() {
    this.$store.commit('increment')
    console.log(this.$store.state.count)
  }
}
也可以先用mapMutation辅助函数将其映射下来
methods: {
    ...mapMutations([
      'increment', // 将 `this.increment()` 映射为 `this.$store.commit('increment')`

      // `mapMutations` 也支持载荷:
      'incrementBy' // 将 `this.incrementBy(amount)` 映射为 `this.$store.commit('incrementBy', amount)`
    ]),
    ...mapMutations({
      add: 'increment' // 将 `this.add()` 映射为 `this.$store.commit('increment')`
    })
  }
提交载荷(Payload)
你可以向 store.commit 传入额外的参数,即 mutation 的 载荷(payload):
mutations: {
  increment (state, n) {
    state.count += n
  }
}
this.$store.commit("increment",6)
Action
- Action类似Mutation,不同在于:
- Action不能直接修改状态,只能通过提交mutation来修改,Action可以包含异步操作。
const store = new Vuex.Store({
  state: {
    count: 0
  },
  mutations: {
    increment (state) {
      state.count++
    }
  },
  actions: {
    increment (context) {
      context.commit('increment')
    }
  }
})
在组件中,可以直接使用this.$store.dispatch('xxx')分发action,或者使用mapActions辅助函数先将其映射下来:
// ...
  methods: {
    ...mapActions([
      'increment', // 将 `this.increment()` 映射为 `this.$store.dispatch('increment')`

      // `mapActions` 也支持载荷:
      'incrementBy' // 将 `this.incrementBy(amount)` 映射为 `this.$store.dispatch('incrementBy', amount)`
    ]),
    ...mapActions({
      add: 'increment' // 将 `this.add()` 映射为 `this.$store.dispatch('increment')`
    })
  }
Module
由于使用单一状态树,应用的所有状态会集中到一个比较大的对象。当应用变得非常复杂时,store 对象就有可能变得相当臃肿。
为了解决以上问题,Vuex 允许我们将 store 分割成模块(module)。每个模块拥有自己的 state、mutation、action、getter、甚至是嵌套子模块——从上至下进行同样方式的分割:
const moduleA = {
  state: () => ({ ... }),
  mutations: { ... },
  actions: { ... },
  getters: { ... }
}

const moduleB = {
  state: () => ({ ... }),
  mutations: { ... },
  actions: { ... }
}

const store = new Vuex.Store({
  modules: {
    a: moduleA,
    b: moduleB
  }
})

store.state.a // -> moduleA 的状态
store.state.b // -> moduleB 的状态
七、前端数据模拟MockJS
1. mockjs介绍
- Mock.js是一款前端开发中拦截Ajax请求再生成随机数据响应的工具,可以用来模拟服务器的响应。
- 优点是非常简单方便,无侵入性,基本覆盖常用的接口数据类型。
- 支持生成随机的文本,数字,布尔值,日期,邮箱,链接,图片,颜色等。
核心方法:
Mock.mock(rurl?,rtype?,template|function(options))
- rurl:表示需要拦截的URL,可以是URL字符串或URL正则
- rtype:表示需要拦截的Ajax请求类型,例如GET,POST,PUT,DELETE等。
- template:表示数据模板,可以是对象或者字符串
- function:表示用于生成响应数据的函数
- 设置延时请求到数据
//延时400ms请求到数据
Mock.setup({
timeout:400
})

//延时200-600毫秒请求到数据
Mock.setup({
timeout:'200-600'
})
2. 安装
npm install mockjs
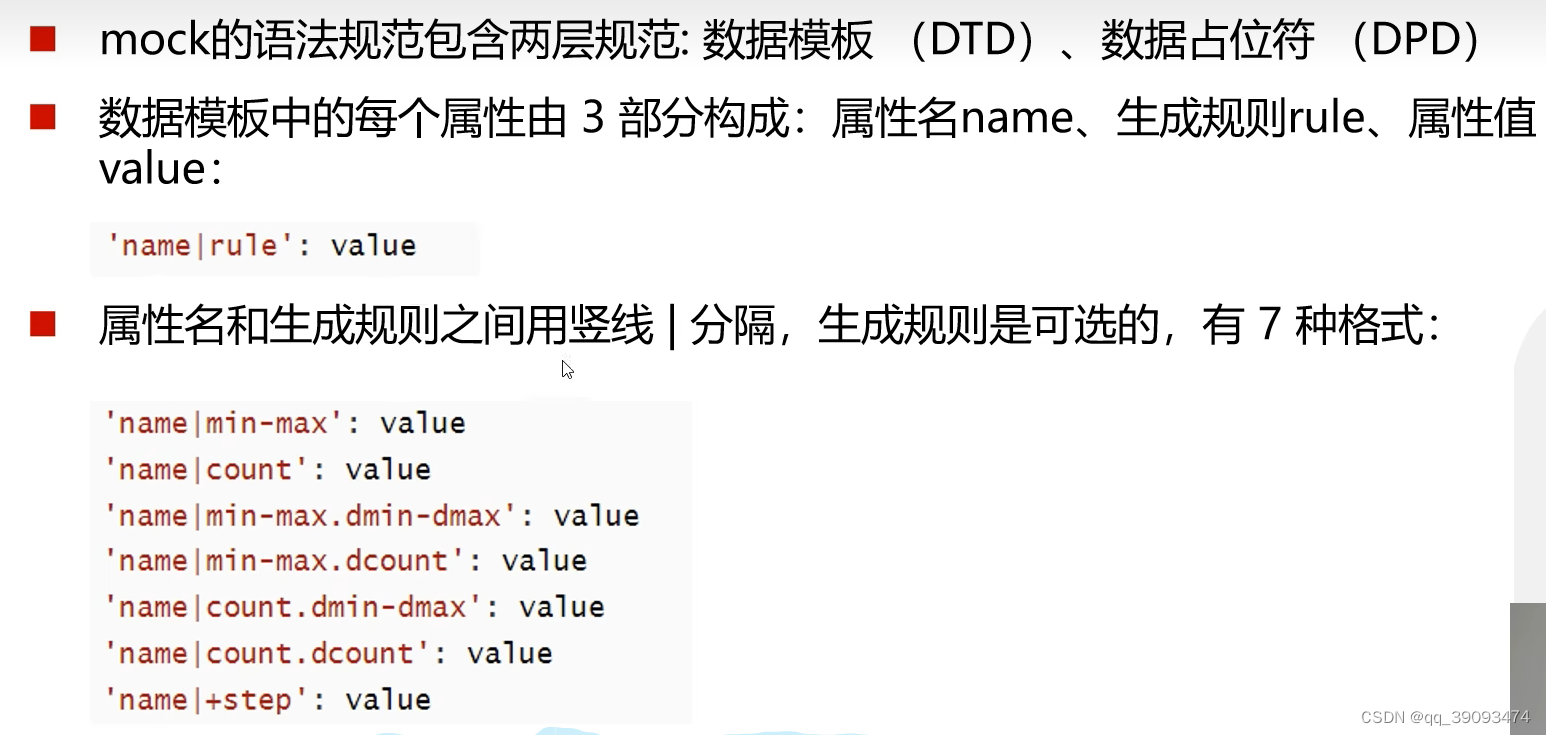
3. 数据生成规则
4.实际应用
首先需要下载安装mockjs模块
npm install mockjs
然后可以在scr下创建一个文件夹,用于存放模拟的数据的文件 例如 /src/mock/index.js,在这个文件中
//引入mockjs
import Mock from 'mockjs'
//设置延迟时间
//延时4000毫秒请求到数据
//Mock.setup({
//    timeout:'4000'
//})

//使用mockjs模拟数据
Mock.mock('/goods/goodAll', { //三个参数。第一个:路径,第二个:请求方式post/get,第三个:回调,返回值
    "data|6" :  [ //生成6条数据 数组
    {
        "shopId|+1": 1,//生成商品id,自增1
        "shopMsg": "@ctitle(10)", //生成商品信息,长度为10个汉字
        "shopName": "@cname",//生成商品名 , 都是中国人的名字
        "shopTel": /^1(5|3|7|8)[0-9]{9}$/,//生成随机电话号
        "shopAddress": "@county(true)", //随机生成地址
        "shopStar|1-5": "★", //随机生成1-5个星星
        "salesVolume|30-1000": 30, //随机生成商品价格 在30-1000之间
        "mtine": "@datetime", //随机生成日期时间
        "shopLogo": "@Image('100x40','#c33', '#ffffff','小北鼻')", //生成随机图片,大小/背景色/字体颜色/文字信息
    }
]
});
模拟完数据后,需要在入口主文件 main.js中 引入这个模拟数据的文件
import "./mock/index.js"
在页面中,我们直接可以进行axios请求,(这里懒省事了,正常情况下,要把每个接口都封装到api里面,后期便于修改维护等一系列操作)
<script>
import axios from 'axios';
export default {
  name: 'App',
  methods:{
       a(){
          console.log(11111)
          axios.post("/goods/goodAll").then((res)=>{
            console.log(res)
        })
      }
  },

  mounted () {
        this.a();
    }
}
</script>


 460
460


 被折叠的 条评论
为什么被折叠?
被折叠的 条评论
为什么被折叠?
 到【灌水乐园】发言


