


SpringBoot入门
了解SpringBoot
通过Spring Boot,可以轻松地创建独立的,基于生产级别的基于Spring的应用程序。
特征
- 创建独立的Spring应用程序
- 直接嵌入Tomcat,Jetty或Undertow(无需部署WAR文件)
- 提供“入门”依赖项,以简化构建配置
- 尽可能自动配置Spring和3rd Party库提供可用于生产的功能,例如指标,运行状况检查和外部化配置
- 完全没有代码生成,也不需要XML配置
创建 HelloSpringBoot,提供接口
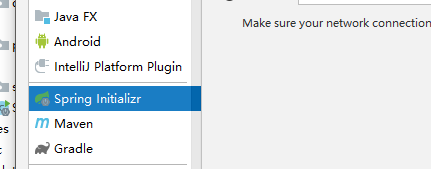
创建程序


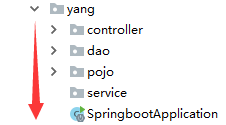
项目结构分析
通过上面步骤完成了基础项目的创建。就会自动生成以下文件。
- 程序的主程序类
- 一个 application.properties
- 配置文件一个测试类

编写接口
1.在主程序的同级目录下,新建一个controller包【一定要在同级目录下,否则识别不到】
- 在包中新建一个Controller类
package com.yang.controller;

import com.yang.dao.UserMapper;
import org.apache.ibatis.annotations.Mapper;
import org.apache.ibatis.annotations.Select;
import org.springframework.web.bind.annotation.RequestMapping;
import org.springframework.web.bind.annotation.RestController;

@RestController
public class HelloController {
    @RequestMapping("/1")
    public String hello(){
        return  "hello";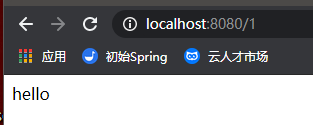
}- 编写完毕后,从主程序启动项目,浏览器发起请求,看页面返回;
- 控制台输出了SpringBoot 的 banner
- 控制条输出了 Tomcat 访问的端口号!
- 访问 hello 请求,字符串成功返回!
SpringBoot原理
启动
新建一个SpringBoot项目中都有一个主启动类
package com.yang;

import org.springframework.boot.SpringApplication;
import org.springframework.boot.autoconfigure.SpringBootApplication;

@SpringBootApplication  //代表SpringBoot应用
public class SpringbootApplication {

    public static void main(String[] args) {
    //Spring启动类
        SpringApplication.run(SpringbootApplication.class, args);
    }

}
依赖配置
主要是依赖一个父项目
<parent>
   <groupId>org.springframework.boot</groupId>
   <artifactId>spring-boot-starter-parent</artifactId>
   <version>2.1.9.RELEASE</version>
   <relativePath/> <!-- lookup parent from repository -->
</parent>
进入父项目
<parent>
  <groupId>org.springframework.boot</groupId>
  <artifactId>spring-boot-dependencies</artifactId>
  <version>2.1.9.RELEASE</version>
  <relativePath>../../spring-boot-dependencies</relativePath>
</parent>
启动器
<dependency>
    <groupId>org.springframework.boot</groupId>
    <artifactId>spring-boot-starter</artifactId>
</dependency>
<dependency>
    <groupId>org.springframework.boot</groupId>
    <artifactId>spring-boot-starter-web</artifactId>
</dependency>- springboot-boot-starter:就是spring-boot的场景启动器
- spring-boot-starter-web 帮我们导入了web模块正常运行所依赖的组件;
SpringBoot配置
<excludes>
  <exclude>**/application*.yml</exclude>
  <exclude>**/application*.yaml</exclude>
  <exclude>**/application*.properties</exclude>
</excludes>
yaml
#普通的key-value
name: wahaha
#对象
student:
  name: wahah
  age: 3

#行内写法
tudent: {name: waha,age: 3}

#数组
pets:
  - cat
  - dog
  - pig
    ........
yaml赋值
  <!--配置文件注解提示包-->
        <dependency>
            <groupId>org.springframework.boot</groupId>
            <artifactId>spring-boot-configuration-processor</artifactId>
            <optional>true</optional>
        </dependency>
配置@ConfigurationProperties(prefix = “类名”)
/*
@ConfigurationProperties作用:
将配置文件中配置的每一个属性的值,映射到这个组件中;
告诉SpringBoot将本类中的所有属性和配置文件中相关的配置进行绑定
参数 prefix = “person” : 将配置文件中的person下面的所有属性一一对应

只有这个组件是容器中的组件,才能使用容器提供的@ConfigurationProperties功能
*/
@Component
@ConfigurationProperties(prefix ="user")
public class User {
private int id;
private String name;
private  String pwd;

    public User() {
        this.id = id;
        this.name = name;
        this.pwd = pwd;
    }


    public int getId() {
        return id;
    }

    public void setId(int id) {
        this.id = id;
    }

    public String getName() {
        return name;
    }

    public void setName(String name) {
        this.name = name;
    }

    public String getPwd() {
        return pwd;
    }

    public void setPwd(String pwd) {
        this.pwd = pwd;
    }


    @Override
    public String toString() {
        return "User{" +
                "id=" + id +
                ", name='" + name + '\'' +
                ", pwd='" + pwd + '\'' +
                '}';
    }
}
配置yaml文件
User:
  id: 1
  name: waha
  pwd: 123456
JSR303数据校验
@Component //注册bean
@ConfigurationProperties(prefix = "person")
@Validated  //数据校验
public class Person {

    //@Value("${person.name}")
    @Email //name必须是邮箱格式
    private String name;
}
Spring-MyBatis
yaml配置
spring:
  datasource:
    username: root
    password: 123456
    url: jdbc:mysql://localhost:3306/mybatis?serverTimezone=UTC&useUnicode=true&characterEncoding=UTF-8
    driver-class-name: com.mysql.cj.jdbc.Driver


#mybatis:
#  type-aliases-package: com.yang.pojo
#  mapper-locations: classpath:com/yang/dao/*.xml
编写实体类
@Lombok
public class User {
private int id;
private String name;
private  String pwd;
}
编写接口
import java.util.List;
@Mapper
@Repository
public interface UserMapper {
    @Select("select * from user")
    List<User> getList();

}
编写Controller
@RestController
public class HelloController {

pping("/2")
    public  List<User> mybatis() {
      List<User> list = userMapper.getList();
      System.out.println(list);
      return list;

  }
}
SpringBoot开发web应用
页面跳转
1.资源目录
static 静态资源
templates页面,只能通controller跳转
- Thymeleaf使用,导入静态资源模板,用html编写页面
- 导入对应的maven依赖
<dependency>
    <groupId>org.springframework.boot</groupId>
    <artifactId>spring-boot-starter-thymeleaf</artifactId>
</dependency>- 编写html页面放到temlpates目录下
<!DOCTYPE html>
<html lang="en"  xmlns:th="http://www.thymeleaf.org">
<head>
    <meta charset="UTF-8" >
    <title>Title</title>
</head>
<body>

</body>
</html>- 使用controller进行跳转
页面传值


 4万+
4万+


 被折叠的 条评论
为什么被折叠?
被折叠的 条评论
为什么被折叠?
 到【灌水乐园】发言


